Home » Kid-friendly Recipes » Page 58

Category: Kid-friendly Recipes

It is so important to cook homemade, healthy food. But it’s not always easy to find kid-friendly recipes.

That’s where I come in. I’ve got hundreds of kid-tested and approved recipes that won’t keep you in the kitchen for hours or stretch your budget too thin.

I focus on allergy-friendly, whole foods. But I always cook with kids in mind. I take all sorts of feeding challenges into account too.

We’ve dealt with every allergy possible, so I’ve created recipes that are gluten free, nut free, dairy free, egg free, soy free, corn free, coconut free and more!

Kid-friendly recipes don’t have to be boring. And they are certainly not limited to chicken nuggets and pizza every night.

A nourished child will enjoy a wide variety of fruits, vegetables, proteins, carbohydrates and fats. Get your kids in the kitchen with you and start cooking! Have fun with food and your kids will learn to love eating.

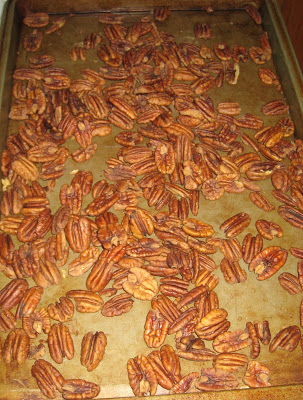
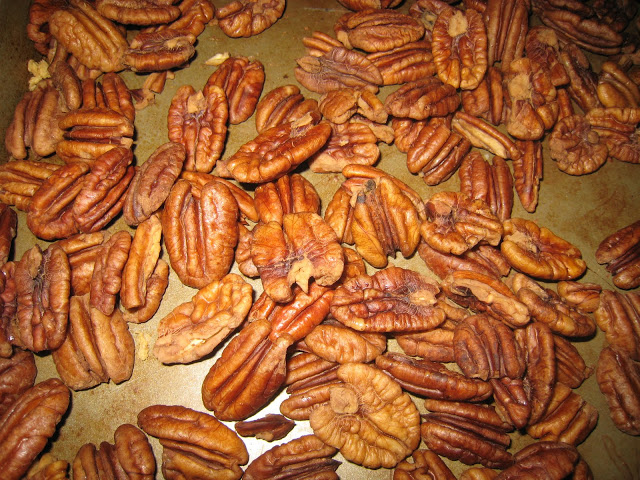
Crispy Pecans (Soaked and Dehydrated)

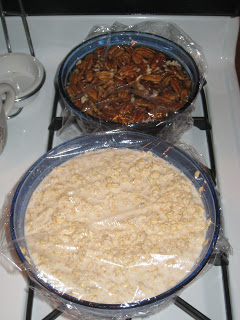
I soaked and dehydrated some pecans the same time I soaked my oats. It is a similar process except you use salt instead of yogurt. But the soak and dry times were the same. And I had them in the oven together. Very efficient. The soaking and drying process for most nuts and seeds is the same. But there are some variations of times.

I did pecans for my first attempt. These are great!!! I love eating nuts plain. But they are even better like this (in flavor…almost a sweetness to them). Plus they are so much better for you! Love it. And now they are all set to use in  my granola. I’ll just post the recipe for pecans here. As I try different varieties of nuts I’ll post them separately. My hope is to start making all of our peanut butter/nut butter from scratch…using soaked nuts. Then maybe I can finally eat nut butter without worrying about how it will impact my tummy 🙂  I wish someone had told me a long time ago there was a way to  make your food easier to digest 🙂

I got this recipe from the Nourishing Traditions cookbook. But you can find it many places if you do a search on soaking nuts. These are great for baking, sprinkling on salads or pasta or just for a snack!

Crispy Pecans

4 cups (1 lb.) pecan halves
2 tsp. sea salt
water

Mix pecans with salt and water and leave in a warm place for at least 7 hours or overnight (I soaked them for close to 24 hours.). Drain. Spread pecans on baking pan. Place in oven on lowest setting (150 degrees) for 12 to 24 hours (I did bout 15 hours.), stirring once in a while, until completely dry and crisp. You can also dry them in a dehydrator. Store in an airtight container.

Soaked and Dehyrdated Oats

As I continue on my healthy eating journey I’m experimenting more and more. This week I tried soaking and dehydrating oats. I’m hopeful this will make them easier for me to to digest. Plus it will break down the phytates and make the nutrients more readily available. It is very simple to do. Hardly any active time at all. But the total time is over 24 hours. Still, not much to it. You just have to be sure you won’t need the oven for anything else (unless you’re using a dehydrator…mine is too small to do a big batch of oats). I should get another batch going soon so I have a good amount. I started small on my first try…just to see how it would go (5 cups). The end product is not like the oats you buy. They are quite hard. My plan is to use them in granola and granola bars. That way I can enjoy some of my favorite food and still have it be soaked. I’m anxious to see if they work well. I’m just about out of granola, so I’ll be trying them soon. There are quite a few variations out there about the oat to water ratio. I used the recipe from Just Making Noise that uses a 1:1 ratio. I’ve seen 1:2 and 1:3 as well. Also, some people say to rinse them and some don’t. Just depends if you want them to have a tanginess to them or not 🙂  I’ll post the 4 cup quantities and the per cup quantities so you can adjust however much you want to make.

Soaked and Dehydrated Oats

4 cups rolled oats (NOT instant)
4 cups filtered water
8 Tbsp. whey, lemon/lime juice, kefir or yohgurt (I used plain full fat yogurt)

————————————————————
PER CUP (adjust to however much you want to make)
1 cup rolled oats
1 cup water
2 Tbsp. whey, lemon juice, kefir or yogurt
————————————————————————

Warm the 4 cups of water in a saucepan (you don’t need a microwave) till warm to touch. Do not let it boil! (I didn’t warm mine. My water was room temp.)

Pour the oats, water and acid medium (whey, etc..) into a large glass bowl and mix thoroughly. Cover the bowl with a towel or plate (I covered it loosely with plastic wrap.) and let it sit overnight in your oven or on your counter (wherever you have space).
Important: Let it sit for 8 – 24 hours… 12 hours is okay, but I always soak mine for 24 hours to reduce the phytic acid as much as possible. (I soaked mine for just under 24 hours).

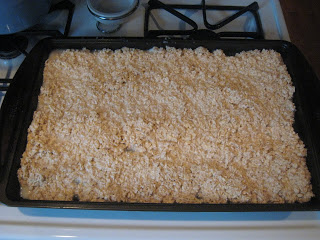
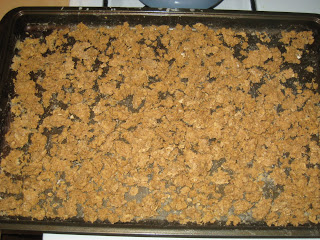
Spread the oats on parchment paper in your tray or cookie pan (for oven drying) or put in dehydrator set on the highest temp (if you have that option) until completely dry. It can take anywhere from 6 to 24 hours… depending on your dehydrator. You can dry the oats in your oven set on the lowest temperature. (I rinsed and drained the oats, then placed them on a baking pan (no parchment…worked fine). I dried them in the oven at the lowest temp (around 150) for about 15 hours. I stirred them periodcially to expose the moist areas.).

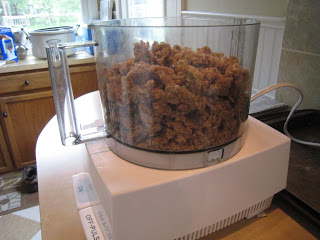
When the oats are dried, you will be able to break them into chunks. Put the chunks in your food processor or blender and pulse until coarsely ground (kinda like oatmeal flakes). Don’t grind it fine unless you want oat flour.

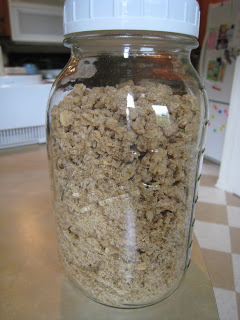
Pour the oats in a sealed container and store in your fridge or in a cool, dark place. Ta-daaa! There you go… you have ‘Soaked & Ready’ Oats for satisfying your urge to make cookies (or granola or granola bars)! Remember, you can make this however much you want.

Peanut Butter Frosting

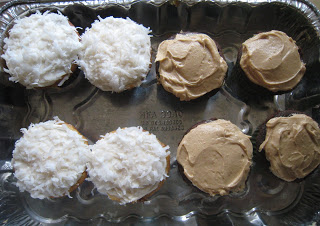
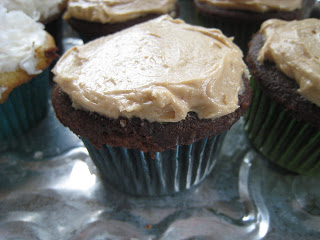
Last weekend I brought cupcakes to my SIL and BIL’s open house. I made 2 kinds – coconut and chocolate peanut butter. I got the recipe for the chocolate peanut butter cupcakes from my Barefoot Contessa cookbook. I decided to just use my regular chocolate cake recipe with her frosting recipe. Super simple and SO good. What’s not to like about chocolate and peanut butter together? 🙂  It’s not the healthiest recipe…but what cake/frosting is? 😛  Definitely a keeper. And I was finally able to use up my last bit of JIF peanut butter that’s been in my cupboard for a while! We haven’t used that stuff in a long time (total junk). But I sometimes have it on hand for baking…and giving away 🙂  I didn’t have quite enough so I did use some natural peanut butter. Still worked fine. I think Ina suggests Skippy (more junk). Just depends how “bad” you want to make the frosting. This makes quite a bit. I frosted about 2 dozen cupcakes pretty generously.

I won’t have any pictures uploaded until we get our pc hard drive fixed. Too much of a pain to do it on the laptop. Check back in a week or so for pics (at least I hope it won’t be more than a week!)

Peanut Butter Frosting

1 cup confectioners’ sugar
1 cup creamy peanut butter
5 tablespoons unsalted butter, at room temperature
3/4 teaspoon pure vanilla extract
1/4 teaspoon kosher salt
1/3 cup heavy cream

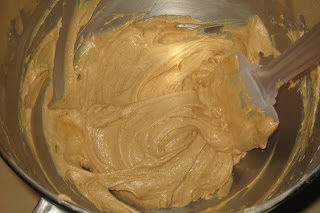
Place the confectioners’ sugar, peanut butter, butter, vanilla, and salt in the bowl of an electric mixer fitted with a paddle attachment. Mix on medium-low speed until creamy, scraping down the bowl with a rubber spatula as you work. Add the cream and beat on high speed until the mixture is light and smooth.

Warm and Nutty Cinnamon Quinoa

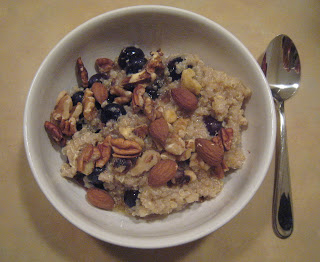
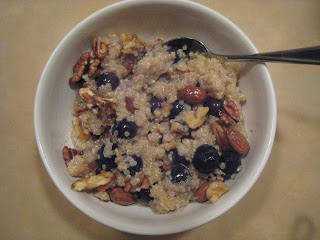
For breakfast this morning I made a new recipe that I found on 101 Cookbooks a long time ago. I had never thought of eating quinoa for breakfast. But I’m so glad I tried it. This is really good! And super easy too. And…I soaked yet another grain! While I was thinking about what I had to get out/prep for meals yesterday it dawned on me that you might be able to soak quinoa. So I looked it up. Sure enough. Same idea as soaking flour, etc. I put the quinoa in a bowl with water and a little plain yogurt last night. Then rinsed it this morning and followed the recipe from there, using a little less liquid. Hardly any hands on work required to make this breakfast. You just have to wait a few minutes for the quinoa to cook. We added raw honey, blueberries, flax seed and a mix of almonds, walnuts and pecans. Such a healhty start to the day. It’ll be fun to try it with different toppings too. Anything you can do with oatmeal you can do with quinoa. I only made a half recipe. A perfect amount for Justin and me.

*Edited 2/9/11 to be NT compatible and adjusted to 2 serving recipe.

Warm and Nutty Cinnamon Quinoa
serves 2

1/2 cup milk
1/2 cup water
1/2 cup organic quinoa, (I soaked mine in water and yogurt over night – see directions below)
1 cup fresh blackberries, organic preferred (I used a cup of blueberries from our freezer, thawed)
1/2 tsp. ground cinnamon

Toppings:
pecans, walnuts or almonds (preferably soaked and dehydrate)
raw honey or real maple syrup
plain or vanilla yogurt
dried cranberries or raisins
butter

To soak quinoa:
Cover the quinoa in water (a couple inches over quinoa) and about 1-2 Tbsp. plain organic yogurt. Soak it over night and rinse it in the morning. Then proceed with recipe.

Combine milk, water and quinoa in a medium saucepan. Bring to a boil over high heat. Reduce heat to medium-low; cover and simmer 15 minutes or until most of the liquid is absorbed. Turn off heat; let stand covered 5 minutes. Stir in blackberries and cinnamon; transfer to two bowls and top with desired toppings.

Oatmeal Muffins

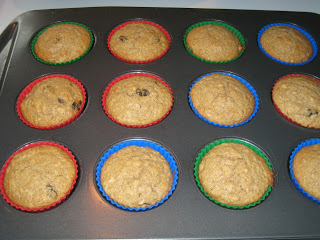
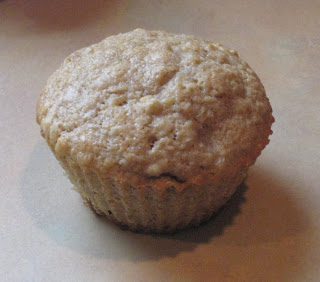
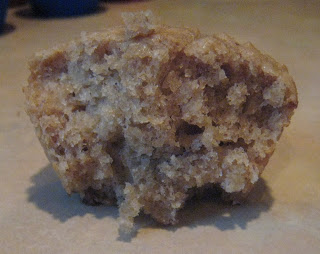
Last week I had to make some muffins for a church event. And while I was looking through my recipes I found a recipe for oatmeal muffins from my MIL. I had never made them, but they sounded good…and it looked like a recipe that would be easily adapted to soaking grains and replacing the white flour with whole wheat flour. I mixed the flour, oats and buttermilk early in the morning yesterday. And then baked them later in the afternoon. They turned out great! We’ll be having them with our dinner tonight. Rebecca and I tried one right out of the oven. Very good. I added some raisins and ground flax seed for extra nutrition. This recipe works very well as a base recipe. You could add any dried fruit, fresh fruit, nuts, spices, etc. I’ll definitely be making these again. So easy, so healthy and so good! I’ll post the recipe the way I made it.

This recipe is linked to GNOWFGLINS probiotics every meal – breakfast ideas. Check it out for some other healthy breakasts.

Oatmeal Muffins

1 cup rolled oats
1 cup cultured buttermilk (I’m guessing kefir or yogurt would work too…I’ll have to try that the next time I make them)
1 cup whole wheat flour (I used freshly ground)
1 egg
4 Tbsp. coconut oil (melted butter would work too)
1/2 cup brown cane sugar (they are quite sweet…you could decrease this if you want to cut back on sugar)
1 tsp. baking powder
1/2 tsp. baking soda
1/2 tsp. salt
(a little cinnamon would probably be good in these)
1/2 – 1 cup add-ins (raisins, flax seed, nuts, seeds, fresh fruit, dried fruit)

Mix oats, flour and buttermilk in a glass bowl. Cover and let sit at least 7 hours.

Heat oven to 400. Stir remaining ingredients into oat mixture. Fill muffin cups 2/3 full. Bake for 18-20 min. Makes 12-14 muffins.

**If you do not want to soak the grains, mix just the oats and buttermilk and let sit 1 hour. Add egg and oil/butter. Mix dry ingredients. Pour wet ingredients into dry. Mix until just dampened. Fill muffin cups and bake as directed above.

Whole Wheat Flour and Whole Wheat Pizza Dough

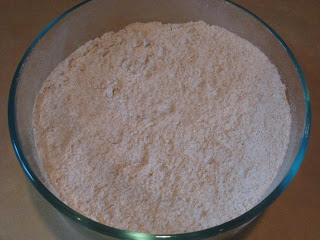
Yesterday I finally tried my new grain mill attachment for my stand mixer. I ground some hard winter wheat berries. It’s so easy. And it makes awesome, soft flour. It is noisy and takes a little time. But not too bad. I made about 4 1/2 cups of flour yesterday. And I’ve already used most of it 🙂  Freshly ground flour really does make your baked goods taste better. I’m excited to do this more often. I just need to find a good source for wheat berries…cheap 🙂

The first thing I tried making with my freshly ground flour was pizza dough for homemade pizza last night. I used the same dough recipe I always use, but modified it slightly to make it 100% whole wheat. This was awesome! It had great flavor and texture. I also made homemade sauce for our pizza. It doesn’t get more homemade than that…all the way down to freshly ground flour. So healthy and so good! I topped mine with tons of veggies. Mmm. This makes me very anxious to try making whole wheat bread with my fresh flour. My camera battery was just about dead, so I had to take a picture as quickly as possible…and didn’t get a very good one. Maybe I’ll try again tonight when we have leftovers. But you can still see the crust.

Whole Wheat Pizza Dough

1 Tbsp. active dry yeast
1 Tbsp. cane sugar
1 1/2 cups warm water
1 Tbsp. vital wheat gluten
2 Tbsp. cane sugar
3 Tbsp. EVOO
1/2 Tbsp. salt
4 cups flour (I used 3 cups freshly ground whole wheat flour and 1 cup white whole wheat flour)

Sprinkle yeast, wheat gluten and 1 Tbsp. sugar over water. Let bubble (about 5 min.). Add 2 more Tbsp. sugar, oil, salt and flour. Mix. Cover. Let rise about an hour. Spread on pizza pan. Add toppings. Bake at 450 or 500 for 15-20 min. Let pizza rest a few mintues before cutting.

This makes enough for 2 pizzas or 1 pizza and breadsticks.

Coconut Cake

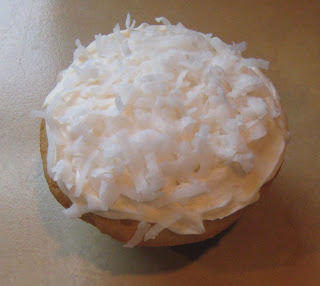
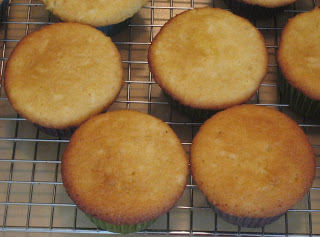
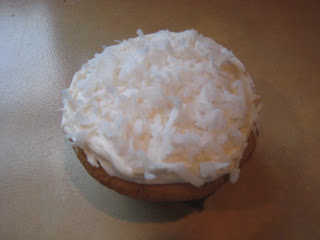
My BIL and SIL are both graduating. They will be having a potluck open house next Saturday to celebrate before they move down to Kentucky to continue school (residency and PhD work). I decided to bring a couple different kinds of cupcakes. One of them is coconut. I found this recipe in my Barefoot Contessa cookbook a while back. It sounded like something a little more unique. The actual recipe is for a cake. I made cupcakes. This recipe makes a lot of batter. I think it would work better in 3 cake pans instead of 2 (like the recipe says). I made 30 cupcakes. I’ll add cream cheese frosting with a layer of coconut. I let Justin try one last night. He really liked it. Rebecca and I tasted one without frosting. Not very strong coconut. Tastes more almondy. But I think the frosting really brings out the coconut flavor. These were easy to make and turned out well. Someday I’ll have to try actually making the cake. I’m not making her frosting recipe. I just don’t have time. I’ll be making a different frosting recipe.

Coconut Cake

3/4 lb. (3 sticks) unsalted butter, at room temperature, plus more for greasing the pans
2 cups sugar
5 extra-large eggs, at room temperature (I just used large eggs)
1 1/2 tsp. pure vanilla extract
1 1/2 tsp. pure almond extract (This makes it pretty strong. I might cut back if I make it again.)
3 cups all-purpose flour, plus more for dusting the pans
1 tsp. baking powder
1/2 tsp. baking soda
1/2 tsp. kosher salt
1 cup milk
4 ounces sweetened shredded coconut (I might add more next time)

For the frosting:

1 lb. cream cheese, at room temperature
1/2 lb. (2 sticks) unsalted butter, at room temperature
3/4 tsp. pure vanilla extract
1/4 tsp. pure almond extract
1 lb. confectioners’ sugar, sifted
6 oz. sweetened shredded coconut

Directions

Preheat the oven to 350 degrees F. Grease 2 (9-inch) round cake pans, then line them parchment paper. Grease them again and dust lightly with flour (I think 3 pans would work better). Or you can use muffin cups.

In the bowl of an electric mixer fitted with a paddle attachment, cream the butter and sugar on medium-high speed for 3 to 5 minutes, until light yellow and fluffy. Crack the eggs into a small bowl. With the mixer on medium speed, add the eggs 1 at a time, scraping down the bowl once during mixing. Add the vanilla and almond extracts and mix well. The mixture might look curdled; don’t be concerned.

In a separate bowl, sift together the flour, baking powder, baking soda and salt. With the mixer on low speed, alternately add the dry ingredients and the milk to the batter in 3 parts, beginning and ending with dry ingredients. Mix until just combined. Fold in the 4 oz. of coconut with a rubber spatula.

Pour the batter evenly into the 2 pans and smooth the top with a knife. Bake in the center of the oven for 45 to 55 minutes, until the tops are browned and a cake tester comes out clean. Cool on a baking rack for 30 minutes, then turn the cakes out onto a baking rack to finish cooling. I made 30 cupcakes…baked at 350 for about 25 minutes.

For the frosting, in the bowl of an electric mixer fitted with a paddle attachment, combine the cream cheese, butter, vanilla and almond extract on low speed. Add the confectioners’ sugar and mix until just smooth (don’t whip!).

To assemble, place 1 layer on a flat serving plate, top side down, and spread with frosting. Place the second layer on top, top side up, and frost the top and sides. To decorate the cake, sprinkle the top with coconut and lightly press more coconut onto the sides. Serve at room temperature.

Whole Wheat Soaked Cinnamon Raisin Coffee Cake

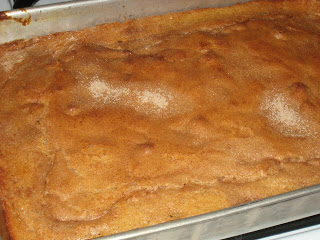
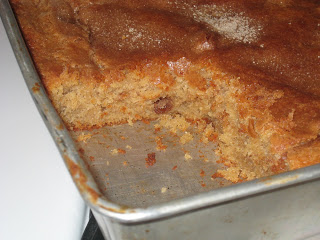
I continue to experiment with soaking grains and swapping ingredients. I had some buttermilk and plain yogurt to use up, so I decided to see what I could do with my recipe for yum yum coffee cake yesterday. I replaced the AP flour with half whole wheat flour and half white whole wheat flour. I used organic butter. I replaced all of the sugar with organic cane sugar. I added a few raisins. And I soaked the grains ahead of time. And the verdict…AMAZING! Seriously. It is way better than the original version. So moist and delicious. All 3 of us munched on a bunch right out of the oven even though it was close to dinner time. It was just too good not to. Rebecca kept asking for more. And she walked around saying “mmmmm.” I’m so glad I tried this. I’ll be making it this way from now on. And I’ll feel much better about serving it and eating it knowing that is much healthier. And hooray for my 3rd successful attempt at soaking grains! I think I do notice a difference in my digestion when I do it. So I will definitely keep trying. This was such a treat for breakfast this morning. Still just as moist this morning as it was yesterday right out of the oven. And I’m glad I have a bunch more in the freezer now. I’m going to post this as a separate recipe since it’s quite different from the original.

This recipe is linked to GNOWFGLINS probiotics at every meal – breakfast ideas. Lots of yummy, healthy breakfast ideas.

Whole Wheat Cinnamon Raisin Coffee Cake

2 cups whole wheat flour (I used half whole wheat and half white whole wheat)
1 tsp. baking powder
1 tsp. baking soda
1/2 tsp. salt
3/4 cup butter, at room temp
2 eggs
1 – 1 1/2 cups cultured buttermilk or plain yogurt…enough to get all of the flour moist (I used about half each…what I had on hand) (kefir would work well too)
1 cup cane sugar
1 tsp. vanilla
1/2 cup raisins (optional)

Topping:
1/3 cup cane sugar (regular or brown)
2 tsp. cinnamon
1/2 cup nutmeats (optional)
———————————————-
To soak grains:
Mix flour, buttermilk and/or yogurt. Cover and let set on counter at least 8 hours.

When ready to bake:
Heat oven to 350 deg. Grease a 9×13 pan.

Mix topping ingredients, set aside.

In a large bowl cream the butter and sugar. Add the eggs, one at a time. Beat well. Add vanilla and mix. Add wheat mixture, baking powder, baking soda and salt and mix well. Add extra yogurt or buttermilk if too thick. Put half of the batter in the prepared pan. Top with half of topping and all of the raisins. Spread the rest of the batter on top. Top with remaining topping. Bake 35-40 min.

Serve warm or room temperature. Freezes well. Can be served for breakfast, brunch, a snack or even dessert (with vanilla ice cream:)

Ice Cream Cones

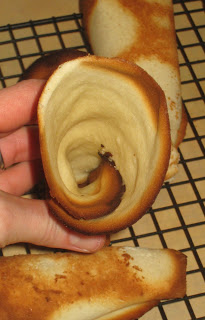
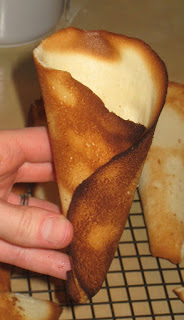
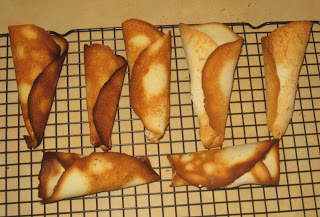
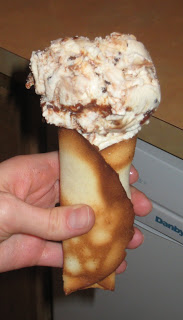
Since it was such a rainy day yesterday Rebecca and I tackled another experimental baking project…ice cream cones! I haven’t had much luck finding a recipe that looks all that great. But I found this one from Disney Family Fun a long time ago. Figured I’d give it a shot. The cone is like the cookie style cones you sometimes see at ice cream shops. It reminds me of a mix between a sugar cookie and a fortune cookie. I think I made them a little thicker than I’d like, but it was a first attempt. The really tough part is shaping them. I don’t have a cone shaper (note to self…put on gift list:), so I have to try to do it by hand…while they are super hot, just out of the oven. It’s tough to roll it and pinch the end before it starts cooling. But it was a fun experiment. One didn’t roll well at all, so we used that to munch on. We haven’t tried them with ice cream yet. I’ll update when we do. This is a decent base recipe. It would work well for making ice cream bowls or even making your own fortune cookies. And best of all, no HFCS or hydrogenated oils! I’m glad we tried it.
**Edited 4-13-10: These taste great with ice cream!!

Ice Cream Cones

2/3 cup sugar
3 egg whites
1 cup all-purpose flour
1/2 teaspoon vanilla extract
1/3 cup melted butter

Heat the oven to 400º F (350º F if you’re using a dark-coated baking sheet). In a medium-size bowl, beat the sugar and egg whites with an electric mixer for 30 seconds.

Mix in the flour until smooth, then add the vanilla extract and melted butter. For each cone, scoop 2 1/2 tablespoons of batter onto the baking sheet, spreading the batter into thin 6-inch circles (use a measuring spoon for accuracy). (Try to get it quite thin…I think that is the trick. And I also think it helps to grease the baking sheet.)

Bake for 7 or 8 minutes or until golden, then remove the sheet from the oven (they need to get quite dark to work well, darker than I expected. Otherwise it stays too doughy.). Working quickly, form each cookie into a cone (a parent’s job), pinching the tip to seal it tightly. Allow the cones to cool seam side down on a rack.

Chocolate Cake

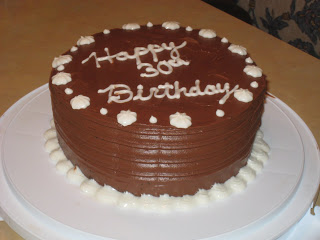
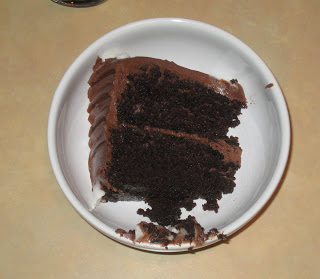
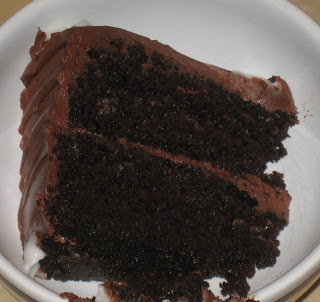
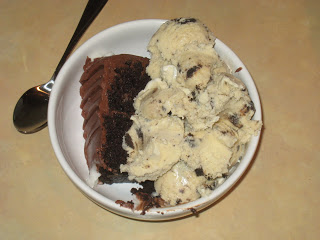
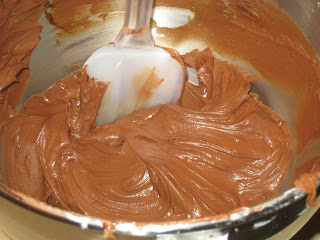
Tomorrow is Justin’s 30th birthday. We celebrated yesterday. One day while I was in the process of figuring out what kind of cake to make Rebecca and I happened to browse through my Barefoot Contessa at Home cookbook…yes, Rebecca likes to read cookbooks with me 🙂  And I came across her recipe for Beatty’s Chocolate Cake. It looked so chocolatey and good. I decided to try it. The secret is that she uses coffee to really bring out the chocolate flavor. This is a VERY moist cake…super chocolatey. And very very good 🙂  I’m glad I tried it. All 3 of us love it. I also made her recipe for chocolate frosting to go with it. It was also really good. A little on the light/fluffy side for my personal taste, but still very good. And I think the frosting has a bit too much coffee flavor…again, for my taste. Justin thought it was great. This is a cake I’ll make again for sure! We had it with homemade chocolate peanut butter cookies and cream ice cream (I fournd some organic oreo-type cookies with peanut butter filling…mmmm). 
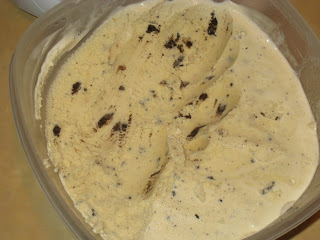
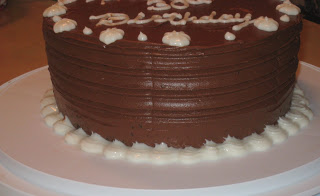
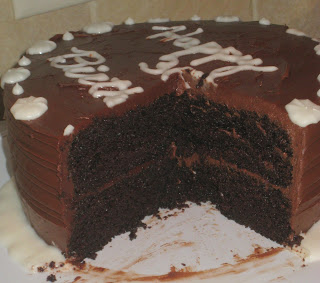
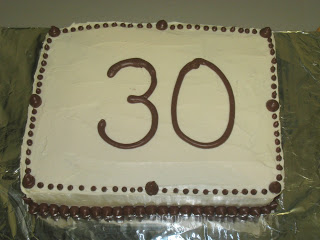
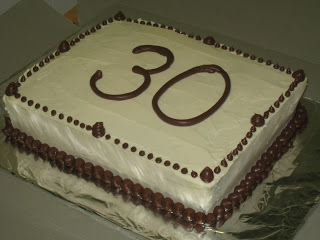
 What a birthday treat!! Poor us…having to eat this for a few days in a row 🙂  I’ll probably have to freeze some of the cake, though. It’s quite rich, so you can’t eat a huge piece. And I don’t think any of us needs to eat it every day for a week straight 😛  Try to focus on the pictures of the actual cake and not the decoration. I did the frosting/decorating in a rush early in the morning. And Justin told me to use his cake to experiment with some tools he had gotten me for Christmas. So this was my first attempt at the side deco. I was also using up some old icing…that was not very good consistency. So shortly after I took the pics it just started to all melt together. Glad I took a few pics right away 🙂
Beatty’s Chocolate Cake

Butter, for greasing the pans
1 3/4 cups all-purpose flour, plus more for pans
2 cups sugar
3/4 cups good cocoa powder
2 tsp. baking soda
1 tsp. baking powder
1 tsp. kosher salt
1 cup buttermilk, shaken
1/2 cup vegetable oil (I used canola)
2 extra-large eggs, at room temperature
1 tsp. pure vanilla extract
1 cup freshly brewed hot coffee

Preheat the oven to 350 degrees F. Butter 2 (8-inch) round cake pans. Line with parchment paper, then butter and flour the pans.

Sift the flour, sugar, cocoa, baking soda, baking powder, and salt into the bowl of an electric mixer fitted with a paddle attachment and mix on low speed until combined. In another bowl, combine the buttermilk, oil, eggs, and vanilla. With the mixer on low speed, slowly add the wet ingredients to the dry. With mixer still on low, add the coffee and stir just to combine, scraping the bottom of the bowl with a rubber spatula. Pour the batter into the prepared pans and bake for 35 to 40 minutes, until a cake tester comes out clean. Cool in the pans for 30 minutes, then turn them out onto a cooling rack and cool completely.

Place 1 layer, flat side up, on a flat plate or cake pedestal. With a knife or offset spatula, spread the top with frosting. Place the second layer on top, rounded side up, and spread the frosting evenly on the top and sides of the cake.

Chocolate Frosting

6 oz. good semisweet chocolate
1/2 lb. (2 sticks) unsalted butter, at room temperature
1 extra-large egg yolk, at room temperature
1 tsp. pure vanilla extract
1 1/4 cups sifted confectioners’ sugar
1 Tbsp. instant coffee powder

Chop the chocolate and place it in a heat-proof bowl set over a pan of simmering water. Stir until just melted and set aside until cooled to room temperature.

In the bowl of an electric mixer fitted with a paddle attachment, beat the butter on medium-high speed until light yellow and fluffy, about 3 minutes. Add the egg yolk and vanilla and continue beating for 3 minutes. Turn the mixer to low, gradually add the confectioners’ sugar, then beat at medium speed, scraping down the bowl as necessary, until smooth and creamy. Dissolve the coffee powder in 2 teaspoons of the hottest tap water. On low speed, add the chocolate and coffee to the butter mixture and mix until blended. Don’t whip! Spread immediately on the cooled cake.

And here are a couple pics of the cake Justin is bringing to work. Chocolate cake with chocolate frosting in the middle and cream cheese frosting on the outside.