Home » Kid-friendly Recipes » snack » Page 7

Category: snack

zebra striped yogurt | Just Take A Bite

Zebra Striped Yogurt For Sensitive Tummies

When your child is recovering from a stomach bug or an allergy flair give them a special treat that is both delicious and calming. Zebra striped yogurt combines cultured dairy and charcoal to ease the pain.

zebra striped yogurt | Just Take A Bite

There are two tricks I have learned in the last year to help get a little tummy back on track after a stomach bug or an allergy flair.

  1. Yogurt
  2. Activated charcoal

Sensitive Tummies

Last year my son had a really bad stomach bug with constant vomiting. Once that part ended he refused to eat. As parents my husband and I were very concerned. We let our fear turn to frustration.

We would try to force him to eat. And it would all come back up. After days of this process we took him to the doctor who suggested yogurt.

My son was having reflux from such an empty stomach and all of the vomiting. He finally got back on track by taking a couple bites of yogurt every 30-60 minutes to ease the pain. Eventually he could tolerate more and more.

zebra striped yogurt | Just Take A Bite

Since then yogurt has been my go-to when he has tummy troubles. Whether it be after an allergy flair (which gives him a stomach ache and keeps him from eating) or after a stomach bug (once any kind of vomiting or diarrhea has subsided).

If your child is allergic to dairy you can try coconut yogurt. I have not personally tried to see if it has the same effect.

Allergy Relief

During the last year we have also dealt with allergy flairs over and over and over as we tried to figure out what was bothering my youngest. A friend suggested activated charcoal. It has been a life saver!

It helps absorb any toxins or allergens and flush them out. It also helps stop vomiting and diarrhea.

zebra striped yogurt | Just Take A Bite

Every time my daughter was screaming from an allergic reaction I would take charcoal. It was like magic. The next time she nursed my milk was safe again.

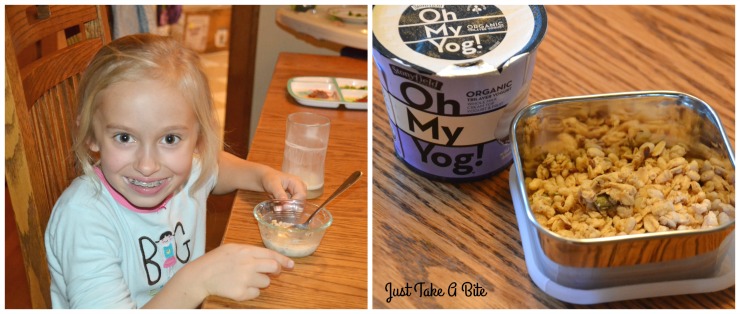
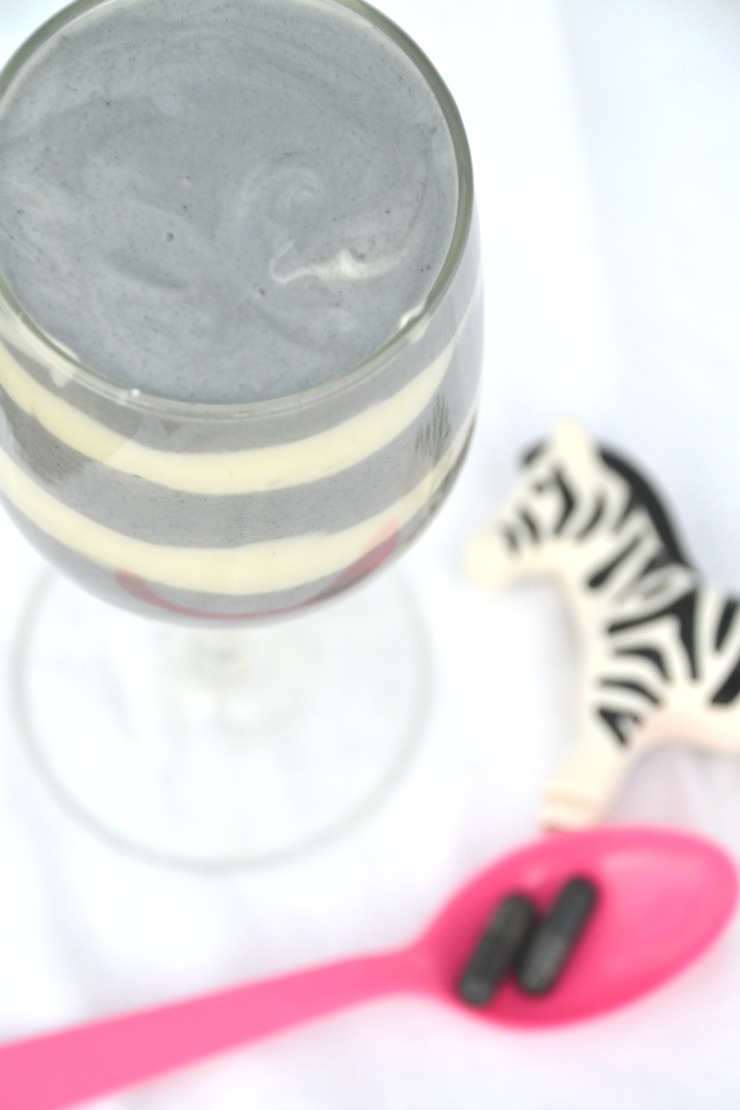
Today I’m sharing a fun way to combine these two secret weapons. Zebra striped yogurt looks cool, tastes great and is very calming to the tummy. In fact, I made the dish of yogurt I photographed the day my son had a stomach bug. He was definitely happy to be my taste tester (even if he does look a bit worn out).

zebra striped yogurt | Just Take A Bite

Depending on your child’s age, tastes and severity of reaction you can keep the yogurt plain or add a bit of sweetener. I use maple syrup in the black yogurt and organic cane sugar in the white yogurt.

The next time your child is recovering from a stomach upset of some kind whip up a zebra striped yogurt to ease the pain and get them back to full health quickly.

zebra striped yogurt | Just Take A Bite

Zebra Striped Yogurt
Serves 1
A black and white striped yogurt for settling tummies.
Write a review
Print
Prep Time
5 min
Prep Time
5 min
Ingredients
  1. 1 cup plain, whole milk yogurt, divided
  2. 1 - 2 tsp. maple syrup
  3. 1 - 2 tsp. organic cane sugar
  4. 1 capsule activated charcoal
  5. pinch unrefined sea salt
Instructions
  1. In a small dish combine half of the yogurt, cane sugar and a pinch of salt.
  2. In another small dish combine the other half of the yogurt, maple syrup, charcoal (emptied from capsule) and a pinch of salt.
  3. Layer the white and black yogurts in a dish.
  4. Serve immediately or store in the refrigerator for up to a week.
Notes
  1. If you are short on time you can just make the "black" yogurt or you can add all of the ingredients to a blender and make a smoothie.
  2. Maple syrup can be used in place of the cane sugar, but it may give the yogurt a little color.
  3. You can adjust the dose of charcoal based on your child's age/serving size.
Just Take A Bite https://justtakeabite.com/
 In order for me to support my blogging activities, I may receive monetary compensation or other types of remuneration for my endorsement, recommendation, testimonial and/or link to any products or services from this blog. It will not change the cost of any products or services for you.

This post is linked to Savoring Saturdays.

Easy Coconut Snowballs | Just Take A Bite

Easy Coconut Snowballs

Are you dreaming of a white Christmas? Even if there is no snow outside you can have a white Christmas inside with these little coconut snowballs. Just four ingredients create a fun, healthy treat.

Easy Coconut Snowballs | Just Take A Bite

If you’re looking for a last minute holiday treat that you can make in minutes I’ve got you covered!

These coconut snowballs only have four ingredients. And they taste like peppermint.

So easy!

All it takes is about five minutes of mixing, melting and pouring. Then form the mixture into balls once it has cooled.

Easy Coconut Snowballs | Just Take A Bite

I like to add these to my kids’ lunches. I make sure they are getting healthy fat. They love having a little treat with their meal.

Coconut snowballs would also make great finger food for a holiday party. Set a tray out for guests and watch them disappear!

Easy Coconut Snowballs | Just Take A Bite

You can use cane sugar or powdered cane sugar (simply blend cane sugar in a high speed blender until powdered) to make coconut snowballs. The flavor is the same. Using powdered sugar creates a smoother texture.

Easy Coconut Snowballs | Just Take A Bite

Let it snow.

Somehow we don’t have snow yet in Michigan this year! I’m not sure if we’ll end up with a white Christmas. But we can make it white with our own snow!

Are you dreaming of a white Christmas?

Get in the kitchen and create a little snowstorm with the kids. Everyone will have fun and stay warm.

Easy Coconut Snowballs | Just Take A Bite

Easy Coconut Snowballs
Yields 9
A minty coconut snowball that makes a great treat or any time snack.
Write a review
Print
Ingredients
  1. 3 Tbsp. organic cane sugar OR powdered cane sugar
  2. 1/4 cup unsweetened shredded coconut
  3. 3 Tbsp. coconut oil
  4. 1/2 tsp. peppermint extract
Instructions
  1. Combine the sugar, coconut and oil in a small saucepan.
  2. Heat over medium heat, stirring until the sugar and oil are melted.
  3. Remove from heat.
  4. Add peppermint extract.
  5. Pour into a small glass dish.
  6. Refrigerate until solid, but not hard (1-2 hours)
  7. Scoop into tsp. size balls.
  8. Store in the refrigerator.
  9. Serve cold or room temperature.
Notes
  1. You can add a tsp. of cocoa powder to the mix to make dirty snowballs.
  2. You can dip the chilled snowballs into melted chocolate.
  3. If your mixture is too hard to scoop simply leave it out to come to room temperature.
  4. You can make your own powdered sugar by blending cane sugar in a high powered blender until fine.
Just Take A Bite https://justtakeabite.com/
In order for me to support my blogging activities, I may receive monetary compensation or other types of remuneration for my endorsement, recommendation, testimonial and/or link to any products or services from this blog. It will not change the cost of any products or services for you.

Peppermint Stick Ice Cream | Just Take A Bite

Peppermint Stick Ice Cream

Celebrate Christmas with the traditional flavors of peppermint and chocolate in this homemade version of peppermint stick ice cream topped with hot fudge.

Peppermint Stick Ice Cream | Just Take A Bite

Mint and chocolate. Chocolate and mint.

It is a match made in heaven. And it is a favorite of my entire family.

One of my husband’s requests every Christmas is peppermint stick ice cream with hot fudge. I usually buy some. A little holiday indulgence.

But this year I wanted my kids to enjoy it too.

So I created my own version of peppermint candy and used it to make peppermint stick ice cream.

Peppermint Stick Ice Cream | Just Take A Bite

It tastes great as is. But it is even better topped with gluten free hot fudge or chocolate sauce. Or you can add chocolate right into the ice cream with mini chocolate chips.

It only takes about three minutes to prepare the ice cream batter. Then the hard part begins – waiting for it to churn and freeze!

Peppermint Stick Ice Cream | Just Take A Bite

Peppermint stick ice cream can be dairy free by using coconut milk. The eggs are also optional, so it is very allergen friendly.

There really isn’t much more to say about this delicious Christmas treat. Run to the kitchen and get a batch started. The taste will speak for itself.

Creamy mint ice cream with little bits of crunchy peppermint candy scattered throughout. Your whole family is sure to love it.

Peppermint Stick Ice Cream | Just Take A Bite

What Christmas goodies do you make every year? Sugar cookies? Gingerbread men? Apple pie?

This year give peppermint stick ice cream a try. Maybe you’ll make it part of your Christmas tradition!

Get the peppermint candy recipe here!

Peppermint Stick Ice Cream | Just Take A Bite

Peppermint Stick Ice Cream
Serves 12
Mint ice cream with homemade peppermint candy pieces.
Write a review
Print
Ingredients
  1. 2 1/2 cups cream (preferably raw) (or coconut milk)
  2. 1/2 cup whole milk (preferably raw) (or coconut milk)
  3. 1/2 - 3/4 cups choice of sweetener (organic cane sugar, honey, maple syrup)
  4. 1 tsp. peppermint extract
  5. 1 Tbsp. organic vanilla or vodka (note that some vanilla comes from corn)
  6. 2 egg yolks (optional)
  7. 1 Tbsp. tapioca or arrowroot (optional)
  8. 1/2 recipe peppermint candy, broken into small pieces (see post for recipe link)
  9. 1/3 cup mini chocolate chips (optional)
Instructions
  1. In a blender combine all of the ingredients, except candy and chocolate chips.
  2. Blend until well mixed. Adjust sweetness and peppermint flavor if needed.
  3. Process in an ice cream mixer according to manufacturer instructions.
  4. Transfer ice cream to a freezer safe container.
  5. Stir in candy and chocolate chips.
  6. Freeze until firm.
Notes
  1. The batter should be slightly sweeter than you want the ice cream to taste. The sweetness will go down as the ice cream churns.
  2. Serve with hot fudge.
Just Take A Bite https://justtakeabite.com/
This post is linked to Savoring Saturdays.

In order for me to support my blogging activities, I may receive monetary compensation or other types of remuneration for my endorsement, recommendation, testimonial and/or link to any products or services from this blog. It will not change the cost of any products or services for you.

Five Minute Salted Honey Chocolates | Just Take A Bite

Five Minute Salted Honey Chocolates

Got five minutes? Then you have enough time to make a melt-in-your-mouth allergen friendly treat! Salted honey chocolates are perfect for holidays, birthdays or any day.

Five Minute Salted Honey Chocolates | Just Take A Bite

As we enter the holiday season with parties and family gatherings, goodies and sweets are everywhere. For most people that is exciting.

But if you have allergies you often have to go without.

I’ve got a five minute treat that just about anyone can enjoy. Salted honey chocolates are the perfect bite size treat for sharing with friends.

Five Minute Salted Honey Chocolates | Just Take A Bite

Kids can even help make some and give them as teacher gifts.

Simple ingredients.

Raw cream style honey and unrefined sea salt are combined to create a gooey caramel filling that doesn’t require any cooking or dairy.

These chocolates remind me of Caramelo® candy bars. Sweet chocolate with soft caramel inside.

Five Minute Salted Honey Chocolates | Just Take A Bite

Salted honey chocolates really only take five minutes of hands on time.

  1. Melt the allergen friendly chocolate chips over a double boiler.
  2. Pour melted chocolate in candy molds.
  3. Add honey.
  4. Sprinkle with mineral rich salt.
  5. Add more chocolate.
  6. Done.

Make it even easier.

No time to melt chocolate chips? Or you’re a busy mom with a baby in one arm and one kid around your ankle? I’ve got a solution.

Put a scoop of honey in a dish. Sprinkle it with salt. Dip chocolate chunks in the honey. Dessert is served.

Sanity is preserved.

Energy is restored.

Five Minute Salted Honey Chocolates | Just Take A Bite

I actually enjoy this little treat when the chocolate is still melted. Put honey and salt in a dish. Pour some melted chocolate over top. Dig in with a spoon!

No flours. No baking. No allergens. Simple and oh so delicious.

Kids love to help.

Let your kids get in on the fun. It could get messy. But it will be a tasty mess! And your kids will cherish the time with you and memories made.

Even if you are making sweets, getting kids in the kitchen will teach them life skills and what real food is all about.

Salted honey chocolates are one of the rare treats my entire family can eat.

Well, I haven’t actually let my toddler have chocolate yet. But she isn’t allergic to it. And I would let her have a little spoon of salted honey.

Her favorite treat these days is a scoop of lard with a little honey and sea salt. Perfect for the little one.

Five Minute Salted Honey Chocolates | Just Take A Bite

What are you waiting for? Grab some honey, chocolate and sea salt and get in the kitchen! Your after dinner snack or “mommy needs a break” fix is only five minutes away.

Just be sure to make a big batch. You’d be surprised how quickly they disappear! You may want to hide them in the back of the fridge.

Want to try your hand at another type of chocolate? You’ll love this chocolate covered toffee.

Five Minute Salted Honey Chocolates | Just Take A Bite| Salted creamy honey between layers of sweet chocolate

Five Minute Salted Honey Chocolates
Yields 12
An allergen friendly chocolate filled with raw honey and sea salt.
Write a review
Print
Ingredients
  1. 1 cup Enjoy Life chocolate chunks (or other chocolate chip you tolerate)
  2. 2 Tbsp. raw cream style honey
  3. 1/2 tsp. unrefined sea salt
Instructions
  1. Melt the chocolate over a double boiler.
  2. Fill the candy molds 1/3 full with chocolate. Refrigerate 5 minutes to partially set.
  3. Put 1/2 tsp. honey in each mold.
  4. Sprinkle with a pinch of sea salt.
  5. Top the honey with melted chocolate, filling each mold.
  6. Chill until firm.
  7. Remove from molds.
  8. Store in the refrigerator.
Notes
  1. A glass bowl on top of a pan with 1 inch of water works well as a double boiler.
  2. You can dip chocolate chunks in salted honey for a quick version.
  3. Salted honey mixed with the melted chocolate is another way to enjoy this treat.
Just Take A Bite https://justtakeabite.com/
In order for me to support my blogging activities, I may receive monetary compensation or other types of remuneration for my endorsement, recommendation, testimonial and/or link to any products or services from this blog. It will not change the cost of any products or services for you.

This post is linked to Savoring Saturdays.

Sourdough Pumpkin Swiss Cake Rolls | Just Take A Bite

Sourdough Pumpkin Swiss Cake Rolls

Are you looking for a non-traditional Thanksgiving dessert? Wow your guests with these fancy yet simple sourdough pumpkin swiss cake rolls.

Sourdough Pumpkin Swiss Cake Rolls | Just Take A Bite

Halloween may be over, but fall is just getting started! That means there is another month to indulge in all things pumpkin.

I grew up eating those little chocolate cake rolls out of a box…anyone else? They were good. Cake filled with cream rolled into a little log and covered with chocolate.

It’s been about twenty years since I’ve had one. But that doesn’t mean I don’t enjoy a good roll cake.

Sourdough Pumpkin Swiss Cake Rolls | Just Take A Bite

Free of just about everything.

I created this sourdough pumpkin swiss cake roll with myself in mind. I know that sounds bad, but I get a special treat about once every four months lately. The rest of the time I’m busy making stuff for my kids.

These delicious little cakes are free of dairy, nuts, soy, corn, rice, roots, coconut and eggs.

They are actually almost fat free too! That is NOT something I aim for. But it just happened.

It is not as much fun or as tasty to bake when you can’t use butter or coconut oil. So I ended up just making a dessert without an added fat.

Sourdough Pumpkin Swiss Cake Rolls | Just Take A Bite

Simple.

The cake is a simple pumpkin sourdough thin sheet cake. The filling is sugar, flour and pumpkin. That’s all.

Then top it with melted chocolate. Divine!

Sourdough pumpkin swiss cake rolls can be prepared in advance, up to a week ahead! One more thing to scratch off your Thanksgiving to-do list early.

Surprise your guests with this special dessert. No messing with ice cream or whipped cream. It is ready to eat.

Sourdough Pumpkin Swiss Cake Rolls | Just Take A Bite

The cake tastes great without the chocolate too. But it really adds a good flavor contrast. Pumpkin and chocolate are a perfect match.

And those extra crispy edges you trim off? They make a great snack dipped in the extra filling!

Looking for a unique Thanksgiving dessert this year?

Try sourdough pumpkin swiss cake rolls. You won’t find anything this good in a box!

Sourdough Pumpkin Swiss Cake Rolls | Just Take A Bite

Sourdough Pumpkin Swiss Cake Rolls
Yields 4
Sourdough pumpkin cake filled with pumpkin cream and topped with melted chocolate.
Write a review
Print
Cake
  1. 1/2 cup sourdough starter
  2. 1/2 cup all purpose flour
  3. 2 Tbsp. water
  4. 1/2 cup pureed pumpkin
  5. 1/4 cup organic brown cane sugar
  6. 1/4 tsp. baking soda
  7. 1/4 ts. unrefined sea salt
  8. 1/2 tsp. cinnamon
Filling
  1. 3/4 cup organic cane sugar
  2. 1/2 cup pureed pumpkin
  3. 1/2 tsp. cinnamon
  4. 4 Tbsp. all purpose flour
  5. Topping: 1/4 cup chocolate chips
Cake
  1. Combine the sourdough, flour and water. Let set one hour.
  2. Heat oven to 350*F. Line a medium size baking sheet with parchment paper.
  3. Add the pumpkin, brown sugar, soda, salt and cinnamon to the flour. Mix well.
  4. Spread evenly (not too thin) on the parchment paper.
  5. Bake 40 minutes.
Filling
  1. Blend the sugar on high in a high power blender to create powdered sugar.
  2. In a medium bowl beat the powdered sugar, pumpkin, cinnamon and flour on high for two minutes. Chill.
Assembly
  1. When the cake comes out of the oven cut it in half both vertically and horizontally to create 4 pieces. Trim any crispy edges.
  2. Let the cake cool for about 2 minutes.
  3. Spread filling on each piece of cake and roll. Use a toothpick to hold the cake in the rolled position if necessary.
  4. Chill the cakes in the refrigerator.
  5. When chilled melt the chocolate chips in a double boiler (glass bowl over a small saucepan with an inch of water).
  6. Drizzle the chocolate over the cakes.
  7. Chill.
  8. Keep the cakes in the refrigerator until ready to serve.
  9. Store in a covered container in the refrigerator for up to a week or in the freezer for up to 6 months.
Notes
  1. The filling can be made up to 3 days in advance or while the cake is baking.
  2. There will likely be extra filling. It is great for dipping graham crackers or using as frosting on muffins or cupcakes. It also tastes great eaten plain with extra melted chocolate swirled in.
Just Take A Bite https://justtakeabite.com/
 In order for me to support my blogging activities, I may receive monetary compensation or other types of remuneration for my endorsement, recommendation, testimonial and/or link to any products or services from this blog. It will not change the cost of any products or services for you.

Einkorn Chocolate Chip Cookies | Just Take A Bite

Einkorn Chocolate Chip Cookies

These einkorn chocolate chip cookies are a remake of the classic. Simple and delicious, yet free of dairy, nuts, soy, corn, rice, coconut and egg whites.

Einkorn Chocolate Chip Cookies | Just Take A Bite

Who doesn’t love chocolate chip cookies? I know I sure do!

Mom’s cookies are the best.

Growing up my mom was famous for her chocolate chip cookies (and still is!). It was rare we didn’t have any in the house.

We would eat two or three fresh out of the oven. 

She still brings her cookies to every family function or church event. They aren’t fancy, just plain old all purpose flour, butter, sugar, etc. But she somehow transforms the ingredients into something unique.

I miss those cookies. I can almost taste one right now.

Einkorn Chocolate Chip Cookies | Just Take A Bite

Finding an alternative.

Even though I can’t eat my mom’s cookies I can indulge in einkorn chocolate chip cookies once in a while.

This version is super easy to make. Plus it doesn’t have dairy, nuts, soy, corn, rice, coconut or egg whites.

Einkorn Chocolate Chip Cookies | Just Take A Bite

Dessert or breakfast.

If you need a quick treat einkorn chocolate chip cookies are perfect. Or use the base and add whatever you like to make it your own.

There is no need to soak the flour, which makes them even easier!

Add dried fruit and seeds to create a breakfast cookie. Or keep it classic with just chocolate chips.

Smart Sweets

No matter what you add they’re good! Especially fresh out of the oven.

Soft cookie dough with melted chocolate.

Who can resist that?!

In need of a cookie fix?

Try something new with einkorn chocolate chip cookies.

Einkorn Chocolate Chip Cookies | Just Take A Bite | A twist on the classic chocolate chip cookie that is free of dairy, nuts, soy, rice, corn and coconut

Einkorn Chocolate Chip Cookies
Yields 12
A twist on the classic chocolate chip cookie using einkorn flour.
Write a review
Print
Ingredients
  1. 1 cup einkorn flour
  2. 1/2 cup whole wheat, all purpose or white rice flour
  3. 1/2 tsp. unrefined sea salt
  4. 1 tsp. baking soda
  5. 1/2 cup honey
  6. 3 egg yolks
  7. 1/4 cup olive oil, avocado oil or melted tallow
  8. 1/4 cup add-ins: chocolate chips, dried fruit, seeds
Instructions
  1. Heat oven to 350*F.
  2. In a large bowl combine all of the ingredients except add-ins. Beat until well combined.
  3. Stir in chocolate chips.
  4. Scoop mounds onto a parchment lined baking sheet.
  5. Bake for 15 minutes.
  6. Cool and store in a sealed container for up to a week or in the freezer for up to a year.
Just Take A Bite https://justtakeabite.com/
 In order for me to support my blogging activities, I may receive monetary compensation or other types of remuneration for my endorsement, recommendation, testimonial and/or link to any products or services from this blog. It will not change the cost of any products or services for you.

Gluten Free Pumpkin Flax Granola Muffins | Just Take A Bite

Gluten Free Pumpkin Flax Granola Muffins

Can’t decide what to have for breakfast? Get your cereal and bread all in one with gluten free pumpkin flax granola muffins. They are the perfect way to start your day this fall.

Gluten Free Pumpkin Flax Granola Muffins | Just Take A Bite

I am working with Stonyfield and Nature’s Path for this post. I have been compensated for my time commitment. But the opinions and ideas are my own. I have not been paid to post positive reviews.

It’s no secret. I L-O-V-E granola. Really I love cereal of any kind.

But cereal is a rare commodity around here, only showing up on the breakfast menu when I have time to make some. Most cereal is just not healthy.

My kids enjoy my homemade granola. I make a kettle corn version that everyone goes crazy for.

But it sure is nice to get variety once in a while. And to give myself a break (it’s hard work cooking for a family with so many different allergies!)

So I was excited to try two products from Nature’s Path – Pumpkin flax granola and Cranberry Vanilla Qia.

Gluten Free Pumpkin Flax Granola Muffins | Just Take A Bite

Big helpers.

Since I can’t have either my big kids gladly volunteered to be the taste testers!

Both kids really loved the Qia. It is a unique blend of seeds and dried fruit. We tried it in both milk and yogurt. Either way is great. Just mix and let it sit for five minutes. Breakfast is served.

My oldest was the granola sampler (since my son is allergic to some of the ingredients). She gave it two thumbs up!

She even got an extra special treat one day with an Oh My Yog! yogurt and pumpkin flax granola in her lunch.

From a flavor standpoint both products are winners.

Gluten Free Pumpkin Flax Granola Muffins | Just Take A Bite

My kids reviewed the taste. I reviewed the ingredients.

I was disappointed to see soy oil in the granola. We try to avoid all soy. I also am not sure what oat syrup solids are. It sounds a lot like corn syrup solids, just using a different grain.

I was hopeful as I read the ingredient list of the Qia cereal. Until I got to the last one – natural vanilla flavor.

Gluten Free Pumpkin Flax Granola Muffins | Just Take A Bite

Natural flavor is my biggest pet peeve when it comes to “natural” products.

Natural flavor is pretty much the same thing as artificial flavor.

They may start with different ingredients, but the end product is about the same. And they impact my children the same way.

Both make my kids C-R-A-Z-Y.

Preparation is key.

I also think that seeds and grains need to be properly prepared to avoid nutrient deficiencies and to aid in digestion. Eating all of these oats and seeds that haven’t been soaked can be hard on the gut. My son seemed to have a really hard time with the seeds and had some off tummy days.

So I did let my kids try both products. But they are not items I would let them have regularly.

Pumpkin flax granola is good for those times when you are traveling or for those days here and there when you really have no time at all to prepare breakfast.

It also makes a great addition to muffins! Especially if you can’t have eggs.

Gluten Free Pumpkin Flax Granola Muffins | Just Take A Bite

Flax seed is a great egg substitute.

So I used the pumpkin flax flavor of the granola and bumped it up with real pumpkin and flax seeds to create gluten free egg free pumpkin flax granola muffins.

A little sprinkle of granola on top adds a nice crunch and burst of flavor.

Since I like to prepare my grains I used Stonyfield whole milk yogurt to soak the flour first. The yogurt not only breaks down the phytic acid, it also helps bind the muffins and give them a soft texture.

You can make the muffins with or without the granola added. I made some without for my son and he still loved them.

Pumpkin and flax are a great pair. Put them in a muffin and you have a great fall breakfast. Make a big batch to stock the freezer for easy weekday mornings.

Are you a cereal fan? Or do muffins top your list?

Why not put them together and enjoy some pumpkin flax granola muffins. Use pumpkin flax granola or your favorite homemade granola for a new twist on breakfast.

Gluten Free Pumpkin Flax Granola Muffins | Just Take A Bite | A gluten and egg free muffin packed with pumpkin and flax seeds plus granola for extra crunch

Gluten Free Pumpkin Flax Granola Muffins
Serves 12
A gluten and egg free muffin with pumpkin flavor and crunchy granola.
Write a review
Print
Ingredients
  1. 1 cup sorghum flour (or brown rice or whole wheat)
  2. 1/4 cup warm water
  3. 1/2 cup plain, whole milk yogurt
  4. 1 cup tapioca flour (or white rice or all purpose)
  5. 1/2 cup granola + 1/4 cup for topping
  6. 1/2 cup pureed pumpkin
  7. 2 Tbsp. ground flax seeds
  8. 1/3 cup organic cane sugar
  9. 1 tsp. baking soda
  10. 1/2 tsp. unrefined sea salt
  11. 3 Tbsp. whole milk
  12. Optional: 1/3 cup mini chocolate chips or dried fruit
Instructions
  1. In a large bowl combine the sorghum, water and yogurt. Cover and let sit 7-24 hours.
  2. Heat the oven to 350*F. Line a muffin pan with paper or silicon muffin cups.
  3. Add the flax seeds to the soaked flour. Let sit 5 minutes.
  4. Add the remaining ingredients (except granola for topping).
  5. Mix well.
  6. Fill muffin cups 3/4 full. Sprinkle granola on top of each muffin.
  7. Bake for 25 - 30 minutes.
Notes
  1. Squash or sweet potato can be used in place of the pumpkin.
  2. The muffins can be made without the granola.
  3. To make these dairy free replace the yogurt and milk with coconut milk or water.
Just Take A Bite https://justtakeabite.com/
 In order for me to support my blogging activities, I may receive monetary compensation or other types of remuneration for my endorsement, recommendation, testimonial and/or link to any products or services from this blog. It will not change the cost of any products or services for you.

This post is linked to Savoring Saturdays.

Molasses Tonic | Just Take A Bite

Molasses Tonic

In need of a warm drink that not only tastes good but is packed with essential minerals? Molasses tonic is the perfect warm up and pick-me-up drink for cold weather.

Molasses Tonic | Just Take A Bite

I like warm drinks. Do you?

Even on the hottest summer days I still start the day with a warm drink. It has a calming effect on my mind and body. In fact I’m sipping on one right now while I write this post!

I’ve never been a coffee drinker. I usually go for tea.

But these days I pretty much drink one of two things. Either healing hot chocolate or molasses tonic. Both provide minerals in a great tasting, soothing beverage.

You may be wondering, what’s so great about molasses? Isn’t that just sugar?

Molasses Tonic | Just Take A Bite

Molasses is actually packed with vitamins and minerals.

It contains:

  • potassium
  • magnesium
  • calcium
  • iron
  • vitamin B6
  • niacin
  • pantothenic acid
  • choline
  • phosphorus
  • zinc
  • copper
  • selenium
  • chromium
  • cobalt
  • sodium

It has also been shown to be helpful with a variety of health issues from PMS, headaches and acne to bone health and constipation.

What’s not to love?

Well, maybe the flavor.

Molasses is an acquired taste.

At least for me. If you are not a fan just start with a small amount and work your way up to a full tablespoon.

You can even do half molasses and half maple syrup to start. Maple syrup has minerals too!

As you can see molasses is very nutritious. You could just take a big spoonful once or twice a day.

Molasses Tonic | Just Take A Bite

I like to combine it with some other nutrients in a hot drink to really give my body a boost.

So you can add any or all of the following to create a molasses tonic:

  • stinging nettle (allergy relief, reduce inflammation)
  • grass-fed collagen (easy-to-digest protein, gut healing)
  • unrefined sea salt (trace minerals, hydration/electrolyte balance)
  • cocoa powder (magnesium, iron, fiber, manganese, zinc, flavonoids)
  • carob powder (calcium, magnesium, phosphorus, potassium)
  • maple syrup (calcium, iron, magnesium, phosphorus sodium, potassium, zinc)
  • butter and/or coconut oil (healthy saturated fat, helps balance the protein and carbohydrates)

When you put all of these together molasses tonic can practically be a meal replacement! And if you have a super busy morning here and there it could be. I drink it after a meal. Though it is best to wait an hour after eating to let your food settle/start digesting first.

If you don’t have time or all of the ingredients to make the full molasses tonic you can simply add molasses and sea salt to hot water. You’ll still get a big nutritional boost and feel hydrated.

The next time you need a hot beverage skip the coffee. Instead whip up a power packed molasses tonic.

This is great for kids too. Add some whole milk or coconut milk to their molasses tonic for a creamy drink.

Do you consume molasses regularly? What is your favorite way to use it? 
Molasses Tonic | Just Take A Bite

Molasses Tonic
Serves 1
A warm drink packed with vitamins and minerals
Write a review
Print
Ingredients
  1. 1 1/2 - 2 cups boiling water
  2. 1/2 - 1 Tbsp. blackstrap molasses
  3. 1/4 tsp. unrefined sea salt
optional
  1. 1 tsp. nettle leaf
  2. 1 Tbsp. grass-fed collagen
  3. 1 tsp. organic cocoa powder
  4. 1/2 tsp. organic carob powder
  5. 2 tsp. grade B maple syrup
  6. 1 Tbsp. butter or coconut oil
  7. 2-4 Tbsp. whole milk or coconut milk
Instructions
  1. If using nettle leaf, use a tea strainer or cheesecloth to steep nettle leaves in 1/2 cup boiling water for 10 minutes. Remove the leaves.
  2. Add the remaining boiling water and ingredients.
  3. Stir to combine.
  4. Allow to cool enough to drink or add ice cubes or milk.
Notes
  1. This can be served warm or cold (iced molasses tonic).
  2. This can be placed in a water bottle and packed for school lunch.
Just Take A Bite https://justtakeabite.com/

In order for me to support my blogging activities, I may receive monetary compensation or other types of remuneration for my endorsement, recommendation, testimonial and/or link to any products or services from this blog. It will not change the cost of any products or services for you.

Candy Corn Finger Jello | Just Take A Bite

Candy Corn Finger Jello: KS Post

Candy corn finger jello is the perfect Halloween treat. It has bright colors and fruit flavor without anything artificial.

Candy Corn Finger Jello | Just Take A Bite

I’ve never been that crazy about  Halloween.

Don’t get me wrong, getting dressed up is fun. Spending time with friends is great.

Of course as a kid the candy is the real star of the show.

An adult perspective.

But on the whole it’s more of a hassle than anything, especially as a parent. Scrambling to find a costume (I’m cheap and just get creative with what we have on hand…anybody with me?). Spending half the week’s grocery budget on junk food for the neighborhood. Not my cup of tea.

But there is one part of Halloween and fall in general that I have always loved.

Candy corn.

I liked the taste. But more than that it reminded me of my grandparents. They lived on a farm and always kept a chicken feeder on the kitchen table to feed their little chicks – their grandchildren!

For some reason I was more into this tradition than any of my siblings or cousins. If my grandparents knew I was coming they were sure to stock it with candy corn for me. I ran to it first thing when I entered the house to check and have a little chicken feed.

My days of visiting the farm are coming to an end as my grandmother passed away earlier this year and my grandfather is in hospice. But when I do get there the chicken feeder is still sitting there on the table as soon as I walk in the door.

Candy Corn Finger Jello | Just Take A Bite || Candy corn finger jello is the perfect Halloween treat. It has bright colors and fruit flavor without anything artificial.

A new tradition.

I am honored that it will soon be the centerpiece of my own table! I can carry on the tradition of feeding my kids and someday grandkids just like little chicks.

But in a different way.

My candy corn will not come out of a bag. It will not have artificial flavors and food coloring.

Instead it will be full of nourishing gelatin!

Want to see how I made this fun treat? Head over to Kitchen Stewardship! I’ll show you just how easy and healthy candy corn finger jello is.

If you’re looking for more holiday treats check out these great real food dessert books:

Naturally Sweetened Sweets - A Community Cookbook

Smart Sweets

This post is linked to Savoring Saturdays.

No Bake Pumpkin Cheesecake Cups | Just Take A Bite

No Bake Pumpkin Cheesecake Cups

Looking for an easy, prep ahead fall breakfast? These no bake pumpkin cheesecake cups are great for kids and adults. Plus they are packed with nutrition.

No Bake Pumpkin Cheesecake Cups | Just Take A Bite

One of my favorite foods is cheesecake. It comes in a close second behind ice cream. Yes, I love my creamy dairy desserts!

However, I don’t have time to make cheesecake very often. So I came up with a cheater version for fall.

Pumpkin cheesecake cups do require about two minutes of heating to dissolve the gelatin. But there is no baking involved. All of the prep work takes about five minutes of hands on time. In fact pumpkin cheesecake cups are so easy to prepare that even your kids can make them!

No Bake Pumpkin Cheesecake Cups | Just Take A Bite

Nutrition first.

Pumpkin is a superstar when it comes to vitamins. So any way I can add it to our diet is a bonus. Then you add yogurt with probiotics and healthy fat.

Don’t forget about the gelatin! This will help aid digestion and boost the protein content.

I love that I can make a batch of pumpkin cheesecake cups before bed and breakfast is ready in the morning. So when I have a child wake up at 6 am and tell me he’s starving we don’t have a mini crisis (i.e. meltdown).

Pumpkin cheesecake cups also work really well for school lunches. Kids see it as a treat. I see it as a source of protein and vegetables. A win for everyone.

No Bake Pumpkin Cheesecake Cups | Just Take A Bite

Perfect any time of day.

Of course you can always serve these for dessert too. Make a big batch for a crowd. Add some crumbled gluten free pumpkin spice graham crackers to individual cups to mimic crust. You’ll get rave reviews and be able to sit and enjoy some with your guests!

This recipe makes enough for two cheesecake cups. It can easily be scaled up to make as many servings as you need. They will stay good in the refrigerator for up to a week so you can make a batch to enjoy all week long. Though I can guarantee they won’t last very long!

If you like your cheesecake really soft you can reduce the gelatin about 1/2 tsp. If you like it super firm you can increase the gelatin about 1/2 tsp. Adjust it to make your ideal cheesecake.

Are you enjoying all things pumpkin right now?

Add these no bake pumpkin cheesecake cups to your list of must try treats!

No Bake Pumpkin Cheesecake Cups | Just Take A Bite


No Bake Pumpkin Cheesecake Cups
Serves 2
Write a review
Print
Ingredients
  1. 3/4 cup plain greek yogurt or strained whole milk yogurt
  2. 1/4 cup pureed pumpkin
  3. 1/4 cup honey
  4. 3 tsp. grass-fed gelatin
  5. 1/2 tsp. cinnamon
  6. 2 homemade graham crackers or 1 store-bought graham cracker
Instructions
  1. Strain whole milk yogurt for one hour (it takes about 1 1/2 cups of yogurt to get 3/4 cups thick yogurt).
  2. Crush graham crackers and place in the bottom of two small containers (1/2 pint jars work well)
  3. Combine the yogurt, pumpkin, honey, cinnamon and gelatin in a small saucepan.
  4. Let sit one minute.
  5. Heat on low-med until the gelatin is dissolved and the mixture is liquid, about 2-3 minutes.
  6. Pour the mixture over the graham crackers and chill until set.
Notes
  1. Pumpkin cheesecake cups will stay good in the refrigerator for up to a week.
  2. Squash can be used in place of the pumpkin.
  3. Coconut milk yogurt can be used in place of the dairy yogurt.
Just Take A Bite https://justtakeabite.com/

In order for me to support my blogging activities, I may receive monetary compensation or other types of remuneration for my endorsement, recommendation, testimonial and/or link to any products or services from this blog. It will not change the cost of any products or services for  you.

This post is linked to Savoring Saturdays.