Home » Archives for Mary | Just Take A Bite » Page 77

Author: Mary | Just Take A Bite

Recycling Your Crayons

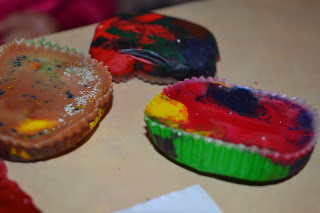
I recently saw a post on The Nourishing Gourmet for using crayon scraps to make new crayons. So Rebecca and I tried it last week. It was so easy! And Rebecca loved it. It’s fun to use the new crayons. We call them rainbow crayons. You never know what color will show up 🙂

I don’t have any fancy molds. I just used paper muffin liners. They worked very well. The crayons came right out. And I didn’t have to worry about getting any of my pans messy or worry about toxins.

No more tossing all the broken pieces of crayons. We’ll recycle them and keep making new ones.

Recycled Crayons

Crayons, peeled of all paper
Ovenproof Mold or paper muffin cups

Heat oven to 350F.

Chop crayons into small pieces with a sharp knife (I didn’t do this. I just used them the way they were.)

Fill mold or cups with crayon pieces.

Place in oven to melt (about 5-10) minutes. Take out as soon as all of the crayon pieces are melted, otherwise they could burn.

Let cool. (After they are cool to the touch, I place in the freezer for about 10 minutes to speed up the process). Remove and repeat as desired!

Meal Plans Week of 9-30-12

Good (yaaawwnn) morning. I think Abram finally went back to sleep. He’s been up for about the last 3 hours 🙁  Time for another round of sleep training I think. He’s at the point where he doesn’t fall asleep when he nurses. So he has to figure out some way to self sooth. Hopefully it won’t be a long process.

making homemade crayons
 

Last week was a bit draining on me since I didn’t get a lot of sleep (for obvious reasons :P) and I did not feel very good (honestly I felt completely rotten). But I managed to get the necessities done. I only did one batch of applesauce. I also made brownies (Justin needed a dessert for work), apple crisp, yogurt, ice cream and  my niece’s baptism cake. Rebecca and I also made crayons (post to come), set up a restaurant and did some leaf rubbings.

This week will be busy with family stuff. Today we will be visiting my whole family for the baptism. Monday is preschool. Tuesday is farmer’s market and kindermusik. I also have an appt. with my psychologist. Wednesday is preschool and Mommy and Me night for Rebecca’s class. I’m excited to meet the other moms. Thursday I need to make a quick trip to Meijer for fresh produce for the weekend. Friday we have MomBreak in the morning and preschool in the afternoon. Then Justin’s parents will be coming for the weekend. Saturday Justin’s brother and his fiance will be here. We’ll spend a good portion of the day with them at a picnic lunch and dinner at our house. We’re excited to meet Haylee for the first time! Justin’s parents will go to church with us on Sunday as well. It’ll be a busy weekend for sure.

So most of the stuff I do this week will be in preparation for the weekend. Cleaning, baking, etc. I’m hoping to make pesto, sour cream, muesli, cupcakes and maybe a pie. I also need to get fall decorations up. I think Rebecca will enjoy helping with that.

Like I mentioned last week was pretty rough. My body is going through another bad round of die off from using apple cider vinegar as a digestive aid. Unfortunately it works so well that now my body is trying to get rid of lots of junk…but it doesn’t know how. So that leaves me with digestive problems, cystic acne (not really acne…more like fluid filled bumps mostly on my face and scalp that look and feel awful), fatigue, irritability, headaches, bloating, swelling/joint/muscle pain, sores in my mouth, burning tongue,…lots of unpleasant stuff. I think I’m on the upswing, but I’m still struggling. It usually lasts two weeks. This is week two. Hopefully I can still feel ok for our party today. And hopefully I’ll be doing better by the weekend. Nothing like hosting family/overnight guests/meeting new family when you feel rotten :\  Hopefully I’ll have enough energy to get done what I need to. I’ve been really dragging the last few days. I’ve had to force myself to keep moving.

I’m still trying to figure out what (if any) supplements are helping. And I’m researching candida. Sometimes I feel like my body is full of toxins/yeast/bad bacteria that I need to get rid of. But then again some people don’t even think candida is real. Every time I add some kind of cultured or fermented food to my diet I have more die off. So it seems like something is in there causing problems. Even just eating some yogurt and sour cream with lunch a few days this week seems to have made things flair again. It’s all so confusing still. I just keep praying and trusting that God will meet my needs each day. He has a plan, and He is in control of this crazy roller coaster I’m on.

Here’s what’s on the menu this week.
—————————————
S – (prep dinner, church/baptism/family party, prep smoothies)
  B – zucchini cake, banana
  L – at party
  D – RR – mac ‘n’ cheese, corn, applesauce, chocolate milk

M (make hot fudge, make pudding, ps, make mayo)
  B – smoothie, zucchini cake
  D – fried chicken, peas, roasted potatoes

T (skim cream, make sc, prep dinner, freeze peppers, fm, km, Dr. V.)
  B – soft boiled egg, toast
  D – (prep ahead) – cp tomato soup, grilled cheese

W (make decorations, make muesli, chop vegetables, ps, m/m, wt)
  B – smoothie, muffins
  D – (light/easy clean up) – pork chops w/ apples over rice, carrots

Th (make cupcakes, clean, Good Will, Meijer, make ice cream)
  B – english muffin, yogurt
  D – pan white fish, baked potatoes, beans

F (soak beans, soak oats, frost/decorate cupcakes, MB, ps, Voogts, prep smoothies)
  B – cold cereal w/ milk, banana
  D – cp beef roast w/ vegetables, sd muffins, applesauce, cupcakes, ice cream

S (soak flour, prep yogurt, make beans, Voogts/picnic)
  B – soaked baked oatmeal, yogurt, fruit
  L – picnic (bring baked beans)
  D – (dairy free) – squash/chx soup, beer bread, peppers and carrot sticks, cupcakes

Sun (make biscuits, Voogts)
  B – soaked biscuits w/ butter/jam/pb/ab, smoothies, muesli w/ milk, fruit

Our Restaurant of Choice

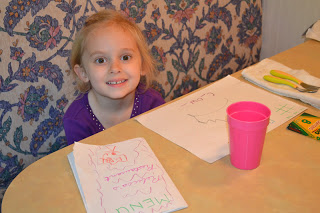
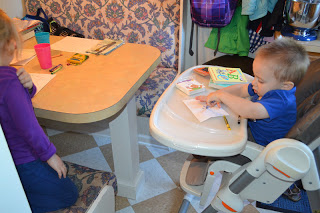
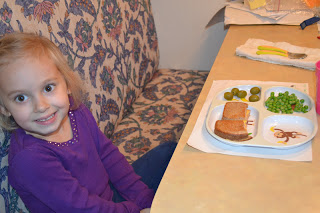
Last night we ate at the best restaurant in town…Rebecca’s Restaurant. Or as she named it Rebecca’s Rainbow.

Rebecca is becoming quite the little chef/baker/creator in the kitchen. She likes to come up with her once a week menu.

But this week we did something different. Justin had to go out to eat for a work dinner. I kind of jokingly said that I should take the kids out to eat if he was going to be gone. Rebecca thought I was serious…and started to cry when I told her we weren’t really going out. Me plus my two kids without my husband’s help at a restaurant? No thanks 😛

I know what Rebecca likes to eat at restaurants. And I know we can make much better versions at home. So I thought…why not have a restaurant at home? So we did!

I told Rebecca she could make the placemats and the menu. We could eat at our breakfast nook…it’s just like a booth at a restaurant. She could order whatever she wants, and I’ll be the cook.

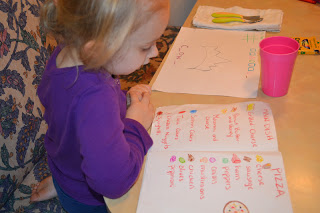
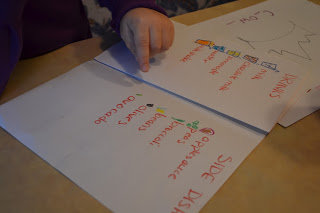
We had a blast!! Early in the day we made the placemats and menu. She decorated my placemat. I made one for her with games, etc. on it (like a kid’s menu at a restaurant). Then I wrote out the menu and she drew pictures of all of the food.


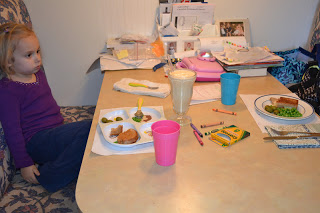
About 45 minutes before dinner we set the table with our placemats, silverware and water. Rebecca got some crayons to work on her placemat. And I took our orders. Even Abram joined in the fun coloring in his high chair.

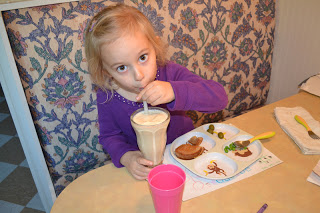
Rebecca ordered grilled cheese, peas, olives and a butterscotch milkshake. No big surprises there 🙂  Abram and I had the same thing. We all enjoyed our meal. And I don’t know if I’ve ever seen Rebecca eat that quickly. She even asked for seconds!

I think the milkshake was the biggest hit. Abram kept asking for more…”cup, cup, cup!”

We made our menu pretty extensive so that we can use it any time we want to visit Rebecca’s Rainbow. I think next time we go it’ll be a pizza parlor. And I suppose we’ll let Justin join us 😉  We can add daily specials if we want to add to the menu or even make a full breakfast menu. Or maybe just go out for dessert some time.

This was so much fun. Rebecca got to pick out her favorite restaurant food…but I knew it was healthy since I was making it. And Rebecca got to help with everything. So she liked it even better than going to a real restaurant.

We rarely go out to eat. I have so many food restrictions that it’s hard to find something I can eat. Abram only sits in a high chair for about 5 minutes before he starts screaming. And Rebecca is too distracted in a restaurant to actually eat.

Now we can go out any time we want! The next time your kids want to go out to eat try making a restaurant at home. It can be fun for the whole family. Older kids can take orders and help cook. Even little ones can help make decorations. Going “out” for dinner just got a lot healthier, a lot cheaper and a lot more fun.

This post is linked to Fat Tuesday, Real Food Wednesday, Fight Back Friday and Fresh Bites Friday.

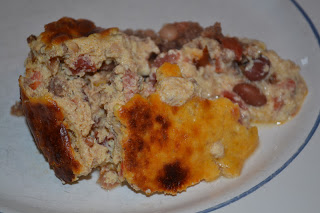
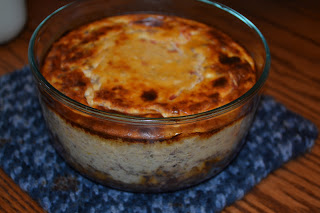
Chili Cheesecake

A couple weeks ago I was watching the show The Best Thing I Ever Ate. One of the dishes featured was a savory cheesecake. It looked pretty good, although I can’t remember at all now what was in it. It got me thinking…maybe I should try making a savory cheesecake.

I had some leftover chili I didn’t know what to do with. So I turned it into chili cheesecake.

I honestly had about 5 minutes to prepare this dish after running in the door from a visit to the the doctor and running errands. I thought it might be a huge failure. I didn’t have a recipe. I didn’t measure. I just dumped, mixed and stuck it in the oven. Praying it would have enough time to bake and that it wouldn’t be a pan of slop when it came out.

To my great surprise it actually turned out really well. Both of the kids even loved it.

This is a great way to use up leftovers and come up with any kind of savory cheesecake you can imagine. You can eat it as is or use it as a dip.

It’s been almost a week now since I made it so I’ll do my best to remember what I did 😛  I just made a small dish. You can scale it up to make it in a pie dish or spring form pan.

Chili Cheesecake

1/2 cup crushed tortilla chips (for a “crust”…this is optional…the chips get soft when baked)
1 cup chili (you could use taco meat, cooked ground meat, shredded chicken, or any vegetables you like)
1 cup homemade cream cheese
3/4 cup homemade sour cream
1 egg
2 egg yolks
seasoning to taste

Place tortilla chips in the bottom of a small baking dish (I used a 4 cup pyrex dish). Top the chips with half of the chili.

Mix the rest of the chili, the cream cheese, the sour cream and the eggs. Adjust seasoning to taste.

Pour the mixture over the layer of chili.

Bake at 400 degrees for about an hour (until set all the way through). Let set 5 minutes before serving.

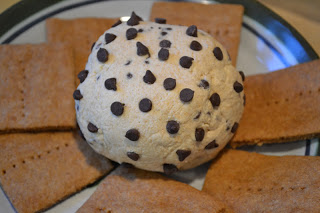
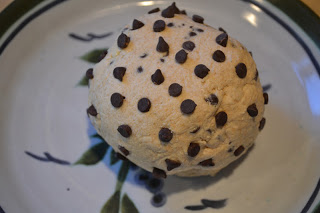
Chocolate Chip Cheese Ball

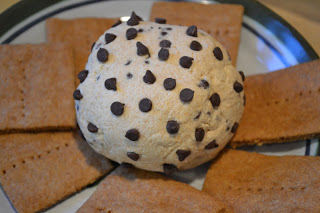
I’ve had a recipe for a chocolate chip cheese ball in my list of recipes to try for a long time. I finally decided to make it. I modified it to use real ingredients. I did use regular chocolate chips. I still need to get to the store to try to find better quality chips. Or I need to find time to make my own again. But aside from that it was all good stuff.

It turned out great! A real treat. It’s kind of like eating cookie dough. I served it with a fresh batch of homemade graham crackers. A sweet twist on a cheese ball. Delicious.

The original recipe says to coat it in nuts. I didn’t do that since I can’t eat nuts. I just added some extra chocolate chips to the outside. Dried coconut flakes would be good too. It’s mostly for looks. You really don’t need to coat it in anything.

This post is linked to Fat Tuesday.

Chocolate Chip Cheese Ball

5 oz. homemade cream cheese
1/3 cup white whole wheat flour (you can use cornstarch or arrowroot. Use a little less than 1/3 cup)
1/3 cup maple syrup
1/4 tsp. vanilla
5 Tbsp. butter, softened
2-4 tsp. molasses
mini chocolate chips

Beat the cream cheese and butter. Mix in the flour, syrup, vanilla and molasses. Taste for sweetness. Add extra syrup or molasses if needed. Stir in chocolate chips (as few or as many as you like).

Refrigerate for two hours.

Scoop onto plastic wrap and form into a ball.

Wrap in plastic wrap and refrigerate until ready to serve.

You can roll the ball in chopped crispy nuts, coconut or more chocolate chips.

Meal Plans Week of 9-23-12

Good morning. Hello fall! Yep, it’s officially here…and it feels like it. The heat is on in our house. I’ve added blankets to our bed. Brr. And we can add to the list of fall fun…colds for both of the kids already. Hopefully they will be short lived. At any rate, the kids and I won’t be going to church today.

This week will be another busy one. Tonight I’m going to a Norwex party. Monday is milk pick up and preschool. Tuesday is farmer’s market, Kindermusik and a filling for me 🙁  Wednesday is groceries and preschool. The rest of the week is actually free. Friday is Grandparents’ Day at school…so there is no preschool.

I’ll be busy in the kitchen trying to make a couple more batches of applesauce (I did 2 last week). I’ll also be making my niece’s baptism cake. I’m not sure I’ll be doing a lot more than that. Probably yogurt. Maybe ice cream. Nothing major.

Last week I finally made it to a West MI Bloggers meeting. It was so much fun to finally meet in person some bloggers I “know” and to meet some new people as well.

I also ended up going to my regular doctor for a pain in my arm. Turns out I have tendinitis (golfer’s elbow). So I’m using an arm band, icing, doing exercises. I hope it heals quickly.

After watching an episode of the Dr. Oz show I was reminded of how important it is for me (my body type) to keep working on getting a high enough ratio of carbs to fat and protein in my diet. It is such a struggle for me after telling myself for so long that grains are bad and living on meat and fat. I’m not always a big fan of Dr. Oz. He’s smart and has some good things to say. But some things are just bologna 😛  Anyway, he was talking about metabolism types. Nothing new for me. But it just reminded me to keep working on bumping up my carbs and lowering my fat. He said 70-80% carbs, 10-20% protein, 10% fat. I know I’m not even close to that carb/fat ratio. But I’ve been trying to improve this week. I think it helps. I just have to get rid of the mental stigma I have about eating a larger serving of grains and not covering them with butter or coconut oil 😛  And I have to be sure I’m not just getting carbs from sweets. I seem to do well with wheat and white rice. So I’ve been eating quite a bit of them. Add in a good portion of vegetables. Then a little protein and fat.

I got more new supplements on Friday. I’m starting them today. We’ll see how it goes. I’ll also be getting a magnesium supplement on Tuesday. I’m anxious to try that. And I started the medication from my colon surgeon.

That being said, I’m doing so-so right now. Still frustrating some days. But I’m trying to just keep pushing. And I know that last week wasn’t the best due to major lack of sleep. Rebecca and Abram were both up a lot in the night from their colds. So I didn’t get much sleep at all. And I could really tell in my mood. Wow. Even I didn’t want to be around me 😛  I could hear myself and feel  myself being so moody/impatient. But I felt like I didn’t know how to change it. It showed me just how important sleep is. That’s something I still need to work on…really need to work on.

One last note…I think we might start the potty training process with Abram this week. He is young (16m), but he totally understands it. He knows when he’s wet or dirty. And if you ask him he’ll nod yes or say no. If you talk about being stinky he says “pa, pa” (potty) and grabs his diaper. And he’ll grunt. It’s quite comical 😛  Anyway, we might give it a go. Knowing him he’ll do it right away. Since he was born he’s wanted to be able to do everything his sister does. He keeps up with her running around the house. He climbs on things with her. He eats in a regular chair like her. He won’t touch baby food (hasn’t for a LONG time). So who knows. Maybe he’ll be much easier to potty train than Rebecca.

On to the menu.
—————
S (prep lunch, church, prep smoothies, NW)
  B – leftover sausage, pancake muffins, fruit
  L – “favorite casserole”, broccoli, garlic toast
  D – leftover cheeseball w/ graham crackers, tortilla chips w/ salsa, beef snack sticks, carrot sticks, grapes

M (make/can applesauce, milk, ps)
  B – smoothie, TBD from freezer
  D – cheeseburgers, baked sweet potatoes, peas

T (skim cream, make yogurt, fm, km, dentist)
  B – hard boiled egg, toast
  D – (prep ahead) – leftover casserole

W (make/can applesauce, Meijer, ps, make ice cream, Justin out for dinner)
  B – smoothie, TBD from freezer
  D –  Rebecca’s Restaurant

Th (make cake deco, bake cake)
  B – yogurt, granola, fruit
  D – butternut squash risotto, beans, fruit

F (bake cake)
  B – cold soaked cereal with milk
  D – grilled “cheese” sandwiches, squash, fruit

S (crumb coat/frost cake, decorate cake)
  B – cinnamon sugar toast, fruit
  D – salmon cakes, herb rice, peas

Banana Split Ice Cream

If you know me, you know I LOVE ice cream. I only eat my homemade ice cream since I know exactly what’s in it. My body does not tolerate all of the fillers, starches, etc. in store-bought ice cream. I’m always trying to come up with new flavors.

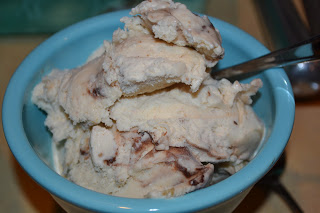
On Sunday I had some cream that needed to be used…which means ice cream. I had some bananas that were getting ripe. So I thought I’d make strawberry banana. Which then morphed into banana split ice cream.

I did a strawberry banana ice cream with walnuts and fudge swirled in. Delicious! And so easy. Using banana really thickened the ice cream. It was done in 10 minutes instead of the usual 20. Love it.

Banana Split Ice Cream

3 cups heavy cream (preferably raw)
3 egg yolks
1 ripe medium banana
1/2 cup frozen strawberries (fresh will work, but frozen helps it thicken and freeze faster)
1/4 cup honey
1/3 cup maple syrup (you can do all honey or all maple syrup)
1/3 cup chopped crispy nuts
hot fudge sauce (recipe below)

In a blender mix cream, yolks, banana, strawberries, honey and syrup. Taste. Make sure it is a little overly sweet (the sweetness will go down after it freezes).

Pour into ice cream maker and process until done (mine took 10 minutes in a Kitchen Aid mixer attachment).

During the last minute of processing add nuts.

Put the ice cream in a freezer safe container. Drop small spoonfuls of fudge into the ice cream and mix very gently. Don’t mix it in. Just fold over the ice cream so the drops of fudge stay in tact as much as possible. It’ll be like pieces of fudge when it freezes. Freeze until firm.

Hot Fudge Sauce
(prepare this in advance so it is cold when you make the ice cream)

1 cup organic cane sugar
1/3 cup cocoa
2 Tbsp. organic all purpose flour (or arrowroot or cornstarch)
1/4 tsp. salt
1 cup boiling water
1 Tbsp. butter
3/4 tsp. vanilla
 
Blend sugar, cocoa, flour and salt in sauce pan.
 
Turn on heat and add boiling water. Bring to a boil.
 
Cook, stirring constantly, until thick, about 3-6 minutes.
 
Remove from heat. Stir in butter and vanilla. Store in refrigerator.

Breakfast Cups

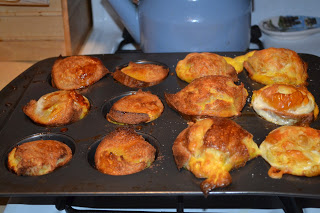
A couple weeks ago I made a simple breakfast for dinner. I made egg cups and french toast cups. They came together very quickly, and we all enjoyed them. I even got them prepped mostly one handed since that’s about the only way to make dinner without running into the other room every five seconds to get Abram down from something he’s climbed on.

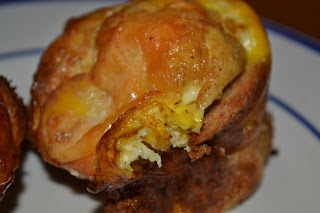
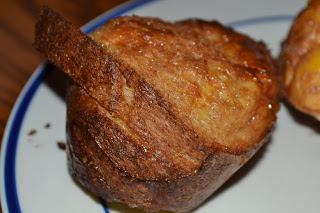
The basis of the recipe is putting bread in muffin cups. Then add whatever to it you want. I did eggs and cheese in some. I did eggs and maple syrup in some.

You could also use the bread in a muffin cup idea with things like sloppy joes or cheeseburger cups or pot pie. The bread is kind of the crust. Then be creative and go from there.

It’s fun to have individual servings, especially for kids. And it’s much faster than making a crust 🙂

These are great for a brunch or for a party. They are also a great prep ahead breakfast. Make them the night before or freeze a bunch and warm them when you need them.

Breakfast Cups

Mini quiche breakfast cups

3 slices whole wheat bread (or whatever bread you tolerate…gluten free, grain free, etc.)
5 eggs
1/2 cup milk
1/2 cup shredded cheese
salt and pepper to taste

Grease 6 cups of a muffin tin. Mix eggs, milk and seasoning. Place 1/4 slice of bread* in each muffin cup. Top with a little cheese. Evenly distrbute the eggs among the cups. Add another 1/4 slice of bread to each cup and push down so it absorbs the eggs. Top with extra cheese if desired. Bake at 350 for 25 – 30 minutes.

Mini french toast cups

3 slices whole wheat bread (or whatever bread you tolerate…gluten free, grain free, etc.)
6 eggs
1/2 cup milk
1/3 cup pure maple syrup
cinnamon (optional)

Grease 6 cups of a muffin tin. Mix eggs, milk and cinnamon. Place 1/4 slice of bread* in each muffin cup. Pour a little maple syrup on top. Repeat with another 1/4 slice of bread and syrup. Evenly distribute the eggs among the cups. Push bread down to be sure it all gets saturated with the eggs. Bake at 350 for 25 – 30 minutes.

*You can also do it with bread torn into chunks instead of keeping it as slices. This works espically well for french toast.

Whole Wheat Cinnamon Rolls

I’ve been wanting to make a batch of cinnamon rolls for some time now. I haven’t made any in years. I finally made some over the weekend. The recipe is from my MIL.

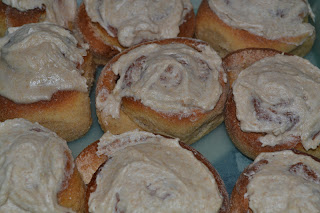
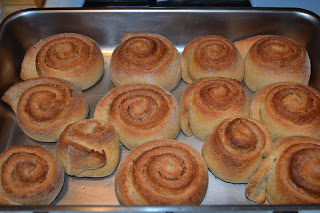
I made a few modifications to meet our standards of healthy. They turned out great!! Rebecca declared them the “best breakfast I’ve ever had.” You can’t beat that.

This is really two recipes – a basic sweet roll dough and the actual cinnamon roll. I prepped the dough Friday night, then made the cinnamon rolls Saturday morning. It worked out well.

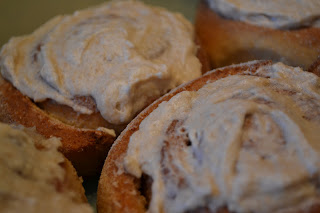
I made my own version of frosting to top them. Delicious!

This post is linked to Fat Tuesday and Real Food Wednesday.

Whole Wheat Cinnamon Rolls

Sweet Roll Dough

2 1/4 tsp. active dry yeast
1/4 cup warm water
1/4 cup lukewarm milk
1/4 cup cane sugar
1/4 cup palm shortening
1/2 tsp. salt
1 egg
2 1/2 cups white whole wheat flour

Cinnamon Rolls

Sweet roll dough
2 Tbsp. butter, softened (room temp)
1/3 cup cane sugar
2 tsp. cinnamon

Frosting

1/4 cup palm shortening
1/4 cup white whole wheat flour (finely ground)
1/4 cup maple syrup

———————————
Dissolve the yeast in the warm water in a stand mixer bowl (or a large bowl if doing it by hand). Mix in milk, sugar, salt, egg, shortening and 1 1/2 cups of flour. Mix until smooth. Mix in remaining flour until a soft dough forms (add extra flour if it’s too wet). Knead by hand or with dough hook for about 5 minutes. Pour a small amount of oil on the dough and turn to coat.

At this point you can cover and refrigerate the dough for 3-4 days. Or you can use it immediately.

When you are ready to make the cinnamon rolls let the dough rise until double in size, about 2 hours (it could take longer if it was in the refrigerator…it has to come to room temp before it will rise).

Roll the dough into a 9×15 rectangle. Spread with the softened butter. Sprinkle mixture of sugar and cinnamon over top. Roll up the dough starting with the long side (so it is 15″ long). Pinch the edge of the dough to seal it.

Cut the roll into 15 equal slices.

Place slices flat side up in a greased 9×13 pan, leaving a little space between them. Let the rolls rise again until double (about 45 minutes).

Bake at 375 for 25 minutes.

Allow to cool slightly.

While the cinnamon rolls are baking mix the shortening, flour and syrup to make the frosting.

When the cinnamon rolls are slightly cooled add the frosting on top. Serve immediately.

The cinnamon rolls can be frozen before or after frosting them.