Home » Kid-friendly Recipes » egg free » Page 10

Category: egg free

Pear Lime Jello Salad | Homemade Dutch Apple Pie

Pear Lime Jello Salad

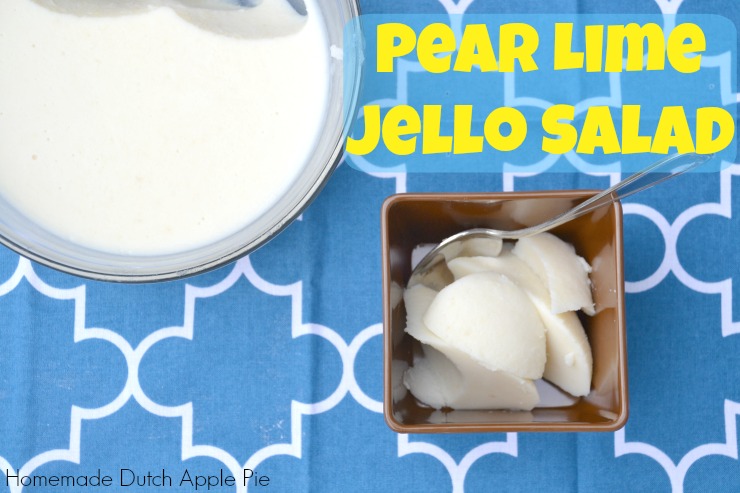
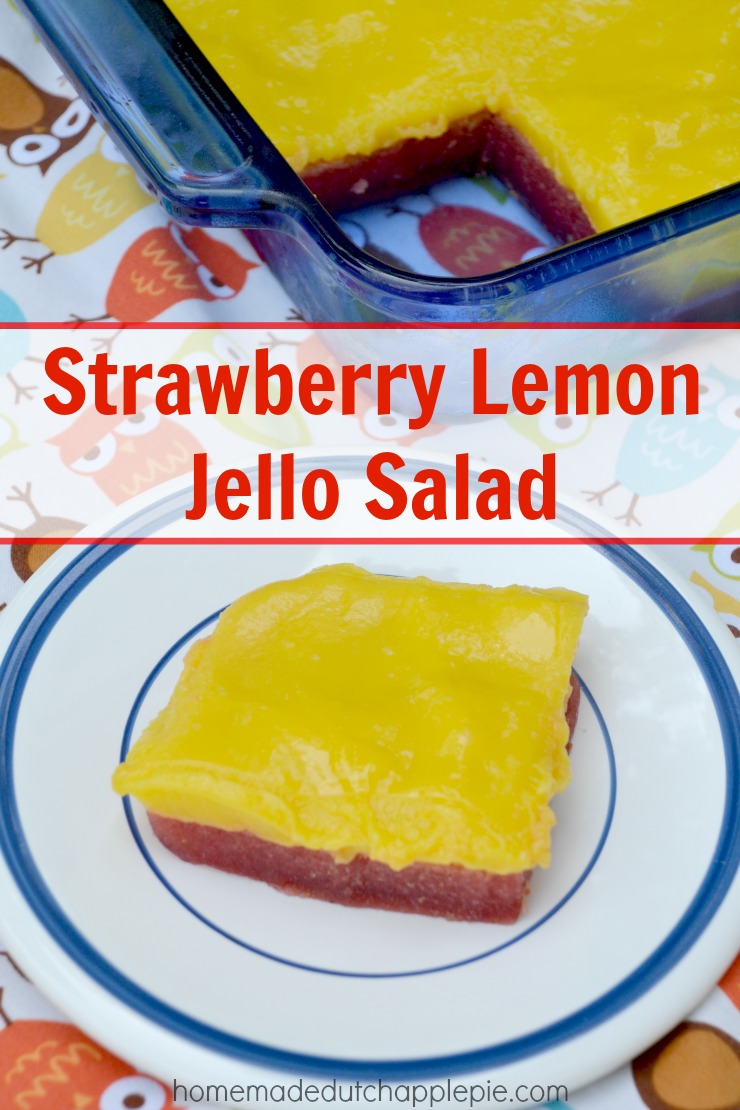
This pear lime jello salad is a simple recreation of the classic seafoam without the food coloring and boxed mix.

Pear Lime Jello Salad | Homemade Dutch Apple Pie

The first time I visited my (now) in-laws was for Thanksgiving. We had a feast (prepared by my talented mother-in-law)! It included the usual turkey, stuffing, potatoes, gravy, vegetables…and seafoam salad.

I had never heard of or tasted seafoam salad. But it was good!

  • Pears in juice.
  • Lime Jello.
  • Cream cheese.

It is an assortment of sweet and creamy goodness.

Fast forward about 15 years and I realize just how unhealthy it is.

  • Boxed jello mix.
  • Green food coloring.
  • Canned pears.
  • Cream cheese with thickeners.

It is an assortment of artificial colors, artificial sweeteners and thickeners.

Pear Lime Jello Salad | Homemade Dutch Apple Pie

Of course that means one thing. Time to get creative.

Homemade Jello Salad

My pear lime jello salad has the bright flavor and creamy texture without the food coloring and refined sweeteners.

Instead, I combine lime juice, fresh pears, grass-fed gelatin, homemade cream cheese and unrefined sweeteners to create a special treat. Homemade powdered sugar really helps thicken the salad.

My kids and my husband really love this pear lime jello salad.

There is one noticeable difference from the original salad – it is white!  Have you ever looked at the inside of a pear? It is white, not green.

If you really want some green in your salad you could add lime zest or maybe even a touch of spinach or peas.

Pear Lime Jello Salad | Homemade Dutch Apple Pie

On top of the sweet flavor, pear lime jello salad is packed with nutrients.

The combination of homemade cream cheese and grass-fed gelatin provides healthy fat and complete protein. The pears add a bit of carbohydrates and fiber.

Pear Lime Jello Salad

Pear lime jello salad makes a great side dish for any week night meal. But it is also great for easy lunches, snacks, picnics and potlucks.

I usually make this salad in a bowl and scoop it with a spoon. But you could also make it in a 9×13 pan and cut it into squares.

Dye-Free Jello

Pear lime jello salad makes great finger food for kids!

But without a green mess.

Are you looking for a new side dish for your summer barbecues or family picnics? Pear lime jello salad is just what you need.

Pear Lime Jello Salad | Homemade Dutch Apple Pie

Pear Lime Jello Salad
Serves 6
A real food version of the classic seafoam salad.
Write a review
Print
Ingredients
  1. 3 large or 4 medium ripe pears, peeled, cored and roughly chopped
  2. 2 Tbsp. cane sugar
  3. 1/4 cup lime juice
  4. 1 1/2 Tbsp. grass-fed gelatin
  5. 1/4 cup cold water
  6. 3/4 cups whole milk plain yogurt OR 1/3 cup whole milk greek yogurt OR 1/3 cup plain cream cheese
  7. 1/4 cup sour cream
  8. 3 Tbsp. homemade powdered sugar OR 2 Tbsp. cane sugar + 1 Tbsp. tapioca flour
Instructions
  1. Strain the yogurt in cheesecloth about 1 hour. Squeeze as much liquid out as possible. Set aside.
  2. Combine the sour cream and powdered sugar. Place in the refrigerator.
  3. Place the pears, lime juice and sugar in a small saucepan. Bring to a boil, reduce heat and simmer 15 minutes.
  4. Puree the pear mixture (leave it in the pan and puree with an immersion blender or puree in a blender and return to pan).
  5. Dissolve the gelatin in 1/4 cup cold water for 30 seconds.
  6. Add the gelatin mixture to the pear mixture and stir to dissolve.
  7. Add the strained yogurt to the pear mixture. Stir to combine.
  8. Pour the pear mixture into a glass bowl or 8" pan. Chill in the refrigerator 15 minutes.
  9. Stir the sour cream mixture into the pear mixture. Return to the refrigerator to chill until fully set, about 4 hours.
  10. Serve cold.
Notes
  1. You can replace the lime juice with water or a different flavor of juice.
Just Take A Bite https://justtakeabite.com/
In order for me to support my blogging activities, I may receive monetary compensation or other types of remuneration for my endorsement, recommendation, testimonial and/or link to any products or services from this blog.

Black Forest Popsicles | Homemade Dutch Apple Pie

Black Forest Popsicles

The sweet flavor of fresh cherries is combined with a hint of chocolate in these black forest popsicles for a unique summer treat.Black Forest Popsicles | Homemade Dutch Apple Pie

The ice cream truck has driven by for the tenth time. The kids are begging for a treat. It’s been hot for days.

Enter super mom with black forest popsicles!

This is the perfect way to use some of your fresh cherries for a unique summer treat. Black forest popsicles are creamy, fruity and chocolaty!

What’s really great is that they only take a few minutes to prepare. The hard part is waiting for the popsicles to freeze!

Black Forest Popsicles | Homemade Dutch Apple Pie

Most of the popsicle is simply pureed cherries. A touch of honey can be added to boost the sweetness.

The real secret is the hint of chocolate.  Chocolate chips, carob chips or cacao nibs are blended right in for a burst of flavor. Leave little chunks of chocolate to get the full effect.

Sweet cherries, tart cherries or both work well in black forest popsicles. Simply adjust the amount of honey added depending on which variety you choose.

I like to use these silicon popsicles molds. They are easy to fill and easy for kids to use.

Black Forest Popsicles | Homemade Dutch Apple Pie

But what about that ice cream truck?

If your kids are like mine, they love to pretend. Mom can be the ice cream truck driver while the kids order their black forest popsicles and “pay” for their treat.

Everyone has fun. Everyone stays healthy.

Black forest popsicles do contain dairy. You can swap the yogurt for coconut yogurt, coconut milk or any other milk you tolerate. So they are a very allergen friendly snack.

Black Forest Popsicles | Homemade Dutch Apple Pie

We are blessed here in Michigan to be able to go cherry picking every summer. We pit and freeze a ton of cherries to use all year in smoothies and yogurt.

I also like to use fresh or frozen cherries for:

This year I’m saving some of our cherries for black forest popsicles. My kids go crazy for them. Yours will too!

Don’t forget mom and dad deserve a treat here and there too. Black forest popsicles are for everyone.

This summer be the hero of the day with black forest popsicles.

Black Forest Popsicles | Homemade Dutch Apple Pie

Black Forrest Popsicles
Yields 6
The sweet flavor of fresh cherries is combined with a hint of chocolate in these black forest popsicles for a unique, low sugar summer treat.
Write a review
Print
Prep Time
5 min
Prep Time
5 min
Ingredients
  1. 2 cups sweet or tart cherries, fresh or frozen
  2. 4 Tbsp. chocolate chips, carob chips or cacao nibs
  3. 2 Tbsp. honey (increase if using tart cherries, omit if you don't want them as sweet)
  4. 1 cup plain whole milk yogurt or milk or coconut yogurt, coconut milk, almond milk or rice milk
Instructions
  1. Blend the cherries, yogurt/milk and honey until smooth.
  2. Add the chocolate chips.
  3. Blend well, leaving small bits of chocolate.
  4. Pour into popsicle molds and freeze until firm.
Notes
  1. You can use 4 tsp. cocoa powder or carob powder + 2 Tbsp. cane sugar in place of the chocolate chips. You will get the chocolate flavor but will not have the chocolate bits.
  2. You can replace the cherries with raspberries.
Just Take A Bite https://justtakeabite.com/

In order for me to support my blogging activities, I may receive monetary compensation or other types of remuneration for my endorsement, recommendation, testimonial and/or link to any products or services from this blog.

Gluten Free Pizza Crackers | Homemade Dutch Apple Pie

Gluten Free Pizza Crackers: Super Healthy Kids Post

These gluten free pizza crackers make the perfect on-the-go snack or lunch addition that your kids will love without filling them up on empty calories. They are also very allergen friendly so you can share them with all of your friends.

Gluten Free Pizza Crackers | Homemade Dutch Apple Pie

Summer is in full swing! That means lots of time outside and outings to the park, the zoo, etc. Kids are bound to get hungry while you are out having fun.

Healthy, portable snacks are a must.

Gluten free pizza crackers are just what you need.

With lots of herbs and just a pinch of sugar these gluten free pizza crackers have the flavor of pizza without the mess.  You don’t even need cheese!

What you do need are a few simple ingredients, including vegetables. Pizza crackers have the “cheese” and sauce baked right in.

My kids raved about these gluten free pizza crackers. They are fun to serve alongside soup, with slices of raw cheese or dipped in hummus or pummus – perfect for a simple lunch or snack.

These crackers even smell like pizza!

Want to learn how to make a batch? Head over to Super Healthy Kids where I share my recipe for gluten free pizza crackers.Gluten Free Pizza Crackers | Homemade Dutch Apple Pie


This post is linked to Savoring Saturdays.

Strawberry Lemon Jello Salad | Homemade Dutch Apple Pie

Strawberry Lemon Jello Salad

When you see strawberries at the farmer’s market you know summer is here! Use that fresh fruit to kick off the season with this fun strawberry lemon jello salad the whole family will love.

Strawberry Lemon Jello Salad | Homemade Dutch Apple Pie

I recall eating a lot of jello growing up.  Of course we had it plain. But we also ate a lot of jello salads.

Church potlucks are notorious for a variety of jello dishes. Some have chunks of fruit. Some are layered. Some are meant to be eaten with your hands. I know I got my fill as a kid!

Jello salads are fruity and fun. Of course kids love them. Who wouldn’t with the bright colors and sweet flavor?

Is Jello Harmful?

It’s been a couple years now since we adopted a strict no food coloring policy in our house.

My children just react way too strongly to artificial colors and flavors.

Plus after researching I realize just how bad all of that artificial stuff is for everyone’s health (think ADHD, hyperactivity, etc.).  I still cringe every time I see a child eating a brightly colored cupcake, cookie or candy. Especially knowing that it is most likely a daily occurrence for them.

So jello out of a box is not something my children ever eat. But I do like to make real jello with nourishing grass-fed gelatin (use code TAKE10 for 10% off).  It is especially fun in the summer.

Strawberry Lemon Jello Salad | Homemade Dutch Apple Pie

Real Food Strawberry Lemon Jello Salad

Recently I decided I wanted to recreate some of my childhood favorite jello recipes.

I started with this strawberry lemon jello salad. It is actually a combination of two jello salads my mom made.

But this one is made with real fruit, grass-fed gelatin, natural sweeteners, pastured eggs and raw milk!

The first layer is a simple strawberry jello made with fresh berries. The top layer is a bright, lemon pudding.

Together they make an irresistible combination. And check out that color!!! No need for anything artificial when you’ve got quality ingredients with vibrant hues.

The final test is the flavor. My whole family gave it two thumbs up! The strawberry and lemon pair well. The jello is not overly sweet. It is a great combination.

Strawberry lemon jello salad would make a great addition to any summer picnic or potluck!

Are you a jello fan? Treat  yourself and your family to this amazing real food version of a classic. Strawberry lemon jello salad is sure to be a hit.

Strawberry Lemon Jello Salad | Homemade Dutch Apple Pie

Strawberry Lemon Jello Salad
Serves 12
Real strawberry jello topped with homemade lemon pudding.
Write a review
Print
Strawberry Layer
  1. 2 cups strawberries (fresh or frozen, thawed)
  2. 1/2 cup organic cane sugar
  3. 2 Tbsp. grass-fed gelatin
  4. 1 cup water
Lemon Layer
  1. 2 egg yolks
  2. 1/3 cup lemon juice
  3. 1/2 cup organic cane sugar
  4. 3 Tbsp. arrowroot, tapioca flour or corn starch
  5. 1 cup cream or whole milk
Strawberry Layer
  1. Puree the strawberries, sugar and water in a blender. Pour into a sauce pan.
  2. Stir the gelatin into the mixture. Let set 1 minute.
  3. Heat the strawberry mixture over low-medium heat, stirring, until the gelatin is dissolved, about 4 minutes.
  4. Pour into an 8" glass pan.
  5. Put in the refrigerator until set, about 1 hour.
Lemon Layer
  1. In a medium saucepan combine the egg yolks, lemon juice, sugar, arrowroot and milk. Whisk to combine.
  2. Heat over medium heat, whisking frequently, until the pudding begins to thicken (will take around 5-10 minutes).
  3. Continue whisking for 30 seconds. Turn off heat. Whisk until fully thickened.
  4. Pour the pudding into a bowl to cool for 20 minutes.
  5. Pour the pudding over the strawberry layer.
  6. Chill until fully set, about 2 hours.
  7. Serve cold.
Just Take A Bite https://justtakeabite.com/
Gluten Free Inside Out Oreos® | Homemade Dutch Apple Pie

Gluten Free Inside Out Oreos®

This homemade version of gluten free inside out Oreos® is a fun, allergen friendly treat that is perfect for birthdays or Father’s Day.Gluten Free Inside Out Oreos® | Homemade Dutch Apple Pie

Father’s Day is just around the corner! It’s time celebrate all the special dads in your life.

What is the best way to a man’s heart? Through his stomach of course!  A special dessert is just the thing to show your husband, father or grandfather how much you love him.

Remember to take care of that stomach, though. Don’t serve sweets with artificial ingredients, food coloring and hydrogenated oils. Instead make a homemade dessert that he can’t resist using real ingredients.

Enter gluten free inside out Oreos®. They are both fun and delicious. They will also last a while so your special man can enjoy them the whole week.

The kids can even help make gluten free inside out Oreos®.  You can make them in advance so there is plenty of time to work on them with the kids. Then they will be so proud to give them to dad.

These tasty cookies are also perfect for birthday treats. I recently made them for my son’s cow spotted birthday.

I love how easy they are to make…and how little mess they make when my kids eat them.

Gluten free inside out Oreos® do contain cocoa powder. But you can substitute carob if you need to avoid it.

Maybe you’re thinking these look great…but what about all the sugar?

Each cookie contains less than two teaspoons of sweetener. Plus there is plenty of healthy fat in the cookie to help metabolize the sugar. The combination of the cookie and the frosting actually does have a purpose!

You also have to remember this is a treat. Itis not something to eat all the time.Gluten Free Inside Out Oreos® | Homemade Dutch Apple Pie

Homemade Oreos® are definitely a family favorite. We usually make them with the traditional combination – chocolate cookies with vanilla frosting.  Sometimes we get really fancy and make special holiday versions.

Now we can add gluten free inside out Oreos® to the list.

Homemade Oreos® are even very allergen friendly. They contain no gluten, dairy, nuts, corn, rice, eggs or soy. With a family like mine that is very important.  I don’t like anyone to feel left out.

Are you still trying to decide what to make your special man for Father’s Day? Or do you need a fun birthday treat? Gluten free inside out Oroes® are just what you need. They:

  • are free of allergens
  • are easy to make
  • can be made in advance
  • are a fun project for kids to help with
  • can be eaten without a big mess

This Father’s Day don’t just go for the traditional cake or chocolate chip cookies. Surprise all the special dads in your life with this fun, allergen friendly dessert that will make his heart and his tummy happy. Gluten free inside out Oreos® are the perfect way to say I love you.Gluten Free Inside Out Oreos® | Homemade Dutch Apple Pie

Gluten Free Inside Out Oreos® {dairy free, nut free, corn free, egg free}
Yields 30
A fun, allergen friendly version of Oreos®...flipped inside out!
Write a review
Print
Cookies
  1. 1 cup sorghum flour (or white rice)
  2. 3/4 cups tapioca flour
  3. 1/2 cup amaranth flour (or brown rice)
  4. 1/2 cup organic cane sugar or coconut sugar
  5. 1/2 tsp. unrefined sea salt
  6. 1/2 tsp. baking soda
  7. 1 tsp. vanilla
  8. 6 Tbsp. honey
  9. 1/2 cup melted butter, coconut oil, palm shortening, lard or tallow
Filling
  1. 1/2 cup palm shortening OR 1/4 cup palm shortening + 1/4 cup butter (at room temp)
  2. 3-4 Tbsp. cocoa powder
  3. 1 Tbsp. carob powder
  4. 10 Tbsp. tapioca flour
  5. 1/4 - 1/3 cup maple syrup
Cookies
  1. Heat the oven to 350*F. Cut 3 sheets of parchment paper the size of a baking sheet.
  2. In a large bowl combine the flour, sugar, salt and soda. Stir to remove any lumps.
  3. Add the vanilla, honey and melted fat. Stir to combine. Use hands to form a ball of dough.
  4. Split the dough in half. Place one half on a piece of parchment paper. Roll until 1/4" thin.
  5. Cut the dough into desired shapes and transfer to a parchment lined baking sheet.
  6. Repeat this process until all of the dough is used.
  7. Bake the cookies for 12-13 minutes. Turn off the oven and leave the cookies in for 5-10 minutes.
  8. Allow to cool completely.
Filling
  1. Beat all of the ingredients together in a medium size bowl.
Fill the cookies
  1. Use a spoon or a piping bag to put filling on one cookie. Top with another cookie and gently push down. Repeat until the filling is gone.
  2. Keep the cookies in the refrigerator for the filling to harden.
Notes
  1. This makes three trays of cookies if cutting shapes. Alternately you can simply roll the dough and cut it into squares and bake them without having to transfer the cookies to another sheet. You will only need two baking sheets of cookies with this method.
  2. You can replace the gluten free flours with whole wheat or all purpose flour.
Just Take A Bite https://justtakeabite.com/


In order for me to support my blogging activities, I may receive monetary compensation or other types of remuneration for my endorsement, recommendation, testimonial and/or link to any products or services from this blog.

Apple Pie Breakfast Parfait | Homemade Dutch Apple Pie

Apple Pie Breakfast Parfait

This apple pie breakfast parfait is a simple layered breakfast that is easy enough for kids to make and fancy enough for guests.
Apple Pie Breakfast Parfait | Homemade Dutch Apple PieSaturday mornings I like to make fun breakfasts and often let my kids choose what we have.  That usually includes things like:

But sometimes by Friday I just don’t have the energy or time to measure and soak flour and get things ready for baking. I need a simple breakfast that is still fun and delicious.

Enter the apple pie breakfast parfait! It is so easy to make that your kids can almost do it by themselves. But what’s even better about it is the taste.Apple Pie Breakfast Parfait | Homemade Dutch Apple Pie

Both of my big kids said it really tastes like apple pie. Then they proceeded to devour it!

There is no refined sugar (unless it is added to your granola). Apple pie breakfast parfait has a good balance of protein and fat from the yogurt and carbohydrates from the apples and granola. There is even some sea salt for balance if you use this kettle corn granola!

Don’t think this is just for kids, though!

Apple pie breakfast parfait looks so pretty and tastes so great it is perfect for entertaining house guests.

I would even make mini versions to serve at a brunch, whether for a playdate or a party.

I prepare the apple filling the night before so it can cool completely. Then in the morning I just layer the ingredients before breakfast. This would be a great thing for kids to do on their own or if they have friends over – build your own apple pie parfait!Apple Pie Breakfast Parfait | Homemade Dutch Apple Pie

This breakfast is very allergen friendly, being gluten, nut, corn, soy and egg free. If you are dairy free you can use coconut milk yogurt.

Apple pie breakfast parfait is also a perfect breakfast for the summer when you want something easy and cold.  You can prepare it in advance or assemble it in the morning.

Are you in a breakfast rut? Try an apple pie breakfast parfait. Your kids will love it. You will too!

Apple Pie Breakfast Parfait | Homemade Dutch Apple Pie

Apple Pie Breakfast Parfait
Yields 4
A simple, yet elegant breakfast parfait made with real ingredients and very allergen friendly.
Write a review
Print
Ingredients
  1. 3 medium apples, peeled, cored and cut into small chunks
  2. 1/2 tsp. cinnamon
  3. 3 Tbsp. honey, maple syrup, coconut sugar or cane sugar
  4. 1 - 1 1/2 cups whole milk yogurt or coconut milk yogurt
  5. 1 cup prepared granola
Instructions
  1. Heat oven to 350*F.
  2. Combine the apples, cinnamon and sugar in a small baking dish.
  3. Bake 40 minutes. Stir.
  4. Cover and refrigerate over night.
  5. Layer the yogurt, apples and granola in four dishes.
Just Take A Bite https://justtakeabite.com/
In order for me to support my blogging activities, I may receive monetary compensation or other types of remuneration for my endorsement, recommendation, testimonial and/or link to any products or services from this blog.

Rhubarb + Apple Sauce

This rhubarb + apple sauce combines the flavors of spring with a staple fruit available all year long to make a delicious side for any spring or summer meal.Rhubarb + Apple Sauce | Homemade Dutch Apple Pie

School is out! Summer has officially begun. Before you move on to strawberries, blueberries and cherries sneak in one last rhubarb dish.

I know strawberries are the classic pairing with rhubarb. It makes sense since they are available at the same time of year. But I’m learning rhubarb goes with so many other fruits!  Cherry and rhubarb blend well in this jello.

Now you can mix rhubarb with a fall staple – apples. Since apples are readily available year round this side dish is easy to make in the spring or summer.

My kids loved this rhubarb applesauce. There is sweetness from the apples, spice from the cinnamon and hint of tart from the rhubarb.

Rhubarb applesauce is great any time of day. Breakfast, lunch, dinner or even a snack – you really can’t go wrong.

The preparation for this side is minimal. Since the apples cook down you don’t have to chop them much ahead of time, especially if you are going to puree the sauce. The rhubarb should be peeled first (I just do this with my hands) to remove the stringy outside. Then a rough chop and you’re all set.

Kids can help make rhubarb applesauce. Peeling rhubarb is a great task for them! Then using a safe knife to roughly chop apples (after you peel/core them) and put them in the pan. My kids love helping make this.

Are you getting bored with plain applesauce? Try a spruced up spring version with rhubarb added.  You’ll add vitamins and boost the flavor. It is also a great way to introduce your kids to rhubarb.

Rhubarb + apple sauce is perfect for early summer picnics, family barbeques and easy lunches while the kids are home.Rhubarb + Apple Sauce | Homemade Dutch Apple Pie

Rhubarb + Apple Sauce
Serves 6
A tart and sweet applesauce with the flavor of early summer.
Write a review
Print
Ingredients
  1. 4 medium apples, peeled, cored and chopped
  2. 1 cup rhubarb, peeled and diced (about 1 large stalk)
  3. 1/3 cup cane sugar or honey
  4. 1 tsp. cinnamon
  5. 1/2 tsp. nutmeg (optional)
  6. 1/2 cup water
Instructions
  1. Combine all of the ingredients in a medium saucepan.
  2. Bring to a boil, reduce heat and simmer for 15 - 25 minutes (will depend on the firmness of the apples), stirring periodically.
  3. Mash or puree the sauce.
  4. Serve warm or cold.
Just Take A Bite https://justtakeabite.com/

Fruit On The Bottom Yogurt

This fruit on the bottom yogurt only requires a few simple ingredients but is full of flavor and nutrients. It’s perfect for summer when fresh fruits are everywhere and you want something cold for breakfast.Fruit On The Bottom Yogurt | Homemade Dutch Apple Pie

Growing up we only got one kind of yogurt – fruit on the bottom.  As kids sometimes we would eat the plain yogurt first and then eat the fruit part last. It was fun.

These days most yogurts are blended and overly sweet. Many of them also contain artificial flavors and colors. Then there is one of my biggest critiques…low fat or worse, no fat. Why would I want yogurt that has had the healthy fat taken out and artificial ingredients added in?

My solution is always homemade.  We eat yogurt a lot for breakfast. I usually just add whatever fruit we have fresh or frozen to plain, whole milk yogurt (kids need lots of healthy fat!!).

But I came up with a fun, fruit on the bottom yogurt so my kids could enjoy it just like I did when I was little. Even if they don’t have to my kids always stir their yogurt before eating it. So when I set a fruit on the bottom yogurt in front of them for breakfast they were very excited! My son enjoyed helping me make it too.Fruit On The Bottom Yogurt | Homemade Dutch Apple Pie

I like using a see through container to serve this so the kids can see the bright fruit at the bottom. Or you could use something opaque and tell them the flavor is a surprise. Then as they stir kids see the yogurt change color.

I keep the sweetness level pretty low in our yogurt. My husband and kids enjoyed this as is. But if you are used to store bought flavored yogurts you might want to add a little extra sweetener.  I divided one batch of fruit among three containers of yogurt. You can split it between two to boost the flavor.

One thing I love about making my own fruit-filled yogurt is no addition of thickeners, particularly corn starch! My son is allergic to corn, so we have to avoid it.

As fresh fruit comes in season (strawberries are here!!!) just use whatever is available. Strawberries, raspberries, blueberries, cherries, peaches – they all work well.  If using blueberries you’ll have to mash them a little to get the juices flowing.Fruit On The Bottom Yogurt | Homemade Dutch Apple Pie

Fruit on the bottom yogurt is simple to make, uses quality ingredients and is fun for kids.  It takes three minutes to cut up a few pieces of fruit and add honey. Then in the morning top it with plain, whole milk yogurt. Serve it with homemade granola, granola bars, quinoa bars or cereal.

This also makes a great addition to a picnic lunch.

Fresh fruit works well in this yogurt, but you can just as easily use frozen. Simply let it thaw a bit before cutting up the fruit.

Did you grow up eating fruit on the bottom yogurt? Now you can serve it to your kids – but in a much healthier way.Fruit On The Bottom Yogurt | Homemade Dutch Apple Pie

Fruit on the Bottom Yogurt
Serves 3
A fun, fruit on the bottom yogurt made with real ingredients.
Write a review
Print
Ingredients
  1. 1/2 cup strawberries, blueberries, raspberries, cherries or peaches
  2. 2 Tbsp. honey or maple syrup (add more if you like it sweeter)
  3. 1 1/2 - 2 cups plain, whole milk yogurt or coconut yogurt
Instructions
  1. Cut up the fruit into small pieces or mash the blueberries.
  2. Add the honey/syrup.
  3. Refrigerator for 1 hour or over night.
  4. Divide the fruit into two or three cups.
  5. Top with 1/2 - 3/4 cups yogurt.
  6. Stir when serving.
Just Take A Bite https://justtakeabite.com/


In order for me to support my blogging activities, I may receive monetary compensation or other types of remuneration for my endorsement, recommendation, testimonial and/or link to any products or services from this blog.

Cherry Rhubarb Jello

Cherry rhubarb jello is the perfect kid-friendly way to use fresh produce and welcome summer weather.

Cherry rhubarb jello is a dye-free, allergy-friendly treat that all kids love. The perfect finger food.

We have two rhubarb plants in our garden. Most years we get a few decent stalks from them that I use to make a special dessert like crisp, ice cream, cake or even cheesecake!

This year our rhubarb plants were huge! After making three strawberry rhubarb crisps there was still plenty left. That means it is time to experiment with new ways to use rhubarb.

What Flavors Go Well With Rhubarb

I came up with cherry rhubarb jello. This is the perfect, nutritious way to use fresh, spring produce in combination with last year’s freezer stash (we still have a couple gallons of sweet cherries left!).

The cherries give sweetness and a deep maroon color while the rhubarb gives a hint of tartness. It’s the perfect combination.

Cherry rhubarb jello is a dye-free, allergy-friendly treat that all kids love. The perfect finger food.

Cherry rhubarb jello makes a great finger food lunch addition or snack for kids. The fruit provides vitamins while the gelatin provides easy-to-digest protein (Use the code TAKE10 for 10% off your gelatin purchase HERE).

Allergen-Free Cherry Rhubarb Jello

An added bonus is that cherry rhubarb jello is very allergy-friendly. Not to mention there is no food coloring or artificial flavor (food dyes are connected with behavioral issues). So it makes a unique and healthy treat for everyone.

Are you looking for a dish to pass at your next potluck or picnic? Cherry rhubarb jello is just the thing. You can make it in advance and both kids and adults will enjoy it.

Sometimes I even serve this for breakfast. My oldest can take her time eating in the morning. If we need to get out the door on time jello is great. It is soft and easy to chew.

Don’t forget the really important part – cherry rhubarb jello is so easy to make! Just cook, puree, add the gelatin and chill. It takes about five minutes of hands on time. Who doesn’t love that?!

Before rhubarb season ends grab a few stalks and make this fun treat to celebrate the end of the school year and welcome summer.

Cherry rhubarb jello is a dye-free, allergy-friendly treat that all kids love. The perfect finger food.

Cherry Rhubarb Jello
Serves 12
Write a review
Print
Ingredients
  1. 2 cups sweet cherries (fresh or frozen)
  2. 2 cups rhubarb, peeled and chopped
  3. 3/4 cups organic cane sugar or coconut sugar
  4. 1/4 tsp. unrefined sea salt
  5. 1/2 cup water
  6. 2 Tbsp. grass-fed gelatin
Instructions
  1. Combine the cherries, rhubarb, sugar and salt in a saucepan.
  2. Bring to a boil, reduce heat and simmer about 20 minutes.
  3. Pour the mixture into a blender. Blend until smooth.
  4. Return the mixture to the saucepan.
  5. Dissolve the gelatin in 1/2 cup cold water. Let sit 1 minute.
  6. whisk the gelatin water into the hot puree until dissolved, about 1 minute.
  7. Pour the mixture into an 8" square pan or a bowl.
  8. Refrigerate until firm.
  9. Scoop or cut into squares to serve.
Just Take A Bite https://justtakeabite.com/

Ultimate Strawberry Frozen Yogurt + Yogurt Cultures and Oxo Review

Ultimate strawberry frozen yogurt | Homemade Dutch Apple Pie

*I am working with Stonyfield and Oxo for this post. I have been compensated for my time commitment to use these products. However, my opinions are entirely my own and I have not been paid to publish positive comments.*

My kids have been begging for frozen yogurt for a while. So it’s been on my to-do list…when I have time. How lucky for them that I was given the opportunity to try this amazing strawberry frozen yogurt recipe from the cookbook Yogurt Culture by Sternman Rule!

The frozen yogurt is easy to make. It is so beautiful with a deep pink color.  I strayed from the original recipe slightly since I was making it for kids. I left out the vinegar and rosemary. I’m sure both ingredients would add a unique and delicious flavor. As always I used Stonyfield Organic plain full fat yogurt, though Greek yogurt would also work.Ultimate strawberry frozen yogurt | Homemade Dutch Apple Pie

If you haven’t heard of Yogurt Cultures, it is a really great cookbook. But more than that it is so fascinating to read about all of the ins and outs of yogurt making. The chapters include Flavor, Slurp, Dine and Lick where Rule explores the many ways to use yogurt – salty, sweet, fruits, meats, drinks, desserts, etc. There is something for everyone.

To help make this frozen yogurt I also had the opportunity to work with Oxo. I tried their strawberry huller and ice cream scoop.

I had no idea strawberry hullers even existed. But this thing is so cool!!!  I’m already anxious for strawberry picking and preserving so I can use the huller. I probably wouldn’t use it if I was taking a few strawberries out to munch on. But if I have a whole basket of strawberries to hull this is so handy. No knife. No mess. Just push it in, twist and pull. Amazing. This is a great way to have kids help with strawberries too since they don’t need a knife.Ultimate strawberry frozen yogurt | Homemade Dutch Apple Pie

The ice cream scoop also works very well. It is heavier than any ice cream scoop I have in the house. It can scoop through hard ice cream pretty easily. I would recommend it if you are looking to buy one.

As for the frozen yogurt – my kids loved it! They both gave it two thumbs up. My husband really enjoyed it too.  Being dairy free right now I couldn’t taste it. But it sure looks and smells good! I will make this again for sure and maybe play around with our own flavor combinations.

Ultimate strawberry frozen yogurt | Homemade Dutch Apple Pie

Ultimate Strawberry Frozen Yogurt
Yields 1
Balsamic vinegar and minced rosemary lend subtle notes that heighten the berry essence without overshadowing it.
Write a review
Print
Ingredients
  1. 1 pound strawberries, preferably organic
  2. ½ cup plus 2 tablespoons sugar
  3. 2 tablespoons balsamic vinegar (I did not add this)
  4. 2½ cups plain whole-milk yogurt (not Greek) or 1½ cups plain whole-milk Greek yogurt
  5. 1 tablespoon light corn syrup (I used honey)
  6. 1 tablespoon plus 1 teaspoon finely minced fresh rosemary, plus (optional) additional minced rosemary for garnish (I did not add this)
Instructions
  1. PREP THE BERRIES. In a food processor, pulse the strawberries, sugar, and vinegar in five 1-second bursts. Let stand at room temperature (go ahead and keep it in the food processor), covered, for 1 hour.
  2. MEANWHILE, PREP THE YOGURT. If using traditional yogurt, spoon it into a fine-mesh sieve set over a deep bowl. Refrigerate to drain off the whey for 1 hour only. Discard the whey or reserve it for another use. Add the yogurt to the food processor with the strawberries. (If using Greek yogurt, do not strain, but do not add the yogurt to the berries until after they have stood for 1 hour.)
  3. PUREE AND CHILL. Add the corn syrup to the yogurt mixture. Process until nearly smooth. Transfer to a covered container and refrigerate for at least 4 hours or overnight.
  4. FREEZE. Freeze the mixture in an ice cream maker according to the manufacturer’s instructions. After 20 minutes, add the rosemary. Continue churning until the mixture has fully thickened and is nearly scoopable. You may eat it now, soft-serve style, but I recommend transferring it to a metal loaf pan to further chill and develop deeper flavor. Press a sheet of parchment directly on the surface of the frozen yogurt, then cover tightly with aluminum foil. Freeze for several hours.
  5. SERVE. Let the yogurt stand at room temperature at least 20 minutes before scooping with a hot, dry scoop. Garnish sparingly with rosemary.
Adapted from Yogurt Culture
Just Take A Bite https://justtakeabite.com/

In order for me to support my blogging activities, I may receive monetary compensation or other types of remuneration for my endorsement, recommendation, testimonial and/or link to any products or services from this blog.