Home » Kid-friendly Recipes » main dish » Page 3

Category: main dish

Simple Soup Series: Split Pea Soup

Simple Soup Series Split Pea Soup || Homemade Dutch Apple PieHands down my favorite kind of soup is split pea!  Growing up it was such a treat when my mom would make a pot of split pea soup with big chunks of ring sausage. You could smell it simmering on the stove for hours in anticipation of dinner.

So of course I make it for my family now. But I generally do not have time to monitor a pot of soup for hours.

I make my split pea soup in the crockpot. It really doesn’t get any easier. Add peas. Add broth. Add meat. Add seasoning. Dinner is ready. It only takes about five minutes to get it going. It’s so easy my three year old can pretty much prepare it for me!Simple Soup Series Split Pea Soup || Homemade Dutch Apple Pie

What we add to the pea soup just depends what we have on hand. Sometimes I make it pure pea soup – peas, broth, salt. Sometimes I add diced ham, ring bologna or diced carrots. It would even be good with cooked sausage or leftover roasted chicken.

For the batch I photographed I used large chunks of ring bologna as a nod to how my mom made it growing up. I would eat the soup and save the sausage for the end. It was fun. But if you have small children it is easier to cut up the meat into smaller pieces.

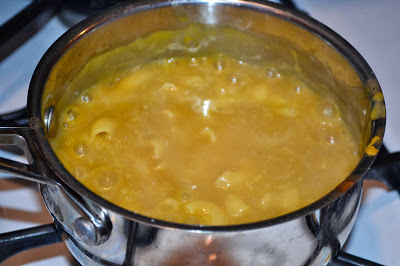
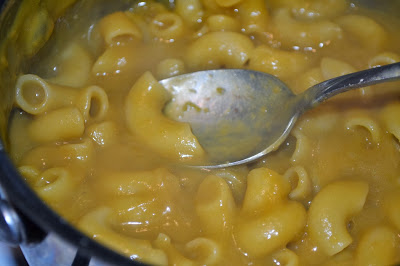
You can make split pea soup as thin or as thick as you like. I prefer mine thicker.

One of the best parts about this soup is how much my kids love it.  I was going to take a picture of my son eating it, but he finished his bowl before I could get the camera. He just shoveled it in barely taking a breath between bites.Simple Soup Series Split Pea Soup || Homemade Dutch Apple Pie

This is even an easy soup for very young children to eat. You can thin it out with extra broth and leave out the meat chunks for little ones.

Split pea soup is very allergen-friendly. So it’s great for people with all types of dietary needs. It also freezes well.

I believe split pea soup is a Dutch soup. Maybe that’s why my grandma and my mom always made it. And maybe that’s why my family and I love it so much!

This is also a very budget friendly soup.  Make broth from chicken bones and add some dried split peas. You’ll feed the whole family for a few dollars.Simple Soup Series Split Pea Soup || Homemade Dutch Apple Pie

Note that split peas are similar to beans. They are not like sweet peas. So if you don’t tolerate beans you should only try a small amount of split pea soup to see if you can handle it. It can be gassy like beans. I learned that quickly as a nursing mom. My little one doesn’t appreciate me eating too much pea soup.

This really is the most delicious and easiest to prepare soup I make. The whole family loves it, and it’s full of vegetables and broth. It doesn’t get much better.  I even love to eat the leftovers for breakfast. Leftovers never last long here. My daughter loves it in her lunch too.

As with other soups that I make I like to add a little coconut oil or butter to individual bowls to balance it with healthy fat. Then I pair it with muffins or bread. Dinner has never been easier or tastier.

Simple Soup Series Split Pea Soup || Homemade Dutch Apple Pie


Simple Soup Series: Split Pea Soup
Serves 6
A simple, nourishing split pea soup.
Write a review
Print
Ingredients
  1. 1 lb. dried split peas (green or yellow)
  2. 6 cups chicken broth (you can substitute water if you don't have broth)
  3. 2 cups any meat of choice (cubed ham, sliced ring bologna, cooked sausage, cooked chicken)
  4. 2 tsp. sea salt (to taste)
  5. 2 tsp. garlic powder (to taste)
Instructions
  1. Rinse the split peas in a strainer.
  2. Put the split peas in the crockpot.
  3. Add the broth, meat and seasoning.
  4. Cover and cook on high 6-8 hours or low 7-12 hours, until the peas are fully cooked and the soup reaches desired thickness.
  5. Stir the soup every 3-4 hours if possible to make sure there is enough liquid. Add mor if necessary.
Notes
  1. You can make the soup thinner by adding extra broth or water.
  2. This soup freezes well.
  3. It is helpful to add a little water or broth when reheating pea soup.
  4. You can make this soup in a pot. Simmer 2-4 hours, until peas are cooked and soup thickens. Stir it periodically.
Just Take A Bite https://justtakeabite.com/

Zucchini Pizza Bites

Zucchini Pizza Bites || Homemade Dutch Apple Pie

Is your refrigerator still overflowing with zucchini? Are you wondering what to do with it besides baking with it or grilling it? Why not make pizza!

Zucchini pizza bites make a great snack, lunch or appetizer. They are very kid-friendly. They are naturally grain free and can be made dairy free as well.

We had them recently and made them a variety of ways. I made some with pureed squash or tomato sauce and toppings to be dairy free. I added cheese to some as well. They all had great flavor.

I actually had a little bit of leftover spaghetti meat sauce to use up. So there was practically no prep work involved. It was perfect for our Sunday evening simple dinner.

I love how the smaller ones are the perfect size for little hands and little mouths.  Plus most kids will eat just about anything that you call pizza. So they are getting lots of vegetables and enjoying pizza without you having to make pizza crust!

I have a picky vegetable eater. So he was hesitant when he saw the zucchini. But once it was in his mouth he was all smiles. If your child is not a fan of zucchini, try peeling the zucchini first. Then once the pizza bites are topped you can’t even tell it’s a vegetable on the bottom.

The zucchini rounds are first baked to make sure they are cooked through and have good flavor. Then you add the toppings and bake them again for a few minutes.

Zucchini pizza bites make a fun, easy, allergen-friendly meal.  Have you ever made pizza with your zucchini? If not, you should!

Zucchini Pizza Bites || Homemade Dutch Apple Pie

Zucchini Pizza Bites
A fun finger food pizza that is free of allergens.
Write a review
Print
Ingredients
  1. Zucchini, sliced in 1/2 - 3/4" thick rounds
  2. Extra virgin olive oil for brushing
  3. Sea salt
  4. Preferred pizza toppings
Instructions
  1. Slice the zucchini and place the round on a parchment lined baking sheet.
  2. Brush the zucchini with olive oil and sprinkle with salt.
  3. Bake at 450*F for about 30 minutes.
  4. Allow the rounds to cool for about 10 minutes.
  5. Transfer the rounds to a clean piece of parchment paper on a baking sheet.
  6. Add desired pizza toppings to each round (don't overfill them or they will be hard to pick up).
  7. Bake at 400*F for about 15 minutes.
  8. Allow the pizza bites to cool for about 5 minutes before serving.
Notes
  1. Pureed squash makes a great substitute for cheese and/or pizza sauce.
  2. Do not slice the zucchini too thinly or it will be difficult to pick up.
Just Take A Bite https://justtakeabite.com/

Zucchini Pesto Pasta

Zucchini Pesto Pasta || Homemade Dutch Apple PieZucchini is a wonderful summer vegetable that can be used in so many ways. One delicious (and sneaky) way to add zucchini to your meal is to mix it with your pasta.

Zucchini pesto pasta incorporates zucchini in two ways. First it is blended in the pesto. Then grated zucchini is sauteed until it the liquid is released and the zucchini becomes soft and creamy. It can then be mixed right in with the pasta.

Even my picky vegetable eater didn’t notice it was there!  But it added big flavor and lots of nutrition. As an added bonus this dish uses chicken broth. So it is very nutrient dense.

The pesto and the sauteed zucchini can be prepared in advance. Then when dinner rolls around all you have to do is cook noodles, add the remaining ingredients and let it simmer for about 10 minutes.

You can keep the pasta simple or add cooked chicken and/or grated cheese for a well-balanced meal.

I love dishes that have lots of vegetables mixed right in. And zucchini pesto pasta definitely does just that!Zucchini Pesto Pasta || Homemade Dutch Apple Pie

Zucchini Pesto Pasta
Serves 4
A nutrient-dense easy pasta dish filled with zucchini.
Write a review
Print
Pesto
  1. 1 cup frozen peas (thawed)
  2. 1/2 zucchini, grated or cut in chunks
  3. 1/4 cup extra virgin olive oil
  4. 1/4 cup water
  5. sea salt and garlic powder to taste
Pasta
  1. 2 cups grated zucchini
  2. 1 Tbsp. coconut oil or butter
  3. 1 tsp. sea salt
  4. 2 cups dry noodles (any variety - wheat, rice, corn)
  5. 1 cup chicken broth
  6. 1 cup cooked chicken (optional)
  7. 1/2 cup grated cheese (optional)
  8. seasoning to taste (salt, pepper, garlic powder)
Pesto
  1. Combine the pesto ingredients in a blender.
  2. Blend until smooth. Add extra water or olive oil if the pesto is too thick.
  3. Adjust seasoning to taste.
Pasta
  1. Saute the zucchini in the oil/butter with salt until creamy and soft, about 15 minutes.
  2. Cook the pasta until almost done. Drain.
  3. Add the broth, sauteed zucchini, 1 cup pesto, chicken and seasoning to the cooked pasta.
  4. Simmer and stir occasionally until the broth reduces and the sauce thickens, about 10 minutes.
  5. Add cheese if desired.
Notes
  1. Extra pesto can be served on the side or reserved for use as a salad dressing or dip.
  2. The pesto, sauteed zucchini and cooked chicken can all be prepared in advance.
Just Take A Bite https://justtakeabite.com/

In order for me to support my blogging activities, I may receive monetary compensation or other types of remuneration for my endorsement, recommendation, testimonial and/or link to any products or services from this blog. If you order by clicking on any of my Tropical Traditions links and have never ordered from Tropical Traditions in the past, you will receive a free book on Virgin Coconut Oil, and I will receive a discount coupon for referring you.

Zucchini Salmon Cakes (grain free, dairy free, nut free)

Zucchini Salmon Cakes - Homemade Dutch Apple Pie

One meal that I know my kids will always devour is salmon cakes. It’s kind of an odd meal for small children to love. But they do. And it makes me so happy.

Recently I decided to change things up a bit and make zucchini salmon cakes since zucchini is in season. I wondered if my kids (one with texture issues and one that is very picky with vegetables) would still enjoy them.

To my great surprise and delight they did!! Both kids loved them!

These zucchini salmon cakes still have the flavor of a salmon cake. But there is actually way more zucchini than salmon in them. So you get the benefits of salmon combined with vegetables. And even if your kids won’t eat another vegetable with the meal you know they are at least getting some. That is my kind of meal!

Zucchini salmon cakes are very easy to make. They also work well for a lot of special diets since they are grain, dairy and nut free.

We had these as our main dish for dinner. But they were also great cold the next day for lunch. I honestly think my kids liked them better that way. I even love them cold for breakfast. It’s a great way to start my day with fish, eggs and vegetables. Plus it’s already prepared, so breakfast is easy.

I serve them with homemade mayonnaise. They would also be good with pesto. These zucchini salmon cakes are even meaty enough to be used as burgers! Put one on a bun with your favorite toppings for a change of pace.

 If you’re looking for a delicious and nourishing summer meal this is it. There is no need to turn on the oven. Just fry up some zucchini salmon cakes. They are great for the whole family. 

Zucchini Salmon Cakes - Homemade Dutch Apple Pie 2 

Zucchini Salmon Cakes
Yields 8
A salmon cake packed with zucchini and lots of flavor.
Write a review
Print
Ingredients
  1. 2 cups finely grated zucchini, drained (about 3 medium zucchinis)
  2. 1 6 oz. can of boneless skinless salmon
  3. 3 eggs
  4. 1/3 cup coconut flour
  5. seasoning to taste (salt, pepper, garlic powder)
  6. Lard, coconut oil or palm shortening for frying
Instructions
  1. Grate the zucchini. Place in a strainer to drain for about one hour. Squeeze out excess liquid.
  2. Combine the zucchini, salmon, eggs, flour and seasoning.
  3. Cover the bottom of a large pan with fat. Heat over medium heat.
  4. Scoop balls of zucchini mixture and form into patties. Place in hot pan.
  5. Cook until browned on bottom, about 7 minutes. Flip. Cook until the other side is browned.
  6. Serve warm.
Notes
  1. If you like the cakes to be really firm add 1/2 cup coconut flour instead of 1/3 cup.
  2. The zucchini salmon cakes can be used as burgers and served on buns.
  3. The zucchini salmon cakes can be served warm or cold, as breakfast. lunch or dinner.
  4. Homemade mayonnaise or pesto make great dipping sauces for the zucchini salmon cakes.
  5. The salmon can be replaced with tuna.
Just Take A Bite https://justtakeabite.com/

In order for me to support my blogging activities, I may receive monetary compensation or other types of remuneration for my endorsement, recommendation, testimonial and/or link to any products or services from this blog.

Easy Beef and Bean Enchilada Bake (gluten, egg, dairy, nut, rice free)

beef and bean enchilada bakeSometimes it is very tough to cook for my family. I have to work around food allergies and intolerances. Of course they are different for everyone in the family. So normally I end up cooking a lot of separate items so everyone can feel good and eat well. But it is a lot of work!

It’s pretty rare that I make casseroles. It’s hard to make one that we can all eat. But last week I came up with a super easy casserole that we all enjoyed! I actually did make it three different ways to meet our needs. The big difference was that making different versions didn’t require any extra work.

The main recipe uses tortilla chips, ground beef, tomato sauce, beans and cheese. I left the cheese out for my son’s dairy free version. My version was simply ground beef, cheese and beans so that it was corn and tomato free.

This casserole is naturally gluten, egg, rice and nut free. You can make it dairy free by leaving out the cheese. There is still plenty of flavor. If you don’t tolerate corn you can substitute another starch like cooked rice or quinoa.

I loved that I found a way to use up the bits of tortilla chips at the bottom of the bag instead of throwing them away. If you’re looking for a super easy, allergen-friendly dinner this is it.

Easy Beef and Bean Enchilada Bake
A quick prep casserole that is allergen-friendly and has big enchilada flavor.
Write a review
Print
Ingredients
  1. 1 lb. ground beef (or turkey or chicken)
  2. 15 oz. tomato sauce
  3. 1 Tbsp. tapioca flour, arrowroot or cornstarch
  4. 2 cups pinto beans (cooked)
  5. 2 cups crushed tortilla chips
  6. 2 cups shredded cheese (optional)
  7. salt and garlic powder to taste
Instructions
  1. Brown the meat. Season with salt and garlic powder.
  2. With the heat still on, sprinkle the flour over the meat and mix.
  3. Add the tomato sauce.
  4. Simmer for 5 minutes. Season to taste. Remove from heat.
  5. Heat the oven to 350*F.
  6. In a 2 qt. casserole layer 1/3 of the crushed chips, 1/3 of the meat mixture and 1/3 of the cheese. Repeat layering two times.
  7. Bake, covered, for 35 minutes.
  8. Remove cover and bake another 5 minutes.
Notes
  1. The tortilla chips can be replaced with another starch like cooked rice or quinoa.
  2. This can be turned into a skillet meal by sprinkling the cheese and chips into the pan of meat after simmering the sauce.
Just Take A Bite https://justtakeabite.com/

Butternut Squash Quinoa Risotto (gluten free, dairy free)

butternut squash quinoa risotto

I LOVE risotto. I also LOVE anything with squash. Unfortunately my son is allergic to rice (yes, really). So I never make risotto anymore.

My son is also fairly picky. But I was craving risotto the other day. So I crossed my fingers and made a quinoa version that we could all eat.

The verdict? Amazing! Three of us dug right in and even had seconds.

My son, however, ran from the table screaming at the word risotto. He didn’t come back until dinner was over and I was cleaning the table. He finally agreed to try a bite. When he did his reaction was, “This is so good!” He proceeded to clear his plate.

I’ll consider it a great dinner success!

One of the best parts about the this risotto is that it is so easy to make. I cooked the quinoa earlier in the day when I had a few spare minutes. Then at dinner time it only took about 15 minutes to make the risotto.

I also love this recipe because it’s a simple way to get my kids to eat quality vegetables and bone broth without them realizing it. Easy, healthy and delicious…my favorite kind of recipe.

Give this risotto a try. Your whole family will love it.

DSC_1512

Butternut Squash Quinoa Risotto (gluten free, dairy free)
Serves 4
A simple main dish or side dish filled with vegetables and bone broth that the whole family will love.
Write a review
Print
Ingredients
  1. 1/2 cup quinoa - soaked for at least 7 hours and then drained
  2. 1 cup water or bone broth
  3. 1 cup pureed butternut squash (you can replace this with any pureed vegetable you like)
  4. 1 Tbsp. coconut oil (or butter)
  5. 1/2 - 3/4 cups bone broth
  6. seasoning - sea salt, garlic powder, pepper - seasoning of your choice
  7. grated parmesan cheese (optional if tolerant of dairy)
Instructions
  1. Bring one cup of water and/or broth to a boil. Add the drained/rinsed quinoa. Cover. Reduce heat and simmer for 12 minutes.
  2. Remove the pan from the heat. Leave the pan covered for 15 minutes. At this point you can make the risotto or refrigerate the quinoa until you are ready to make the risotto.
  3. In a pot, heat the quinoa, squash, coconut oil, seasoning and 1/2 cup broth. Stir until well combined. Simmer the mixture until the broth has cooked down, stirring occasionally. Add more broth if desired/if the mixture is too dry. This will take about 10-15 minutes.
  4. Adjust the seasoning to taste. Add cheese directly to the pan or grate on top of individual servings if desired.
Just Take A Bite https://justtakeabite.com/


Dairy Free Macaroni and "Cheese"


I have a picky eater. He ate tons of vegetables when he was starting to eat solids. He’d need third helpings of carrots. He would eat just about anything you gave him.

Now he’s two. Enough said. The mere mention of the word squash sends him running to another room. One bite of broccoli can turn into gagging and his whole dinner coming back up. And after eliminating beans and peas from his diet from allergies there isn’t much left to try that he might even attempt to eat.
So it’s time to puree. I have started to add pureed vegetables to whatever I can. If he doesn’t eat any of this broccoli from dinner, it goes right into the blender as part of a smoothie…that he’ll happily drink.
Last night I made one of my son’s favorite foods – macaroni and cheese (he has no idea there is such a thing as a box of mac ‘n’ cheese…so at least I don’t have to try to make it taste like that). This is not an easy task for a child allergic to dairy! But I came up with a recipe that is healthy and has no dairy substitutes.

I used broth and pureed vegetables for the sauce. Both kids cleared their plates! My five year old knew what was in it. She loves vegetables and healthy foods. So my only challenge was to make sure she didn’t tell her little brother!
I’m always happy when we have a dinner success. Especially when it involves healing broth and a variety of vegetables. I also added some leftover roasted chicken for extra protein.
This is a fun, easy dinner that will get even picky eaters to clear their plates. You can use whatever vegetables you want. You can even make green mac ‘n’ cheese if your kids would enjoy that. I stick to an orange base so it looks like cheese. But I did have broccoli in it too.
If you are totally grain free you can still use the sauce to put on top of meat or vegetable ribbons. It would also be great on spaghetti squash.
I’ve never been so happy to give my kids mac ‘n’ cheese for dinner. I’m sure I’ll be doing it more often now.

This recipe does not have exact measurements. It is a method. You really can’t go wrong. If you add a lot of broth, you just cook it longer until it reduces enough. And you can start with a small amount of vegetables or add a lot. Whatever you think your family will like.

Depending on what noodles you use, this recipe can be gluten free, egg free, nut free and/or corn free.

Dairy Free Macaroni and “Cheese”

Cooked noodles (wheat, rice, quinoa, bean…whatever you like – I used quiona/corn for my son)
Pureed vegetables (squash alone works well, but any vegetable or combination works – I used carrot, broccoli and squash this time)
Chicken broth
Coconut oil
Unrefined sea salt (to taste…or any other seasoning you like)

Cook and drain the noodles. Return them to the saucepan. Add enough chicken broth to mostly cover the noodles. Add some coconut oil (as much or as little as you want – the fat helps it thicken – 1 Tbsp. is a good start). Turn the heat on high.

Add the vegetable puree. Start with equal amounts of broth and puree. You can add more as it cooks if you like. Add some seasoning.

Bring to a boil and reduce heat. Allow the mixture to simmer, stirring once in a while. As the liquids reduce and it gets thicker you’ll need to stir more so it doesn’t stick to the pan. You can add more broth and/or vegetables at any time during this process.

Cook the mixture until the liquids reduce enough to be a thick sauce. Adjust the seasoning to taste.

You can add cooked meat or vegetables at this point and allow them to warm through.

Enjoy some amazing macaroni and cheese that is filling, nourishing and totally dairy free!

Gluten Free Corndogs

Last year I started the routine of having fun finger foods for dinner on Sunday evenings. I don’t always stick to that plan anymore. But this week we did. I made corndogs! That is definitely a fun finger food.


I’ve tried making corndogs quite a few times in the past. But I always tried baking them. They were ok. But not great.

This time I fried them. And made sure the batter was thick enough to stick to the hot dogs. And it worked.

The kids thought it was fun. They didn’t even know what a corndog was. Although now I think they might always want their hot dogs served on sticks.


It was a fun experiment and a perfect July finger food. Maybe next I’ll have to try elephant ears to get the full carnival experience at home.

Gluten Free Corndogs

6-8 grassfed nitrite/nitrate free hot dogs
1/2 cup organic cornmeal
1/2 cup total white rice flour + tapioca flour (I do 2:1)
1/3 cup organic cane sugar, sucanat or coconut sugar
1 tsp. baking soda
1/2 tsp. sea salt
1 egg
1/3 cup milk or milk substitute
2 Tbsp. butter or coconut oil, melted

coconut oil, palm shortening, lard and/or tallow for frying

Directions:

Cut hot dogs in half. Place each half on a popsicle stick or sucker stick.

Combine the cornmeal, rice flour, tapioca flour, sugar, baking soda and salt. Add the egg, milk and butter. Mix well.

Heat enough oil over medium heat in a cast iron skillet to cover the bottom of the pan.

When the oil is hot, one at a time dip a hot dog in the batter, coating it fully. Place the hot dog in the oil. Cook on each side a few minutes, until golden.

Continue the process until all of the corn dogs have been cooked. Be sure not to crowd the pan so you can easily flip the corndogs. Add extra oil if it gets low.


Serve warm with ketchup or mustard.

Soaked Gluten Free Waffles

Soaked gluten free waffles make a great Saturday morning breakfast or fun weeknight dinner.

Soaked Gluten Free Waffles | Homemade Dutch Apple Pie

My daughter requested waffles the other day. So I added them to our menu.

No problem. I’ve made gluten free waffles before.

But this time I decided to try soaking them to make them easier to digest.
 
Soaked gluten free waffles are so good!!  The version I made looked a little dark because of the teff flour. But they were delicious – especially covered in homemade strawberry topping.
 
These soaked gluten free waffles come together in minutes. Just soak the flour the day before. Then beat some egg whites, mix and pour in your waffle maker.
 
Use your favorite toppings like butter, real maple syrup, honey or fresh fruit to make soaked gluten free waffles a real treat.
 
These soaked gluten free waffles are now a staple in our Friday night breakfast for dinner rotation.  Once you try them you’ll want to add them to your menu regularly as well!
 
Are you in the mood for a satisfying breakfast (or dinner!)? Try some soaked gluten free waffles.
 
Soaked Gluten Free Waffles | Homemade Dutch Apple Pie
 
Soaked Gluten Free Waffles
makes about 4 waffles
 
1/2 cup white rice flour (or sorghum)
1/3 cup tapioca flour
1/4 cup teff flour (or brown rice, buckwheat or amaranth)
1/2 cup total soaking liquid: buttermilk OR kefir OR yogurt OR 1 Tbsp. lemon juice + water to equal 1/2 cup
1 egg, separated
1/2 tsp. cream of tartar (not essential, but helps the egg whites stiffen)
1/2 cup smooth, unsweetened applesauce
1 Tbsp. organic cane sugar, sucanat or coconut sugar
1 tsp. baking soda
1/2 tsp. sea salt
Combine the flours and soaking liquid. Cover and let soak for 7-24 hours.
 
  1. Heat and grease a waffle iron.
  2. In a medium bowl beat the egg white and cream of tartar until stiff peaks form.
  3. Add the remaining ingredients to the soaked flour and beat (I like to use a hand mixer for this) until well combined (about 2 minutes).
  4. Fold in the egg white.
  5. Pour batter onto the waffle iron and allow to fully cook. You can keep the cooked waffles on a cooling rack on a baking sheet in the oven on low heat until all of the waffles are done.
  6. Serve with real maple syrup, honey, homemade powdered sugar or fruit topping.
  7. Store leftovers in a seal container in the refrigerator or freezer.

*To reheat wrap the waffles in a damp paper towel. Heat at 350 degrees in an oven or toaster oven for 5 – 8 minutes, until warmed.Soaked Gluten Free Waffles | Homemade Dutch Apple Pie

Gluten Free Pancakes

My whole family enjoys breakfast for dinner sometimes. A few days ago I decided to make pancakes. I made a simple batch of gluten free pancakes…that everyone loved!! I’ve never seen my daughter eat that much pancake in one sitting. Even my husband asked if it was a new or special recipe because they were really good.

This is an adaption from a recipe I got from my mother-in-law shortly after I got married. We’ve been making these for years. But now we can enjoy them in a gluten free form…and not miss a thing 🙂

Gluten Free Pancakes
makes about 8 pancakes

1/2 cup white rice flour
1/3 cup tapioca flour
1/4 cup teff flour
1 egg
1/2 cup buttermilk, kefir or sour milk (2 tsp. vinegar + milk to equal 1/2 cup)
1/2 cup smooth, unsweetened applesauce
1 Tbsp. organic cane sugar, sucanat or coconut sugar
1 tsp. baking soda
1/2 tsp. sea salt

In a medium bowl whisk egg. Add remaining ingredients and mix well. If the batter is really runny add extra tapioca flour until desired thickness.

Scoop 1/4 – 1/3 cup batter onto a hot griddle coated with butter or coconut oil. Cook pancakes until the edges dry and bubbles form. Flip and cook the other side for a few minutes until cooked through. Repeat until the batter is used.

You can keep the cooked pancakes on a baking sheet in the oven on low heat until all of the pancakes are done.

Store leftovers in a seal container in the refrigerator or freezer.

To reheat wrap the pancakes in a damp paper towel. Heat at 350 degrees in an oven or toaster oven for 3-6 minutes, until warmed.