Home » Kid-friendly Recipes » main dish » Page 4

Category: main dish

Gluten Free Pizza Crust

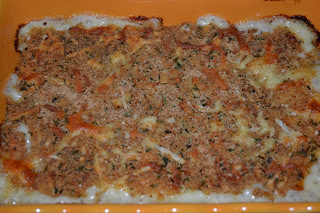
My daughter wants pizza for her birthday party. Pizza for 20 people…from scratch…and gluten free. Ummmm…ok??

I’m still fairly new to gluten free baking. But I’m always up for a challenge. And this was a big challenge. I don’t mind experimenting with my family. But I do mind when I have 20 guests. I am passionate about my food and like to make things people enjoy (yes, I am and always have been a people pleaser…if you come to my house and hate the food please don’t tell me :P).

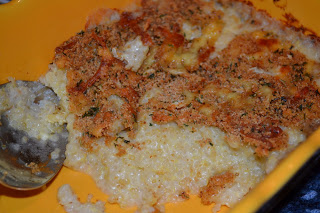
So I used my little knowledge I’ve gained from previous baking experiments and gave it a go. And I think I came up with a pretty decent crust. Everyone in our house ate it without complaints.

This recipe is great for people with all kinds of allergies. The main recipe does use egg whites. But since I can’t have eggs right now I made some without the whites. It was a little thinner/crispier, but it still tasted great. I actually got to eat pizza!!!! Pizza that didn’t make me sick!!! A true  miracle.

It is also dairy free. So as long as you don’t pile cheese on top you can have a dairy free pizza. You can use a cheese alternative. Or you can do what I do and make a pesto pizza. The pesto gives so much flavor you don’t even need cheese. I also like to add some dollops of pureed pumpkin or winter squash here and there to give some extra depth to cheese free pizza.

So using this crust you can make a gluten free, egg free, nut free, corn free, dairy free, soy free pizza.

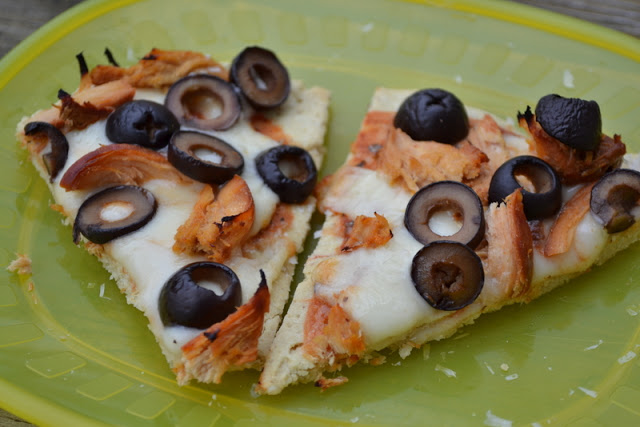
Do you like pizza but thought you had to give it up because of allergies? Think again. Try this great tasting, easy to prepare pizza crust for your next pizza party. Everyone can enjoy it. It’s allergen friendly and has no gums or starches.

One of the best things about this recipe is that you can make/bake the crust in advance and freeze it. Then you can have a quick pizza any night of the week. Just add your favorite toppings and bake for about 15 minutes. So easy.

I must point out that I used a small amount of flax seed in this recipe. I don’t normally use or advocate the use of flax seeds. But they help bind the dough when using gluten free flours and prevents having to use any gums. I figure one teaspoon for an entire pizza isn’t going to do much harm. You could substitute chia seeds for the flax seeds.

Gluten Free Pizza Crust
makes one 12-14″ pizza or 3-5 individual pizzas

3/4 cup white rice flour
1/4 cup tapioca flour
1/4 cup brown rice flour
1/4 amaranth flour or more brown rice flour
1 tsp. salt
1/2 tsp. baking soda
1 tsp. flax seed
1 tsp. cane sugar
1 Tbsp. evoo
1/2 cup water
2 egg whites
1/2 tsp. cream of tartar

Heat oven to 400 degrees F. Grease a pizza pan or baking pans for individual pizzas.

To make this a soaked crust combine the flour, water and 2 Tbsp. lemon juice. Cover and let set for 7-24 hours. Then proceed with the recipe.

Beat the egg whites with the cream of tartar until still peaks form. Set aside.

Combine the remaining ingredients. Fold in the egg whites. Spread onto the prepared pan(s).

Bake for 10 – 15 minutes (smaller crusts will need less time, whole pizzas will need more time), until firm.

Use crust immediately or allow to cool, remove from pan and refrigerate or freezer. Thaw frozen crust in the refrigerator when ready to use.

When ready to make the pizza, add your favorite sauce and toppings. Bake at 400 degrees for 10 – 15 minutes, until cheese is melted and pizza is hot.

Sweet Potato Lentil Soup

I continue to push myself a bit and try new foods that have been on my avoid list for a while. This week I tried sweet potatoes. And I tried them in a very delicious way…sweet potato and lentil soup! I found the recipe on Food.com.

It was really easy to make. I actually prepped it first thing in the morning. Then at dinner time all I had to do was warm it. We all really enjoyed it. You’d never know it has lentils. So it’s a great way to sneak them into a meal since they are so healthy.

I used regular green lentils instead of red…mostly because I started soaking the lentils before I read the recipe thoroughly 😛  I’ll have to try it with the red sometime. I also just used what spices/herbs I had on hand. So ours tasted a bit different than the original, but it was still good.

I did learn that sweet potatoes are still on my avoid list 😛  But at least I got to enjoy this tasty soup.

I did not make a full recipe. I’ll post it as I made it. There was enough for two adults, one child and enough leftover for a couple more bowls.

I garnished the soup with crispy chickpeas (sauteed in evoo until crisp). They added nice texture to the soup.

Sweet Potato and Lentil Soup
~ 4 – 5 servings

3 cups chicken or turkey broth (or water)
3/4 cups lentils (red or green), soaked
3 cups sweet potatoes, cut in large chunks
2 tsp. garlic powder
1 tsp. cumin
3 tsp. sea salt
1 tsp. thyme

Combine all ingredients. Cover and bring to a boil. Simmer until the potatoes and lentils are cooked, about 30 minutes.

Use an immersion blender to puree the soup (or puree it in a blender and pour it back into the pan). Adjust seasoning to taste.

White Rice Pancakes (egg free, nut free, dairy free, gluten free)

I continue to experiment with my allergy-free foods. Last night for dinner I made pancakes. I made our usual buttermilk pancakes for the family…whole wheat, dairy and eggs. Doesn’t quite cut it for me.

It was a rice day for me, so I tried rice pancakes. I didn’t really have a recipe. I just kind of poured and mixed what I thought might work. I ended up with a thick white batter that I really thought would just turn into a messy glob in the pan. But to my great surprise (and to my growling tummy’s delight) they turned out quite well!

My biggest concern was not being able to use eggs. But it wasn’t a problem. I compensated with a little extra baking soda and some oil.

These weren’t as light and fluffy like the other pancakes I made. They were a little thicker. I’m sure I’ll keep experimenting with the recipe. But honestly I really liked them. I found myself sneaking another bite and another bite and another bite as we sat at the dinner table (after I was “done” with my dinner :P). And then I started snacking on them later in the evening 🙂  The combination of white rice, coconut milk and lard gave them a unique, addicting flavor.

When I search for gluten free recipes I get the usual combo of about five different flours and gums to bind them all. I can’t do that with a rotational diet. I have one or two grains allowed each day. And I can’t do gums. So my goal is to make simple allergy-free recipes that don’t require twenty ingredients.

Eating allergy-free foods doesn’t mean you have to give up your favorite meals or buy a ton of specialty food. Do you have a go-to pancake recipe? Do you have a favorite allergy-free breakfast? Give these pancakes a try. Even if you don’t have to eat allergy-free. It’s a nice change from the usual wheat pancakes.

White Rice Pancakes (egg free, nut free, dairy free, gluten free)
makes ~ 6 pancakes

1 cup white rice flour (you could substitute another gluten free flour…you may have to adjust the liquid ratios)
1 cup coconut milk (I used mostly the liquidy part but also a little of the cream)
1/3 cup water
1 1/2 Tbsp. EVOO
1 tsp. baking soda
3/4 tsp. salt
2 Tbsp. cane sugar

lard, tallow, coconut oil or palm shortening for frying (you can use butter if you are not dairy free)

Directions:

Mix all  ingredients (except frying oil). Adjust to desired thickness by adding more coconut milk or water.

Fry in lard over medium heat on griddle until golden, 3-5 minutes per side.

Serve with honey, maple syrup or fruit topping.

These can also be used as bread/buns.

Single Serving Simple Pot Pie (gluten free, egg free, dairy free, nut free)

I’ve just started my rotational diet. And I have a trial four day rotation that I’ve laid out. It’s still a work in progress, but it’s a start.

So today I’m allowed rice as my starch/grain, lard as my fat and beans and beets as my vegetables. How do I make that appealing all day long? I had rice cooked in chicken broth with beets and beet greens for breakfast. But I didn’t really want the exact same thing for lunch.

I came up with this easy single serving pot pie. Lots of nourishing broth and fat. Plus it’s super delicious! It really hit the spot for a comforting lunch as I’m adjusting to having my options so limited/so different from what they were just a week ago.

I was also trying to feed two grumpy kids, so it’s a bit lacking in visual appeal. But you get the idea.

My protein for today is pork. I don’t have any cooked yet (I’ll be making it for dinner). But it would be a great addition to this dish. Chicken or turkey would be great too. And any kind of vegetable will work.

I didn’t measure anything as I was cooking. I’ll give a rough idea of quantities. But feel free to adjust as needed. And you can multiply this to make a larger dish to feed more than one person.

Single Serving Pot Pie

1/4 cup white rice flour
1 Tbsp. lard (or palm shortening or butter)
2 tsp. water
1/4 tsp. sea salt

1 cup chicken broth
1/2 cup vegetables (I used roasted golden beets and frozen green/yellow beans)
1 Tbsp. white rice flour
sea salt to taste
2 tsp. lard (or butter)
1/8 cup cooked pork, turkey or chicken (optional)

Heat oven (I used the toaster oven) to 400 degrees F.

Combine flour, salt and lard. Add enough water for the dough to stick together. Mix until combined. Press into bottom and up the sides of a small oven safe bowl (I used a small pyrex dish). Bake for 15 – 20 minutes.

While the crust is baking, in a small cast iron or stainless steel pan bring chicken broth to a boil. Add vegetables, lard and seasoning. Simmer until broth begins to reduce (about 10 minutes). Add meat. Sprinkle on flour and stir. Continue to simmer until thick. Adjust seasoning to taste.

Pour the filling into the baked crust. Return to the oven. Bake 5 more minutes. Serve warm.

Quinoa Mac ‘n’ Cheese

We tried yet another new recipe for dinner last night. Quinoa Mac ‘n’ Cheese. This recipe comes from Tasty Kitchen.

The original recipe has spinach in it. I just used the concept of replacing noodles with quinoa and then made it the way I normally make macaroni and cheese.

This was quite good. It was a unique way to get my family to eat quinoa. So far they are not big fans (I really enjoy it myself…but the rest not so much). But Justin and Rebecca both finished their helpings. Since they normally only tolerate a few bites of quinoa I consider it a success :).

You could easily add any chopped, cooked vegetables to this dish. Or even add bacon or ham. That would make it even better!

I’ll post the recipe the way I made it. Very simple. And a nice change from the traditional macaroni and cheese. It’s also a great way to make a gluten free version of a classic dish. If you like your mac ‘n’ cheese to really hold together well you can mix in a couple of beaten eggs before pouring it into the pan.

This can be prepared in advance and then simply baked right before dinner. Or you can skip the topping/baking and serve it right out of the pan. This would also make a great, warming breakfast!

Quinoa “Macaroni” and Cheese
serves 3 – 4

1/2 cup dry quinoa (makes about 1 1/2 cups cooked quinoa)
1 cup water
1 tsp. evoo
1/2 tsp. sea salt

2 Tbsp. butter
2 Tbsp. flour
1 1/2 cups milk
1 – 2 cups grated cheese (depends how cheesy you like it. Any varieties will do. I used mozzarella, cheddar and parmesan.)
salt and garlic powder to taste

1/2 cup seasoned bread crumbs (optional – use gluten free or omit to keep it gluten free)
1/4 cup grated cheese (I used the same cheese mix as was in the casserole)

Rinse quinoa in a small mesh strainer for 1-2 minutes to remove bitter coating.

Toast quinoa in hot oil in a small saucepan for 1-2 minutes. Add water. Bring to a boil. Add salt. Cover. Reduce heat and simmer 15 minutes. Remove from heat. Let set covered 5 minutes. Pour quinoa into a bowl.

In the mean time melt butter in a saucepan. Add flour and mix. Cook for 1-2 minutes, stirring constantly.

Add milk very gradually, a couple Tbsp. at a time at first. Stir after each addition to incorporate into the butter/flour mixture. Add remaining milk. Bring to a boil. Reduce heat and add cheese. Stir until the cheese is melted. Season to taste.

Pour cheese sauce over quinoa and mix. Add extra seasoning if necessary. Add eggs if desired.

Pour into a greased casserole dish.

Sprinkle breadcrumbs and cheese over top.

Bake at 400 degrees for 25 – 30 minutes, until cheese on top is melted and golden. Let set for 5 minutes before serving.

Roasted Cauliflower Cheddar Soup

I’ve been in a recipe rut lately. So a couple weeks ago I did some recipe browsing. I found this recipe for roasted cauliflower cheddar soup on two peas and their pod. It was very easy to make and tasted great.

I modified it so that I could eat it. So it was basically roasted cauliflower, broth and cheddar cheese. That’s it.

Simple and healthy. It reminded me of potato soup…which is nice treat for someone that can’t eat potatoes 🙂

It isn’t exactly the most photogenic soup. But what it lacks in appearance it makes up for in taste. I added a little diced avocado for some texture. I also offered diced chicken and beef to mix in for a heartier soup.

Check out the link for the original recipe with things like onions and celery. Here is how I made it.

Roasted Cauliflower and Cheddar Soup
serves 3 – 4

1 head cauliflower
1 -2 Tbsp. EVOO
2 tsp. sea salt

2 – 3 cups chicken broth (or vegetable broth to make it vegetarian)
salt and garlic powder to taste
1/2 – 3/4 cup grated cheddar cheese

Wash and chop cauliflower. Mix cauliflower with EVOO and salt. Roast the coated cauliflower on a parchment lined baking sheet at 400 degrees for 35 minutes.

Simmer roasted cauliflower in the broth for about 15 minutes.

Remove from heat and puree with an immersion blender until smooth and creamy. Add seasoning to taste.

Return the pan to the stove over low heat. Add extra broth if the soup is too thick. Add the cheese and heat until it has melted.

One Handed Honey Herb Chicken

My son and I stayed home from church on Sunday because he was sick. I still wanted to make a decent “Sunday dinner.” But he wanted to be held constantly.

I knew I was going to bake some chicken, but had no idea what kind. I knew it had to be simple…so simple that you can prepare it with one hand.

This is what I came up with. And it’s delicious!!

Put the chicken in the pan. Sprinkle a few things on top. And put it in the oven. In an hour you have moist, flavorful chicken. Perfect.

It’s a little sweet and a little savory. Just what I like.

One Handed Honey Herb Chicken

2 boneless skinless chicken breasts
1/2 tsp. sea salt
1/2 tsp. garlic powder
2 Tbsp. honey
1/4 – 1/2 cup seasoned bread crumbs of choice (can be gluten free or substitute with seasoned almond or coconut flour for grain free)

Heat oven to 350. Butter/grease a small baking dish.

Place chicken in baking dish. Sprinkle with salt and garlic powder. Drizzle eat breast with honey. Rub slightly to cover. Sprinkle bread crumbs on top.

Cover dish and bake for 40 minutes. Remove cover and turn heat up to 400. Bake another 20 minutes, until topping is crisp and chicken is cooked through.

Caramelized Brussels Sprouts

After asking on facebook for some vegetable ideas I tried a new recipe for brussels sprouts from Eat, Live, Run. It’s so simple and so delicious! We all loved it.

Basically you saute brussels sprouts and add a little brown sugar at the end. Who knew that could make them taste so amazing? We already love brussels sprouts. This was a great way to change it up a bit.

I did not use the garlic or the nuts. But that would be good too. I will definitely be making these again. I might even turn them into a one dish meal by adding a starch and protein (quinoa and nuts?, rice and chicken?, couscous and salmon?). My mind is whirling with variations already 🙂

I’ll be trying this method of vegetable preparation with other vegetables as well. I already did broccoli and kohlrabi last week. Yum!! Cauliflower would be a great addition as well.

Do you like brussels sprouts? If not would a little brown sugar make you change your mind?

Caramelized Brussels Sprouts

12-14 large brussels sprouts
1 Tbsp olive oil (I used about 2 Tbsp. of butter and coconut oil)
1 clove garlic, minced (I just used a sprinkle of garlic powder)
pinch sea salt (or a lot if you’re like me:)
2 Tbsp brown cane sugar (or honey or maple syrup)
1/4 cup roughly chopped pecans or walnuts, toasted (I’d use crispy nuts)

Slice each brussels sprout very thin until you have a mound of feathery brussels sprout ribbons. Heat the olive oil/butter/coconut oil over medium high in a large skillet and saute the garlic for 30 seconds. Add the brussels sprouts and continue sauteing for another 4-5 minutes, until bright green and tender (I saute them a bit longer…my family likes them plenty soft). Add the sea salt and brown sugar and toss together. Finish by adding the toasted nuts.

RR – Macaroni and Quiche

The other day I was playing play-doh with my kids. Which means Rebecca was getting creative 🙂  She made “egg noodle casserole.” And asked if we could actually make it. Her ingredient list: noodles, eggs and cheese.

It sounded simple, so we gave it a try. We used egg noodles and a mix of cheeses. I also added ham since we had some to use up.

In the end it was a cross between macaroni and cheese and a ham and cheese quiche. And it was delicious!

Rebecca doesn’t usually like eggs. But she ate this no problem. Let your kids help plan and make meals…and they will eat them 🙂  Rebecca came up with the recipe. Abram helped me make it.

I made a small batch since I didn’t have many egg noodles in the house. But it was still plenty for us.

Macaroni and Quiche (or Egg Noodle Casserole)

2 cups dry egg noodles (or any noodle of choice), cooked
3/4 cup shredded cheese (we used marble and cheddar)
2 whole eggs
2 egg yolks
1/2 cup diced cooked ham (nitrate/nitrite free) (optional)
salt and garlic powder to taste

Heat oven to 375. Grease an 8″ square baking pan.

Mix the noodles, cheese, eggs, ham and seasoning. Pour into prepared pan.

Bake for 35 – 45 minutes, until eggs are set.

Simple Chicken Nuggets

I’ve made chicken nuggets countless times. I’ve made them in a variety of ways. But I have always used chicken breast or roasted chicken.

Last week I put chicken nuggets on my menu…then went to the freezer to get chicken…and found I had no chicken breast. Hmmm.

I did have some ground chicken, so I figured I’d go with that. I had no recipe and not a lot of time to prepare dinner. And I had my usual little “helper” in the kitchen (Abram thinks he must be held whenever I’m cooking so he can watch and try to get his hands on whatever I’ll let him).

I came up with an easy, delicious chicken nugget recipe that we all loved.

This is a great recipe if you’re trying to get your kids to eat homemade chicken nuggets instead of a fast food version. By using ground chicken you can make them round…or whatever shape you want really 🙂  They look like the typical nugget, but they only have good stuff in them.

I used a combination of bread crumbs and freshly grated parmesan cheese for the breading. You can skip the cheese if you want. And you can sub wheat flour, coconut flour or almond flour for the bread crumbs.

I also used egg yolks for a binder. If you can’t eat eggs you can leave them out. They will still hold together.

One other bonus about this recipe – they are baked. Don’t get me wrong, I love to fry things in healthy fat like coconut oil, butter and lard. But it can be messy and you have to monitor the stove. I like it when I can prepare dinner, stick it in the oven and forget about it until it’s time to eat.

You can prepare a large batch and freeze them for quick lunches any time. They didn’t last long enough here to freeze any 🙂  Serve them with homemade ketchup, honey mustard or barbecue sauce.

This post is linked to Real Food Wednesday and Fat Tuesday.

Simple Chicken Nuggets
dairy free, nut free, grain free, gluten free, egg free options

1 lb. ground chicken (or turkey or pork)
2 egg yolks (optional)
seasoning (I used sea salt, garlic powder and seasoning salt)
1/4 cup grated parmesan cheese (optional)

3/4 cup bread crumbs, wheat flour, coconut flour or almond flour
1/3 cup grated parmesan cheese (optional)

Heat oven to 375 degrees F. Grease a large baking sheet.

Mix the chicken, eggs, seasoning and cheese. In a separate bowl mix the breadcrumbs or flour and cheese.

Take a small scoop of the chicken mixture. Drop it into the breadcrumb mixture. Roll it around until it is coated. Place it on the baking sheet and press down until desired thickness. Repeat until all of the chicken mixture is used.

Bake the chicken nuggets for 30-35 minutes, flipping them over after 20 minutes.