Home » Kid-friendly Recipes » Page 30

Category: Kid-friendly Recipes

It is so important to cook homemade, healthy food. But it’s not always easy to find kid-friendly recipes.

That’s where I come in. I’ve got hundreds of kid-tested and approved recipes that won’t keep you in the kitchen for hours or stretch your budget too thin.

I focus on allergy-friendly, whole foods. But I always cook with kids in mind. I take all sorts of feeding challenges into account too.

We’ve dealt with every allergy possible, so I’ve created recipes that are gluten free, nut free, dairy free, egg free, soy free, corn free, coconut free and more!

Kid-friendly recipes don’t have to be boring. And they are certainly not limited to chicken nuggets and pizza every night.

A nourished child will enjoy a wide variety of fruits, vegetables, proteins, carbohydrates and fats. Get your kids in the kitchen with you and start cooking! Have fun with food and your kids will learn to love eating.

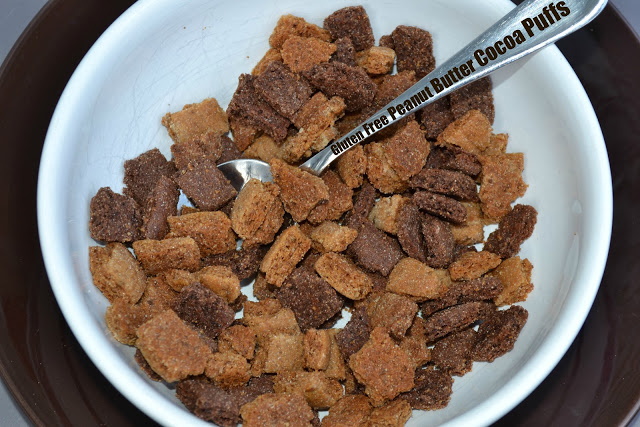
Gluten Free Homemade Peanut Butter “Cocoa Puff” Cereal (egg free, corn free, dairy free option)

Baby stepping your way to real food? Swap out your store-bought cereal for this healthy version of peanut butter cocoa puffs. They are even gluten and egg free (with a diary free option)!
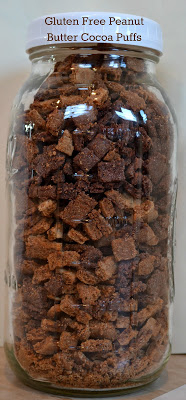
A little while back I made homemade cocoa puffs. They were a big hit! Then my daughter and I went gluten free. And I haven’t made the cocoa puffs since then.

Problem Solved

I decided to make a gluten free version…but add an extra element and make them into peanut butter puff cereal (any fans here of the “real” version of this?).
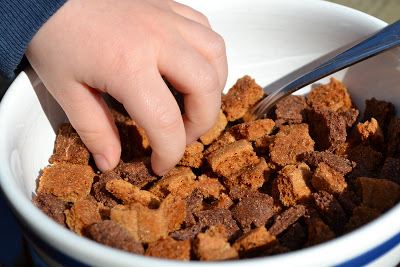
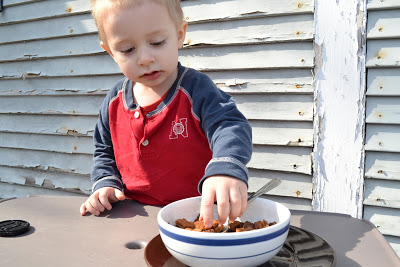
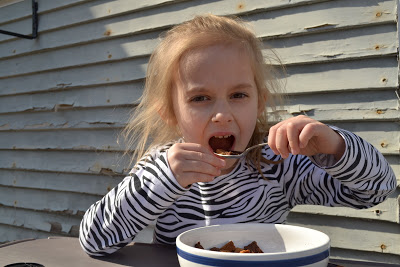
My inability to keep the kids away from the cereal means it turned out well. I could hardly even get a picture before they were digging in. And my son found whatever he could to reach the cereal on the counter and stuff his mouth full 🙂
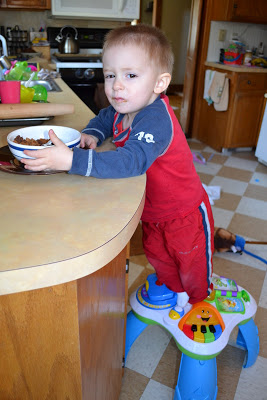
Kid Approved!

A mix of chocolate and peanut butter with a little sweetness and crunch. Both kids ate it plain after I made the cereal and then each had a bowl with milk for a bedtime snack. They really enjoyed drinking the chocolate peanut butter milk at the end.

We don’t buy cereal. My son will be 2 in a couple weeks and has no idea what cereal is. But they sure enjoyed this.
Easy and Healthy

This cereal is an easy breakfast on a busy morning. You get some protein from the peanut butter and milk (or milk substitute) and some carbohydrate to keep you going. It’s also a delicious treat any time of day. Or put some in a little container for young kids to munch on when you are out and about. A perfect finger food snack (with no preservatives or unhealthy oils!).

These puffs are also very allergen friendly. They are gluten free, egg free, corn free and soy free. The chocolate puffs are nut free and can easily be made dairy free. The peanut butter puffs are dairy free as well.

Try making a batch for your kids…or for yourself. You’ll be glad you did. It takes a little time to make two batches of dough/puffs. But it’s worth the effort. And if you aren’t fond of the combination you can just make one or the other. Plain chocolate is just like cocoa puffs. Or plain peanut butter puffs are great too.
Gluten Free Peanut Butter Cocoa Puffs
makes 10 cups

Chocolate Puffs

1 cup white rice flour
1/2 cup amaranth flour
1/4 cup tapioca flour
1/3 cup organic cocoa powder
1/2 cup organic cane sugar, sucanat or coconut sugar
1 tsp. baking soda
1/2 tsp. sea salt
1/4 cup honey
2 tsp. chocolate extract (optional)
1 tsp. vanilla extract
1/4 cup butter (can be replaced with coconut oil or palm shortening)
1/4 cup coconut oil

Heat oven to 350.
Melt butter and coconut oil in sauce pan. Set aside.
In a mixing bowl, stir together flour, cocoa, sugar, baking soda and salt. Add the liquids: honey, chocolate extract, vanilla, butter/oil. Stir well. Taste dough and adjust honey and chocolate extract to your liking. Mix until a nice ball of dough is formed. The dough should not be crumbly. If it is gradually add more honey.

Split the dough into 2 equal parts. Cut 3 pieces of parchment paper the size of a cookie sheet. Lay one piece on table. Put 1/2 of dough on the paper. Lay a 2nd piece of parchment on top of dough. Squish the dough down a little with your hand. Use a rolling pin to roll the dough between the parchment paper. Roll until the dough is about 1/4″ thick. Remove the top piece of parchment paper. Cut into very small squares (with pizza cutter). Place on a baking sheet (on the parchment paper…just move the whole thing onto the baking sheet). Repeat for other half of dough. (If you don’t care about appearance you can skip the cutting step and simply break the cookie into little chunks after it bakes.)

Bake for 12-13 minutes. Turn off oven, but leave cereal in to get crisp. Remove after about 5-7 minutes (if some of the puffs are burning remove the pan). Let cool completely. Separate squares.

Peanut Butter Puffs

1 cup white rice flour
1/2 cup amaranth flour
1/2 cup tapioca flour
1/2 cup organic cane sugar, sucanat or coconut sugar
1 tsp. baking soda
1/2 tsp. sea salt
1/3 cup peanut butter
1/3 cup coconut oil
5 Tbsp. honey
1 tsp. vanilla extract

Heat oven to 350.
Melt peanut butter and coconut oil in sauce pan. Set aside.
In a mixing bowl, stir together the flour, sugar, baking soda and salt. Add the liquids: honey, vanilla, peanut butter/oil. Stir well. Mix until a nice ball of dough is formed.The dough should not be crumbly. If it is gradually add more honey.

Split the dough into 2 equal parts. Cut 3 pieces of parchment paper the size of a cookie sheet. Lay one piece on table. Put 1/2 of dough on the paper. Lay a 2nd piece of parchment on top of dough. Squish the dough down a little with your hand. Use a rolling pin to roll the dough between the parchment paper. Roll until the dough is about 1/4″ thick. Remove the top piece of parchment paper. Cut into very small squares (with pizza cutter). Place on a baking sheet (on the parchment paper…just move the whole thing onto the baking sheet). Repeat for other half of dough. (If you don’t care about appearance you can skip the cutting step and simply break the cookie into little chunks after it bakes.)

Bake for 12-13 minutes. Turn off oven, but leave cereal in to get crisp. Remove after about 5-7 minutes (if some of the puffs are burning remove the pan). Let cool completely. Separate squares.

Combine the chocolate and peanut butter puffs in one container. Serve plain, with milk (or milk substitute) or mixed in yogurt. Store in an airtight container. You can freeze the cereal to make it last longer.
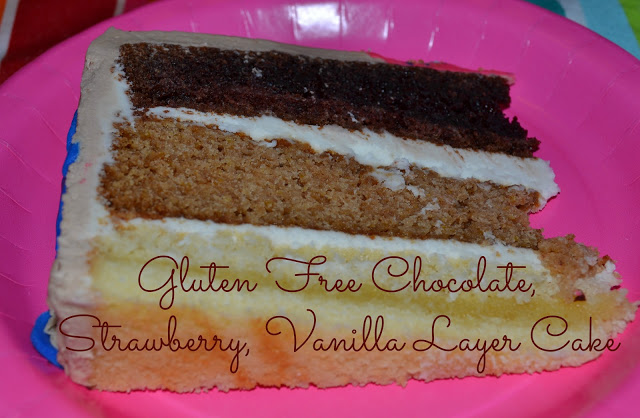
Gluten Free Arts and Crafts Cake (Chocolate, Strawberry, Vanilla – Dairy Free Options)

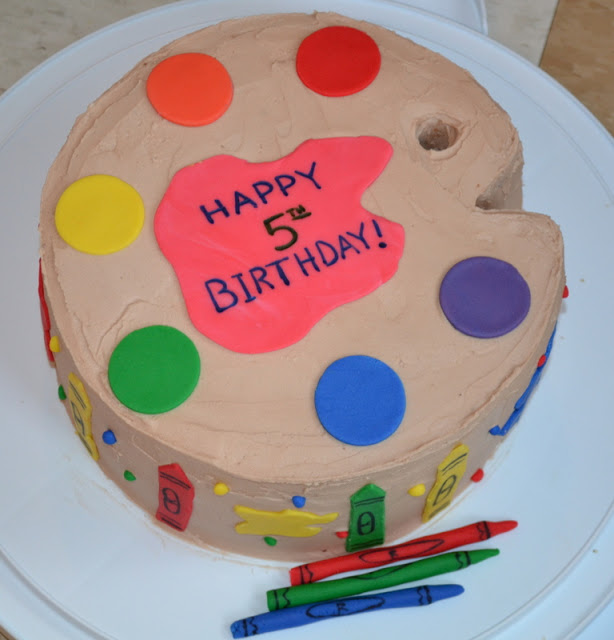
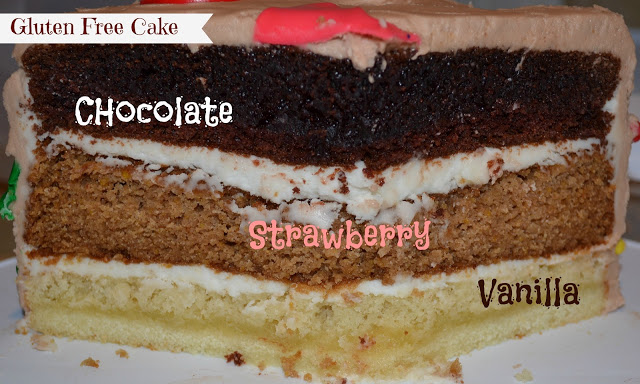
My daughter just had her 5th birthday with an arts and crafts party. She requested a 3 layer, chocolate, vanilla, strawberry cake. And we had just started her on a gluten free diet. So that meant it’s time to experiment!

I made one layer of cake and about a dozen cupcakes from each batch/flavor. I only ended up being able to freeze 6 cupcakes…my kids ate the rest 😛  I guess that means they were pretty good.

The cakes all turned out well. And the final product of putting them all together with homemade frosting was a big hit at the party.

Are you looking for a gluten free cake? Here are three flavors to try. The strawberry seemed to be the most light/moist cake. But they were all good.

Gluten Free Dairy Free Strawberry Cake
makes 2-layer 8″ or 9″ cake or 28 – 32 cupcakes

1 1/2 cups white rice flour
1/2 cup amaranth flour
3 Tbsp. tapioca flour
1 2/3 cup organic cane sugar
2/3 cup organic palm shortening
1 cup strawberry puree (frozen strawberries blended with a little bit of water until smooth)
1/4 cup coconut milk, water, milk or other milk substitute
2 tsp. baking powder
1 tsp. baking soda
1 tsp. sea salt
3 eggs, separated
1 tsp. vanilla
1/2 tsp. cream of tartar

Heat oven to 350. Grease and line with parchment paper two 8″ or 9″ cake pans or fill muffin tins with cupcake liners.

Separate eggs. Beat egg whites and cream of tartar until stiff peaks form. Set aside.

In a large bowl combine the flours, sugar, shortening, strawberry, milk, baking powder, baking soda, salt, vanilla and egg yolks. Beat until well combined, about 3 minutes. Fold in beaten egg whites.

Pour into prepared pans. Bake 45-50 min. (cake rounds) or 30-35 min. (cupcakes). Let cool for 30 min. before removing from pan. Cool completely on a wire rack before frosting.

Gluten Free Chocolate Cake
makes 2-layer 8″ or 9″ cake or 28 – 32 cupcakes

1/2 cup organic cocoa powder
1/2 cup boiling water
2/3 cup organic palm shortening
1 3/4 cups organic cane sugar
1/2 tsp. sea salt
1 tsp. vanilla
3 eggs, separated
1 1/2 tsp. baking soda
1/2 tsp. cream of tartar
1 3/4 cups white rice flour
1/4 cup amaranth flour
1/4 cup tapioca flour
1 cup buttermilk, sour milk or coconut milk

Heat oven to 350. Grease and line with parchment paper two 8″ or 9″ cake pans or fill muffin tins with cupcake liners.

Combine the boiling water and cocoa. Set aside.

Separate eggs. Beat egg whites and cream of tartar until stiff peaks form. Set aside.

In a large bowl combine the flours, sugar, shortening, salt, vanilla, egg yolks and buttermilk. Beat until well combined. Fold in beaten egg whites. Fold in cocoa mixture.

Pour into prepared pans. Bake 50 min. (cake rounds) or 30-35 min. (cupcakes). Let cool for 30 min. before removing from pan. Cool completely on a wire rack before frosting.

Gluten Free White Cake
makes 2-layer 8″ or 9″ cake or 28 – 32 cupcakes

1 1/2 cups white rice flour
1/2 cup amaranth flour
3 Tbsp. tapioca flour
1 2/3 cup organic cane sugar
2/3 cup organic palm shortening
1 1/4 cups milk, coconut milk or other milk substitute
3 tsp. baking powder
1/2 tsp. baking soda
1 tsp. sea salt
1 tsp. vanilla
3 eggs, separated
1/2 tsp. cream of tartar

Heat oven to 350. Grease and line with parchment paper two 8″ or 9″ cake pans or fill muffin tins with cupcake liners.

Separate eggs. Beat egg whites and cream of tartar until stiff peaks form. Set aside.

In a large bowl combine the flours, sugar, shortening, milk, baking powder, baking soda, salt, vanilla and egg yolks. Beat until well combined, about 3 minutes. Fold in beaten egg whites.

Pour into prepared pans. Bake 45-50 min. (cake rounds) or 30-35 min. (cupcakes). Let cool for 30 min. before removing from pan. Cool completely on a wire rack before frosting.

Gluten Free Pizza Crust

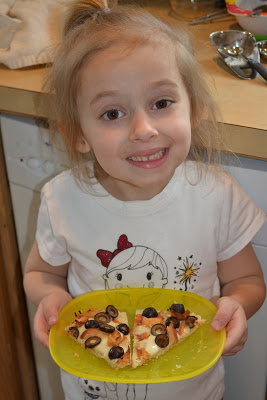
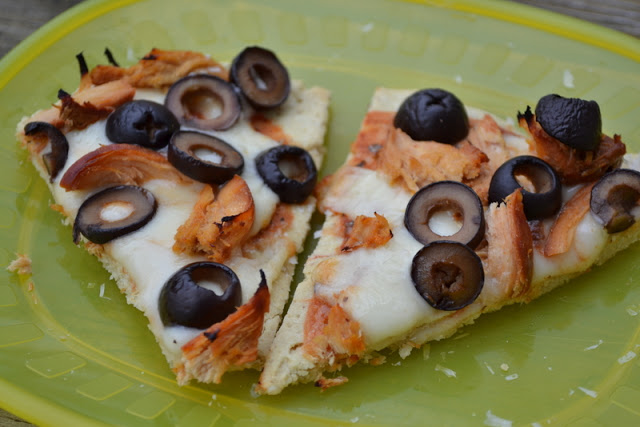
My daughter wants pizza for her birthday party. Pizza for 20 people…from scratch…and gluten free. Ummmm…ok??

I’m still fairly new to gluten free baking. But I’m always up for a challenge. And this was a big challenge. I don’t mind experimenting with my family. But I do mind when I have 20 guests. I am passionate about my food and like to make things people enjoy (yes, I am and always have been a people pleaser…if you come to my house and hate the food please don’t tell me :P).

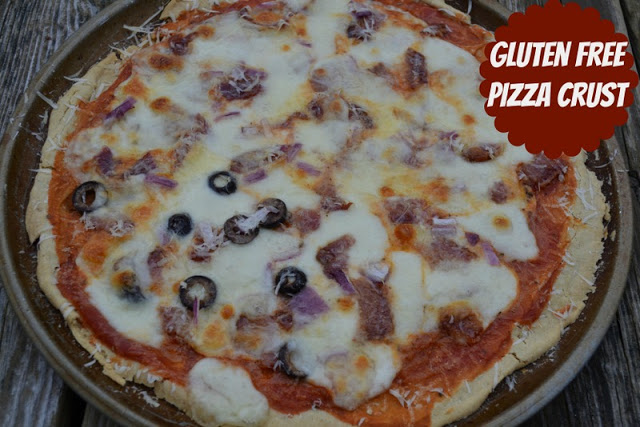
So I used my little knowledge I’ve gained from previous baking experiments and gave it a go. And I think I came up with a pretty decent crust. Everyone in our house ate it without complaints.

This recipe is great for people with all kinds of allergies. The main recipe does use egg whites. But since I can’t have eggs right now I made some without the whites. It was a little thinner/crispier, but it still tasted great. I actually got to eat pizza!!!! Pizza that didn’t make me sick!!! A true  miracle.

It is also dairy free. So as long as you don’t pile cheese on top you can have a dairy free pizza. You can use a cheese alternative. Or you can do what I do and make a pesto pizza. The pesto gives so much flavor you don’t even need cheese. I also like to add some dollops of pureed pumpkin or winter squash here and there to give some extra depth to cheese free pizza.

So using this crust you can make a gluten free, egg free, nut free, corn free, dairy free, soy free pizza.

Do you like pizza but thought you had to give it up because of allergies? Think again. Try this great tasting, easy to prepare pizza crust for your next pizza party. Everyone can enjoy it. It’s allergen friendly and has no gums or starches.

One of the best things about this recipe is that you can make/bake the crust in advance and freeze it. Then you can have a quick pizza any night of the week. Just add your favorite toppings and bake for about 15 minutes. So easy.

I must point out that I used a small amount of flax seed in this recipe. I don’t normally use or advocate the use of flax seeds. But they help bind the dough when using gluten free flours and prevents having to use any gums. I figure one teaspoon for an entire pizza isn’t going to do much harm. You could substitute chia seeds for the flax seeds.

Gluten Free Pizza Crust
makes one 12-14″ pizza or 3-5 individual pizzas

3/4 cup white rice flour
1/4 cup tapioca flour
1/4 cup brown rice flour
1/4 amaranth flour or more brown rice flour
1 tsp. salt
1/2 tsp. baking soda
1 tsp. flax seed
1 tsp. cane sugar
1 Tbsp. evoo
1/2 cup water
2 egg whites
1/2 tsp. cream of tartar

Heat oven to 400 degrees F. Grease a pizza pan or baking pans for individual pizzas.

To make this a soaked crust combine the flour, water and 2 Tbsp. lemon juice. Cover and let set for 7-24 hours. Then proceed with the recipe.

Beat the egg whites with the cream of tartar until still peaks form. Set aside.

Combine the remaining ingredients. Fold in the egg whites. Spread onto the prepared pan(s).

Bake for 10 – 15 minutes (smaller crusts will need less time, whole pizzas will need more time), until firm.

Use crust immediately or allow to cool, remove from pan and refrigerate or freezer. Thaw frozen crust in the refrigerator when ready to use.

When ready to make the pizza, add your favorite sauce and toppings. Bake at 400 degrees for 10 – 15 minutes, until cheese is melted and pizza is hot.

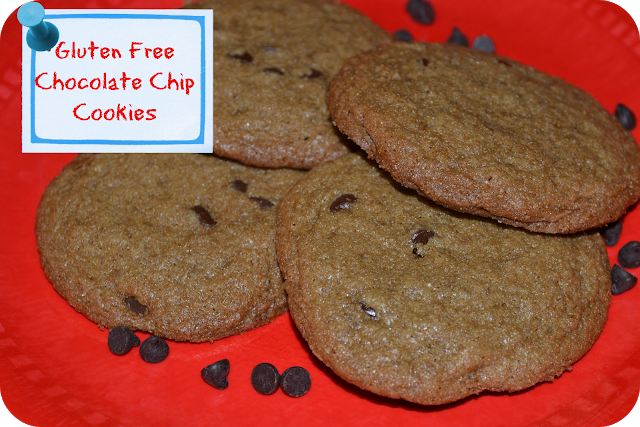
Gluten Free Chocolate Chip Cookies

We had a free morning at home today. That usually means at least one baking project. Today we decided to go for a classic – chocolate chip cookies.

The kids helped with the baking. They made great taste testers too 🙂  These cookies were very easy to make and turned out well. You’d never know they are gluten free. Both kids happily ate one with lunch, fresh out of the oven.

Gluten Free Chocolate Chip Cookies
makes about 2 dozen cookies

8 Tbsp. fat (butter, palm shortening, lard tallow or any combination…I used butter and shortening), room temp or melted
1/2 cup sucant or organic brown cane sugar
1/4 cup organic cane sugar
1 egg
1 cup white rice flour
2 Tbsp. tapioca flour
1/4 cup amaranth flour
1/2 tsp. baking soda
1/2 tsp. salt
1/2 tsp. vanilla
1/2 cup mini chocolate chips

Heat oven to 350.

Cream the butter and sugars. Add the egg. Beat on high for a couple minutes. Add the flours, soda, salt and vanilla. Blend well. Stir in the chocolate chips.

Drop by teaspoonful onto a parchment lined baking sheet. Bake for 11-13 minutes, until golden. Remove from oven. Let cool for 10 minutes on the pan. Transfer cookies to a cooling rack and allow to cool completely. Store in an airtight container or in the freezer for long term storage.

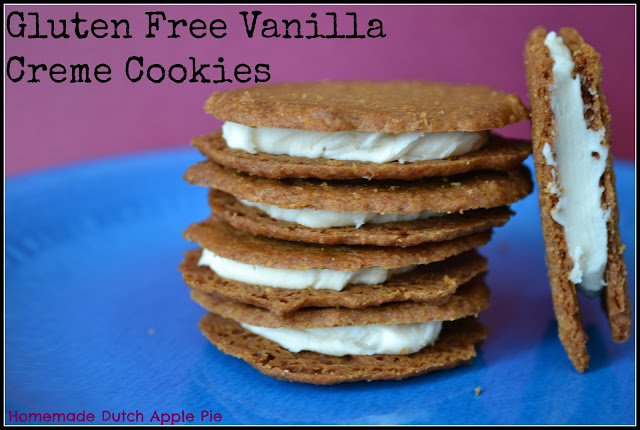
Gluten Free Vanilla Wafers and Creme Cookies

Vanilla wafers. A classic cookie. Who doesn’t love them? Now you can enjoy a gluten free version. These are simple and delicious.

Want to make them a little fancier? Add some filling to make vanilla creme cookies. These were a big hit with the whole family.

Gluten Free Vanilla Wafers and Creme Cookies

1 cup white rice flour
1/2 cup tapioca flour
1/2 cup teff flour
1/2 cup butter or coconut oil or palm shortening (or a combination), room temperature
1/2 cup coconut sugar or cane sugar
2 Tbsp. honey
1 Tbsp. maple syrup
1/2 tsp. baking soda
1/2 tsp. salt
2 tsp. vanilla

Creme Filling:

1/4 cup organic palm shortening
6-8 Tbsp. tapioca flour
1/4 cup maple syrup

DIRECTIONS

Heat oven to 350 degrees.

Cream the sugar and butter. Add the remaining ingredients. Mix until a ball of dough forms. You may have to squeeze the dough in your hands to see if it will hold.

Roll half of the dough between two pieces of parchment paper until about 1/8″ – 1/4″ thick. Cut into desired shape. Transfer to a parchment lined baking sheet. Repeat until all of the dough is used.

Alternately you can scoop small mounds of the dough onto parchment paper and flatten slightly.

Bake for about 15 minutes, until golden. Let cool completely. Store in an airtight container or add filling.

To make the cream filling:

Cream the shortening, flour and maple syrup in a small bowl. Add more flour for a stiffer cream (note that it will firm up/become solid when chilled). Add more maple syrup for a sweeter cream. You can prep the filling ahead and store it in the refrigerator. Let it come to room temperature before filling.

Place a small amount of filling on one cookie. Top it with another cookie and press down just until the filling reaches the edge. Repeat until the filling is gone. Store cookies in the refrigerator.

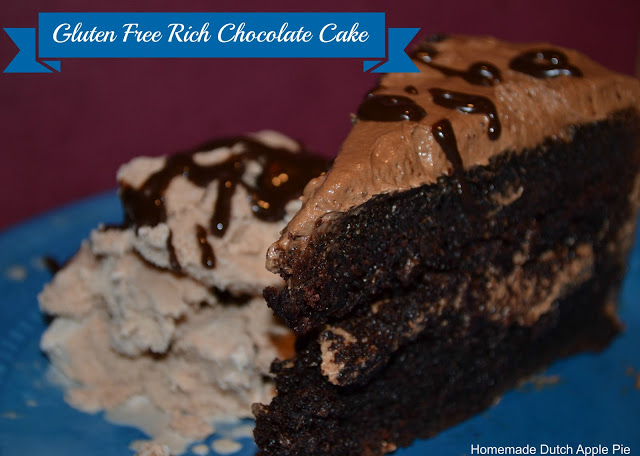
Gluten Free Rich Chocolate Cake

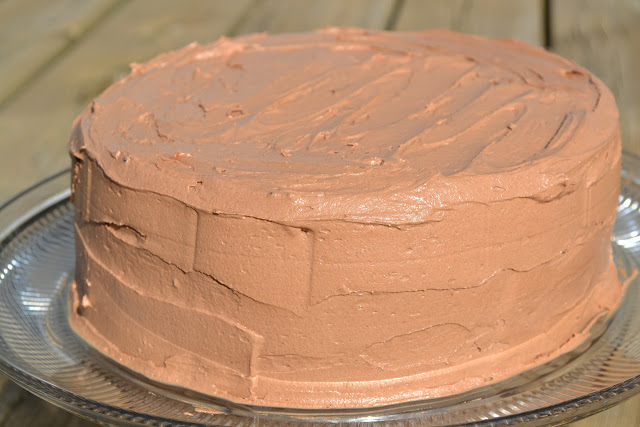
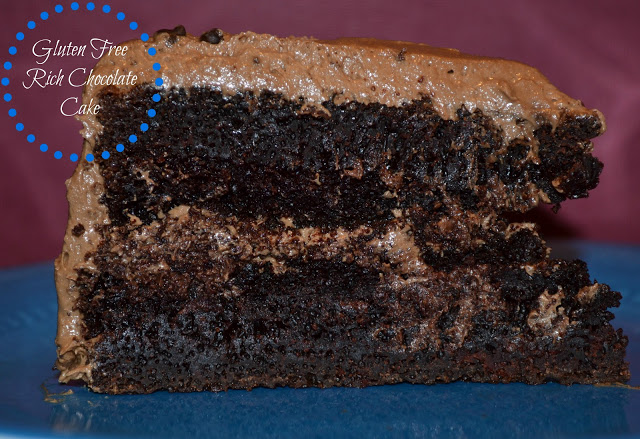
Yesterday was my husband’s birthday. He requested the same cake I made for him three years ago. It’s a Barefoot Contessa recipe. The cake is very rich and chocolatey and has a little coffee to really boost the flavor.

No problem. But instead of following the original recipe I modified it to be gluten free and free of vegetable oils. I didn’t think it was fair to make a big chocolate birthday cake and then tell Rebecca she can’t have any.

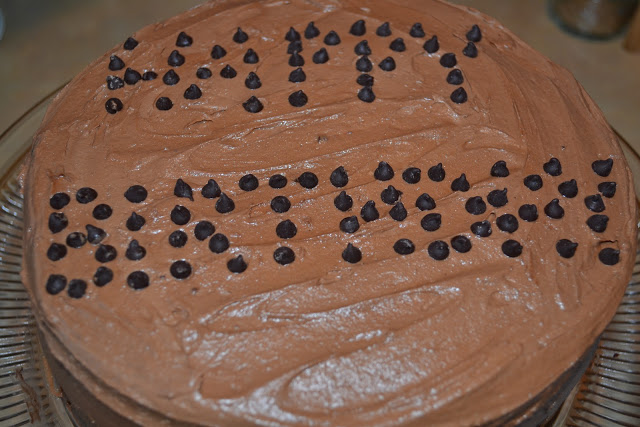
I also slightly modified the frosting. And had my first successful attempt at homemade powdered sugar! So this cake is rich, moist and chocolate. But it’s also gluten free and totally from scratch using healthy ingredients.

Everyone thought it was great!!! And Justin said he would have never known that it’s gluten free. That equals success to me 🙂  And what’s chocolate birthday cake without a little homemade chocolate ice cream alongside? 🙂

Gluten Free Rich Chocolate Cake

1 cup white rice flour
3/4 cups tapioca flour and/or amaranth flour (I used half of each)
2 cups organic cane sugar
3/4 cups organic cocoa powder
2 tsp. baking soda
1 tsp. aluminum free baking powder
1 tsp. sea salt
1 cup buttermilk, sour milk or kefir
1/4 cup palm shortening + 1/4 cup butter, melted (you can do all palm shortening, all butter or replace some or all of it with coconut oil)
2 eggs
1 tsp. organic vanilla
1 cup freshly brewed hot coffee

Preheat the oven to 350 degrees F. Butter 2 (8-inch) round cake pans. Line with parchment paper.

Sift the flour, sugar, cocoa, baking soda, baking powder, and salt into the bowl of an electric mixer fitted with a paddle attachment and mix on low speed until combined. In another bowl, combine the buttermilk, butter/shortening, eggs, and vanilla. With the mixer on low speed, slowly add the wet ingredients to the dry. With the mixer still on low, add the coffee and stir just to combine, scraping the bottom of the bowl with a rubber spatula. Pour the batter into the prepared pans and bake for 45 to 50 minutes, until a cake tester comes out clean. Cool in the pans for 30 minutes, then turn them out onto a cooling rack and cool completely.

Chocolate Frosting

3/4 cups (6 oz.) semisweet chocolate (I used dairy free, soy free chocolate chips)
2 sticks unsalted butter, at room temp (you can replace some of the butter with palm shortening if desired. I used 3/4 cups butter and 1/4 cup shortening)
1 egg yolk
1 tsp. organic vanilla
1 1/4 cups homemade powdered sugar (recipe below)
1 Tbsp. instant coffee powder (I only used half the coffee powder in the frosting to make it more kid friendly)

Place the chocolate in a heat-proof bowl set over a pan of simmering water. Stir until just melted and set aside until cooled to room temperature.

In the bowl of an electric mixer fitted with a paddle attachment, beat the butter on medium-high speed until light yellow and fluffy, about 3 minutes. Add the egg yolk and vanilla and continue beating for 3 minutes. Turn the mixer to low, gradually add the powdered sugar, then beat at medium speed, scraping down the bowl as necessary, until smooth and creamy. Dissolve the coffee powder in 2 teaspoons of the hottest tap water. On low speed, add the chocolate and coffee to the butter mixture and mix until blended. Don’t whip! Spread immediately on the cooled cake.

Powdered Sugar

1 1/2 cups organic cane sugar
2-3 Tbsp. tapioca flour, white rice flour or corn starch

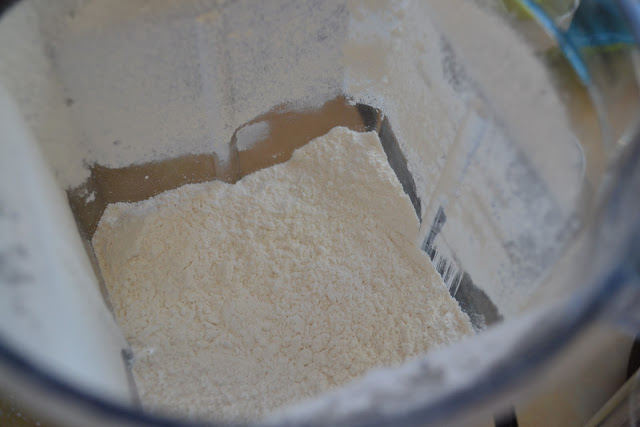
Blend sugar and flour in a high powered blender (I used a Vitamix dry blender) on high until powdered. This will make more than enough for this frosting recipe.

After the frosting is finished, place 1 layer, flat side up, on a flat plate or cake pedestal. With a knife or offset spatula, spread the top with frosting. Place the second layer on top, rounded side up, and spread the frosting evenly on the top and sides of the cake.

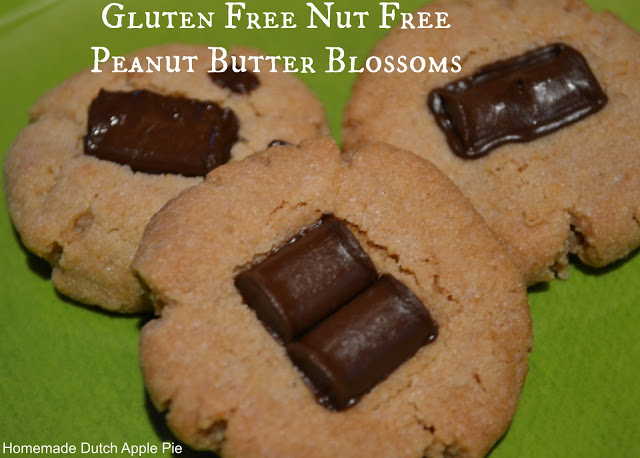
Gluten Free Nut Free Peanut Butter Cookies and Blossoms

When I was little you didn’t hear much about food allergies or restrictions. You didn’t have to worry about bringing treats to school or having nut free rooms. Almost every year for my birthday treat I had my mom make peanut butter blossoms. My favorite!

Fast forward to now…you can’t bring anything into a school with nuts. And sadly I can’t even eat any nuts. I’m sure it’s partially just awareness. But I think allergies are also on the rise. It’s an indicator of the state of our health.

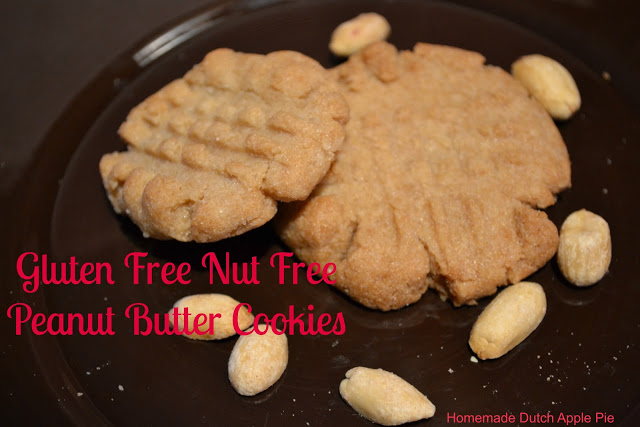
That being said, I miss my favorite cookie. But now I can have a safe version of this treat. It’s gluten free, nut free and egg free! These are delicious. My whole family approves.

Do you have a nut allergy or sensitivity? Do you miss peanut butter as much as I do? Try these nut free peanut butter cookies!

Gluten Free Nut Free Peanut Butter Cookies and Blossoms

1 cup white rice flour
1/2 cup tapioca flour
1/2 cup amaranth flour
1/2 cup organic cane sugar
1/2 tsp. baking soda
1/2 tsp. salt
6 Tbsp. maple syrup
6 Tbsp. melted butter
1 tsp. vanilla
2 Tbsp. water

dairy free, nut free chocolate chunks (affiliate link)

DIRECTIONS

Heat oven to 350 degrees. Line a baking sheet with parchment paper.

Combine the flour, sugar, syrup, soda, salt, butter and vanilla. Slowly add water until the dough will hold together when squeezed with your hands.
Take a small scoop of dough (about a Tbsp.), roll into a ball, place on baking sheet and press down slightly. Repeat until the dough is gone. For the traditional peanut butter cookie look press on cookie with a fork in both directions. For blossoms you can skip this step.

Bake for about 15 – 20 minutes, until golden.

For blossoms immediately push 1 or 2 chocolate chunks into the cookie.

Let cool.

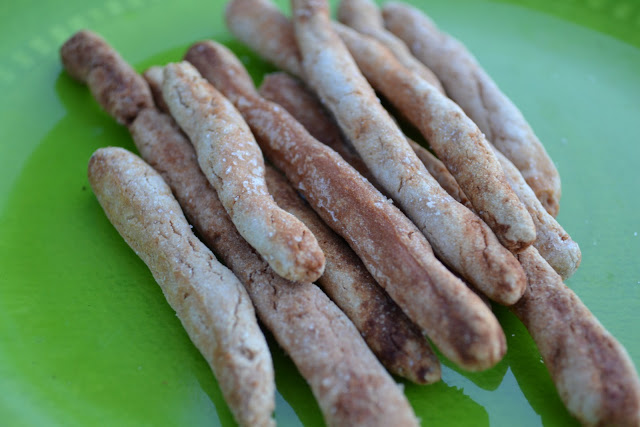
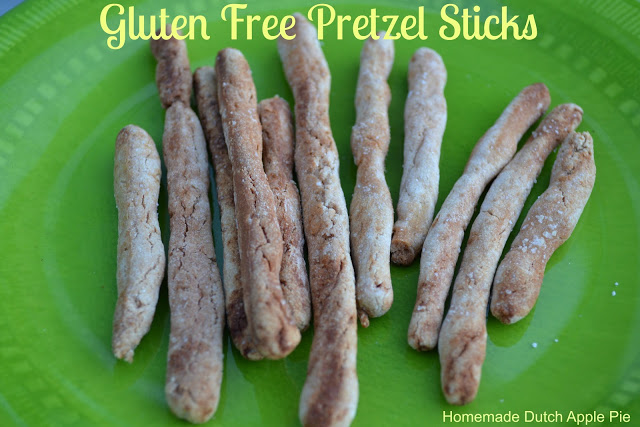
Gluten Free Pretzel Sticks (gluten free, egg free, dairy free, nut free, corn free)

My daughter loves salt, as do I 🙂  So she enjoys munching on pretzels. But if you’ve ever looked at a package of gluten free pretzels you’ll know that they are made with quite a few odd and unhealthy ingredients. I’d rather not have her eating them.

As usual, my solution is to make my own 🙂  I can’t say these are a perfect replica of pretzel sticks. They are a little harder/crunchier than any you’d buy. But they still taste great! If my daughter will eat them, I figure they are pretty good. And she had some as soon as she got up this morning 🙂

One more snack that travels well and I’m ok with my kids eating.

What is your favorite snack? Do you like salty or sweet?

Gluten Free Pretzel Sticks

1/2 cup flour (2/3 white rice, 1/3 amaranth)
1/4 tsp. sea salt
1 tsp. organic cane sugar
3 Tbsp. water

1 Tbsp. water + 1 tsp. honey

Heat oven to 350. Line a baking sheet with parchment paper.

Mix the flour, salt, sugar and water.

Take a small piece of dough and form into a ball (about the size of a small bouncy ball). Roll into a stick on the parchment paper. Repeat process until all of the dough is used, lining up the pretzels on the baking sheet.

Mix the water and honey. Use your finger to rub it over the pretzels, rolling them around to coat completely.

Sprinkle sea salt over top of pretzels.

Bake 40 – 45 minutes, until golden and crunchy. Rotate pretzels on the pan a few times during baking. Let cool completely.

Soaked Gluten Free Muffins/Cupcakes (dairy free, nut free)

As we continue to experiment with a gluten free diet I want to be sure my daughter doesn’t feel like everything is being taken away. She is very sensitive about that. So I’m trying to make plenty of homemade treats that are safe and I feel good about feeding her.

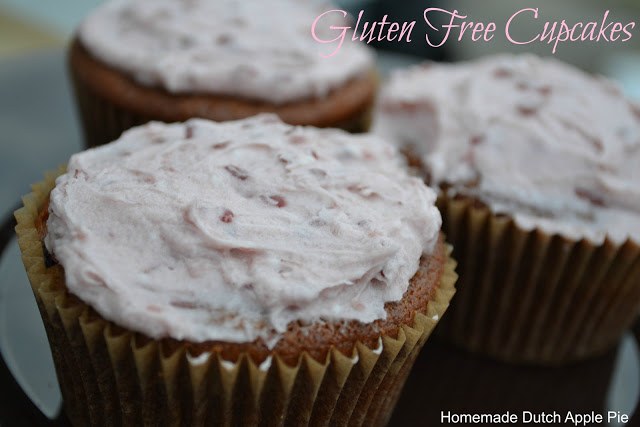
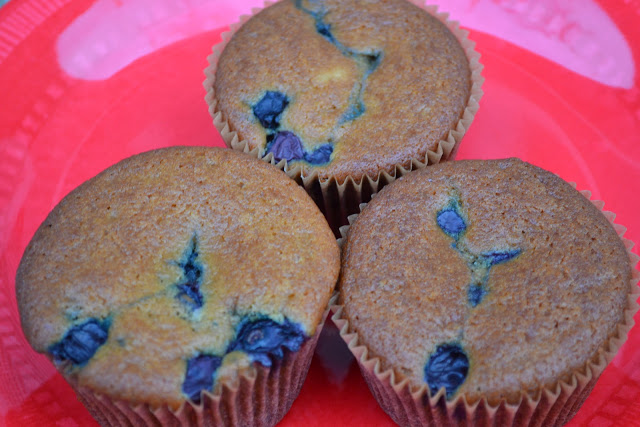
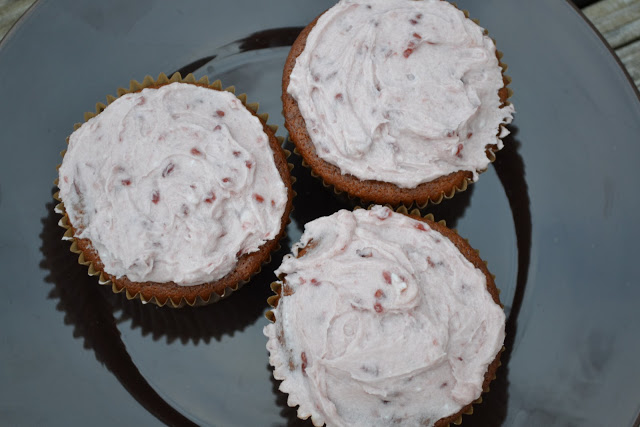
Yesterday I decided to try making muffins. They ended up being a cross between muffins and cupcakes. I made some with blueberries and some without. I also added a raspberry frosting to some of them.

Each variety was a hit with everyone! Even my one-year old that will hardly eat sweets scarfed down three of these!

You can increase the sweetener a little to make them more like traditional cupcakes. You can decrease the sweetener a little to make them more like muffins. Or follow the recipe as is and call them what you want 🙂  It just depends on your taste buds/how much sweetness you are used to.

Part way through eating her cupcake my daughter asked if her birthday cake would be gluten free. I said I didn’t know, but asked she thought it should be. Her response: “Yes!!!” I think she can even tell that she feels better eating this way. My wise beyond her years four-year old 🙂

One last benefit of these…they are soaked!! So they are even easier on your tummy. A perfect breakfast, brunch or birthday treat.

Gluten Free Soaked Muffins/Cupcakes

makes 12 muffins

1 cup white rice flour
1/2 cup amaranth flour
1 cup soaking liquid (water + 2 Tbsp. lemon juice OR buttermilk OR kefir OR any combination to equal 1 cup total)
1/2 cup organic cane sugar
2 Tbsp. maple syrup
1 tsp. vanilla
1/2 tsp. salt
1 tsp. baking soda
1 egg
1 1/2 Tbsp. melted better or coconut oil

optional mix-ins: blueberries, raspberries, cinnamon and raisins, chopped nuts and chocolate chips

DIRECTIONS

Combine the flour and soaking liquid. Cover and let sit 7-24 hours.

Heat oven to 325.

Add remaining ingredients to the flour mixture. Add nuts, raisins, chocolate chips or spices if desired. If using fruit do not add it to the batter.

Fill paper lined muffin cups 3/4 full. Add fresh or frozen fruit to the top of batter if desired.

Bake for 45 minutes.

Raspberry Frosting

1/2 cup organic palm shortening
1/2 cup tapioca flour or white rice flour
2-4 Tbsp. organic raspberry jam
1 Tbsp. maple syrup

Mix all ingredients together. Adjust the jam and syrup to taste. Spread on cooled cupcakes.

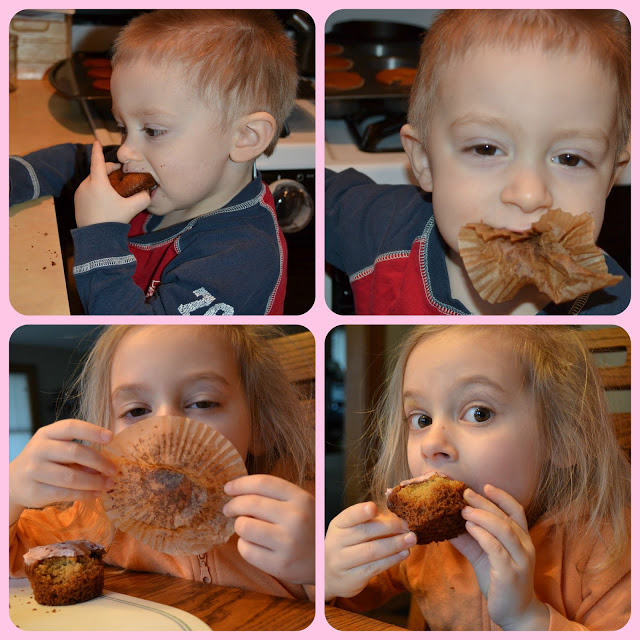
I just had to add the photos of my kids devouring these. They didn’t actually eat the wrappers…but almost 🙂  They didn’t want to miss a crumb.

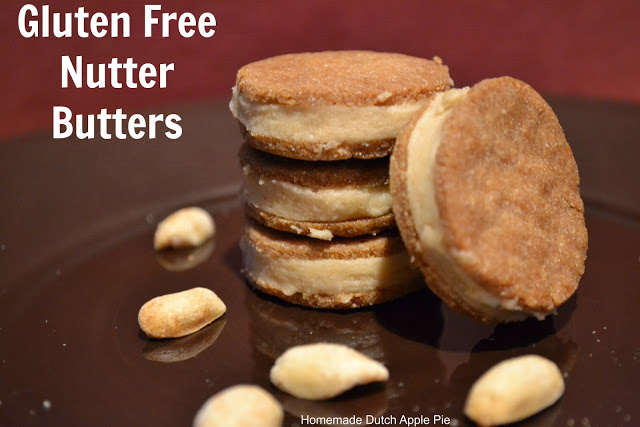
Gluten Free Nutter Butters (egg free, dairy free)

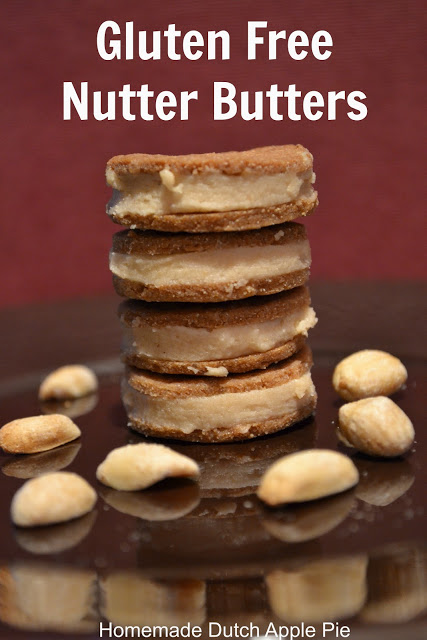
I love to recreate conventional foods and turn them into healthy, real food treats. And lately I’ve been making gluten free creations. My most recent experiment is Nutter Butters.

I loved Nutter Butters when I was younger. But I haven’t had one in many, many years. A crunchy cookie with a peanut buttery filling. That can’t be too hard to create, right? Right.

These turned out very well. Two thumbs up from the family. And they can be harsh critics sometimes 😛

To my surprise I made the cookie part without peanut butter! You can add some if you like a stronger peanut flavor. But they are great without it.

This is a simple recipe that results in a delicious treat! These cookies are gluten and egg free. You can substitute coconut oil for the butter to make them dairy free as well. But you might need to add peanut butter to the cookie then. I haven’t quite figured out how to make the filling taste like peanut butter without nuts. I’ll have to work on that 🙂

Gluten Free Nutter Butters

Cookie:

1 cup white rice flour
1/2 cup tapioca flour
1/2 cup amaranth flour
1/2 cup organic cane sugar
1/2 tsp. baking soda
1/2 tsp. salt
6 Tbsp. maple syrup
6 Tbsp. melted butter (optional – replace some of the butter with peanut butter or replace the butter with a combination of coconut oil and peanut butter)
1 tsp. vanilla
2 Tbsp. water

Filling:

1/4 cup organic palm shortening
1 Tbsp. natural peanut butter
1 Tbsp. maple syrup
1/4 cup tapioca or white rice flour

DIRECTIONS

Cookie:

Heat oven to 350 degrees.

Combine the flour, sugar, syrup, soda, salt, butter and vanilla. Slowly add water until the dough will hold together when squeezed with your hands.

Roll half of the dough between two pieces of parchment paper until about 1/8″ thick. Cut into desired shape. Transfer to a parchment lined baking sheet. Repeat until all of the dough is used.

Bake for about 15 minutes, until golden. Let cool completely.

Filling:

In a small bowl mix the shortening, peanut butter, syrup and flour. Adjust peanut butter and syrup to taste. Add extra flour if the filling is too thin.

Assembly:

Place a small amount of filling on a cookie. Place another cookie on top and press down just until the filling reaches the edge. Repeat for all cookies. Refrigerate to allow the filling to get firm.

Store in a container in the refrigerator or freezer.