When you see strawberries at the farmer’s market you know summer is here! Use that fresh fruit to kick off the season with this fun strawberry lemon jello salad the whole family will love.
I recall eating a lot of jello growing up. Of course we had it plain. But we also ate a lot of jello salads.
Church potlucks are notorious for a variety of jello dishes. Some have chunks of fruit. Some are layered. Some are meant to be eaten with your hands. I know I got my fill as a kid!
Jello salads are fruity and fun. Of course kids love them. Who wouldn’t with the bright colors and sweet flavor?
Is Jello Harmful?
It’s been a couple years now since we adopted a strict no food coloring policy in our house.
My children just react way too strongly to artificial colors and flavors.
Plus after researching I realize just how bad all of that artificial stuff is for everyone’s health (think ADHD, hyperactivity, etc.). I still cringe every time I see a child eating a brightly colored cupcake, cookie or candy. Especially knowing that it is most likely a daily occurrence for them.
So jello out of a box is not something my children ever eat. But I do like to make real jello with nourishing grass-fed gelatin (use code TAKE10 for 10% off). It is especially fun in the summer.
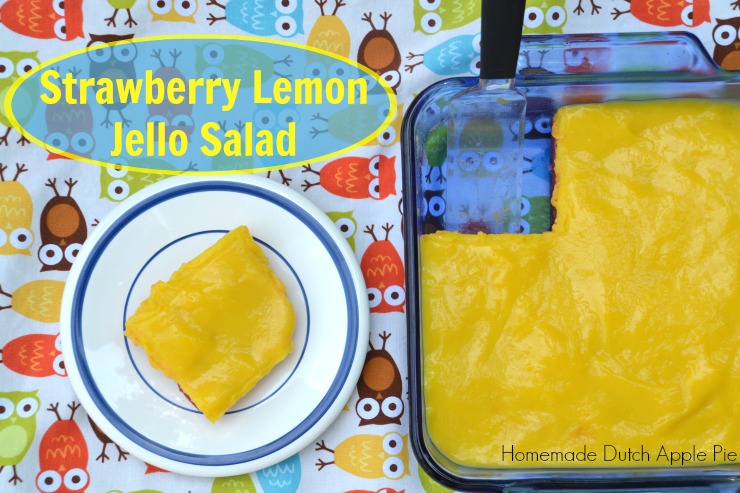
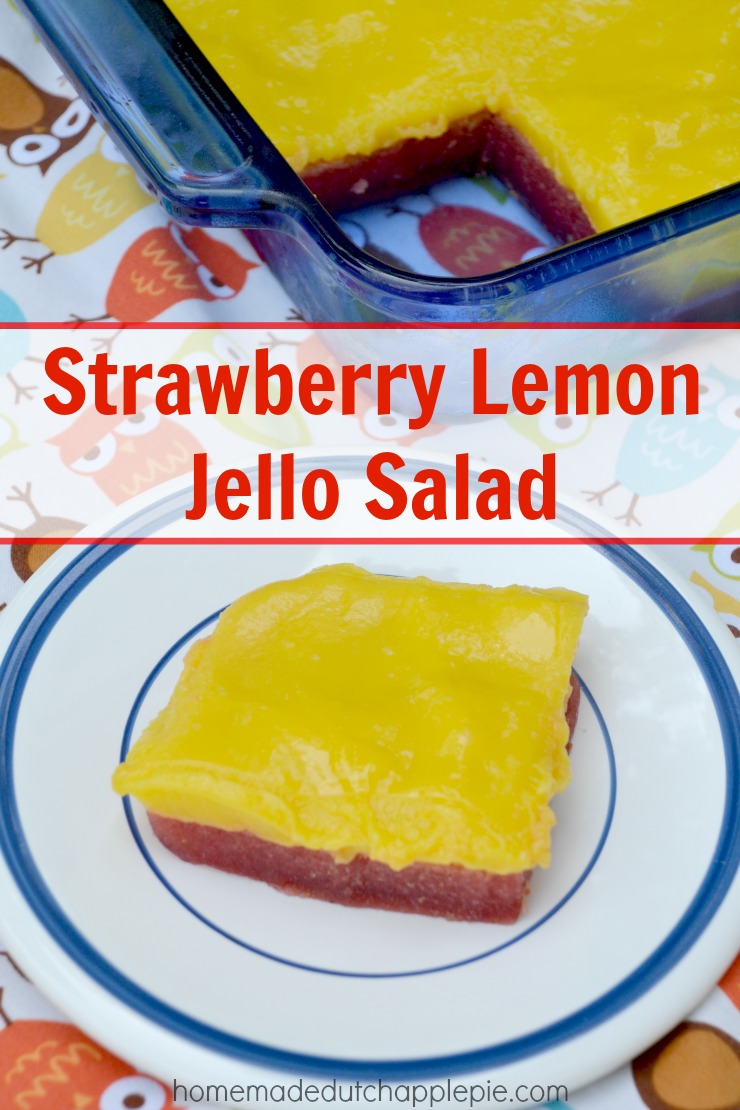
Real Food Strawberry Lemon Jello Salad
Recently I decided I wanted to recreate some of my childhood favorite jello recipes.
I started with this strawberry lemon jello salad. It is actually a combination of two jello salads my mom made.
But this one is made with real fruit, grass-fed gelatin, natural sweeteners, pastured eggs and raw milk!
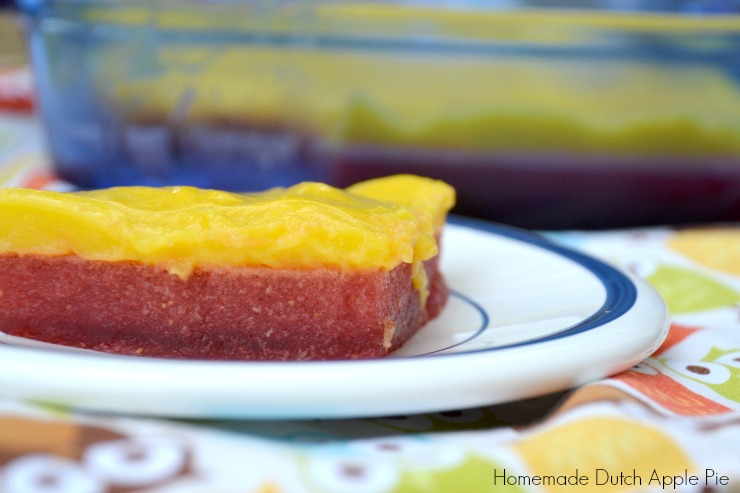
The first layer is a simple strawberry jello made with fresh berries. The top layer is a bright, lemon pudding.
Together they make an irresistible combination. And check out that color!!! No need for anything artificial when you’ve got quality ingredients with vibrant hues.
The final test is the flavor. My whole family gave it two thumbs up! The strawberry and lemon pair well. The jello is not overly sweet. It is a great combination.
Strawberry lemon jello salad would make a great addition to any summer picnic or potluck!
Are you a jello fan? Treat yourself and your family to this amazing real food version of a classic. Strawberry lemon jello salad is sure to be a hit.

- 2 cups strawberries (fresh or frozen, thawed)
- 1/2 cup organic cane sugar
- 2 Tbsp. grass-fed gelatin
- 1 cup water
- 2 egg yolks
- 1/3 cup lemon juice
- 1/2 cup organic cane sugar
- 3 Tbsp. arrowroot, tapioca flour or corn starch
- 1 cup cream or whole milk
- Puree the strawberries, sugar and water in a blender. Pour into a sauce pan.
- Stir the gelatin into the mixture. Let set 1 minute.
- Heat the strawberry mixture over low-medium heat, stirring, until the gelatin is dissolved, about 4 minutes.
- Pour into an 8" glass pan.
- Put in the refrigerator until set, about 1 hour.
- In a medium saucepan combine the egg yolks, lemon juice, sugar, arrowroot and milk. Whisk to combine.
- Heat over medium heat, whisking frequently, until the pudding begins to thicken (will take around 5-10 minutes).
- Continue whisking for 30 seconds. Turn off heat. Whisk until fully thickened.
- Pour the pudding into a bowl to cool for 20 minutes.
- Pour the pudding over the strawberry layer.
- Chill until fully set, about 2 hours.
- Serve cold.


 Now that you understand


 I often serve some kind of fruit side dish with our dinner. I try to have variety or simply make fruit salads with whatever fruit we have on hand and is in season.