Home » Kid-friendly Recipes » snack » Page 28

Category: snack

Creamy Chocolate Pudding

I am not a big fan of pudding. But I’ve been wanting to try making REAL pudding for a while. And now that we have lots of raw milk and Christmas is coming I figured it was a good time to try. I used the Heavenly Homemaker recipe. It turned out really well. So easy to make…and so fast. Rebecca liked helping mix everything and then watching me stir it on the stove. This is definitely not like the stuff you get out of box. This is rich and thick. I actually kind of like it. Not sure I could eat a large amount, but it is good. And I love how healthy it is…raw milk, fresh egg yolks, real butter. What a great treat. I’ll definitely be making this again. I need to try the vanilla and butterscotch too.
Creamy Chocolate Pudding
2 1/2 cups milk
3 egg yolks
2/3 cup rapadura or 1/2 cup real maple syrup (I used cane sugar)
1/4 cup cocoa powder
4 Tbsp. arrowroot powder
1/4 tsp. sea salt
3 Tbsp. butter
1 tsp. vanilla

In a medium saucepan, whisk together milk, egg yolks, rapadura or maple syrup, cocoa, arrowroot powder and salt. Cook over medium heat, stirring CONSTANTLY until pudding begins to thicken. Remove immediately from the heat, and continue to stir until pudding is creamy. Add butter and vanilla and continue to stir until mixed. Pour into serving dishes and serve warm, or chill for two hours and serve cold.

Whole Wheat Gingerbread Cookies

My goal this year is to make healthy holiday treats. I’ve never made gingerbread cookies before…and have never even had one! My mom never made them growing up because she doesn’t like them. I’m not a fan of ginger, so I didn’t know if I’d like them. But I wanted to try. I found a recipe for whole wheat cookies on englightened cooking. They were very easy to make. And they turned out really well. They are a bit on the gingery side for me, but I can still eat them. Rebecca really likes them. Justin does too. And they are not overly sweet.

For the deocrating I was trying to also go the healthy route. I had seen on Heavenly Homemakers how to make your own powdered sugar. But when it was time to make the icing my blender was dirty. So I tried using my food processor…didn’t work. So I had to just grab the regular, white, processed stuff. I’ll try making powdered sugar some other time. At least that’s the only bad thing on them. And really there isn’t much icing per cookie. I still used raw milk for the icing. And we decrated with chocolate covered raisins, yogurt covered raisins, gum drops, sprinkles and chocolate candies…all from the health food store. Rebecca enjoyed helping with these. But she only made it part way through decorating because she wanted to lick every piece of candy before putting it on the cookie :p  I guess she figured out how to get the treats.

Overall a great recipe. It would work well for making a gingerbread house too. The dough was really nice to work with. I only made a half recipe since it was my first try. And it made quite a few cookies. A full recipe would make a LOT.

Please note that my photos are unedited right now. So they may not be the best.

Whole Wheat Gingerbread Cookies

2/3 cup molasses (not robust)
2/3 cup packed dark brown sugar (I used organic brown cane sugar)
2 Tbsp. ground ginger
1 Tbsp. ground cinnamon
1 tsp. ground cardamom (optional, you can use allspice) (I skipped this)
1/2 tsp. ground cloves
2 tsp. baking soda
2 sticks (1 cup) unsalted butter, cut into tablespoon pieces
1 large egg, lightly beaten
3 and 3/4 cups white whole wheat flour (I used freshly ground hard winter wheat)
1/2 tsp. salt
1/4 cup all-purpose flour (I used my freshly ground wheat flour for this too)

Preheat oven to 325°F. Line 2 large cookie sheets with parchment paper.

Bring molasses, brown sugar, and spices to a boil in a 4- to 5-quart heavy saucepan over moderate heat, stirring occasionally, and remove from heat. Stir in baking soda (mixture will foam up), then stir in butter a few pieces at a time, letting each addition melt before adding next, until all butter is melted. Stir in the egg until combined; stir in white whole wheat flour and salt.

Transfer dough to a lightly floured surface and knead, dusting with as much of the 1/4 cup all-purpose flour as needed to prevent sticking, until soft and easy to handle, 30 seconds to 1 minute. Halve dough, then wrap 1 half in plastic wrap and keep at room temperature.

Roll out remaining dough to 1/4 inch thickness on a lightly floured board.

Cut out cookies with cutters; transfer to prepared sheets, arranging them about 1 inch apart.

Bake cookies in upper and lower thirds of oven; switching position of sheets halfway through baking, until edges are slightly darker, 11-13 minutes total (do not overbake—watch carefully!). Transfer cookies to racks. Cool completely. Repeat with remaining dough and scraps (re-roll once). Makes about 3 dozen medium cookies, Decorate, or eat straight up.

Sourdough Granola Muffins

I haven’t used my sourdough in a few weeks, and I’ve been trying to figure out what to make with it before it grew too much. Today I was trying to come up with an easy baking project that my daughter and I could do that would also use up a really ripe banana I had.

I thought sourdough muffins with banana. I’ve done that before in combination with both strawberries and blueberries. But I don’t have fresh berries to use up. So I thought I could do banana chocolate chip muffins.

As I gathered ingredients I also took out an open bag of butterscotch chips. Then my daughter said she wanted to use her “granola bowl” (the bowl she usually uses for “her granola” when we make it together). So I got out a little coconut to put in her bowl (she LOVES coconut).

Then I thought I guess I could add some coconut to our muffins. Then Rebecca came over to help me get out our mixing bowls and grabbed the nut chopper. I thought I guess I could add nuts too. So my muffins evovled into granola muffins!

I LOVE granola. I could eat it every day. So I figured a granola muffin must be good too. And it is!!! So good! My daughter scarfed down a whole one with lunch.

Sourdough Granola Muffins
Makes 12 muffins

1 cup whole wheat flour (I used sprouted wheat flour…really helps keep them moist)
1 tsp. baking soda
1/4 – 1/2 cup cane sugar
1/4 tsp. salt
1 egg
1 tsp. vanilla
1/4 cup oil (I used coconut)
1 cup sourdough starter
1 1/2 cups total of granola add-ins (I used raisins, chopped crispy walnuts, chocolate chips, butterscotch chips and coconut.)
1 small very ripe banana, mashed (optional)

Preheat oven to 425F.

Combine dry ingredients in small bowl. Stir in granola add-ins. Combine wet ingredients (and mashed banana) in medium bowl. Add dry ingredients to wet ones.

Mix quickly and spoon into muffin cups (I used silicon muffin cups…the muffins popped right out.).

Bake at 425 for 18-20 minutes.

Grain Free Granola (dairy free, egg free, GAPS-legal)

I’ve been cutting back on grains lately to see how that impacts my gut and my fertility. And I recently came across a recipe on Heartland Renaissance for grain free granola. I just finished off my last batch of granola the other day, so it’s time to restock. It helped that I have crispy pecans, walnuts, almonds and pumpkin seeds on hand. So everything was all set to go. I didn’t follow this recipe completely. I never measure anything when I make granola. And I didn’t heat the oil/sugar. My coconut oil is always liquid these days from the heat 😛  I just chopped the nuts together (instread of separately). Then stirred in seeds, dried fruit, coconut oil and maple syrup. Very quick prep! The verdict…awesome! It’s actually better than the versions I’ve been making lately with soaked/dried oats. I’ll just have to remember not to eat too much at once now so I don’t go totally overboard on nuts in one sitting 😛

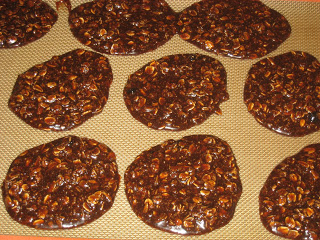
*Edited 4/7/11 – I tried making an unbaked version of this today. Worked great!! I keep the granola in the fridge, and it’s always hard anyway from the coconut oil. So I figured it wouldn’t change much if I didn’t bake it. I was right. Plus it makes less mess (no pan to clean up) and makes sure you’re not doing any harm to the wonderful crispy nuts 🙂  I only used honey to sweeten it today to make it GAPS legal. I’ll add to the recipe below to reflect this update.

This post is linked to Wheatless Wednesday at Naturally Knocked Up.
This post is linked to the Gluten Free Recipe Parade at Heavenly Homemakers.
This post is linked to Grain Free Tuesdays at Hella Delicious.

Grain Free Granola

2 cups almonds (I used a combo of crispy almonds, walnuts and pecans)
2 cups walnuts
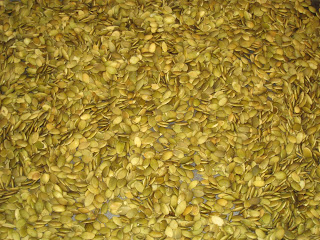
1 cup pumpkin or sunflower seeds
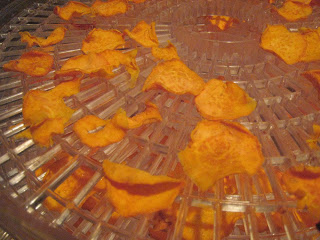
1 cup dried fruit of your choice, chopped into bite size pieces (I used a mix of homemade dried fruit – strawberries, pineapple, blueberries, cherries and raisins.)
1 cup unsweetened shredded coconut
1/3 cup sesame seeds, optional (I didn’t add these.)
1/2 stick butter or coconut oil or combination of both (I have used both. A combo works very well)
1/2 cup brown cane sugar, sucanat, muscovado sugar, honey or maple syrup (I have used maple syrup and honey. A combo of sweeteners works well.)
1-1/2 tsp. vanilla (I didn’t add this, but it would be good)

Preheat oven to 300 degrees Fahrenheit.

In a food processor, place the 2 cups of almonds and pulse a few times until they are chopped up. Some pieces will be much finer than others, which is what you want. Those little, fine pieces will remind you more of what granola is supposed to feel like (i.e. mimics a cereal grain in texture) while the big chunks are welcome as well. Pour almonds into a large mixing bowl. Do the same thing with the walnuts. (I did all the nuts at the same time.) Add the remaining seeds, fruit and coconut to the bowl and mix well.

In the meantime, combine butter/oil, sugar and honey over heat until combined. Take off heat and stir in vanilla.

Pour the hot liquid into the nut mixture and stir well until evenly combined and all pieces are coated.

Pour the granola out onto a greased (I use silpat), walled cookie sheet and spread out to an even layer. Bake in the oven for 15-20 minutes until you can smell the nuts roasting. When done, remove and allow to briefly cool on the cookie sheet before decanting into your preferred storage jar while still warm, taking care not to allow it to cool completely on the cookie sheet as it can stick.

GAPS-legal Granola (modified, unbaked version)

4 cups any combination of crispy nuts (I have used walnuts, pecans, almonds, hazelnuts, macadamia nuts, brazil nuts and peanuts)
1 cup crispy pumpkin or sunflower seeds
1 cup dried fruit of your choice, chopped into bite size pieces or raisins
1 cup unsweetened shredded coconut
1/3 – 1/2 cup coconut oil or butter or combination of both (dairy free w/o butter)
1/2 cup honey

In a food processor, place the nuts and pulse a few times until they are chopped up. Some pieces will be much finer than others, which is what you want. Those little, fine pieces will remind you more of what granola is supposed to feel like (i.e. mimics a cereal grain in texture) while the big chunks are welcome as well. Pour  into a large mixing bowl. Add the remaining seeds, fruit and coconut to the bowl and mix well.
In the meantime, combine butter/oil and honey over heat until combined.
Pour the hot liquid into the nut mixture and stir well until evenly combined and all pieces are coated.

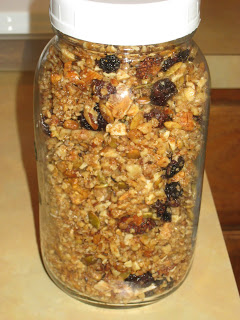
Scoop granola into glass jars and let cool. Store in the refrigerator or freezer (for long term storage). Serve right from the fridge or let sit at room temp for a bit to soften. Serve in yogurt/kefir, with milk or plain.

Whole Wheat Crackers

Since we’re “taking it easy” around here I decided to do some baking with Rebecca today. Making crackers was one of my monthly goals, so I went with that. Laura on Heavenly Homemakers has a super simple recipe. Only a few ingredients, easy to do with kids, quick, not much mess. Just what I like. And they taste great! I’m sure mine have a little different texture since I use sprouted flour. But they are still very good. I only made a half recipe. That was enough for one full baking sheet of crackers. I had to increase the water and oil a bit to get a ball of dough. That could be due to the flour. They kind of remind me of saltines. But MUCH healthier. Maybe I’ll be glad I have them around in a few weeks 😉

Whole Wheat Crackers

2 cups whole wheat flour (I used bulgur flour)
1/2 tsp. salt
1/2 tsp. baking soda
1/2 tsp. baking powder
1/4 cup oil (I used coconut oil)
1/2 cup water

Mix flour, salt, baking soda and baking powder. Stir in oil and water until a ball of dough has formed. Roll dough very thin, about 1/16 inch thickness on a cookie sheet. (I find it’s easiest to roll dough between two pieces of parchment paper.) Use small heart cookie cutter to shape crackers. Bake in a 350 degree oven for 12 minutes. Turn off the oven, but allow crackers to sit inside while it cools. This will dry out the crackers so that they become crispy.

For square crackers, use a pizza cutter to cut the dough into 1 inch squares after rolling it onto a cookie sheet.

Sauerkraut

Last week I made my first batch of sauerkraut. I finally got around to tasting it today 🙂  Very good! It tastes like pickles to me. I just used the basic recipe in Nourishing Traditions. I used purple cabbage. Very simple (aside from a good arm workout pounding cabbage for 10 min.). Very good. And so great for your gut!! Plus it gets better with age. So it should taste really good in a few months 🙂

Sauerkraut
Makes 1 quart

1 medium cabbage, cored and shredded (I used my food processor for this)
1 Tbsp. caraway seeds
1 Tbsp. sea salt
4 Tbsp. whey, if not available use an additional 1 Tbsp. salt

In a bowl, mix cabbage with caraway seeds, sea salt and whey. Pound with a wooden pounder or a meat hammer for about 10 minutes to release juices. Place in a quart-sized, wide-mouth mason jar and press down firmly with a pounder or meat hammer until juices come to the top of the cabbage. The top of the cabbage should be at least 1 inch (2,5cm) below the top of the jar. Cover tightly and keep at room temperature for about 3 days before transferring to cold storage. The sauerkraut may be eaten immediately, but it improves with age.

Crispy Pumpkin Seeds

I’ve made plenty of crispy nuts, but yesterday I did my first batch of seeds. I did pumpkin seeds. Yum!!! So salty and crunchy. A great, healthy snack. And a great add in for homemade granola. Same process for making crispy nuts, just different ratios.

Crispy Pumpkin Seeds

4 cups of raw, hulled pumpkin seeds
2 Tbsp. sea salt
filtered water

Mix water, salt and seeds. Soak at least 7 hours (I soaked mine for close to 24 hours). Dry in dehydrator or oven at lowest setting (150) until completely dry and crisp.

Whole Wheat Blueberry Muffins

I’m trying to use up the perishable food in our fridge before we leave for vacation. And that includes some plain yogurt. Yesterday morning I made a batch of blueberry sourdough muffins. And Justin asked if I was going to make “regular” blueberry muffins. So I did a search for blueberry muffins that use yogurt and found a great recipe from Simply Recipes. I used whole wheat flour instead of AP. They turned out great! So moist. Rebecca and I had one yesterday morning after baking them…even though we had just had some of the sourdough muffins 😉  A great recipe. A great way to use fresh blueberries. And a great way to use up plain yogurt. I’m assuming the original recipe intends you to use fat free or low fat. I use whole 🙂  The original recipe says it makes 12-16 muffins. I got 22 regular size muffins out of this…filling each muffin cup to the top. Some crispy walnuts would be really good in these. You could also add a cinnamon-sugar topping if you like a really sweet muffin.

Whole Wheat Blueberry Muffins
makes 18 – 22 muffins

3 cups flour (I used whole wheat. You can use all purpose.)
1 Tbsp. baking powder
1/2 tsp. baking soda
1/2 tsp. salt
10 Tbsp. butter, softened (this was impromptu baking, so my butter was cold. I had to warm the butter on the stove. It was partly melted, partly soft. Still worked fine.)
1 cup sugar
2 large eggs
1 tsp. vanilla (This isn’t in the original recipe, but I added it to mine.)
1 1/2 cups plain yogurt (I used whole)
1 tsp. lemon zest
1 1/2 cups blueberries (fresh or frozen, thawed)
1 Tbsp. flour (if using frozen blueberries)

Heat oven to 375. Whisk together the flour, baking powder, baking soda and salt. Set aside. In large bowl cream butter and sugar. Add eggs one at a time, beating after each one. Beat in lemon zest (and vanilla). Add flour mixture and yogurt alternately, 1/3 at a time, beating after each addition, just until blended. Do not over mix. Fold in berries (if using frozen, defrost, drain, and coat with a light dusting of flour.)

Pour batter into greased muffin pan or muffin cups. Bake 25-30 min., until golden brown on top and toothpick comes out clean. Let cool 5 min. and remove from pan.

Sweet Potaote (Veggie) Chips

I’ve been wanting to make some healthier non-sweet snacks. And continue to increase my veggie intake. So I decided to start experimenting with veggie chips. So far I’ve only tried making them in my dehydrator. I made zucchini chips earlier this week (which I forgot to take a picture of). They turned out well. Yesterday I made sweet potato chips. Those are really good too! And both are raw, so they still have most of their nutrients. I’m still experimenting and want to try other veggies too. I had some boughten carrot chips recently that I love, so I want to try that for sure. For the zucchini chips I didn’t add anything besides sea salt. For the sweet potato chips I added a little olive oil. I think that worked well. My only issue is figuring out how to keep them crisp. They are crisp right out of the dehydrator, but then they get a little soft. So I’ll have to keep experimenting. And try other ways of making them. I want to try cooking them in coconut oil or palm shortening. I’m excited to have these to take on our trip. A tastey, healthy treat!

Sweet Potato (Veggie*) Chips

Sweet potato, peeled, sliced very thinly (I used my mandolin/food slicer on its lowest setting)
Olive oil
Sea salt

Toss potato slices with oil and salt. Place in single layers on dehydrator trays. Cook until completly dry and crisp.

*The thickness of the veggie depends on the moisture content. So you’ll have to experiment. For sweet potatoes very thin slices work well (low moisture content veggie). For zucchini you need much thicker slices – 1/4 – 1/2″ (high moisture content veggie).

No Bake Carob Cashew Cookies

It’s been a while since I’ve actually posted a recipe. Things have been slightly crazy here lately. So there hasn’t been much new…or much of anything at all going on in my kitchen. But I’m getting back into the swing of things now that I’m not stuck on the couch all day. This is actually something I made last week, but I haven’t been able to be at the computer much since then. Last week I decided to experiment with some no bake cookies. I figured it was a good way to get a few cookies in the house without using the oven. And it’s easy for Rebecca to help. I just used my basic no bake cookie recipe. But I used carob instead of cocoa and homemade cashew butter instead of peanut butter. The result…they taste great…but they are so gooey. I have to store them in the freezer to keep them hard. Something about this combo just didn’t quite work right. I’m guessing it’s the cashew butter. Anyway, they look normal and taste fine. And it was a fun experiment. I’ll post my regular cookie recipe. I got it in 6th grade in home economics class 🙂  I’ve made it a million times with no problems…these are generally pretty fool proof. You just have to use the right ingredients.

Chocolate No Bake Cookies

1 cup sugar
1/4 tsp. salt
2 Tbsp. cocoa (or carob)
2 Tbsp. butter
1/4 cup milk
1 cup oatmeal (I used rolled oats this time…just realized I’ve used instant in the past…that may have been part of the problem)
1/4 cup peanut butter
1/2 tsp. vanilla

Mix sugar, salt and cocoa in a medium sauce pan.

Add butter and milk. Bring to a boil, stirring constantly. Continue to cook and stir about 1 1/2 minutes.

Remove from heat. Add remaining ingredients and mix well. Drop by spoonfuls onto wax paper lined baking pan. Chill.