Home » Kid-friendly Recipes » snack » Page 27

Category: snack

These scotcheroos come together in about ten minutes, using real, allergen friendly ingredients. A simple, delicious dessert with no baking required!

Quick And Easy Scotcheroos {Gluten, Dairy, Egg and Nut Free!}


These scotcheroos come together in about ten minutes, using real, allergen friendly ingredients. A simple, delicious dessert with no baking required!

These scotcheroos come together in about ten minutes, using real, allergen friendly ingredients. A simple, delicious dessert with no baking required!

I grew up eating scotcheroos.

My mom still makes them all the time. She brings them to the neighbors, brings them for fellowship at church, etc.

But I haven’t made them or had one in years, though. Why? They are filled with not-so-good stuff. The main 3 things…Rice Krispies, corn syrup and regular peanut butter (hydrogenated oils and GMO nuts.

These scotcheroos come together in about ten minutes, using real, allergen friendly ingredients. A simple, delicious dessert with no baking required!

A Fresh Look.

I like to update classic recipes using real ingredients. So I gave these scotcheroos a makeover.

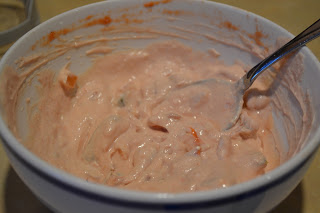
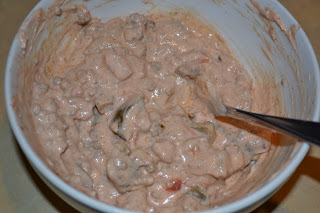
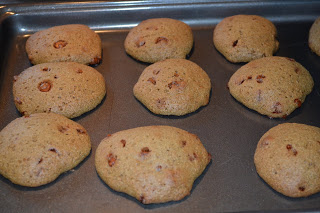
I use plain puffed brown rice, cane sugar, honey and sunbutter in the base. Then I simply melt allergen free chocolate chips for the topping.

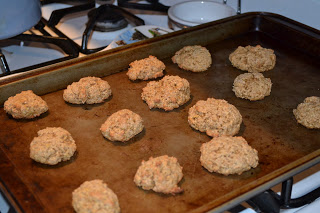
Even with three kids trying to help these took about ten minutes from start to finish. There is no baking required. Just a few minutes at the stove. The mix and pour.

These scotcheroos come together in about ten minutes, using real, allergen friendly ingredients. A simple, delicious dessert with no baking required!

And, yes, they got a huge two thumbs up from everyone! Be forewarned…one batch may not be enough.

Scotcheroos also make a great party treat because they are free of gluten, corn, eggs, dairy, nuts and soy!

These scotcheroos come together in about ten minutes, using real, allergen friendly ingredients. A simple, delicious dessert with no baking required!

Kids In The Kitchen.

This may be one of our new favorite treats. And pretty soon my kids can make it without my help since they are learning to cook through the Kids Cook Real Food ecourse. My five and eight year olds can cook at the stove. Even my two year old can measure and pour quite well.

Ready for a special dessert with no allergens and very little effort? I’ve got you covered!
These scotcheroos come together in about ten minutes, using real, allergen friendly ingredients. A simple, delicious dessert with no baking required!

 
Quick And Easy Scotcheroos
Serves 16
A simple allergy friendly bar that requires no baking.
Write a review
Print
Ingredients
  1. 1/2 cup organic cane sugar or sucanat
  2. 1/2 cup honey
  3. 1/2 cup plain sunbutter
  4. 3 cups organic puffed brown rice
  5. 1/2 tsp, vanilla (optional)
  6. 1 1/2 cup chocolate chips
Instructions
  1. Mix sugar and honey in a large saucepan. Heat and boil until sugars are dissolved (about 2 minutes).
  2. Remove from heat. Stir in su butter, rice and vanilla.
  3. Spread in a greased 9" square pan.
  4. Melt the chocolate chips in a double boiler until smooth. Poor over rice mixture. Let cool completely before cutting (in the refrigerator works best).
Just Take A Bite https://justtakeabite.com/


These scotcheroos come together in about ten minutes, using real, allergen friendly ingredients. A simple, delicious dessert with no baking required!

Crispy Hazel Nuts

In addition to macadamia nuts I soaked/dried some hazel nuts. I’m not sure I’ve ever even had a hazel nut. But I wanted to try it. Same process. And another yummy snack 🙂  I’m having fun experimenting with different nuts (since I LOVE nuts). Maybe next I’ll try Brazil. I hear those are quite healthy too.

Crispy Hazel Nuts

4 cups of raw nuts
1 Tbsp. unrefined sea salt
filtered water

Mix nuts with salt and water and leave in a warm place for at least 7 hours or overnight (I generally soak them for 24 hours.). Drain. Spread nuts on baking pan. Place in oven on lowest setting (150 degrees) for 12 to 24 hours (or in a dehydrator), stirring once in a while, until completely dry and crisp. Store in an airtight container. The nuts will keep longer in the refrigerator or freezer.

Crispy Macadamia Nuts

This week I tried soaking a couple new kinds of nuts. One was macadamia. After doing my post on nuts and reading about how healthy they are I wanted to try some right away. I don’t think I’ve eaten one in years. Boy are they good! I only did a small batch to try them out. I’ll have to stock up on more for sure. Same process as most nuts. Soak with water and salt. Dry.

Crispy Macadamia Nuts

4 cups raw macadamia nuts
1 Tbsp. unrefined sea salt
filtered water

Mix nuts with salt and water and leave in a warm place for at least 7 hours or overnight (I generally soak them for 24 hours.). Drain. Spread nuts on baking pan. Place in oven on lowest setting (150 degrees) for 12 to 24 hours (or in a dehydrator), stirring once in a while, until completely dry and crisp. The macadamia nuts absorb a lot of water. It took over 24 hours to get mine completely dry. Store in an airtight container in the refrigerator or freezer. Macadamia nuts don’t last long at room temp.

Grain Free Muesli

I recently made muesli for the first time. And it was really good! But my tummy doesn’t handle oats very well. So I can’t eat that. Then I came across this recipe on Gluten Free Diva for a grain free version of muesli. I tried it this morning. Awesome!! It’s basically the same ingredients I use for my grain free granola, except you don’t add fat/sugar and bake it. So it’s super easy to make. Only takes a few minutes. Plus this uses fresh fruit. You can add whatever you like to this recipe…as long as it’s not grains 🙂  And you can make a big batch to have on hand and just add fresh fruit when you eat it. It will freeze very well. This is a great option for quick breakfasts, summer breakfasts (when you don’t want anything hot) or if you’re a long time cereal lover (like me:) but don’t want to eat that junk anymore. This was the closest thing I’ve had to a bowl of cereal in a LONG time (I think I might be going on a year now!). What a treat! And I don’t have to worry about it killing my stomach. Love it. I didn’t actually measure anything. I just added what looked good. Adjust to your taste. I’ll post the original recipe (for 1 serving) with some of my adjustments in ().

Grain Free Muesli

3 strips of dried banana AND/OR 3 – 6 chopped dates (I used prunes)
one small handful dark raisins (I used golden raisins)
7 raw almonds, chopped (I used a combo of crispy almonds, crispy pecans and crispy walnuts)
7 raw pecan halves, chopped
handful raw sunflower seeds (not roasted or salted) (I used crispy pumpkin seeds)
1 – 2 tablespoons grated unsweeted coconut
one chopped apple (I gave Justin some apple chunks in his. I left them out of mine.)
about 6 – 8 blackberries or the berry of your choice (I used strawberries. Blueberries would be very good…great option in the summer.)

Mix all ingredients (except fresh fruit). Store in a closed container (freeze for long term storage or keep at room temp for shorter term). When ready to serve mix in fresh fruit. Top with milk or stir into yogurt.

Green and Yellow Deviled Eggs (Packers Eggs)

Since my husband is from WI and is a huge GB Packers fan…and they were in (and won!) the Super Bowl  yesterday I wanted to make something fun for the occasion. I decided to make yellow and green deviled eggs. I made regular deviled eggs for the yellow. And I added avocado for green. Again, I didn’t really measure anything. I’ll try to give a rough estimate. I only made 4 eggs total. You can increase the recipe for a large group. I ate leftovers for breakfast this morning. Yum! Deviled eggs are good any time of day 🙂

Green Deviled Eggs

2 hardboiled eggs
1/4 – 1/2 ripe avocado
1 Tbsp. mayo (preferable homemade)
salt to taste

Yellow Deviled Eggs

2 hardboiled eggs
2 Tbsp. mayo (preferably homemade)
1 – 2 tsp. mustard
salt to taste

Split eggs in half. Put whites in a serving dish. Put yolks in a food processor (I use a mini processor for such small quantities). Process for a few seconds. Add remaining ingredients. Blend. Adjust to taste. Fill egg whites with yolk mixture. Chill.

*Note – the green eggs will turn color after a while because of the avocado. So don’t make them too far in advance.

Grain Free Salmon Cakes

Yesterday I wanted something light for lunch since I knew we’d have a bigger, snacky dinner. And I’m trying to get more seafood into my diet right now. So I decided to make salmon cakes. I’ve made them before…but a recipe that takes some extra work and prep ahead. I wanted something easy. So I threw these together using what I had on hand. Simple, quick, healthy. And delicious!! All 3 of us liked them. And I’m excited to eat the leftovers. I cooked a couple salmon filets to use in these. You could used canned salmon. I didn’t measure anything. But I’ll try to give rough estimates of what I added.

My daughter LOVES these (and she can be picky about fish). So if you are trying to get your kids to eat more healthy seafood give these a try.

Salmon Cakes
makes ~ 7 cakes

2 (6 oz.) salmon filets, cooked OR 1 (14 oz.) can salmon
1 egg (optional)
1/4 cup mayo (preferably homemade)
1/2 – 1 tsp. Old Bay seasoning
1/2 – 1 tsp. sea salt

1/4 cup – 1/2 cup almond flour and/or coconut flour

Crumble salmon in a bowl. Add egg, mayo and seasoning. Mix well. Form into balls. Roll in flour and flatten slightly. At this point you can cover and refrigerate them (helps to firm them up/hold them together before cooking. and allows you to prep them ahead) or cook them immediately.

To cook, heat a large skillet and add butter, coconut oil, palm shortening and/or lard. Cook salmon cakes in oil/butter for about 5-7 min. per side.

Serve plain or with tartar sauce (homemade mayo mixed with a little sweet pickle relish).

Beefy Cream Cheese Salsa Dip (Taco Dip/Topping)

I wanted to try one of the dip recipes from Heavenly Homemakers last night. I was debating between the cream cheese salsa dip and the simple chip dip. When I looked at the recipes I realized I couldn’t do the chip dip because I don’t have any sour cream. But I did have leftover taco meat to use up. So I kind of combined the recipes/made it my own and made beefy cream cheese salsa dip. Or taco dip. It’s Laura’s cream cheese salsa dip with taco meat mixed in. Turned out great!!! A very easy and fun food. It only took a few minutes to make (since I already had the meat cooked, just had to warm it a little). And it’s filling enough (meat, cheese, veggies) to make it part of a main dish. You can use it as a dip with chips or veggies. Or even put it over rice or pasta. It’s also very healthy. I used homemade cream cheese, homemade salsa and taco meat with homemade taco seasoning. I didn’t actually measure anything. I just added what looked right. Note that the top picture is just the cream cheese salsa dip. The bottom picture has the meat added.

Beefy Cream Cheese Salsa Dip (Taco Dip/Topping)

1 (8 oz.) package cream cheese (or homemade)
1 ¼ cups salsa
1/2 – 1 lb. taco meat (adjust to your taste)
Tortilla chips, veggies, rice or pasta

Lay cream cheese out on counter for 1-2 hours to soften. Put softened cream cheese and salsa in a bowl and mix with beaters (I just used a spoon.) until thoroughly combined. Warm meat. Stir into cream cheese mix. Serve with tortilla chips (or fresh veggies or over rice or pasta).

Cinnamon Vanilla Cookies

Yesterday Rebecca said she wanted to bake. And since we had been looking at her new Strawberry Shortcake coloring book she told me she wanted to make strawberry cookies and vanilla cookies. When she got up from her nap the first thing on her agenda was to make the cookies. I quickly started searching for strawberry cookie recipes. Then she said she just wanted vanilla. So I did a quick search for “vanilla cookies” with nothing really in mind. This is the first recipe I came across. It had no comments, no pictures, nothing. But it sounded very easy and quick. And that’s what we needed. I had no idea if these would turn out at all. There isn’t even any fat (butter/oil) added to the cookies. But I figured I’m an experienced baker and might be able to make it work. So I decided to just go for it.

I have to say this is the fastest cookie I’ve ever made. And Rebecca could help with all of it. I only made a half recipe since I thought it might be a flop. After mixing the dough there was not nearly enough moisture (as I expected with only 1 egg as the liquid). So I debated about what to add and decided to add a little milk. That gave a soft dough. I dropped them onto the cookie sheet and went for it. They’re not bad. Very mildly sweet. A soft cookie. Rebecca seemed to really like them. It would actually be a good cookie for a young child/toddler because it’s not too sweet or crispy. And it uses all good ingredients. A half batch made about 15 cookies. I think if I make them again (which is likely on those days where Rebecca decides she wants to bake all of a sudden…and this recipe doesn’t require any softened butter, special ingredients, planning ahead) I might try adding cinnamon. Or some kind of chips (chocolate or butterscotch).

I’ll post the recipe the way I made it…using whole wheat flour and adding milk. I also adjusted the sugar since my brown sugar is like one big block. So I had to use regular cane sugar. Overall a decent cookie. Great recipe for baking with young kids. And Rebecca got her “vanilla cookies.” 🙂  She seemed very satisfied with what we came up with.

**Edited 9/4/11 – I made a batch of cinnamon vanilla cookies yesterday. They turned out great! I added cinnamon to the dough. And mixed in cinnamon chips. The cinnamon really improves the taste of these cookies. I bet they would be really good with a little cinnamon glaze. Then they would be triple cinnamon cookies. Maybe we’ll try that next time. I made a double batch this time and made the cookies a little bigger. I got 20 good sized cookies. I’ll update the recipe.

Cinnamon Vanilla Cookies
makes 10 cookies

3/4 cups whole wheat flour
3/8 cups sucanat
1/4 tsp. baking soda
1/4 tsp. salt
1 tsp. vanilla extract
1 egg
1/8 – 1/4 cup milk (enough to moisten dough)
2 tsp. cinnamon
1/2 cup cinnamon chips

Mix all ingredients (except chips) in one bowl (I just mixed it with a wooden spoon). Stir in cinnamon chips. Drop by spoonfuls onto ungreased cookie sheet and bake at 425 degrees for 8-10 minutes (I did 8 min.).

Muesli

In my search through my Barefoot Contessa cookbooks this month I came across a recipe for muesli that sounded good and easy. I’m always looking for new breakfast ideas to give us a little variety. This was super easy and really good. It’s a lot like granola, just softer. And I LOVE granola. Unfortunately oats don’t agree with my tummy too well. So I know I have to limit my intake. But this is a tasty breakfast option once in a while. I love how easy it is too. I’ve seen other versions of muesli that are soaked a lot longer…and probably better for you because of that. So I’ll have to try other recipes sometime. But this was a great first attempt at muesli. And I actually used one of my cookbooks this month 🙂  The recipe calls for strawberries and raspberries. I just used strawberries. Any berry would work really well. I also added a few extra raisins. If you are trying to find breakfast options to replace cold cereal this is a good one. And it’s pretty versatile. You could add in other things besides nuts and raisins, like coconut and seeds.

Muesli with Red Berries
serves 2 (fairly small servings)

1/3 cup quick cooking oatmeal
1 1/2 Tbsp. coarsely chopped toasted hazelnuts (I used crispy walnuts)
2 Tbsp. granola with raisins (I used homemade)
pinch of salt
1/3 cup hottest tap water
1 Tbsp. honey (raw is best)
4 large ripe strawberries, hulled and sliced
6 to 8 fresh raspberries
2 tsp. cane sugar
greek yogurt (I used full fat plain yogurt)

Mix oatmeal, nuts, granola and salt in a bowl. Pour the water and honey over the mixture, stir and set aside to soak for 12 – 15 minutes.

Meanwhile, toss the berries and sugar in a bowl and allow to macerate. (If you want to cut back on sugar you could skip this step and just use fresh fruit. It would still taste very good.)

When ready to eat, divide the muesli between 2 bowls. Top with berries and yogurt.

Chocolate Ice Cream…Homemade Frosty

I’ve made homemade ice cream quite a few times now. Especially now that we have raw milk and good cream (that I don’t have to pay an arm and a leg for). But I’ve never tried chocolate. So yesterday afternoon I experimented and came up with a recipe. I didn’t make a huge batch since I didn’t have a full 3 cups of cream, but Rebecca really wanted to make ice cream 😛  So we used what we had. I’ll try to adjust quantities for a full recipe. It turned out really well! I intentionally didn’t make it super chocolatey. It’s kind of a light chocolate…and tastes just like a Wendy’s Frosty 🙂  All 3 of us love it. I used cocoa and chocolate extract for the chocolate flavor. You could probably use carob in place of the cocoa…and adjust the extract to get the flavor you like.

Chocolate Ice Cream (Healthy Frosty)

3 egg yolks
1/2 cup maple syrup
2 tsp. vanilla extract
1 – 2 Tbsp. cocoa or carob powder
2 tsp. chocolate extract (adjust to your taste)
1 Tbsp. arrowroot
3 cups heavy cream, not ultrapasteurized, preferably raw

Beat egg yolks in 4 cup measuring cup. Mix in arrowroot until lumps are gone. Whisk in remaining ingrdients. Pour into an ice cream maker and process according to instructions (about 15 – 20 min. in my Kitchen Aid ice cream maker attachment). Transfer to a shallow plastic container, cover and store in freezer.

This is awesome served immediately. It’s like soft serve/like a Frosty. It’s great after it’s been in the freezer for a while too.