Home » Kid-friendly Recipes » dairy free » Page 19

Category: dairy free

Gluten Free Dairy Free Strawberry Rhubarb Muffins

gf df strawberry rhubarb muffins

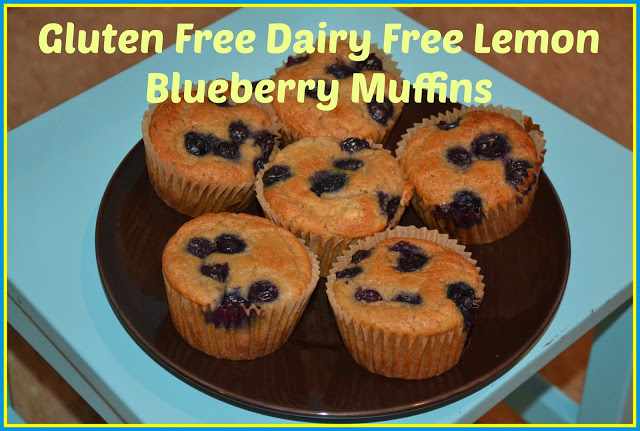
When it’s rhubarb season you have to make at least one thing with the classic strawberry rhubarb combination. Recently I made a batch of strawberry rhubarb muffins.

I love the combination of sweet and tart. I added a little cinnamon sugar topping to give them an extra punch of flavor.

I also love that they are so simple to make! It takes less than ten minutes to get them in the oven.

These muffins are very allergen-friendly with no gluten, dairy, rice or nuts. You don’t even have to use a milk substitute.

Make a big batch of muffins, serve some for breakfast and free some for later. It’s a great way to use fresh, spring rhubarb.

gf df strawberry rhubarb muffins 2

Gluten Free Dairy Free Strawberry Rhubarb Muffins
Yields 12
A sweet and tart muffin that is gluten, dairy, rice and nut free.
Write a review
Print
Ingredients
  1. 1/2 cup amaranth flour*
  2. 1/2 cup sorghum flour*
  3. 1/2 cup tapioca flour*
  4. 1/2 cup coconut sugar, sucanat or cane sugar
  5. 2 Tbsp. maple syrup
  6. 1/2 tsp. sea salt
  7. 1/2 tsp. baking soda
  8. 1 tsp. aluminum free baking powder
  9. 1 tsp. vanilla
  10. 3 eggs
  11. 2 Tbsp. melted coconut oil (or butter or palm shortening)
  12. 1/4 c up water or milk substitute
  13. 1/2 cup strawberries, chopped
  14. 1/2 cup rhubarb, chopped
  15. 1/2 tsp. cinnamon (optional)
Topping (optional)
  1. 1/2 tsp. cinnamon
  2. 2 tsp. coconut sugar, sucanat or cane sugar
Instructions
  1. Heat oven to 350 degrees F. Grease muffin tin or line with baking cups.
  2. In a large bowl combine the flour, sugar, syrup, salt, soda, powder, vanilla, eggs, coconut oil, cinnamon and water. Mix until well combined.
  3. Stir in the strawberries and rhubarb.
  4. Fill muffin cups 3/4 full with batter.
  5. Combine the cinnamon and sugar. Sprinkle a little on each muffin.
  6. Bake for 35 minutes, until golden brown and baked through.
  7. Allow muffins to cool 5-10 minutes before serving.
Notes
  1. *You can substitute any gluten free flour for the flours listed. It works best to include at least one "white" flour, such as tapioca or white rice. Using a combination of flours gives a more neutral flavor.
Just Take A Bite https://justtakeabite.com/
 

In order for me to support my blogging activities, I may receive monetary compensation or other types of remuneration for my endorsement, recommendation, testimonial and/or link to any products or services from this blog.

Rhubarb Pecan Ice Cream

Rhubarb isn’t just for cakes and cobblers. You can also use it to make an amazing rhubarb pecan ice cream! Wow all of your friends and family.

Rhubarb pecan ice cream | Just Take A Bite

As soon as the weather gets warmer and our milk share volume goes up I’m anxious to make ice cream.  It’s definitely a family favorite.

Recently I combined my love of creating ice cream with my need to use rhubarb. I came up with rhubarb pecan ice cream.

The result is delicious!!! Even my six-year old LOVES it. The ice cream is plenty sweet. But it has a hint of tartness from the rhubarb and a nice crunch from the crispy pecans.

If you can’t eat nuts you can absolutely leave them out. The rhubarb alone gives a wonderful flavor.

Are you dairy free? Swap coconut milk for the cream. This ice cream is a unique spring treat no matter what way you make it.
Rhubarb pecan ice cream | Just Take A Bite

Rhubarb Pecan Ice Cream
A fruity ice cream with crunchy pecans.
Write a review
Print
Ingredients
  1. 1 1/2 cups rhubarb, diced
  2. 3 Tbsp. honey, maple syrup, coconut sugar or cane sugar
  3. 2 tsp. butter or coconut oil
  4. 2 cups cream (or coconut milk)
  5. 1/2 cup whole milk (or coconut milk)
  6. 1/3 - 1/2 cup honey, maple syrup, coconut sugar and/or cane sugar*
  7. 1 Tbsp. vanilla
  8. 1/2 tsp. sea salt
  9. 1 Tbsp. tapioca flour or arrowroot (optional)
  10. 1-3 egg yolks (optional)
  11. 1/4 - 1/2 cup liquid reserved from cooked rhubarb
  12. 1/2 cup chopped crispy pecans
Instructions
  1. In a small pan sautee the rhubarb in 2 tsp. fat and 3 Tbsp. sweetener over medium heat. Cook until the rhubarb is soft and released liquid (about 10 minutes).
  2. Allow the rhubarb mixture to cool. Drain up to 1/2 cup liquid off the rhubarb to use in the ice cream batter.
  3. Combine the cream, milk, sweetener, vanilla, salt, flour, egg yolks and rhubarb liquid in a blender.
  4. Blend until well mixed. Taste and adjust sweetness and rhubarb liquid to taste.
  5. Process the ice cream batter in an ice cream maker (I use a Kitchen Aid attachment - it takes 15 - 20 minutes).
  6. During the last 1-2 minutes of processing add the cooked rhubarb.
  7. Transfer the ice cream to a freezer-safe container. Stir in the pecans.
  8. Freeze the ice cream until solid.
Notes
  1. *Using a combination of sweeteners for the ice cream gives a more neutral flavor.
  2. *The batter should be slightly sweeter than how you want the final product to taste. The sweetness will go down as the ice cream freezes.
Just Take A Bite https://justtakeabite.com/
 

In order for me to support my blogging activities, I may receive monetary compensation or other types of remuneration for my endorsement, recommendation, testimonial and/or link to any products or services from this blog.

Rhubarb Quinoa Breakfast Porridge (gluten free, dairy free, nut free, egg free)

rhubarb quinoa breakfast porridge

You’ve made muffins and coffee cake and pie. But you still have rhubarb and don’t know what to do with it. How about serve it for breakfast?

Rhubarb is a very versatile vegetable. If you pair it with a healthy, gluten free grain like quinoa you’ve got a power-packed breakfast.

This breakfast porridge is slightly tart and slightly sweet. It can be served warm or cold. You can make it fresh or prepare it in advance. You can serve it as-is or add all sorts of fun things for more texture and flavor. I added cranberries, raisins, butter and milk to mine. I also served some chopped nuts on the side for my husband.

If you don’t like or don’t tolerate quinoa you can easily swap it for oatmeal or rice.

Rhubarb isn’t just for desserts. It makes a great addition to your breakfast!

rhubarb quinoa breakfast porridge 2

Rhubarb Quinoa Breakfast Porridge
Serves 2
A fun and healthy rhubarb-flavored breakfast that is gluten, egg, dairy and nut free.
Write a review
Print
Prep Time
5 min
Cook Time
30 min
Prep Time
5 min
Cook Time
30 min
Ingredients
  1. 1/2 cup quinoa
  2. 1 cup water
  3. 1/2 tsp. cinnamon
  4. 1/4 tsp. nutmeg
  5. 1 Tbsp. maple syrup or honey
  6. 1 1/2 cups rhubarb, diced
  7. 2 tsp. butter or coconut oil
  8. 3 Tbsp. coconut sugar, sucanat, honey or maple syrup
  9. optional add-ins: dried fruit, nuts, milk, butter, coconut oil
Instructions
  1. Soak the quinoa in water for 1 - 24 hours. Drain and rinse.
  2. Bring 1 cup water to a boil in a medium pan. Add the drained quinoa, cover and simmer for 12 minutes.
  3. Remove the pan from the heat and keep covered for 15 minutes.
  4. While the quinoa is cooking, in a small pan over med-low heat cook the rhubarb, butter and 3 Tbsp. sweetener until the rhubarb is tender (about 10 minutes), stirring periodically.
  5. After the quinoa and rhubarb are prepared, poor the rhubarb mixture into the quinoa and stir.
  6. Add cinnamon, nutmeg and 1 Tbsp. syrup.
  7. Add any optional add-ins you desire (if serving immediately).
  8. Serve immediately or store in the refrigerator until ready to serve.
Notes
  1. This can be prepared the day before and served cold or quickly reheated on the stove. If preparing in advance, add the optional ingredients just before serving.
  2. You can add other fruits (strawberries, cherries, etc.) to the cooked rhubarb for a sweeter flavor.
Just Take A Bite https://justtakeabite.com/
 

In order for me to support my blogging activities, I may receive monetary compensation or other types of remuneration for my endorsement, recommendation, testimonial and/or link to any products or services from this blog.

If you order by clicking on any of my Tropical Traditions links and have never ordered from Tropical Traditions in the past, you will receive a free book on Virgin Coconut Oil, and I will receive a discount coupon for referring you.

Decadent Dairy-Free Chocolate Fudge Pudding | Easy and Kid-Friendly!

DF pudding

Now that our milk share is back to the full three gallons a week I’ve been able to make some extra treats with it like ice cream, yogurt and pudding. It has been fun and delicious.

But making all of these tasty dairy treats makes my little guy feel left out.

Yesterday I ate some chocolate pudding. He kept asking if he could have a bite. So I promised him I’d try to make a dairy-free version just for him.

Now that my son can have eggs pudding is very doable. So I set to work right away experimenting. And I love the results!

I’ll be honest – I think the dairy-free version I made is even better than the dairy version! It’s that good. I was also very surprised that even though I used coconut milk it does not taste like it. So even if you don’t have to be dairy-free this is a great dessert. You won’t know the difference.

df pudding collage

When my son got up from his nap I told him I had made pudding for him. His eyes lit up like it was Christmas. When he took his first bite he exclaimed, “This is my favorite I so wanted!” After a few bites he kept saying, “It’s ‘dewitus’!” (delicious)  He definitely approved. Though now he wants to eat pudding for every meal.

If you are looking for an easy and decadent gluten and dairy-free dessert this is it. It only takes about ten minutes to prepare. Plus it’s got good stuff in it. Maybe I’ll freeze my next batch for dairy-free pudding pops. Yum!

DSC_1953

Decadent Dairy Free Chocolate Fudge Pudding
Serves 4
A rich, chocolate pudding that is both gluten and dairy free.
Write a review
Print
Ingredients
  1. 2 egg yolks
  2. 1 cup coconut milk
  3. 3/4 cup oat milk (or any milk substitute)*
  4. 1/2 cup coconut sugar or sucanat
  5. 1/4 cup organic cocoa powder (or carob)
  6. 2 1/2 Tbsp. tapioca flour (or corn starch or arrowroot)
  7. 1/4 tsp. sea salt
  8. 1 tsp. vanilla
Instructions
  1. Combine all of the ingredients except vanilla in a small saucepan and whisk until combined.
  2. Cook the pudding over medium heat, stirring frequently, until it begins to thicken (about 10 minutes).
  3. Continue stirring until the pudding is quite thick.
  4. Remove from heat and add vanilla.
  5. Whisk until combined.
  6. Poor pudding into serving dishes. Serve immediately or cover and refrigerate.
Notes
  1. *Using two kinds of "milk" will give a more neutral flavor. If you use all coconut milk there will be a stronger coconut flavor.
Just Take A Bite https://justtakeabite.com/

Gluten Free Dairy Free Rhubarb Crisp (nut free, egg free)

rhubarb crisp

 The earliest produce to pop up in our garden is rhubarb. It seems to be one of those strange vegetables that you either love or hate.

Growing up I don’t think anyone in my family liked rhubarb. So I never even tasted it until a few years ago when I started baking it with it myself.

It’s tart and a little tough. But if you add sugar and cook it rhubarb is delicious! It is perfect for all sorts of desserts.

In the past I’ve made strawberry rhubarb upside down cake, rhubarb muffins and Dutch strawberry rhubarb pie. We have more in our garden, so I need to come up with other ways to use it.

Yesterday I made one of my favorites – rhubarb crisp. This version is gluten, dairy, nut and egg free. I used oats in the topping, but they can be replaced with other gluten free flours if you don’t tolerate oats.

The whole family gave the seal of approval for this recipe! The best part for me? It’s really easy to make. It only took about 10 minutes to get it prepared and in the oven. A simple dessert the whole family can enjoy. Perfect!

Do you enjoy rhubarb? What are some creative ways you use it?

rhubarb crisp 2


Gluten Free Dairy Free Rhubarb Crisp
A delicious summer treat that is gluten, dairy, egg and nut free.
Write a review
Print
Ingredients
  1. 3 cups rhubarb, chopped (you can also peel outer layers if they are stringy)*
  2. 1 cup organic cane sugar or sucanat
  3. 1 cup rolled oats**
  4. 1/2 cup coconut flour***
  5. 1/2 cup organic palm shortening, butter and/or coconut oil
  6. 1/2 cup organic cane sugar or sucanat
Instructions
  1. Heat oven to 350*F. Grease a 9" baking pan.
  2. Combine the rhubarb and 1 cup sugar. Mix well and pour into prepared pan.
  3. Combine the oats, flour and 1/2 cup sugar in a small bowl. Mix in the fat until the mixture is crumbly.
  4. Sprinkle the crumble over the rhubarb.
  5. Bake the crisp for 50-60 minutes, until the rhubarb is soft and the topping is golden brown.
  6. Let the crisp cool completely before serving. This will allow it to solidify.
  7. Serve plain or topped with whipped cream or ice cream.
Notes
  1. *You can substitute chopped strawberries, raspberries or cherries for some of the rhubarb to make a sweeter crisp.
  2. **You can replace the oats with 1/2 cup white rice flour and 1/2 cup coconut flour.
  3. ***You can replace the coconut flour with 1/2 cup oat flour.
Just Take A Bite https://justtakeabite.com/

Hydrating Iced Cocoa

iced cocoa

Last year I shared my “secret” recipe for hot chocolate that I drink daily. It tastes great and keeps me  going all day.

This past week we went from chilly to hot! Though now it’s back to chilly again. That’s Michigan for you.

As much as I love my hot chocolate, when I’m dripping with sweat from playing outside with the kids it just doesn’t sound that appealing.

So now it’s time for an iced version! When I tried it I was pleasantly surprised that the iced cocoa kept me just as hydrated as the hot version. It was also just as easy to drink without feeling like I had a belly full of liquid.

I don’t know the science behind it, but just a small amount of cocoa helps my body absorb liquids and stay hydrated. Cocoa is also full of minerals like potassium and magnesium. It even has quite a bit of iron and fiber.

I’ve talked before about the importance of not drinking tons of plain water throughout the day. It will actually flush the vitamins and minerals out of your body and leave you dehydrated…and feeling even thirstier! It will also lower your metabolism (you can read more about that in Eat for Heat and The Nourished Metabolism).

I stick to my mug of hot chocolate in the morning and now my mug of iced cocoa in the afternoon. My thirst is quenched for the whole day. As an added bonus I no longer have the overactive bladder I had from childhood on. I’m not running to the bathroom all day long.

Do you play sports? Skip the neon-colored sports drinks and fill your water bottle with iced cocoa.

My kids often ask me to make hot chocolate for them. But it’s tough to get it just the right temperature so that it’s still warm but not too hot. They are going to love this new treat.

If you’re looking for a delicious, refreshing and hydrating drink this summer try some iced cocoa. It only takes a few minutes to make and tastes great! 

iced cocoa collage

Hydrating Iced Cocoa
Serves 1
A delicious, hydrating drink to keep you going all summer long.
Write a review
Print
Prep Time
2 min
Prep Time
2 min
Ingredients
  1. 1 - 2 tsp. organic cocoa powder (you can substitute carob powder)
  2. 1 Tbsp. honey, maple syrup, coconut sugar and/or cane sugar
  3. 1/8 - 1/4 tsp. unrefined sea salt
  4. 1-2 tsp. gelatin or collagen (optional)
  5. 1/4 cup milk or milk substitute (optional)
  6. ice cubs
  7. hot water
  8. cold water
Instructions
  1. Add cocoa powder, sweetener, salt and gelatin to a heat-safe cup (I like to use a pint jar/mug).
  2. If using gelatin, add 1/8 cup of water, stir and let sit for about 30 seconds to dissolve.
  3. Add 1/4 cup boiling water to the cup. Stir to dissolve the cocoa/sweetener/salt mixture.
  4. Add 4-6 ice cubes to cool the cocoa.
  5. Add milk for richness.
  6. Fill the rest of the glass with cold water.
  7. Stir and serve immediately.
Just Take A Bite https://justtakeabite.com/

Three Ingredient Caramel Apple Salad (gluten free, dairy free)

caramel apple salad

Lately I’ve been serving fruit salad with our “breakfast for dinner” meals. I usually just do a mix of whatever fresh and frozen fruits we have on hand. We all enjoy it.

But last week I wanted something different. I also wanted something my son could eat (he’s allergic to grapes, bananas and pears…and he doesn’t tolerate citrus fruits well). That’s not easy to do.

I decided to use apples. I created a caramel apple salad that is so easy to make and so delicious!

My daughter actually licked every last drop of “caramel” off her plate. Both kids asked for seconds too. It was that good.

I love how simple this recipe is. It takes about three minutes to prepare and only has three ingredients. You can make enough for one or for a large group.

I served it as a simple fruit salad on the side. But this salad isn’t just for eating plain. It works as an ice cream topping, a dessert, a yogurt add-in (caramel apple yogurt…mmm) or a treat to mix in your oatmeal.

If you want to make the salad a bit fancier you can add chopped nuts, dried fruit or shredded coconut. You could also add a little heavy cream or coconut milk to make a creamy caramel apple salad.

I happened to have a little extra heavy cream in the fridge. So I topped ours with fresh whipped cream.

Dress it up, serve it plain, eat it for breakfast or as a dessert. No matter how you eat it, this caramel apple salad is quick, easy and so good!

DSC_1732

Three Ingredient Caramel Apple Salad (gluten free, dairy free)
Serves 4
A simple side dish or dessert that only takes minutes to prepare. Make as little or as much as you want.
Write a review
Print
Ingredients
  1. 4 large apples
  2. 4 Tbsp. coconut sugar or cane sugar
  3. 2 Tbsp. honey and/or maple syrup
Instructions
  1. Peel and chop the apples.
  2. Mix all of the ingredients in a bowl.
  3. Cover the salad and refrigerate until the sugar is dissolved and a syrup has formed (about 1 hour).
Notes
  1. The apples make a great ice cream topping, dessert, yogurt add-in or oatmeal topping.
  2. Add 1 Tbsp. coconut milk or heavy cream for a creamy version.
  3. Add chopped nuts, dried fruit or shredded coconut for variety.
  4. Top with whipped cream to serve as a dessert.
Just Take A Bite https://justtakeabite.com/

Butternut Squash Quinoa Risotto (gluten free, dairy free)

butternut squash quinoa risotto

I LOVE risotto. I also LOVE anything with squash. Unfortunately my son is allergic to rice (yes, really). So I never make risotto anymore.

My son is also fairly picky. But I was craving risotto the other day. So I crossed my fingers and made a quinoa version that we could all eat.

The verdict? Amazing! Three of us dug right in and even had seconds.

My son, however, ran from the table screaming at the word risotto. He didn’t come back until dinner was over and I was cleaning the table. He finally agreed to try a bite. When he did his reaction was, “This is so good!” He proceeded to clear his plate.

I’ll consider it a great dinner success!

One of the best parts about the this risotto is that it is so easy to make. I cooked the quinoa earlier in the day when I had a few spare minutes. Then at dinner time it only took about 15 minutes to make the risotto.

I also love this recipe because it’s a simple way to get my kids to eat quality vegetables and bone broth without them realizing it. Easy, healthy and delicious…my favorite kind of recipe.

Give this risotto a try. Your whole family will love it.

DSC_1512

Butternut Squash Quinoa Risotto (gluten free, dairy free)
Serves 4
A simple main dish or side dish filled with vegetables and bone broth that the whole family will love.
Write a review
Print
Ingredients
  1. 1/2 cup quinoa - soaked for at least 7 hours and then drained
  2. 1 cup water or bone broth
  3. 1 cup pureed butternut squash (you can replace this with any pureed vegetable you like)
  4. 1 Tbsp. coconut oil (or butter)
  5. 1/2 - 3/4 cups bone broth
  6. seasoning - sea salt, garlic powder, pepper - seasoning of your choice
  7. grated parmesan cheese (optional if tolerant of dairy)
Instructions
  1. Bring one cup of water and/or broth to a boil. Add the drained/rinsed quinoa. Cover. Reduce heat and simmer for 12 minutes.
  2. Remove the pan from the heat. Leave the pan covered for 15 minutes. At this point you can make the risotto or refrigerate the quinoa until you are ready to make the risotto.
  3. In a pot, heat the quinoa, squash, coconut oil, seasoning and 1/2 cup broth. Stir until well combined. Simmer the mixture until the broth has cooked down, stirring occasionally. Add more broth if desired/if the mixture is too dry. This will take about 10-15 minutes.
  4. Adjust the seasoning to taste. Add cheese directly to the pan or grate on top of individual servings if desired.
Just Take A Bite https://justtakeabite.com/


Gluten Free Dairy Free Orange Cranberry Scones (egg free, nut free, rice free)

orange cranberry scones

Almost every Friday we have breakfast for dinner. It gets hard to come up with a variety of hearty breakfast food when you can’t serve eggs, dairy or wheat. Recently I decided to make one of my favorite breakfast foods as a component of our meal – scones!

Instead of finding a recipe I wanted to try making something new. I decided on orange cranberry scones.

DSC_1076

I had a great little helper in the kitchen to run the food processor for me. He sampled the dough as well to make sure it was just right. Then he did his best to wait patiently while they baked.

In the end we had delicious, slightly sweet scones that the whole family thoroughly enjoyed. For a special touch I sprinkled homemade powdered sugar on top. You could also make a simple glaze with powdered sugar and orange juice or any type of milk. Or they are great as-is.

These would pair very well with quiche (if you tolerate eggs). I served them with bacon, roasted asparagus and fruit salad.

If you don’t like orange and/or cranberry you can substitute your favorite flavors. Lemon and blueberry would taste great. You could simply swap cranberries for another dried fruit. Or you could add nuts. I can’t wait to have them again!

 DSC_1077

Gluten Free Dairy Free Orange Cranberry Scones
Yields 8
A mildly sweet scone that is gluten, dairy, egg, nut and rice free.
Write a review
Print
Prep Time
10 min
Cook Time
35 min
Total Time
45 min
Prep Time
10 min
Cook Time
35 min
Total Time
45 min
Ingredients
  1. 2 cups any combination of gluten free flours (I use amaranth, sorghum, teff and tapioca)
  2. 1/3 cup organic cane sugar or coconut sugar
  3. 1 tsp. aluminum-free baking powder
  4. 1/2 tsp. baking soda
  5. 1/2 tsp. unrefined sea salt
  6. 3/4 cups organic palm shortening (you can substitute butter if you tolerate dairy)
  7. 1/4 cup orange juice
  8. 3 Tbsp. maple syrup or honey
  9. 1 tsp. ground flaxseed (optional - this helps bind them)
  10. 1 Tbsp. orange zest
  11. 1/2 cup cranberries (or other dried fruit or nut)
Instructions
  1. Heat the oven to 350*F. Line a baking sheet with parchment paper.
  2. In a food processor or mixing bowl combine the flour, sugar, baking powder, baking soda, salt, flaxseed and orange zest. Pulse or stir until combined.
  3. Add half of the palm shortening. Pulse or blend. Add the other half of the shortening. Pulse or blend until the mixture is slightly crumbly.
  4. Add the juice and syrup. Mix until a sticky dough forms.
  5. Transfer the dough to a clean bowl (if using a food processor). Add the cranberries and mix well.
  6. Drop the dough by large mounds onto the prepared baking sheet. Press the dough down slightly and form scones into desired shape.
  7. At this point you may bake the scones immediately, cover them and refrigerate or freeze to bake later.
  8. When ready to bake, place the baking sheet in the oven and bake for 35 minutes. Allow the scones to cool for 5-10 minutes before removing them from the pan.
  9. Dust the scones with powdered sugar if desired.
Just Take A Bite https://justtakeabite.com/

Gluten Free Dairy Free Lemon Blueberry Muffins (nut free, soy free, rice free)

Brrrr!!! Winter is really starting with a bang this year. We’ve already had so much snow. Now an ice storm. It sure would be nice to be somewhere warm and sunny right now!

I know that is not possible, but I can imagine. And a batch of lemon blueberry muffins really helps. They remind me of the bright, fresh flavors of summer.

These muffins are both gluten and dairy free. And they are very simple to make. My little muffin loving two year old can eat a whole batch himself in a few days.

So whether it is warm and sunny near you or you just want to imagine it is, give these muffins a try.


Gluten Free Dairy Free Lemon Blueberry Muffins
makes 12 muffins

3/4 cups amaranth flour
3/4 cups sorghum flour
2/3 cup organic cane sugar, sucanat or coconut sugar
1 tsp. baking soda
1 tsp. baking powder
1/2 tsp. sea salt
1 egg
1 cup applesauce
4 Tbsp. real lemon juice
4 Tbsp. coconut oil, melted
blueberries (fresh or frozen) (adjust amount for personal taste)

Heat the oven to 350 degrees F. Line a muffin pan with muffin cups.

In a medium bowl combine the flour, sugar, soda, powder and salt.

Add the egg, applesauce, lemon juice and oil. Mix until well combined (I use a hand mixer).

Fill the muffin cups 3/4 full with batter. Drop the blueberries into the muffins. Press down slightly.

Bake for about 30 minutes, until starting to become golden and baked through. Allow to cool for a few minutes before serving.