Home » Kid-friendly Recipes » lunch » Page 7

Category: lunch

Simple Squash Soup

Simple Soup Series: Squash Soup

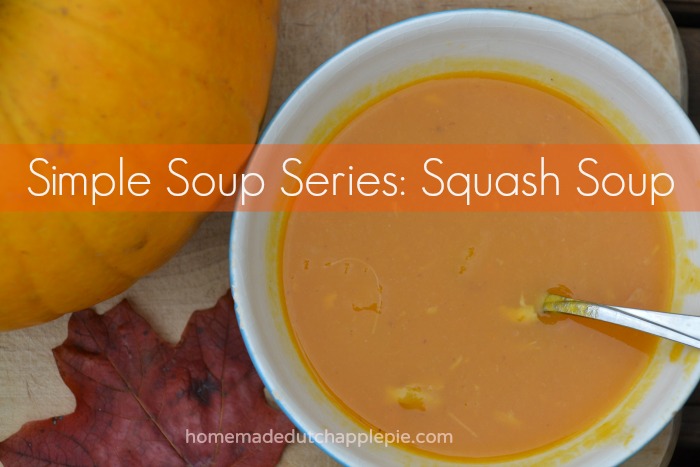
 This simple squash soup is full of homemade chicken broth and comes together in minutes. Pair it with some soaked teff crackers for a complete meal! Simple Soup Series Squash Soup || Homemade Dutch Apple Pie

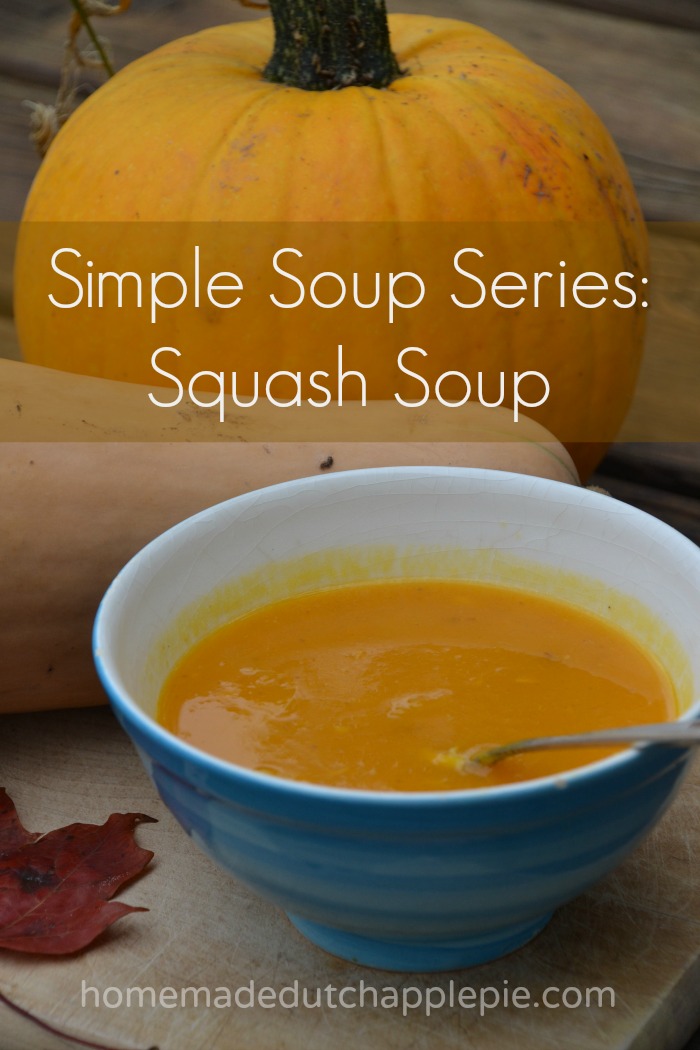
 Today I am kicking off my Simple Soup Series. I make soup all the time. But I always forget to post the recipes. So I’m starting by sharing some of my simplest soups.

They take very little time to prepare. They can be prepared in advance. They can be made in a soup pot or the crockpot. Best of all they are so nutritious and very allergen friendly.

Homemade Squash Soup

I have two absolute favorite soups – squash and split pea. I could eat one or the other every single day. I especially love having them for breakfast.

So today I’m sharing my simple recipe for squash soup. It’s very versatile. You can keep it pure squash. Or you can add meat and vegetables for texture.

Simple Soup Series Squash Soup || Homemade Dutch Apple Pie

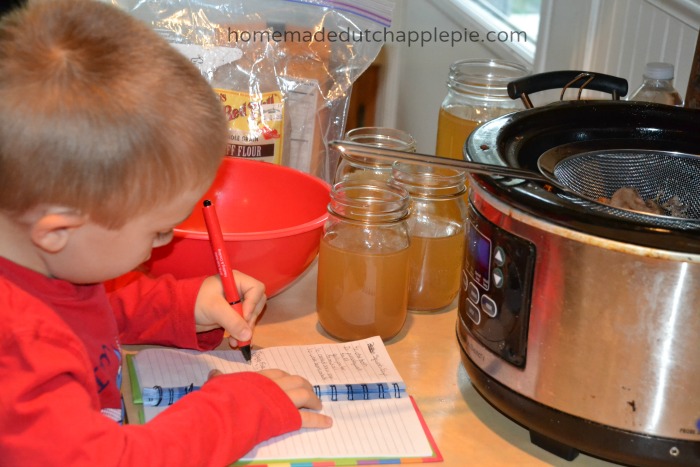
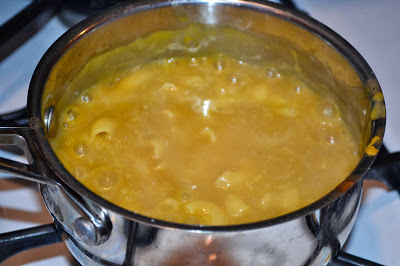
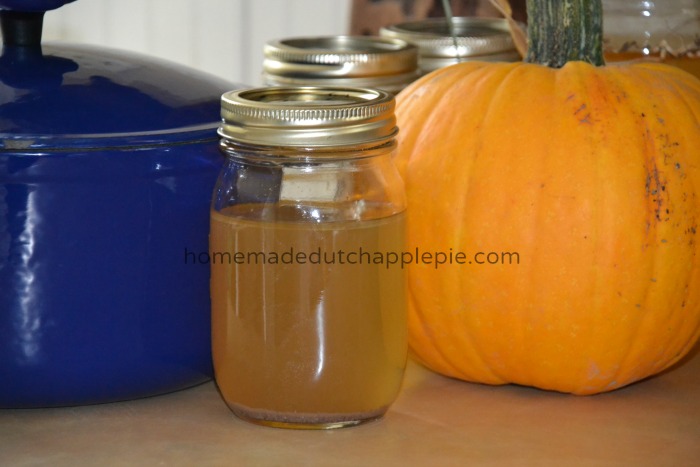
 The first two things you need for good squash soup are bone broth and a cute helper to write your recipe. One is more critical than the other, but they both help.

How to Easily Roast Squash

Then you need cooked and pureed squash. I like to roast three or four squash at a time. Simply wash them, place them on a large baking sheet, add water to the bottom and bake at 400*F for about two hours. Then you can easily cut them open, remove the seeds, scoop the flesh into a bowl and puree it with an immersion blender or a regular blender.

Put your squash in storage containers. Use some fresh and freeze the rest. Then you can quickly make squash soup any time.

You can also buy pureed squash at the store. It is in the frozen section. 

Simple Soup Series Squash Soup || Homemade Dutch Apple Pie

Nourishing Soup with Squash

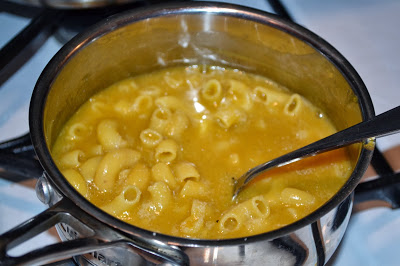
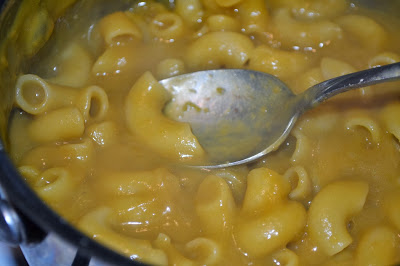
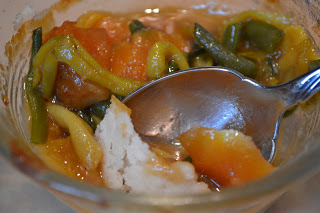
Once you have your broth and your squash this soup comes together in minutes.  Add any seasoning you like. Add any meat or vegetables you like. Simmer for about ten minutes. Dinner is served.

Squash soup makes a great school lunch. It is a thick soup, so it won’t spill very easily. It’s also easy for young kids to eat without making a mess.  Squash soup also tastes great cold. That is always a bonus when packing lunches.

I like to add coconut oil or butter to squash soup for some added healthy fat. If you are going to serve some of the leftovers cold then it is best to only add coconut oil to individual bowls when it’s warm. Else it will solidify in the cold soup.

How to Serve Squash Soup to Kids

I usually pair soup with muffins or scones. Crackers and cheese are an easy accompaniment as well.

Squash soup can be ready in about fifteen minutes. It is very nutrient dense with vegetables and broth. And the leftovers make a great breakfast or lunch.

You can also make a double or triple batch of soup and freeze some of it. Then all you have to do for dinner is warm and serve. It’s so simple.

Do you enjoy squash soup? What do you like to add to yours?

Simple Soup Series Squash Soup || Homemade Dutch Apple Pie

Simple Soup Series: Squash Soup
Serves 5
A simple squash soup that is ready in 20 minutes.
Write a review
Print
Ingredients
  1. 4 cups chicken broth (homemade)
  2. 4 cups pureed squash
  3. 1 tsp. sea salt (to taste)
  4. 1/2 tsp. garlic powder (to taste)
  5. 2 Tbsp. coconut oil (optional)
  6. 1 cup cooked, cut up chicken or cooked sausage (optional)
  7. 1 cup cooked white beans (optional)
  8. 1 Tbsp. collagen (optional)
Instructions
  1. In a large saucepan combine the broth, squash, salt, garlic powder, coconut oil (if adding, see note), collagen (if adding), meat and beans.
  2. Bring to a boil, reduce heat and simmer for 10 minutes.
  3. When the soup reaches the desired thickness adjust the seasoning to taste.
Notes
  1. If the soup is thinner than you'd like continue to simmer until it thickens.
  2. If you will be eating leftovers cold do not add coconut oil to the soup. It will harden. You can add coconut oil to individual bowls when the warm soup is served.
  3. You can replace the beans with peas, corn or tomatoes.
  4. You can also make this soup in the crockpot. Add all of the ingredients to the crockpot and cook on low for 3-4 hours.
Just Take A Bite https://justtakeabite.com/
This post is linked to From The Archives Friday.

Creamy Broccoli Noodle Soup {Gluten Free, Dairy Free}

Creamy Broccoli Noodle Soup {Gluten Free Dairy Free} || Homemade Dutch Apple PieDuring the winter I serve soup for dinner a lot. It’s about the easiest way to make sure my family is consuming a good amount of nourishing bone broth. In fact, every Wednesday is soup night so I make sure we’re getting a healthy dose at least once a week. Then leftovers go in lunches for more nourishment.

But it wasn’t until recently that I realized I rarely post soup recipes! So I need to start posting more of the soups we eat. Today I’m starting with this creamy broccoli noodle soup…that is gluten and dairy free!

The broccoli gets pureed into the soup, so even picky vegetable eaters will enjoy it. And it has a rich, creamy taste without using dairy. The whole family will love it.

If you’re not a fan of broccoli you can swap it for another vegetable like spinach, zucchini, squash or carrots. The soup is also great without the noodles if you want it grain free.

I like to serve a warm bowl of salty soup with a sweet baked good like chocolate zucchini scones, pumpkin muffins or cornbread. Add salad or some raw veggies and you’ve got a great meal.

You can add cooked chicken to the soup to make it meatier and give it texture. But there is plenty of protein in the soup from the broth without added meat.

Broccoli noodle soup is sure to be a family favorite and it’s great for those with allergies. It is also very easy to make and can feed a whole family at a very low cost.

Do you eat much soup in the winter? What is your favorite kind?

Are you looking for more soup recipes? Stay tuned. I’ve got a soup series coming up soon!!
 Creamy Broccoli Noodle Soup {Gluten Free Dairy Free} || Homemade Dutch Apple Pie 2

Creamy Broccoli Noodle Soup {gluten free, dairy free}
Serves 4
A creamy, nourishing soup filled with broccoli and noodles.
Write a review
Print
Ingredients
  1. 2 cups chicken broth
  2. 1 cup milk or milk substitute
  3. 2 cups broccoli florets (fresh or frozen)
  4. 1 cup gluten free noodles (corn, rice, etc.)
  5. seasoning to taste - sea salt, garlic powder, celery salt, parsley
  6. optional - 1 cup cooked chicken or sausage
Instructions
  1. In a large saucepan combine the chicken broth, milk, broccoli and seasoning.
  2. Bring to a boil, reduce heat and simmer until the broccoli is cooked, about 10 minutes.
  3. Roughly puree the soup with an immersion blender or in a blender.
  4. Bring the soup back to a boil. Add the noodles, reduce heat and simmer until the noodles are cooked, about 10 minutes.
  5. Add meat if desired and simmer until warmed.
  6. Adjust seasoning to taste.
Notes
  1. I used oat milk. Any milk substitute will work, but coconut milk might give a strong flavor. A milder milk like oat, rice or almond is best.
Just Take A Bite https://justtakeabite.com/

Gluten Free Dairy Free Zucchini Crackers

Zucchini crackers are crispy, allergen-friendly and full of zucchini. They make the perfect snack at home or on the go.Gluten Free Dairy Free Zucchini Crackers || Homemade Dutch Apple PieAre you in need of a healthy snack or lunch box addition for school? Zucchini crackers are just the thing!

They are very allergen-friendly. Plus they add vegetables to your diet.

Even if your child is picky about vegetables this is a great option. You can’t tell there is zucchini in them! The flecks look like seasoning. If your child can’t handle the sight of green…use golden zucchini or summer squash! Still not convinced? Simply peel the zucchini before grating it.

The dough for these crackers comes together in minutes. You just dump all of the ingredients in a bowl and stir. It’s that simple.

My kids love munching on crackers, and I can feel good about it when the crackers are homemade and made with vegetables. No vegetable oils. No strange ingredients. Just the good stuff.

I also love that I can control the seasoning. The crackers can be very mild with just sea salt (for my oral sensory child). Or I can make them with various herbs and seasoning for lots of flavor.

The next time you need a healthy snack for your kids try some zucchini crackers. You’ll love them!Gluten Free Dairy Free Zucchini Crackers || Homemade Dutch Apple Pie

Gluten Free Dairy Free Zucchini Crackers
A crispy, allergen-friendly cracker filled with zucchini.
Write a review
Print
Ingredients
  1. 1 cup any combination of gluten free flour
  2. 1/2 cup grated zucchini (may be peeled)
  3. 1/2 tsp. sea salt
  4. 1/2 tsp. cane sugar
  5. 3 Tbsp. coconut oil or palm shortening, melted
  6. 3 Tbsp. water
  7. seasoning/extra salt to taste
Instructions
  1. Heat oven to 350*F. Cut two pieces of parchment paper the size of a baking sheet.
  2. Combine all of the ingredients in a bowl.
  3. Mix until well combined.
  4. Adjust seasoning to taste.
  5. Roll the dough between the pieces of parchment paper until 1/8" - 1/4" thin. Remove the top piece of parchment paper.
  6. Sprinkle salt and/or seasoning over the top of the dough.
  7. Cut the dough into squares.
  8. Transfer the dough (on the paper) to a baking sheet.
  9. Bake for 25 minutes.
  10. Turn off the oven. Leave the crackers in the oven for an additional 15 minutes.
  11. Remove from the oven and allow to cool/crisp.
  12. Store in an airtight container.
Notes
  1. It works best to use at least half white gluten free flour (white rice or tapioca).
  2. The crackers keep well in the freezer.
  3. One batch makes about 2 cups of crackers. You can double or triple the recipe for a larger batch.
Just Take A Bite https://justtakeabite.com/

In order for me to support my blogging activities, I may receive monetary compensation or other types of remuneration for my endorsement, recommendation, testimonial and/or link to any products or services from this blog. If you order by clicking on any of my Tropical Traditions links and have never ordered from Tropical Traditions in the past, you will receive a free book on Virgin Coconut Oil, and I will receive a discount coupon for referring you.

This post is linked to From The Archives Friday.

Zucchini Salmon Cakes (grain free, dairy free, nut free)

Zucchini Salmon Cakes - Homemade Dutch Apple Pie

One meal that I know my kids will always devour is salmon cakes. It’s kind of an odd meal for small children to love. But they do. And it makes me so happy.

Recently I decided to change things up a bit and make zucchini salmon cakes since zucchini is in season. I wondered if my kids (one with texture issues and one that is very picky with vegetables) would still enjoy them.

To my great surprise and delight they did!! Both kids loved them!

These zucchini salmon cakes still have the flavor of a salmon cake. But there is actually way more zucchini than salmon in them. So you get the benefits of salmon combined with vegetables. And even if your kids won’t eat another vegetable with the meal you know they are at least getting some. That is my kind of meal!

Zucchini salmon cakes are very easy to make. They also work well for a lot of special diets since they are grain, dairy and nut free.

We had these as our main dish for dinner. But they were also great cold the next day for lunch. I honestly think my kids liked them better that way. I even love them cold for breakfast. It’s a great way to start my day with fish, eggs and vegetables. Plus it’s already prepared, so breakfast is easy.

I serve them with homemade mayonnaise. They would also be good with pesto. These zucchini salmon cakes are even meaty enough to be used as burgers! Put one on a bun with your favorite toppings for a change of pace.

 If you’re looking for a delicious and nourishing summer meal this is it. There is no need to turn on the oven. Just fry up some zucchini salmon cakes. They are great for the whole family. 

Zucchini Salmon Cakes - Homemade Dutch Apple Pie 2 

Zucchini Salmon Cakes
Yields 8
A salmon cake packed with zucchini and lots of flavor.
Write a review
Print
Ingredients
  1. 2 cups finely grated zucchini, drained (about 3 medium zucchinis)
  2. 1 6 oz. can of boneless skinless salmon
  3. 3 eggs
  4. 1/3 cup coconut flour
  5. seasoning to taste (salt, pepper, garlic powder)
  6. Lard, coconut oil or palm shortening for frying
Instructions
  1. Grate the zucchini. Place in a strainer to drain for about one hour. Squeeze out excess liquid.
  2. Combine the zucchini, salmon, eggs, flour and seasoning.
  3. Cover the bottom of a large pan with fat. Heat over medium heat.
  4. Scoop balls of zucchini mixture and form into patties. Place in hot pan.
  5. Cook until browned on bottom, about 7 minutes. Flip. Cook until the other side is browned.
  6. Serve warm.
Notes
  1. If you like the cakes to be really firm add 1/2 cup coconut flour instead of 1/3 cup.
  2. The zucchini salmon cakes can be used as burgers and served on buns.
  3. The zucchini salmon cakes can be served warm or cold, as breakfast. lunch or dinner.
  4. Homemade mayonnaise or pesto make great dipping sauces for the zucchini salmon cakes.
  5. The salmon can be replaced with tuna.
Just Take A Bite https://justtakeabite.com/

In order for me to support my blogging activities, I may receive monetary compensation or other types of remuneration for my endorsement, recommendation, testimonial and/or link to any products or services from this blog.

Pesto Quinoa Salad

pesto quinoa salad

It’s that time of year again. Time for picnics and potlucks and family gatherings. It’s always tough to figure out what to bring.

Are you sick of potato salad and pasta salad? Or are your kids like mine and won’t touch either of those anyway?

This pesto quinoa salad is my solution! It has a lot of flavor from the pesto. But it’s not overpowering. So even my sensitive palate daughter enjoys it.

The other great part is that this salad is very allergen friendly. It basically has three ingredients – quinoa, peas and olive oil. You can swap peas for another vegetable if you don’t like them or don’t tolerate them.

As an added bonus you don’t have to worry about this salad spoiling after being outside for a little bit.

Pesto quinoa salad can be served as a warm side dish or chilled. The leftovers are great for easy lunches. You can add a little cooked chicken for a complete meal. I even added a few chickpeas and topped it with a fried egg for lunch! It was delicious.

I use a very simple pesto made with peas. A traditional basil or spinach pesto would also be delicious. For a nutrient boost you could even make it with pummus!

If you’re looking for an alternative salad for your next picnic or just want a new side dish for your dinner at home try this pesto quinoa salad. Both of my kids said it was great! If they approve, it must be good.

 pesto quinoa salad 2

Pesto Quinoa Salad
Serves 4
A simple spring salad that is perfect for picnics.
Write a review
Print
Ingredients
  1. 1/2 cup quinoa - soaked and drained
  2. 1 cup water or chicken broth
  3. 1/2 - 1 cup peas (frozen, thawed or fresh)
  4. 1/4 cup pesto (I use pesto made with peas* - you can use any pesto you like)
To taste (optional)
  1. salt
  2. garlic powder
  3. parmesan cheese
  4. chopped nuts
Instructions
  1. Soak the quinoa for 1 - 24 hours. Rinse and drain.
  2. Bring water or broth to a boil in a sauce pan. Add the quinoa, cover, reduce heat and simmer for 12 minutes.
  3. Remove the pan from the heat. Keep the lid on.
  4. After 10 minutes add the peas to the pan of quinoa. Cover and let sit 5 - 10 minutes.
  5. Stir in the pesto.
  6. Season to taste.
  7. Add nuts or cheese if desired.
  8. Serve immediately or chill until ready to serve.
Notes
  1. If you are taking this to a group gathering double or triple the recipe.
  2. *For a simple pesto blend 2 cups thawed peas, 1/2 - 1 cup extra virgin olive oil (can replace some of the oil with water for a milder flavor), sea salt and garlic powder to taste in a blender until smooth.
Just Take A Bite https://justtakeabite.com/

Three Ingredient Caramel Apple Salad (gluten free, dairy free)

caramel apple salad

Lately I’ve been serving fruit salad with our “breakfast for dinner” meals. I usually just do a mix of whatever fresh and frozen fruits we have on hand. We all enjoy it.

But last week I wanted something different. I also wanted something my son could eat (he’s allergic to grapes, bananas and pears…and he doesn’t tolerate citrus fruits well). That’s not easy to do.

I decided to use apples. I created a caramel apple salad that is so easy to make and so delicious!

My daughter actually licked every last drop of “caramel” off her plate. Both kids asked for seconds too. It was that good.

I love how simple this recipe is. It takes about three minutes to prepare and only has three ingredients. You can make enough for one or for a large group.

I served it as a simple fruit salad on the side. But this salad isn’t just for eating plain. It works as an ice cream topping, a dessert, a yogurt add-in (caramel apple yogurt…mmm) or a treat to mix in your oatmeal.

If you want to make the salad a bit fancier you can add chopped nuts, dried fruit or shredded coconut. You could also add a little heavy cream or coconut milk to make a creamy caramel apple salad.

I happened to have a little extra heavy cream in the fridge. So I topped ours with fresh whipped cream.

Dress it up, serve it plain, eat it for breakfast or as a dessert. No matter how you eat it, this caramel apple salad is quick, easy and so good!

DSC_1732

Three Ingredient Caramel Apple Salad (gluten free, dairy free)
Serves 4
A simple side dish or dessert that only takes minutes to prepare. Make as little or as much as you want.
Write a review
Print
Ingredients
  1. 4 large apples
  2. 4 Tbsp. coconut sugar or cane sugar
  3. 2 Tbsp. honey and/or maple syrup
Instructions
  1. Peel and chop the apples.
  2. Mix all of the ingredients in a bowl.
  3. Cover the salad and refrigerate until the sugar is dissolved and a syrup has formed (about 1 hour).
Notes
  1. The apples make a great ice cream topping, dessert, yogurt add-in or oatmeal topping.
  2. Add 1 Tbsp. coconut milk or heavy cream for a creamy version.
  3. Add chopped nuts, dried fruit or shredded coconut for variety.
  4. Top with whipped cream to serve as a dessert.
Just Take A Bite https://justtakeabite.com/

Dairy Free Macaroni and "Cheese"


I have a picky eater. He ate tons of vegetables when he was starting to eat solids. He’d need third helpings of carrots. He would eat just about anything you gave him.

Now he’s two. Enough said. The mere mention of the word squash sends him running to another room. One bite of broccoli can turn into gagging and his whole dinner coming back up. And after eliminating beans and peas from his diet from allergies there isn’t much left to try that he might even attempt to eat.
So it’s time to puree. I have started to add pureed vegetables to whatever I can. If he doesn’t eat any of this broccoli from dinner, it goes right into the blender as part of a smoothie…that he’ll happily drink.
Last night I made one of my son’s favorite foods – macaroni and cheese (he has no idea there is such a thing as a box of mac ‘n’ cheese…so at least I don’t have to try to make it taste like that). This is not an easy task for a child allergic to dairy! But I came up with a recipe that is healthy and has no dairy substitutes.

I used broth and pureed vegetables for the sauce. Both kids cleared their plates! My five year old knew what was in it. She loves vegetables and healthy foods. So my only challenge was to make sure she didn’t tell her little brother!
I’m always happy when we have a dinner success. Especially when it involves healing broth and a variety of vegetables. I also added some leftover roasted chicken for extra protein.
This is a fun, easy dinner that will get even picky eaters to clear their plates. You can use whatever vegetables you want. You can even make green mac ‘n’ cheese if your kids would enjoy that. I stick to an orange base so it looks like cheese. But I did have broccoli in it too.
If you are totally grain free you can still use the sauce to put on top of meat or vegetable ribbons. It would also be great on spaghetti squash.
I’ve never been so happy to give my kids mac ‘n’ cheese for dinner. I’m sure I’ll be doing it more often now.

This recipe does not have exact measurements. It is a method. You really can’t go wrong. If you add a lot of broth, you just cook it longer until it reduces enough. And you can start with a small amount of vegetables or add a lot. Whatever you think your family will like.

Depending on what noodles you use, this recipe can be gluten free, egg free, nut free and/or corn free.

Dairy Free Macaroni and “Cheese”

Cooked noodles (wheat, rice, quinoa, bean…whatever you like – I used quiona/corn for my son)
Pureed vegetables (squash alone works well, but any vegetable or combination works – I used carrot, broccoli and squash this time)
Chicken broth
Coconut oil
Unrefined sea salt (to taste…or any other seasoning you like)

Cook and drain the noodles. Return them to the saucepan. Add enough chicken broth to mostly cover the noodles. Add some coconut oil (as much or as little as you want – the fat helps it thicken – 1 Tbsp. is a good start). Turn the heat on high.

Add the vegetable puree. Start with equal amounts of broth and puree. You can add more as it cooks if you like. Add some seasoning.

Bring to a boil and reduce heat. Allow the mixture to simmer, stirring once in a while. As the liquids reduce and it gets thicker you’ll need to stir more so it doesn’t stick to the pan. You can add more broth and/or vegetables at any time during this process.

Cook the mixture until the liquids reduce enough to be a thick sauce. Adjust the seasoning to taste.

You can add cooked meat or vegetables at this point and allow them to warm through.

Enjoy some amazing macaroni and cheese that is filling, nourishing and totally dairy free!

Pumpkin Pot Pie With Soaked Amaranth Crust (gluten free, egg free, dairy free, nut free)

I’m still at it with my alternative grain experiments. Today I used soaked amaranth to make a delicious pie crust. Then I made a savory pumpkin salmon filling. What an awesome breakfast treat!!

I love starting my day with broth, omega-3s, saturated fat, plenty of carbohydrates and lots of sea salt.

This was really easy to make. It does take a little time for things to bake and cook. But there is very little hands on time.

Are you looking for a very satisfying breakfast, lunch or dinner treat? Give this pot pie a try. You won’t be disappointed!! And your whole body will thank you.

Pumpkin Pot Pie With Soaked Amaranth Crust
serves 1

Crust:
1/2 cup amaranth flour
2 – 3 Tbsp. palm shortening, butter or lard
1 – 3 Tbsp. warm water
1 Tbsp. lemon juice

Filling:
3/4 cups broth (beef, chicken or turkey)
1/2 cup pumpkin puree (or winter squash)
2 Tbsp. coconut oil (optional)
sea salt to taste (I use a LOT)
garlic powder to taste
2 Tbsp. cooked salmon (optional…or any other cooked meat or vegetable)

Directions:

Mix flour and shortening until just crumbly. Add 1 Tbsp. warm water and 1 Tbsp. lemon juice. Mix. If the mixture is still really dry gradually add more water. It should stay a little crumbly. Cover and let soak for 7-24 hours.

Heat oven to 375 degrees F. Grease a small oven safe dish (I use a small pyrex dish/cup).

Add a little water to the crust mixture until the dough holds together. Press into the prepared dish and up the sides. Bake for 25 minutes.

While the crust is baking simmer the broth, pumpkin, coconut oil and salt until it reduces and gets thick (about 20 minutes). Add the salmon during the last few minutes.

Pour the pumpkin filling into the hot crust (fill it to the top. There might be extra filling…it can be eaten plain). Bake another 10 minutes. Let set 5-10 minutes before eating.

Single Serving Simple Pot Pie (gluten free, egg free, dairy free, nut free)

I’ve just started my rotational diet. And I have a trial four day rotation that I’ve laid out. It’s still a work in progress, but it’s a start.

So today I’m allowed rice as my starch/grain, lard as my fat and beans and beets as my vegetables. How do I make that appealing all day long? I had rice cooked in chicken broth with beets and beet greens for breakfast. But I didn’t really want the exact same thing for lunch.

I came up with this easy single serving pot pie. Lots of nourishing broth and fat. Plus it’s super delicious! It really hit the spot for a comforting lunch as I’m adjusting to having my options so limited/so different from what they were just a week ago.

I was also trying to feed two grumpy kids, so it’s a bit lacking in visual appeal. But you get the idea.

My protein for today is pork. I don’t have any cooked yet (I’ll be making it for dinner). But it would be a great addition to this dish. Chicken or turkey would be great too. And any kind of vegetable will work.

I didn’t measure anything as I was cooking. I’ll give a rough idea of quantities. But feel free to adjust as needed. And you can multiply this to make a larger dish to feed more than one person.

Single Serving Pot Pie

1/4 cup white rice flour
1 Tbsp. lard (or palm shortening or butter)
2 tsp. water
1/4 tsp. sea salt

1 cup chicken broth
1/2 cup vegetables (I used roasted golden beets and frozen green/yellow beans)
1 Tbsp. white rice flour
sea salt to taste
2 tsp. lard (or butter)
1/8 cup cooked pork, turkey or chicken (optional)

Heat oven (I used the toaster oven) to 400 degrees F.

Combine flour, salt and lard. Add enough water for the dough to stick together. Mix until combined. Press into bottom and up the sides of a small oven safe bowl (I used a small pyrex dish). Bake for 15 – 20 minutes.

While the crust is baking, in a small cast iron or stainless steel pan bring chicken broth to a boil. Add vegetables, lard and seasoning. Simmer until broth begins to reduce (about 10 minutes). Add meat. Sprinkle on flour and stir. Continue to simmer until thick. Adjust seasoning to taste.

Pour the filling into the baked crust. Return to the oven. Bake 5 more minutes. Serve warm.

Quinoa Mac ‘n’ Cheese

We tried yet another new recipe for dinner last night. Quinoa Mac ‘n’ Cheese. This recipe comes from Tasty Kitchen.

The original recipe has spinach in it. I just used the concept of replacing noodles with quinoa and then made it the way I normally make macaroni and cheese.

This was quite good. It was a unique way to get my family to eat quinoa. So far they are not big fans (I really enjoy it myself…but the rest not so much). But Justin and Rebecca both finished their helpings. Since they normally only tolerate a few bites of quinoa I consider it a success :).

You could easily add any chopped, cooked vegetables to this dish. Or even add bacon or ham. That would make it even better!

I’ll post the recipe the way I made it. Very simple. And a nice change from the traditional macaroni and cheese. It’s also a great way to make a gluten free version of a classic dish. If you like your mac ‘n’ cheese to really hold together well you can mix in a couple of beaten eggs before pouring it into the pan.

This can be prepared in advance and then simply baked right before dinner. Or you can skip the topping/baking and serve it right out of the pan. This would also make a great, warming breakfast!

Quinoa “Macaroni” and Cheese
serves 3 – 4

1/2 cup dry quinoa (makes about 1 1/2 cups cooked quinoa)
1 cup water
1 tsp. evoo
1/2 tsp. sea salt

2 Tbsp. butter
2 Tbsp. flour
1 1/2 cups milk
1 – 2 cups grated cheese (depends how cheesy you like it. Any varieties will do. I used mozzarella, cheddar and parmesan.)
salt and garlic powder to taste

1/2 cup seasoned bread crumbs (optional – use gluten free or omit to keep it gluten free)
1/4 cup grated cheese (I used the same cheese mix as was in the casserole)

Rinse quinoa in a small mesh strainer for 1-2 minutes to remove bitter coating.

Toast quinoa in hot oil in a small saucepan for 1-2 minutes. Add water. Bring to a boil. Add salt. Cover. Reduce heat and simmer 15 minutes. Remove from heat. Let set covered 5 minutes. Pour quinoa into a bowl.

In the mean time melt butter in a saucepan. Add flour and mix. Cook for 1-2 minutes, stirring constantly.

Add milk very gradually, a couple Tbsp. at a time at first. Stir after each addition to incorporate into the butter/flour mixture. Add remaining milk. Bring to a boil. Reduce heat and add cheese. Stir until the cheese is melted. Season to taste.

Pour cheese sauce over quinoa and mix. Add extra seasoning if necessary. Add eggs if desired.

Pour into a greased casserole dish.

Sprinkle breadcrumbs and cheese over top.

Bake at 400 degrees for 25 – 30 minutes, until cheese on top is melted and golden. Let set for 5 minutes before serving.