Home » Kid-friendly Recipes » Page 27

Category: Kid-friendly Recipes

It is so important to cook homemade, healthy food. But it’s not always easy to find kid-friendly recipes.

That’s where I come in. I’ve got hundreds of kid-tested and approved recipes that won’t keep you in the kitchen for hours or stretch your budget too thin.

I focus on allergy-friendly, whole foods. But I always cook with kids in mind. I take all sorts of feeding challenges into account too.

We’ve dealt with every allergy possible, so I’ve created recipes that are gluten free, nut free, dairy free, egg free, soy free, corn free, coconut free and more!

Kid-friendly recipes don’t have to be boring. And they are certainly not limited to chicken nuggets and pizza every night.

A nourished child will enjoy a wide variety of fruits, vegetables, proteins, carbohydrates and fats. Get your kids in the kitchen with you and start cooking! Have fun with food and your kids will learn to love eating.

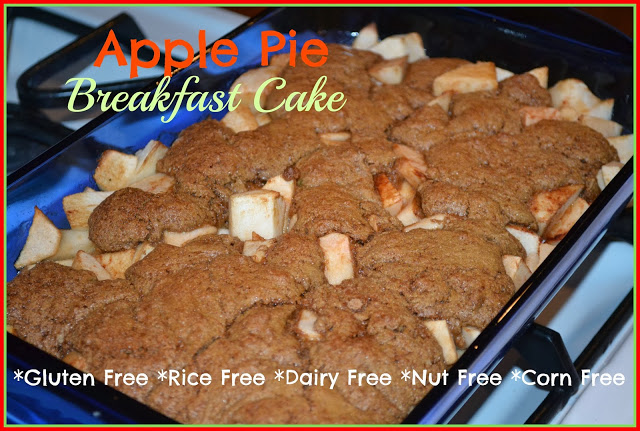
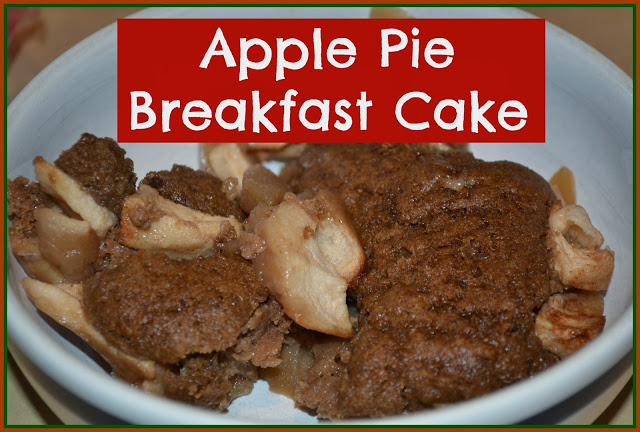
Gluten Free Apple Pie Breakfast Cake (rice free, dairy free, nut free, corn free)

Now that my son is dairy, wheat and rice free I have to be a bit more creative with my cooking and baking. A couple days after his allergy test I made this breakfast cake as a treat for him.

It’s really simple to make. And the whole family enjoyed it.

The apples are lightly sweetened and resemble an apple pie filling. The cake has a hint of spice from the cinnamon. It’s a thin layer, so it’s not too heavy for an early meal. The combination makes a delicious breakfast.

Nothing says fall in Michigan like apples. Why not start your day with them? How do you like to incorporate apples into your breakfast?

Gluten Free Apple Pie Breakfast Cake

1 cup gluten free flour (any one or combination of amaranth, teff, sorghum, tapioca, millet, oat, quinoa – I used amaranth, teff and tapioca)
3 Tbsp. coconut oil*, melted
3 Tbsp. coconut milk*
1 egg
1/2 cup organic cane sugar or coconut sugar*
1 tsp. baking soda
1/2 tsp. sea salt*
1/4 tsp. cinnamon (optional)

5 medium apples, peeled, cored and chopped
1/4 tsp. cinnamon (or to taste)
2 Tbsp. organic cane sugar or coconut sugar

Heat the oven to 400 degrees F. Grease a 7×11 baking pan with coconut oil.

Place the apples, cinnamon and sugar in the prepared pan. Gently mix. Place in the oven to bake for 5-10 minutes while you mix the cake batter.

Combine the flour, sugar, soda, salt and cinnamon in a medium bowl. Add the oil, milk and egg. Beat until well combined. The batter will be thick. Dollop onto the slightly baked apples.

Return the cake to the oven. Bake for 25 – 30 minutes, until the apples are tender and the cake is baked through and golden. Allow to cool slightly before serving.

*These are affiliate links. It will not change the cost for you if you buy through the link, but I will get a small commission. It helps me earn a small amount to keep putting in the time and effort to do what I do 🙂

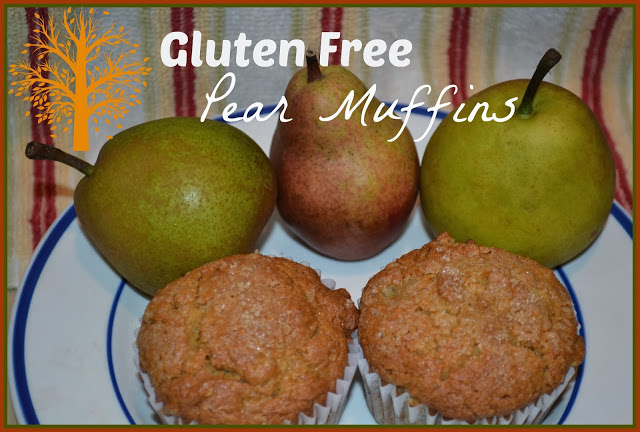
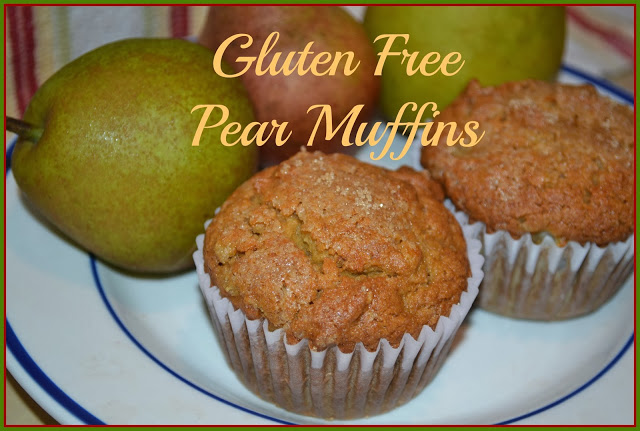
Gluten Free Pear Muffins (dairy free, nut free)

For a couple weeks my house seemed to be overflowing with pears. I’ve used most of them, but we still have a handful of very ripe pears that need to be used.

Pears are a bit tricky to bake with because they have such a high water content. You’d think they are interchangeable with apples, but they aren’t.

So while brainstorming what to do with my pears I decided to try muffins. I’ve never made any kind of bread or muffin with pears. I was happy with how these turned out.

The muffins are very moist. But also sweet with a mild spice from the nutmeg. If you want the texture to be a bit more uniform and not chunky you can grate the pears instead of dicing them. You could even puree them/use pearsauce instead of fresh pears.

However you make them, these muffins are a perfect fall treat. They even have some vegetables in them!

What is your favorite way to enjoy pears?

Gluten Free Pear Muffins
makes 1 dozen

1 cup white rice flour*
3/4 cup amaranth flour* or sorghum flour
1/2 cup organic cane sugar or coconut sugar*
1 tsp. baking soda
1 tsp. baking powder
1/2 tsp. sea salt*
1/4 tsp. nutmeg
1 tsp. vanilla
1 egg
5 Tbsp. melted coconut oil* or butter
2 Tbsp. honey or molasses
1/2 cup pureed squash
2 large or 3 small ripe pears, peeled and finely diced
organic brown cane sugar, sucanat or coconut sugar for topping (optional)

Heat oven to 350 degrees F. Line muffin tin with paper liners.

In a large bowl combine the dry ingredients. Add the vanilla, egg, oil, honey and squash. Mix well (the batter will be thick). Add the pear. Mix until fully combined.

Divide the batter into muffin cups. Sprinkle sugar on top.

Bake for 30 minutes. Allow to cool.

*These are affiliate links. It will not change the cost for you if you buy through the link, but I will get a small commission. It helps me earn a small amount to keep putting in the time and effort to do what I do 🙂

This post is linked to From The Archives Friday.

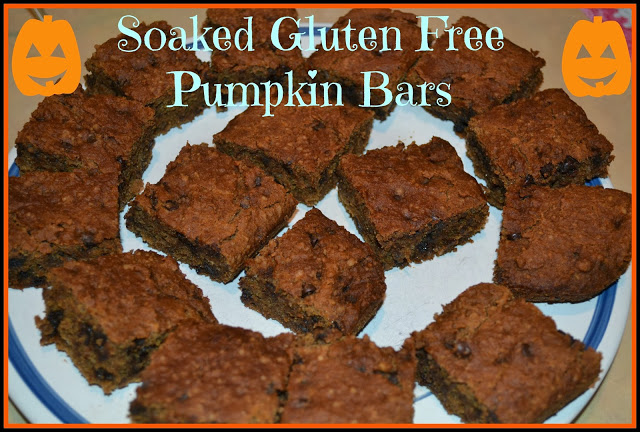
Soaked Gluten Free Pumpkin Bars (egg free, nut free, dairy free)

Fall is in full swing. That means it’s time for pumpkin recipes! I used to not like anything pumpkin. At all.

Now that I eat real food my palate sure has changed. I love just about anything pumpkin. Even pumpkin pie (up until a few years ago one bite of that at Thanksgiving was more than I needed for a year)!

These bars are simple to make. They are easy on your tummy. They are free of a lot of allergens. And they taste like fall.

Do you enjoy pumpkin-flavored treats? What is your favorite way to use pumpkin?

Soaked Gluten Free Pumpkin Bars

1 cup amaranth flour*
1/2 cup teff flour* (or amaranth or white rice)
1/2 cup tapioca flour*
1/3 cup lemon water (2 Tbsp. lemon juice + water to equal 1/3 cup)
1/3 cup coconut oil*, melted

1/2 tsp. cinnamon and nutmeg or pumpkin pie spice
1/2 tsp. cream of tartar
1/2 tsp. sea salt
1 tsp. baking soda
1/2 cup pureed pumpkin or squash
5 Tbsp. organic cane sugar, sucanat or coconut sugar*
1/4 cup honey
1/3 cup mini chocolate chips* (optional)

Combine the flours, lemon water and coconut oil. Cover and let sit for 7-24 hours.

Heat oven to 350 degrees. Grease an 8″ or 9″ square baking pan.

Add the remaining ingredients (except chocolate chips) to the flour mixture. Mix well with a hand mixer or stand mixer. Stir in the chocolate chips.

Spread the batter in the pan.

Bake for 25 minutes. Allow to cool about 10 minutes. Cut into squares.

Serve fresh or store in the refrigerator.

*These are affiliate links. It will not change the cost for you if you buy through the link, but I will get a small commission. It helps me earn a small amount to keep putting in the time and effort to do what I do 🙂

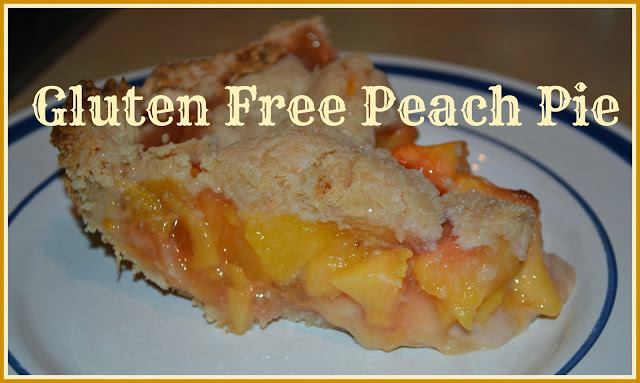
Gluten Free Peach Pie (egg free, nut free, corn free, dairy free option)

For the last few weeks we’ve had lots of peaches in our house. I’ve canned almost 30 quarts of peaches. And still had more. So I asked my family what they’d like me to make. The first request…pie!

Ok. I’ve never made peach pie before. I’m not even sure I’ve ever had it to be honest. But that’s no problem. I’ll make one anyway.

This pie is slightly sweet and captures the fresh peach taste. You can make it with a gluten free crust or a regular wheat crust.


Do you enjoy peach pie? I couldn’t answer that question just a few weeks ago. But now I can say yes!

Gluten Free Peach Pie

1 gluten free pie crust (recipe here) or a wheat crust (recipe here) for a not gluten free version

7-9 large freestone peaches, peeled and sliced or chopped
1/2 cup organic cane sugar, sucanat or coconut sugar*
4 Tbps. tapioca flour*
3 tsp. gelatin*
1 Tbsp. lemon juice
1/2 tsp. cinnamon (optional)
1/4 tsp. nutmeg (optional)
1 Tbsp. butter, cut into small pieces (optional)

Prepare the pie crust. Put the bottom layer in a pie pan.

Heat oven to 400 degrees F.

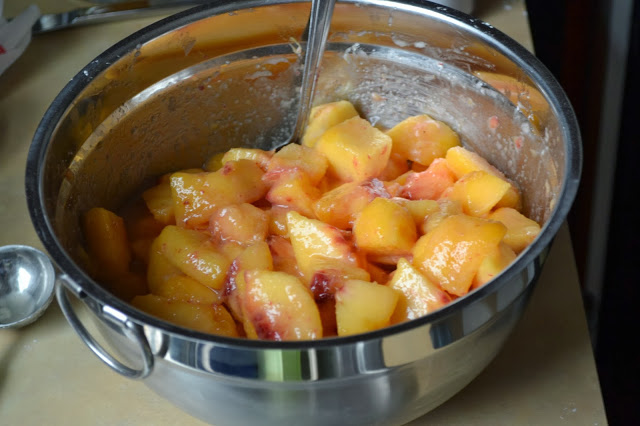
In a bowl combine the peaches, sugar, tapioca flour, gelatin, lemon juice and spices. Let sit for 10 minutes.

Put the peach mixture in the pie crust. Dot with butter.

Place the top pie crust over the peaches and seal the edges. Cut slits in the top crust to let steam out.

Place the pie pan on a baking sheet. Bake the pie at 400 degrees F for 10 minutes. Reduce the heat to 350 degrees F and bake for another 50 minutes, until crust is golden.

Allow the pie to cool and set completely.

*These are affiliate links. It will not change the cost for you if you buy through the link, but I will get a small commission. It helps me earn a small amount to keep putting in the time and effort to do what I do 🙂

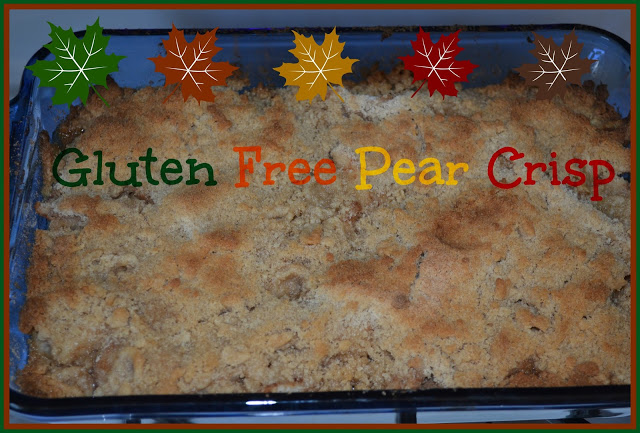
Gluten Free Pear Crisp

Although fall technically doesn’t start for a few more days, fall weather is sure here. That means it’s time for fall fruits, including pears.

They are delicious plain or pureed as pearsauce. But another great way to use them is in a crisp.

This pear crisp is gluten free and oat free. It is very easy to make (I made 2 over the weekend). And it’s a unique treat. I can’t say I’ve had many pear desserts in my life.

The pears get soft and release a lot of juice as they are baked. The crisp has a hint of cinnamon and the perfect amount of sweetness.


I hope you enjoy this crisp as much as we did. Top it with vanilla ice cream and you’ll have real treat! This makes a wonderful dessert. But it’s so good you could even serve it for breakfast or brunch.

No pears in the house? No problem. Try using peaches, plums or even apples. It’ll still be a delicious dessert. Just beware…you might have to make two of them as well. This crisp won’t last long.

Gluten Free Pear Crisp

15 – 20 pears
1/3 cup organic cane sugar
1 tsp. cinnamon
1 Tbsp. coconut flour

1/2 cup butter, coconut oil* or organic palm shortening
1 cup organic brown cane sugar, sucanat or coconut sugar*
3/4 cup tapioca flour*
1/4 cup coconut flour*

Heat oven to 350 degrees F. Grease a 7×11 pan.

Peel, core and slice pears. Place in the greased pan. Sprinkle sugar, cinnamon and coconut flour on top. Gently mix.

Combine the butter, sugar and flour until crumbly. Sprinkle over top of the pears.

Bake for 35 minutes, until golden brown.

*These are affiliate links. It will not change the cost for you if you buy through the link, but I will get a small commission. It helps me earn a small amount to keep putting in the time and effort to do what I do 🙂


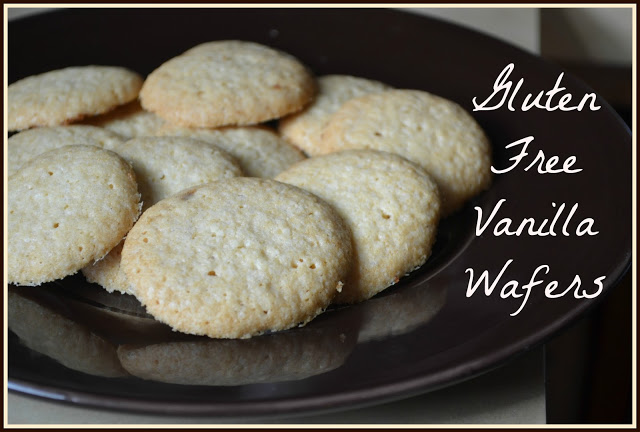
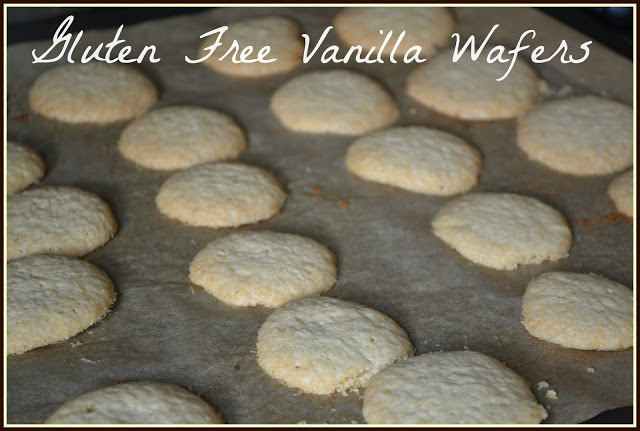
Gluten Free Vanilla Wafers


Last week I needed to make a snack for my daughter that was comparable to “vanilla cookies.” So I came up with a gluten free vanilla wafer.

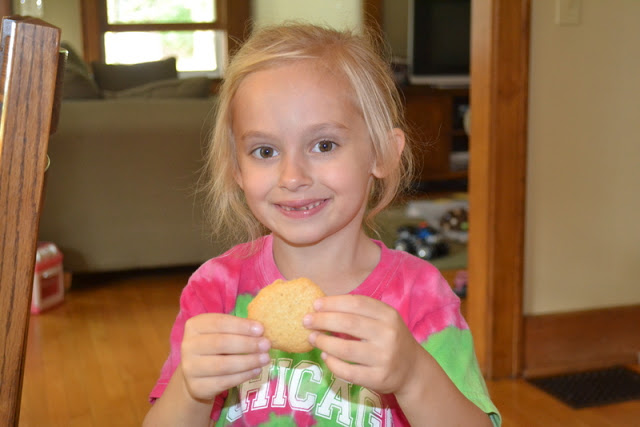
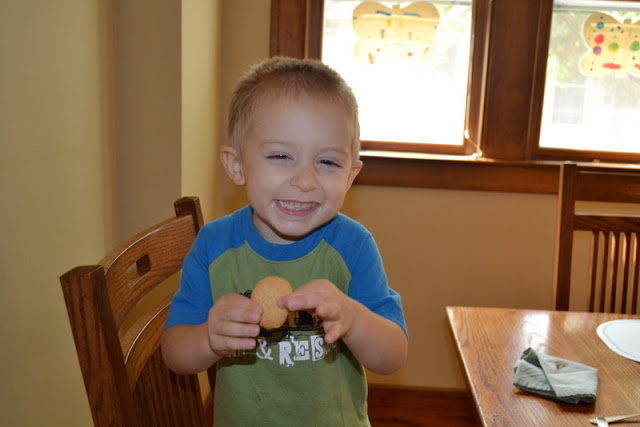
Both kids LOVE these. My husband and I do too!

These wafers are very easy to make. And one batch makes about 60 cookies. You can eat them plain. Or even put peanut butter or homemade frosting between two cookies for a real treat.


We tried chocolate frosting. My daughter said they were her “Oreos.”

If you need an easy treat that isn’t full of preservatives give these a try. Gluten free vanilla wafers are a great snack for any age at any time of day.

Gluten Free Vanilla Wafers
makes about 60 cookies

6 Tbsp. butter or palm shortening
1/3 cup organic cane sugar
1/3 cup organic brown cane sugar, sucanat or coconut sugar*
3/4 cups tapioca flour*
1/2 cup white rice flour* (or amaranth or sorghum flour)
1/4 tsp. sea salt*
1/2 tsp. baking powder
1 egg
1 tsp. vanilla

Heat oven to 325 degrees F.

Cream the butter and sugar. Add the egg and vanilla. Mix well. Add the flour, salt and baking powder. Stir with a spoon until combined.

Drop quarter-sized mounds onto parchment lined baking sheets. Bake 13-15 minutes. Turn off oven. Leave cookies in the oven to crisp for 10 – 20 minutes.

*These are affiliate links. It will not change the cost for you if you buy through the link, but I will get a small commission. It helps me earn a small amount to keep putting in the time and effort to do what I do 🙂


Easy Pink Lemonade | Just Take A Bite

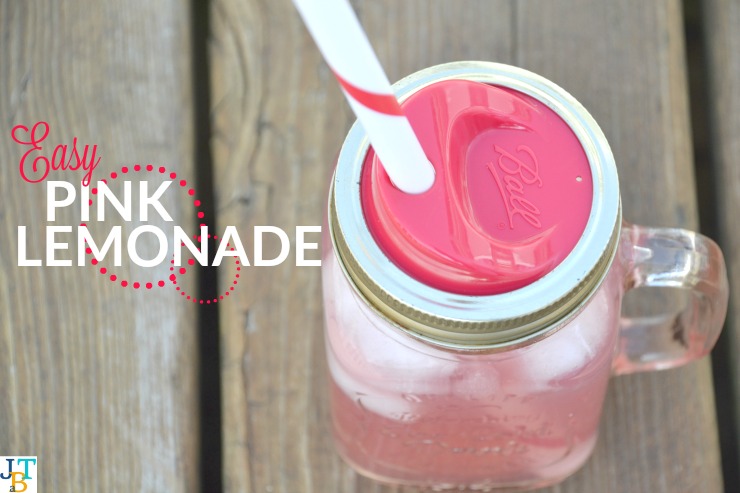
Easy Pink Lemonade

Refreshing and hydrating, this easy pink lemonade is made with only real ingredients. No artificial flavors or colors. It’s the perfect summer drink!

Easy Pink Lemonade | Just Take A Bite

Whether it’s the middle of summer or you’re just looking forward to the start of spring, pink lemonade is the perfect drink.

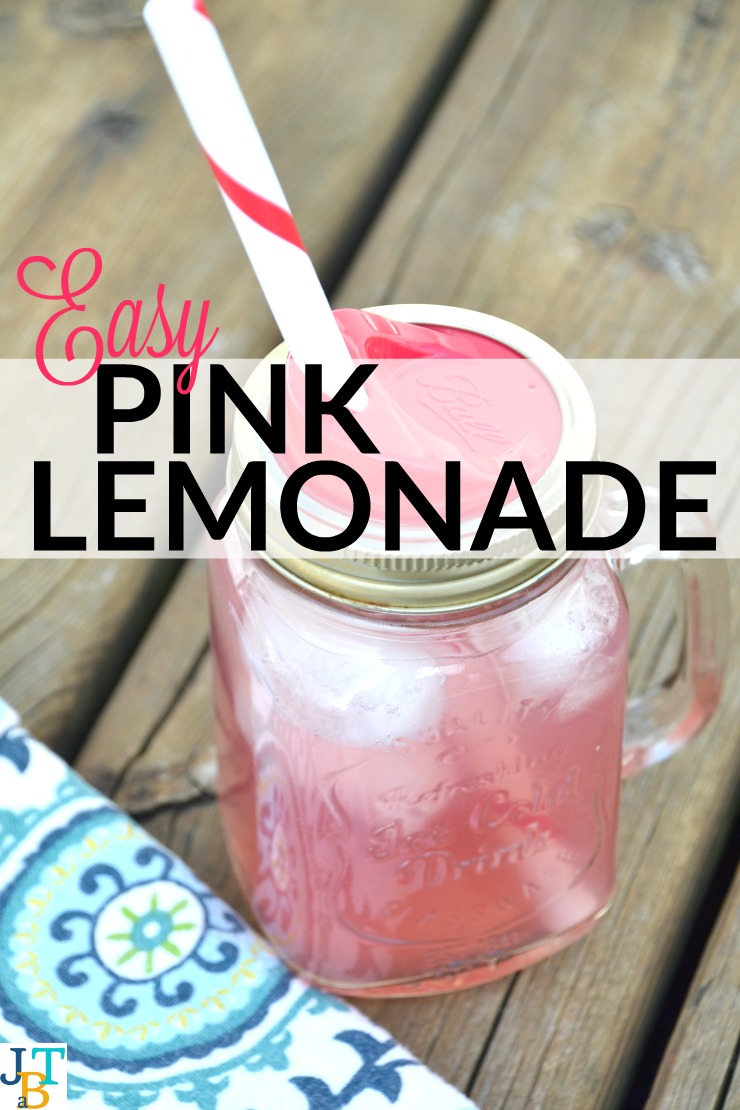
Dye-free Pink Lemonade

This easy pink lemonade only takes minutes to make. It is free of anything artificial (i.e. no food coloring!). And a simple addition of sea salt turns it into a hydrating homemade sports drink.
 
Sometimes I even go a step further and add grass-fed collagen and powdered probiotic to really bump up the nutrition factor.
 
You can make a single cup or a big pitcher. I usually make a half gallon at a time. It doesn’t last long in my house.

Allergen-Free Drinks

Having kids with all sorts of allergies means they don’t get much to drink besides water (they don’t even have any milk alternatives they tolerate). So I like to treat them to hydrating pink lemonade once in a while, especially when they are playing hard or after illness.

This is also a fun surprise in my daughter’s lunch once in a while. She tends to forget to drink while she’s at school. But if I give her pink lemonade she comes home with an empty cup.

Keep everyone hydrated and satisfied with pink lemonade. All the great flavor. Nothing artificial.

Easy Pink Lemonade | Just Take A Bite

Easy Pink Lemonade

makes 1/2 gallon

6 1/2 cups water
1/3 – 1/2 cup lemon juice
1/4 – 1/3 cup pure grape juice or pure blueberry juice
1/2 cup organic cane sugar (you can also use honey or maple syrup, but it will change the flavor a bit)
1 tsp. unrefined sea salt (optional…makes it very hydrating)
2 Tbsp. grass-fed collagen (optional)
1 capsule powdered probiotic (optional)
ice

Combine all of the ingredients in a 1/2 gallon container. Mix well, allowing the sugar to dissolve. Adjust the lemon juice and grape juice to taste if needed. Refrigerate.

Chocolate Zucchini Cupcakes | Homemade Dutch Apple Pie

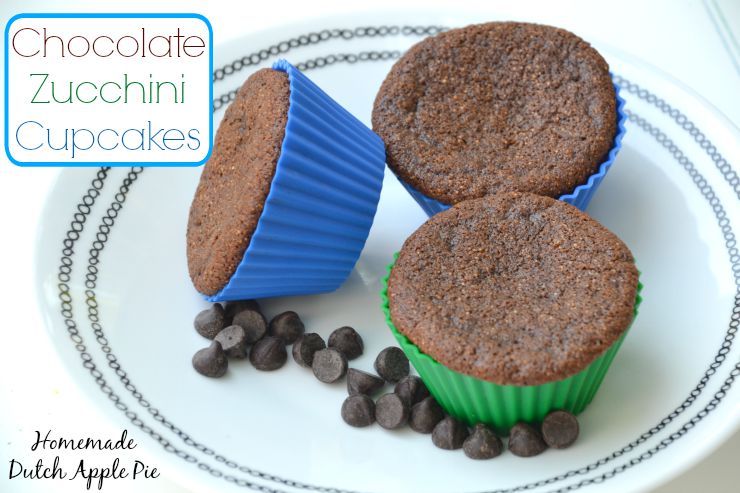
Chocolate Zucchini Cupcakes…Or Muffins (Whichever Makes You Feel Better)

Use up your abundance of zucchini with chocolate zucchini cupcakes. Enjoy them for breakfast, with a bowl of soup or as a dessert. No matter when you eat them chocolate zucchini cupcakes are delicious!
Chocolate Zucchini Cupcakes | Homemade Dutch Apple Pie
Anyone who’s ever grown zucchini knows that it just keeps coming! To me that means one thing – time to bake!
 
Chocolate and zucchini pair beautifully.
 
I added cocoa powder to a zucchini muffin batter. What I had intended to be muffins turned out a bit more like cupcakes.
 
To give you an idea of how they went over with the family…we ate twelve in the first day. Yes, twelve!
 
Since they taste like cupcakes my daughter asked for frosting on hers. So far we’ve tried vanilla and strawberry frosting. Chocolate would be great too!
Chocolate Zucchini Cupcakes | Homemade Dutch Apple Pie
Not just a dessert.
 
Personally I like to eat chocolate zucchini cupcakes like muffins. They taste amazing when they are warm and topped with butter.
 
I have even cut one up and put in my yogurt for cookies ‘n’ cream yogurt. Basically they are all around delicious.
 
Some now. Some later.
 
I’ve made two batches now. And they don’t last long. If you can keep yourself from eating them all in one day they freeze well for a special treat or a fun breakfast when you don’t have time to bake.
Chocolate Zucchini Cupcakes | Homemade Dutch Apple Pie
 
Chocolate zucchini cupcakes can be made with or without eggs. They are soaked for better nutrient absorption. And they would be perfect for an allergen-friendly birthday treat. Nobody will even know there is zucchini in them!
 
The next time you are looking for a sweet treat that is also healthy try chocolate zucchini cupcakes. Everyone will love them.
Chocolate Zucchini Cupcakes | Homemade Dutch Apple Pie
 
Gluten Free Chocolate Zucchini Cupcakes {dairy free, nut free, corn free, coconut free, soy free, egg free}
Yields 20
A simple chocolate cupcake that uses fresh summer produce to add moisture and nutrition. Chocolate zucchini cupcakes are also free of most allergens.
Write a review
Print
Ingredients
  1. 1/2 cup tapioca flour (or potato starch or arrowroot)
  2. 1/2 cup amaranth flour (or brown rice)
  3. 1/2 cup white rice flour (or sorghum)
  4. 1/3 cup cocoa powder
  5. 6 Tbsp. butter, coconut oil, lard, tallow or olive oil
  6. 1/3 cup soaking liquid (kefir, buttermilk, milk + vinegar or water + lemon juice)
  7. 1/2 tsp. cream of tartar (if using eggs) OR 1 1/2 tsp. cream of tartar (if egg free)
  8. 2 egg whites
  9. 2 egg yolks
  10. 2 Tbsp. honey (omit if using eggs)
  11. 3/4 cup organic cane sugar, sucanat or coconut sugar
  12. 1 tsp. baking soda
  13. 1/2 tsp. sea salt
  14. 1/2 tsp. organic vanilla extract
  15. 1 cup shredded zucchini
  16. 1/2 cup mini chocolate chips, nuts, dried fruit (optional)
Instructions
  1. Mix the flours, cocoa powder, fat and soaking liquid. Cover and let sit 7-24 hours.
  2. Heat oven to 350 degrees F. Grease muffin tins or fill tin with paper liners.
  3. Beat egg whites and cream of tartar until stiff peaks form. Set aside.
  4. Add the remaining ingredients (except nuts/chips/fruit) to the soaked flour.
  5. Beat until well combined and lumps are removed (about 2 minutes).
  6. Fold in egg whites.
  7. Stir in nuts/chips/fruit.
  8. Pour the batter into the muffin cups, about 3/4 full.
  9. Bake until golden and toothpick inserted in center comes out clean, about 25 minutes. Allow to cool. Top with frosting if desired.
  10. To make the muffins egg free follow the same soaking directions. Then add the cream of tartar, honey and remaining ingredients. Mix well until lumps are removed. Stir in nuts/chips/fruit. Bake as directed above. They may take a few extra minutes to bake.
Notes
  1. Any 1 1/2 cup combination of gluten free flour will work. All purpose, whole wheat or spelt flour will also work.
Just Take A Bite https://justtakeabite.com/


In order for me to support my blogging activities, I may receive monetary compensation or other types of remuneration for my endorsement, recommendation, testimonial and/or link to any products or services from this blog.

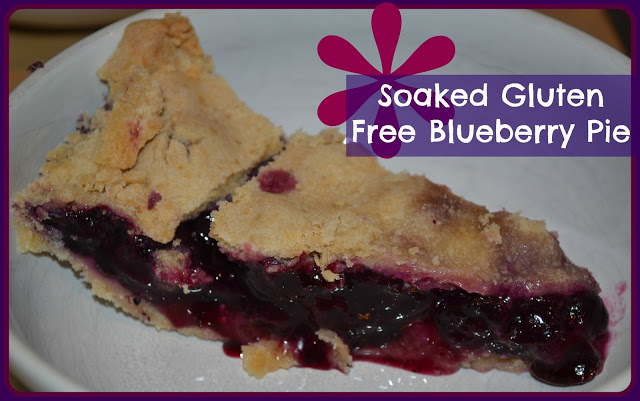
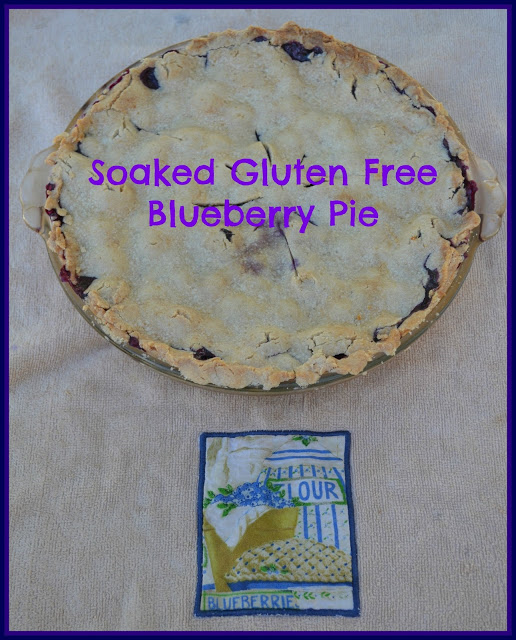
Soaked Gluten Free Blueberry Pie

Over the course of the last week I have made two blueberry pies. And the second one is almost gone already! I won’t say who ate most of it…

I will say that the whole family loves blueberry pie! It’s been a wonderful treat for all of us.

I’ve made three gluten free pies so far this summer and have been experimenting with crust. My latest version was quite good. Plus it is soaked for easier digestion.

Gluten free crust can be tricky because it doesn’t hold together as well as a wheat crust when you roll it. But I worked around that by rolling the dough onto wax paper and then just laying the whole thing on top of the pie. It worked really well! This crust recipe will work for any kind of pie, quiche, etc.


I prepared the dough earlier in the day to let it start soaking. Then I rolled the dough/put the bottom crust in the pan in the evening and assembled the rest of the ingredients. The next morning I had a blueberry pie in the oven in less than 10 minutes!

Blueberry pie is great plain or topped with ice cream or whipped cream. I’ve even been enjoying cutting it up into little pieces and mixing it into yogurt for a delicious breakfast or lunch.

I have to give credit to my mom – the original blueberry pie recipe is hers. I’ve just modified it a bit to make it gluten free.

Blueberry is my absolute favorite flavor of pie. And I’m so thankful I can still enjoy this amazing summer treat with fresh Michigan blueberries.

Soaked Gluten Free Blueberry Pie
makes 1 pie

CRUST:

1 cup amaranth flour* (or sorghum or teff)
1 cup tapioca flour*
1/3 cup white rice flour*
1 Tbsp. organic cane sugar
1/2 tsp. sea salt*
1 tsp. cream of tartar (or flaxseed)
1/2 cup + 1 Tbsp. butter, palm shortening or lard (or any combination – I used butter and shortening)
2 Tbsp. lemon juice or yogurt
4 Tbsp. water

In a food processor (or bowl – you can do it by hand, it’s just harder) combine the flour, sugar, salt, cream of tartar and 1/4 cup of fat. Pulse until crumbly. Add the remaining fat and pulse until combined. Add the soaking agent and water. Blend until a dough forms. If the dough is still crumbly gradually add more water.

Gather all of the dough into a ball. At this point you can cover it and refrigerate it until ready to use. Or you can split it in half and roll it out. Place one half in the bottom of a 9″ pie plate (I just pressed the bottom half into the pan). Cover and refrigerate. Roll the 2nd half of the dough onto wax paper until it is large enough to cover the pie. Cover it with a second piece of wax paper and refrigerate.

Let the dough soak (either as a ball or rolled out) for 7-24 hours. If soaking the dough as a ball, after soaking split it in half and roll out as instructed above. You might have to knead the dough a few times when it’s cold to prevent crumbling.
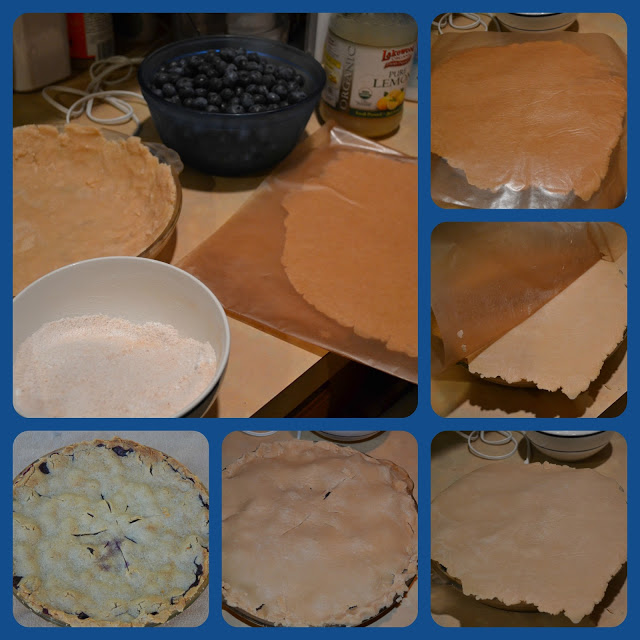
Preparation of all components the night before and simple baking in the morning.

PIE:

4 1/2 cups fresh blueberries (or frozen, thawed)
1 cup organic cane sugar, sucanat or coconut sugar*
2 tsp. gelatin (optional – helps the filling to gel)
6 Tbsp. tapioca flour OR 4 Tbsp. arrowroot OR 3 Tbsp. tapioca flour + 2 Tbsp. arrowroot
1/8 tsp. sea salt
1/4 tsp. nutmeg
1/4 tsp. cinnamon
2 Tbsp. lemon juice

Prepare the pie crust (bottom crust in pan/top crust rolled out). Heat the oven to 450 degrees F.

Combine the filling ingredients. Pour the mixture into the prepared crust. Top with the remaining crust. Flute/seal the edges. Cut slits into the top of the crust.

Bake the pie at 450 degrees F for 10 minutes. Reduce the heat to 350 (leave the pie in the oven) and bake for another 35 – 40 minutes, until the the crust is golden and crisp.

Allow the pie to cool and set completely before serving.

Store covered in the refrigerator.

*These are affiliate links. It will not change the cost for you if you buy through the link, but I will get a small commission. It helps me earn a small amount to keep putting in the time and effort to do what I do 🙂