Home » Kid-friendly Recipes » Page 26

Category: Kid-friendly Recipes

It is so important to cook homemade, healthy food. But it’s not always easy to find kid-friendly recipes.

That’s where I come in. I’ve got hundreds of kid-tested and approved recipes that won’t keep you in the kitchen for hours or stretch your budget too thin.

I focus on allergy-friendly, whole foods. But I always cook with kids in mind. I take all sorts of feeding challenges into account too.

We’ve dealt with every allergy possible, so I’ve created recipes that are gluten free, nut free, dairy free, egg free, soy free, corn free, coconut free and more!

Kid-friendly recipes don’t have to be boring. And they are certainly not limited to chicken nuggets and pizza every night.

A nourished child will enjoy a wide variety of fruits, vegetables, proteins, carbohydrates and fats. Get your kids in the kitchen with you and start cooking! Have fun with food and your kids will learn to love eating.

Hydrating Iced Cocoa

iced cocoa

Last year I shared my “secret” recipe for hot chocolate that I drink daily. It tastes great and keeps me  going all day.

This past week we went from chilly to hot! Though now it’s back to chilly again. That’s Michigan for you.

As much as I love my hot chocolate, when I’m dripping with sweat from playing outside with the kids it just doesn’t sound that appealing.

So now it’s time for an iced version! When I tried it I was pleasantly surprised that the iced cocoa kept me just as hydrated as the hot version. It was also just as easy to drink without feeling like I had a belly full of liquid.

I don’t know the science behind it, but just a small amount of cocoa helps my body absorb liquids and stay hydrated. Cocoa is also full of minerals like potassium and magnesium. It even has quite a bit of iron and fiber.

I’ve talked before about the importance of not drinking tons of plain water throughout the day. It will actually flush the vitamins and minerals out of your body and leave you dehydrated…and feeling even thirstier! It will also lower your metabolism (you can read more about that in Eat for Heat and The Nourished Metabolism).

I stick to my mug of hot chocolate in the morning and now my mug of iced cocoa in the afternoon. My thirst is quenched for the whole day. As an added bonus I no longer have the overactive bladder I had from childhood on. I’m not running to the bathroom all day long.

Do you play sports? Skip the neon-colored sports drinks and fill your water bottle with iced cocoa.

My kids often ask me to make hot chocolate for them. But it’s tough to get it just the right temperature so that it’s still warm but not too hot. They are going to love this new treat.

If you’re looking for a delicious, refreshing and hydrating drink this summer try some iced cocoa. It only takes a few minutes to make and tastes great! 

iced cocoa collage

Hydrating Iced Cocoa
Serves 1
A delicious, hydrating drink to keep you going all summer long.
Write a review
Print
Prep Time
2 min
Prep Time
2 min
Ingredients
  1. 1 - 2 tsp. organic cocoa powder (you can substitute carob powder)
  2. 1 Tbsp. honey, maple syrup, coconut sugar and/or cane sugar
  3. 1/8 - 1/4 tsp. unrefined sea salt
  4. 1-2 tsp. gelatin or collagen (optional)
  5. 1/4 cup milk or milk substitute (optional)
  6. ice cubs
  7. hot water
  8. cold water
Instructions
  1. Add cocoa powder, sweetener, salt and gelatin to a heat-safe cup (I like to use a pint jar/mug).
  2. If using gelatin, add 1/8 cup of water, stir and let sit for about 30 seconds to dissolve.
  3. Add 1/4 cup boiling water to the cup. Stir to dissolve the cocoa/sweetener/salt mixture.
  4. Add 4-6 ice cubes to cool the cocoa.
  5. Add milk for richness.
  6. Fill the rest of the glass with cold water.
  7. Stir and serve immediately.
Just Take A Bite https://justtakeabite.com/

Three Ingredient Caramel Apple Salad (gluten free, dairy free)

caramel apple salad

Lately I’ve been serving fruit salad with our “breakfast for dinner” meals. I usually just do a mix of whatever fresh and frozen fruits we have on hand. We all enjoy it.

But last week I wanted something different. I also wanted something my son could eat (he’s allergic to grapes, bananas and pears…and he doesn’t tolerate citrus fruits well). That’s not easy to do.

I decided to use apples. I created a caramel apple salad that is so easy to make and so delicious!

My daughter actually licked every last drop of “caramel” off her plate. Both kids asked for seconds too. It was that good.

I love how simple this recipe is. It takes about three minutes to prepare and only has three ingredients. You can make enough for one or for a large group.

I served it as a simple fruit salad on the side. But this salad isn’t just for eating plain. It works as an ice cream topping, a dessert, a yogurt add-in (caramel apple yogurt…mmm) or a treat to mix in your oatmeal.

If you want to make the salad a bit fancier you can add chopped nuts, dried fruit or shredded coconut. You could also add a little heavy cream or coconut milk to make a creamy caramel apple salad.

I happened to have a little extra heavy cream in the fridge. So I topped ours with fresh whipped cream.

Dress it up, serve it plain, eat it for breakfast or as a dessert. No matter how you eat it, this caramel apple salad is quick, easy and so good!

DSC_1732

Three Ingredient Caramel Apple Salad (gluten free, dairy free)
Serves 4
A simple side dish or dessert that only takes minutes to prepare. Make as little or as much as you want.
Write a review
Print
Ingredients
  1. 4 large apples
  2. 4 Tbsp. coconut sugar or cane sugar
  3. 2 Tbsp. honey and/or maple syrup
Instructions
  1. Peel and chop the apples.
  2. Mix all of the ingredients in a bowl.
  3. Cover the salad and refrigerate until the sugar is dissolved and a syrup has formed (about 1 hour).
Notes
  1. The apples make a great ice cream topping, dessert, yogurt add-in or oatmeal topping.
  2. Add 1 Tbsp. coconut milk or heavy cream for a creamy version.
  3. Add chopped nuts, dried fruit or shredded coconut for variety.
  4. Top with whipped cream to serve as a dessert.
Just Take A Bite https://justtakeabite.com/

Butternut Squash Quinoa Risotto (gluten free, dairy free)

butternut squash quinoa risotto

I LOVE risotto. I also LOVE anything with squash. Unfortunately my son is allergic to rice (yes, really). So I never make risotto anymore.

My son is also fairly picky. But I was craving risotto the other day. So I crossed my fingers and made a quinoa version that we could all eat.

The verdict? Amazing! Three of us dug right in and even had seconds.

My son, however, ran from the table screaming at the word risotto. He didn’t come back until dinner was over and I was cleaning the table. He finally agreed to try a bite. When he did his reaction was, “This is so good!” He proceeded to clear his plate.

I’ll consider it a great dinner success!

One of the best parts about the this risotto is that it is so easy to make. I cooked the quinoa earlier in the day when I had a few spare minutes. Then at dinner time it only took about 15 minutes to make the risotto.

I also love this recipe because it’s a simple way to get my kids to eat quality vegetables and bone broth without them realizing it. Easy, healthy and delicious…my favorite kind of recipe.

Give this risotto a try. Your whole family will love it.

DSC_1512

Butternut Squash Quinoa Risotto (gluten free, dairy free)
Serves 4
A simple main dish or side dish filled with vegetables and bone broth that the whole family will love.
Write a review
Print
Ingredients
  1. 1/2 cup quinoa - soaked for at least 7 hours and then drained
  2. 1 cup water or bone broth
  3. 1 cup pureed butternut squash (you can replace this with any pureed vegetable you like)
  4. 1 Tbsp. coconut oil (or butter)
  5. 1/2 - 3/4 cups bone broth
  6. seasoning - sea salt, garlic powder, pepper - seasoning of your choice
  7. grated parmesan cheese (optional if tolerant of dairy)
Instructions
  1. Bring one cup of water and/or broth to a boil. Add the drained/rinsed quinoa. Cover. Reduce heat and simmer for 12 minutes.
  2. Remove the pan from the heat. Leave the pan covered for 15 minutes. At this point you can make the risotto or refrigerate the quinoa until you are ready to make the risotto.
  3. In a pot, heat the quinoa, squash, coconut oil, seasoning and 1/2 cup broth. Stir until well combined. Simmer the mixture until the broth has cooked down, stirring occasionally. Add more broth if desired/if the mixture is too dry. This will take about 10-15 minutes.
  4. Adjust the seasoning to taste. Add cheese directly to the pan or grate on top of individual servings if desired.
Just Take A Bite https://justtakeabite.com/


Gluten Free Dairy Free Orange Cranberry Scones (egg free, nut free, rice free)

orange cranberry scones

Almost every Friday we have breakfast for dinner. It gets hard to come up with a variety of hearty breakfast food when you can’t serve eggs, dairy or wheat. Recently I decided to make one of my favorite breakfast foods as a component of our meal – scones!

Instead of finding a recipe I wanted to try making something new. I decided on orange cranberry scones.

DSC_1076

I had a great little helper in the kitchen to run the food processor for me. He sampled the dough as well to make sure it was just right. Then he did his best to wait patiently while they baked.

In the end we had delicious, slightly sweet scones that the whole family thoroughly enjoyed. For a special touch I sprinkled homemade powdered sugar on top. You could also make a simple glaze with powdered sugar and orange juice or any type of milk. Or they are great as-is.

These would pair very well with quiche (if you tolerate eggs). I served them with bacon, roasted asparagus and fruit salad.

If you don’t like orange and/or cranberry you can substitute your favorite flavors. Lemon and blueberry would taste great. You could simply swap cranberries for another dried fruit. Or you could add nuts. I can’t wait to have them again!

 DSC_1077

Gluten Free Dairy Free Orange Cranberry Scones
Yields 8
A mildly sweet scone that is gluten, dairy, egg, nut and rice free.
Write a review
Print
Prep Time
10 min
Cook Time
35 min
Total Time
45 min
Prep Time
10 min
Cook Time
35 min
Total Time
45 min
Ingredients
  1. 2 cups any combination of gluten free flours (I use amaranth, sorghum, teff and tapioca)
  2. 1/3 cup organic cane sugar or coconut sugar
  3. 1 tsp. aluminum-free baking powder
  4. 1/2 tsp. baking soda
  5. 1/2 tsp. unrefined sea salt
  6. 3/4 cups organic palm shortening (you can substitute butter if you tolerate dairy)
  7. 1/4 cup orange juice
  8. 3 Tbsp. maple syrup or honey
  9. 1 tsp. ground flaxseed (optional - this helps bind them)
  10. 1 Tbsp. orange zest
  11. 1/2 cup cranberries (or other dried fruit or nut)
Instructions
  1. Heat the oven to 350*F. Line a baking sheet with parchment paper.
  2. In a food processor or mixing bowl combine the flour, sugar, baking powder, baking soda, salt, flaxseed and orange zest. Pulse or stir until combined.
  3. Add half of the palm shortening. Pulse or blend. Add the other half of the shortening. Pulse or blend until the mixture is slightly crumbly.
  4. Add the juice and syrup. Mix until a sticky dough forms.
  5. Transfer the dough to a clean bowl (if using a food processor). Add the cranberries and mix well.
  6. Drop the dough by large mounds onto the prepared baking sheet. Press the dough down slightly and form scones into desired shape.
  7. At this point you may bake the scones immediately, cover them and refrigerate or freeze to bake later.
  8. When ready to bake, place the baking sheet in the oven and bake for 35 minutes. Allow the scones to cool for 5-10 minutes before removing them from the pan.
  9. Dust the scones with powdered sugar if desired.
Just Take A Bite https://justtakeabite.com/

Fudge Caramel Cone Swirl Ice Cream

Fudge Caramel Cone Swirl Ice Cream

Ice cream has to be my absolute favorite food. I love to make homemade ice cream so that it is nutrient-dense and does not contain any chemicals. As an added bonus, when you make your own ice cream you can create any flavor you like!

We generally don’t have much cream all winter since our milk share goes down. But I recently found some good cream at a local farm store. I jumped at the chance to have good ice cream in the house again.

DSC_1065

My daughter and I brainstormed flavors and came up with fudge caramel cone swirl. This flavor does take a little work up front since you have to make the fudge and the caramel. You could also make the cones (I happened to have some gluten free store-bought cones that I needed to use up). But it is well worth the time and effort.

Do you make your own ice cream? What is your favorite flavor?

DSC_1061


Fudge Caramel Cone Swirl Ice Cream
Write a review
Print
Ingredients
  1. 3 cups heavy cream (raw if available)
  2. 1/2 - 3/4 cups any combination of sweetener (cane sugar, maple syrup, honey, coconut sugar)
  3. 1-4 egg yolks (optional)
  4. 1/2 tsp. unrefined sea salt
  5. 1 Tbsp. organic vanilla
  6. 1/4 cup caramel sauce
  7. 1/4 cup fudge sauce
  8. 1/4 cup ice cream cone pieces
Instructions
  1. Prepare the caramel sauce and fudge sauce. Allow the sauces to cool completely.
  2. Combine the cream, yolks, sweetener, salt and vanilla in a blender. Blend until smooth. Adjust the sweetness to taste.*
  3. Prepare the ice cream in an ice cream maker (this usually takes 15 - 20 minutes with a Kitchen Aide ice cream maker attachement).
  4. Transfer the ice cream to a freezer-safe container. Mix the cone pieces into the ice cream. Drop spoonfuls of the fudge and caramel into the ice cream and gently swirl.
  5. Place the ice cream in the freezer until firm.
Notes
  1. *The ice cream batter should be slightly sweeter than you want the ice cream to taste. The sweetness will decrease as it freezes.
Just Take A Bite https://justtakeabite.com/

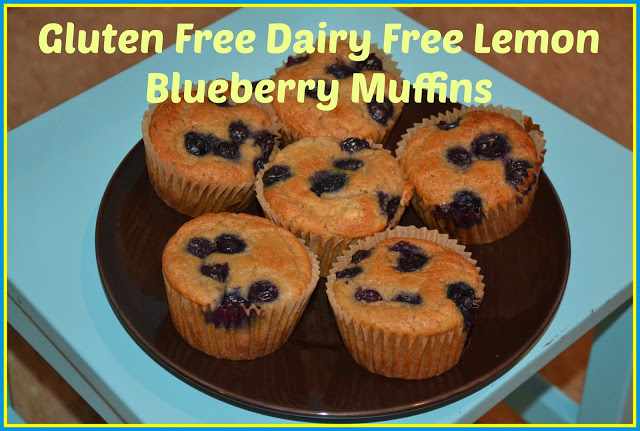
Gluten Free Dairy Free Lemon Blueberry Muffins (nut free, soy free, rice free)

Brrrr!!! Winter is really starting with a bang this year. We’ve already had so much snow. Now an ice storm. It sure would be nice to be somewhere warm and sunny right now!

I know that is not possible, but I can imagine. And a batch of lemon blueberry muffins really helps. They remind me of the bright, fresh flavors of summer.

These muffins are both gluten and dairy free. And they are very simple to make. My little muffin loving two year old can eat a whole batch himself in a few days.

So whether it is warm and sunny near you or you just want to imagine it is, give these muffins a try.


Gluten Free Dairy Free Lemon Blueberry Muffins
makes 12 muffins

3/4 cups amaranth flour
3/4 cups sorghum flour
2/3 cup organic cane sugar, sucanat or coconut sugar
1 tsp. baking soda
1 tsp. baking powder
1/2 tsp. sea salt
1 egg
1 cup applesauce
4 Tbsp. real lemon juice
4 Tbsp. coconut oil, melted
blueberries (fresh or frozen) (adjust amount for personal taste)

Heat the oven to 350 degrees F. Line a muffin pan with muffin cups.

In a medium bowl combine the flour, sugar, soda, powder and salt.

Add the egg, applesauce, lemon juice and oil. Mix until well combined (I use a hand mixer).

Fill the muffin cups 3/4 full with batter. Drop the blueberries into the muffins. Press down slightly.

Bake for about 30 minutes, until starting to become golden and baked through. Allow to cool for a few minutes before serving.

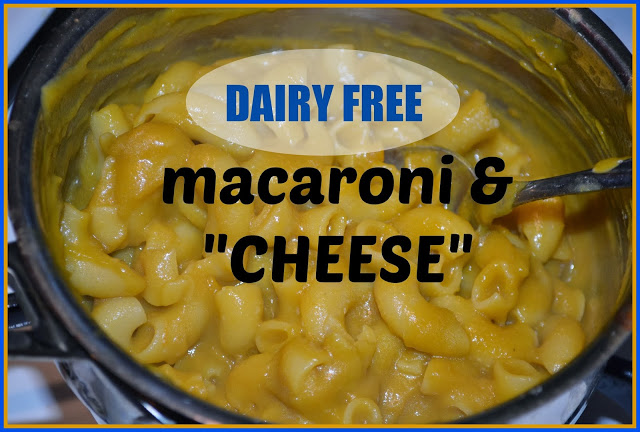
Dairy Free Macaroni and "Cheese"


I have a picky eater. He ate tons of vegetables when he was starting to eat solids. He’d need third helpings of carrots. He would eat just about anything you gave him.

Now he’s two. Enough said. The mere mention of the word squash sends him running to another room. One bite of broccoli can turn into gagging and his whole dinner coming back up. And after eliminating beans and peas from his diet from allergies there isn’t much left to try that he might even attempt to eat.
So it’s time to puree. I have started to add pureed vegetables to whatever I can. If he doesn’t eat any of this broccoli from dinner, it goes right into the blender as part of a smoothie…that he’ll happily drink.
Last night I made one of my son’s favorite foods – macaroni and cheese (he has no idea there is such a thing as a box of mac ‘n’ cheese…so at least I don’t have to try to make it taste like that). This is not an easy task for a child allergic to dairy! But I came up with a recipe that is healthy and has no dairy substitutes.

I used broth and pureed vegetables for the sauce. Both kids cleared their plates! My five year old knew what was in it. She loves vegetables and healthy foods. So my only challenge was to make sure she didn’t tell her little brother!
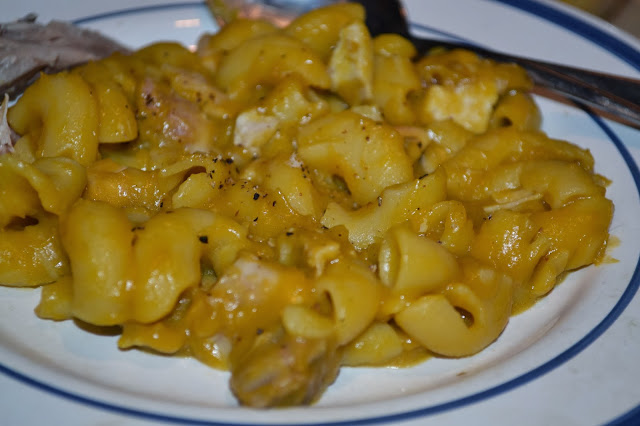
I’m always happy when we have a dinner success. Especially when it involves healing broth and a variety of vegetables. I also added some leftover roasted chicken for extra protein.
This is a fun, easy dinner that will get even picky eaters to clear their plates. You can use whatever vegetables you want. You can even make green mac ‘n’ cheese if your kids would enjoy that. I stick to an orange base so it looks like cheese. But I did have broccoli in it too.
If you are totally grain free you can still use the sauce to put on top of meat or vegetable ribbons. It would also be great on spaghetti squash.
I’ve never been so happy to give my kids mac ‘n’ cheese for dinner. I’m sure I’ll be doing it more often now.

This recipe does not have exact measurements. It is a method. You really can’t go wrong. If you add a lot of broth, you just cook it longer until it reduces enough. And you can start with a small amount of vegetables or add a lot. Whatever you think your family will like.

Depending on what noodles you use, this recipe can be gluten free, egg free, nut free and/or corn free.

Dairy Free Macaroni and “Cheese”

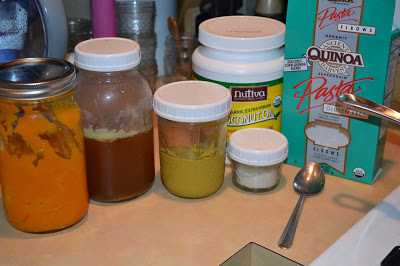
Cooked noodles (wheat, rice, quinoa, bean…whatever you like – I used quiona/corn for my son)
Pureed vegetables (squash alone works well, but any vegetable or combination works – I used carrot, broccoli and squash this time)
Chicken broth
Coconut oil
Unrefined sea salt (to taste…or any other seasoning you like)

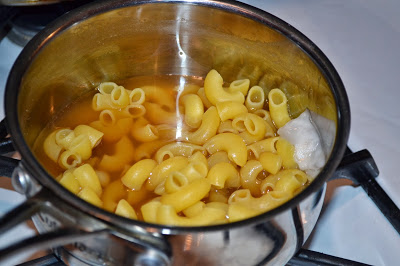
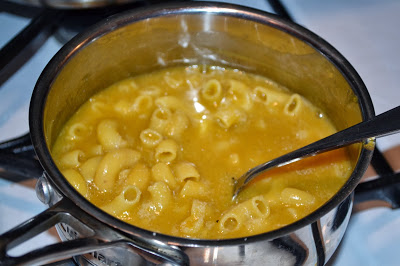
Cook and drain the noodles. Return them to the saucepan. Add enough chicken broth to mostly cover the noodles. Add some coconut oil (as much or as little as you want – the fat helps it thicken – 1 Tbsp. is a good start). Turn the heat on high.

Add the vegetable puree. Start with equal amounts of broth and puree. You can add more as it cooks if you like. Add some seasoning.

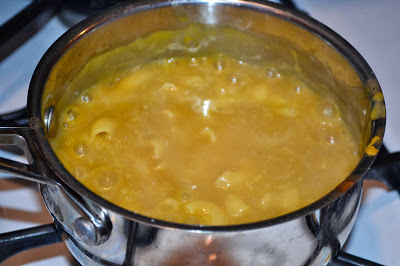
Bring to a boil and reduce heat. Allow the mixture to simmer, stirring once in a while. As the liquids reduce and it gets thicker you’ll need to stir more so it doesn’t stick to the pan. You can add more broth and/or vegetables at any time during this process.

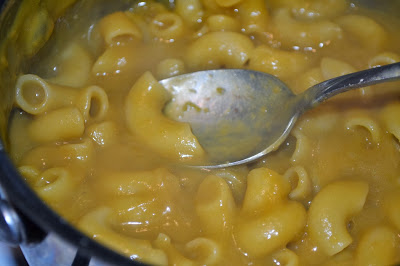
Cook the mixture until the liquids reduce enough to be a thick sauce. Adjust the seasoning to taste.

You can add cooked meat or vegetables at this point and allow them to warm through.

Enjoy some amazing macaroni and cheese that is filling, nourishing and totally dairy free!

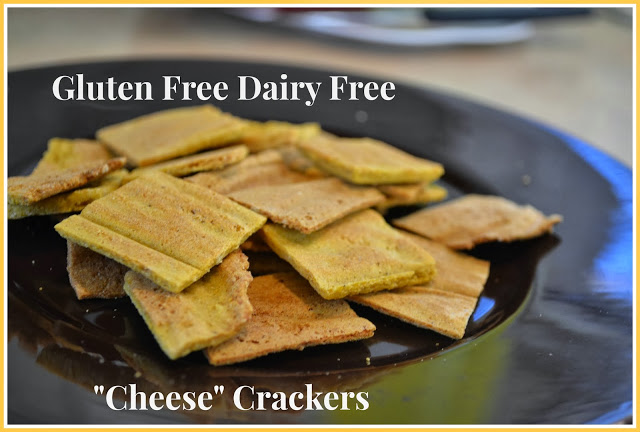
Gluten Free Dairy Free "Cheese" Crackers (egg free, nut free, rice free, corn free)

I do my best to make homemade snacks for my kids. It used to be pretty easy. Then we went gluten free. A little more challenging, but not that big of a deal. Now that my son is also dairy, almond, egg and rice free it gets even harder.

So I had to create a cracker that he could eat…that actually tastes good…and isn’t made with weird cheese substitutes. I came up with a dairy free version of my cheese crackers.

They look cheesy and taste cheesy. But it’s really just squash and salt. But please don’t tell my two year old that! He loves them. And as long as he doesn’t hear the word squash, he’ll devour them. Literally. I could hardly even take a picture because he wanted the entire plate of crackers.

These crackers aren’t just for people with a dairy allergy. They are great for anyone looking for a healthy, homemade snack. They really are delicious! The whole family really enjoys them.

Homemade crackers are an easy snack to keep on hand. They take about 10 minutes to prepare. And you can add any seasoning you like for variety. It doesn’t hurt that they have vegetables in them either. It is a healthy snack that makes everyone happy.

Gluten Free Dairy Free “Cheese” Crackers

3/4 cup any combination of gluten free flour (I use amaranth and sorghum)
1/4 cup tapioca flour
(you can substitute 1 cup or organic whole wheat or all purpose flour if you aren’t gluten free)
1/2 tsp. sea salt
1/4 tsp. baking soda
1/2 tsp. organic cane sugar or coconut sugar
1 Tbsp. coconut oil, melted
4 Tbsp. pureed squash (or pumpkin, sweet potato or carrot)
1 Tbsp. water

Heat oven to 350 degrees F. Cut two pieces of parchment paper the size of a baking sheet.

Combine the flours, salt, soda and sugar. Mix. Add the coconut oil and squash. Mix well. If the dough does not hold together gradually add water until the dough just comes together. The best way to check is to work the dough with your hands a little.

Once a ball of dough is formed, place it on a piece of parchment paper. Place the other piece of parchment paper on top. Roll the dough until it fills most of the paper/until it is about 1/4″ thick.

Remove the top piece of parchment paper. Cut the dough into squares with a pizza cutter or knife (you can also use cookie cutters to make shapes and transfer them to parchment lined baking sheet). Slide the parchment paper with the crackers onto a baking sheet.

Bake for 20 – 25 minutes, until starting to get golden and crisp. Remove from the oven and allow the crackers to cool. They will get slightly crispier as they cool.

Store in an air tight container.

This post is linked to Fat Tuesday at Real Food Forager.

Soaked Gluten-Free Zucchini Bread

Soaked Gluten-Free Zucchini Bread

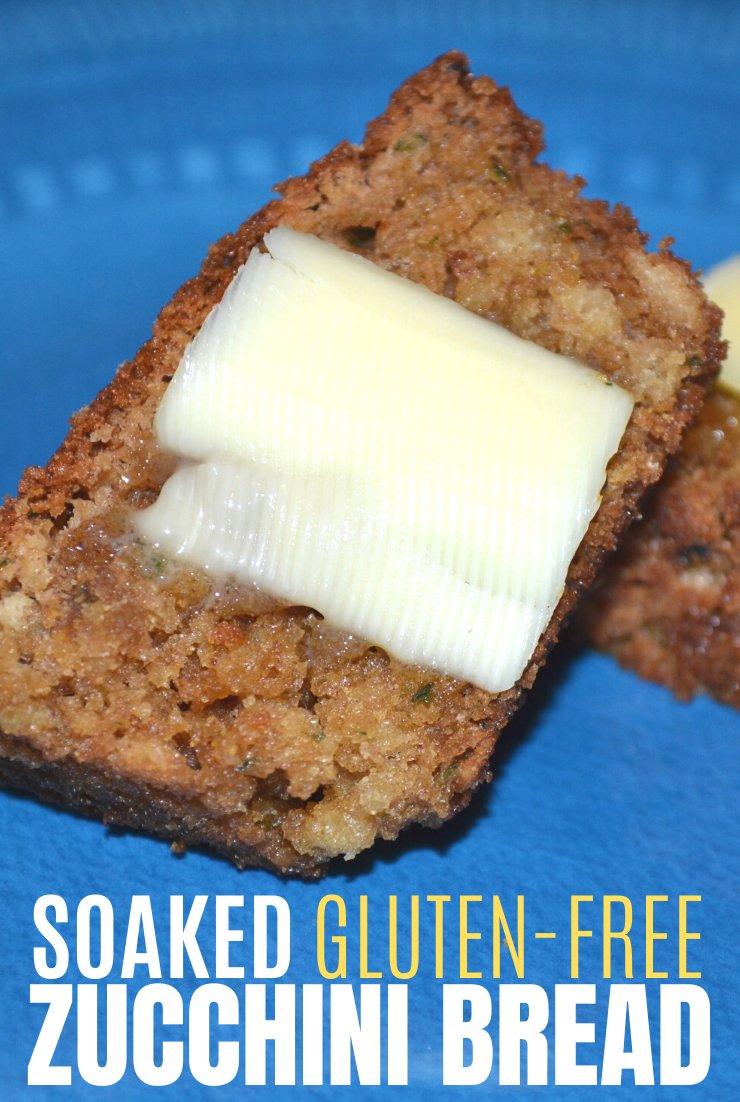
Looking for a delicious way to use up extra zucchini or to simply add veggies to your kids’ diet? This soaked gluten-free zucchini bread is easy to make and will quickly become a family favorite.Soaked Gluten-Free Zucchini Bread

No matter what time of year I love zucchini. It can be added to just about anything!

One of our favorite ways to eat zucchini is in bread. It adds moisture to baked goods without adding an odd flavor.

Gluten-Free Zucchini Bread

This is my soaked and gluten-free version of zucchini bread. You still get the sweet, cinnamon zucchini bread flavor. But it’s much easier on your tummy.

You can read more on why it’s important to soak grains HERE.

Soaked Gluten-Free Zucchini BreadHow to Use Up Extra Zucchini

When zucchini is in season, we get quite an abundance from our garden. If you participate in a CSA you likely get a lot too!

We actually keep up with eating most of it fresh. But I do try to preserve some. I like to grate it and freeze it in two-cup portions so that I can make gluten-free zucchini bread any time of year!

Some of our other favorite ways to use zucchini include:

How to Eat Zucchini Bread

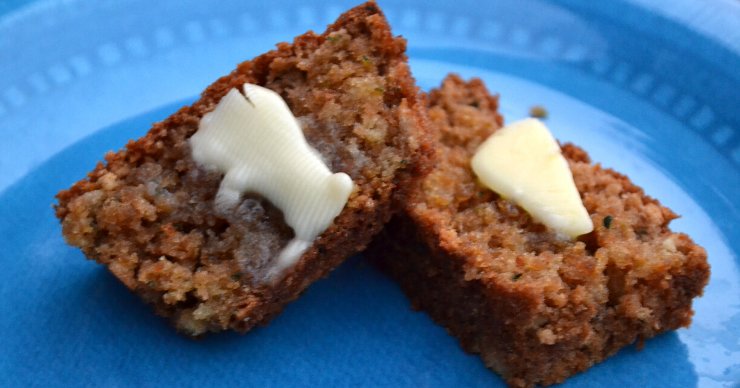
In my opinion, zucchini bread is best enjoyed fresh out of the oven, topped with lots of real butter.

Sometimes for variety I add chopped walnuts, raisins, cranberries, or chocolate chips. My kids love all of these variations.

Easy-Prep Zucchini Bread

One of the best things about soaking your grains is that you can do most of the prep work ahead of time. I prefer to do it the night before. Then in the morning you can have fresh zucchini bread in the oven in minutes!

By the time everyone is showered and dressed there is warm zucchini bread for breakfast. Pair it with eggs or bacon for a well-balanced, real food diet.

Do you like zucchini bread? What else do you make with zucchini?
Soaked Gluten-Free Zucchini Bread: A kid-friendly tummy-friendly treat #realfood #feedingkids #zucchini

Soaked Gluten-Free Zucchini Bread

makes one 9″ loaf

1/2 cup white rice flour
1/2 cup tapioca flour
1/2 cup amaranth flour
1 tsp. psyllium husk powder
1/3 cup butter or coconut oil, melted
1/3 cup soaking liquid (yogurt, kefir, buttermilk, sour milk or warm water + 1 Tbsp. lemon juice or vinegar)

2 eggs, separated
1/2 tsp. cream of tartar (optional – it helps the egg whites get stiff)
1/2 cup honey
1 cup grated zucchini
1 tsp. organic vanilla
1 tsp. baking soda
1 tsp. sea salt
1 tsp. cinnamon

chopped nuts, chocolate chips, dried fruit (optional)

Directions:

  1. Mix the flours, fat, psyllium husk, and soaking liquid. Remove any lumps. Cover and let sit at room temperature for 7-24 hours.
  2. Heat oven to 350 degrees F. Grease a 9″ pan.
  3. Beat egg whites and cream of tartar until stiff peaks form. Set aside.
  4. Add the remaining ingredients (except nuts/chips/fruit) to the soaked flour. Mix (with hand mixer, stand mixer or food processor) until well combined and lumps are removed (about 2 minutes). Fold in egg whites. Stir in nuts/chips/fruit.
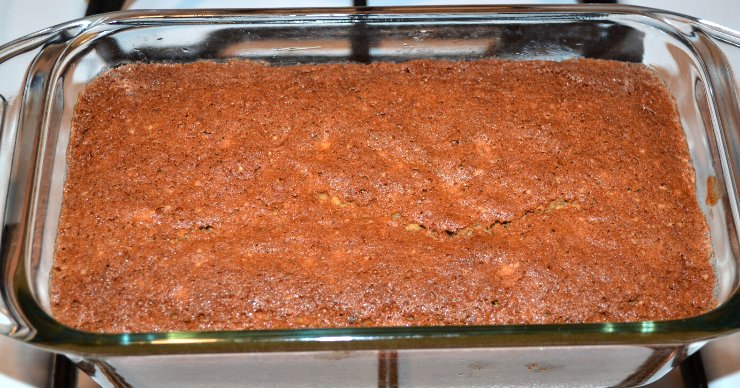
  5. Pour the batter into the prepared pan. Bake 55-60 minutes, until golden and toothpick inserted in center comes out clean.

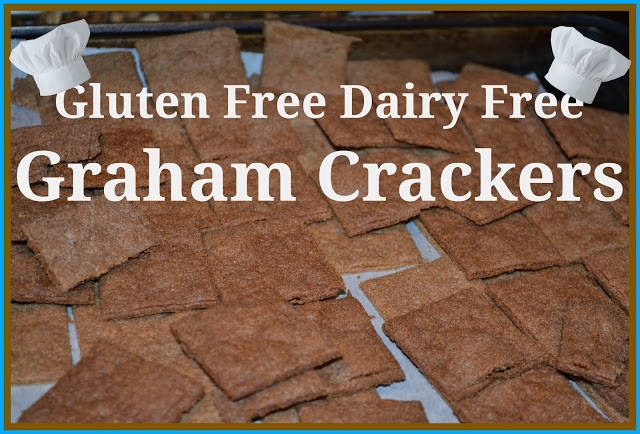
Gluten Free Graham Crackers (rice free, dairy free, egg free, corn free, nut free)

I’ve said it before and I’ll say it again…I love graham crackers!  They have been my go-to snack for many, many years. It’s very rare that we don’t have any in the house.

Last week we ran out of graham crackers. And it was perfect timing. I usually use butter to make graham crackers. And it wouldn’t have been much fun telling my son he couldn’t have them.

So I made a new batch that is gluten free, dairy free and rice free! I was quite surprised that I couldn’t really tell a difference using all coconut oil instead of butter.

The kids still love them, and I do too! Graham crackers are a perfect mildly sweet treat for the whole family. Even if you have allergies.


One batch makes about 50 crackers, so they last quite a while. I fill a 1/2 gallon mason jar with crackers. And we’ve got a grab and go snack ready when we need it.

Gluten Free Graham Crackers

1 cup amaranth flour*
1/2 cup tapioca flour*
1/4 cup sorghum flour (can be replaced with amaranth)
1/4 cup teff flour* (can be replaced with sorghum or amaranth)
1/2 cup organic cane sugar or coconut sugar* (can reduce to 1/4 cup)
1/2 tsp. sea salt*
1/2 tsp. vanilla
6 Tbsp. liquid sweetener (honey, molasses and/or maple syrup…I like to use at least 2 Tbsp. of molasses to really get a graham flavor)
1/2 cup coconut oil, melted (this can be replaced with butter if you tolerate dairy)

Heat oven to 350 degrees F. Cut 3 pieces of parchment paper the size of a baking sheet.

Melt the oil. Set aside.

Mix the flours, sugar and salt. Add the vanilla, sweetener and the oil and mix until well combined (I do this with a spoon). The dough should hold together when squeezed. If it is crumbly add more honey.

Split the dough into 2 equal parts. Lay one piece of parchment paper on a table. Put 1/2 of the dough on the paper. Lay a 2nd piece of parchment on top of the dough. Squish the dough down a little with your hand. Use a rolling pin to roll the dough between the parchment paper. Roll the dough until your desired cracker thickness (1/4 – 1/8th” or so). Remove the top piece of parchment paper.

 Cut into squares (with pizza cutter). Place on a baking sheet (on the parchment paper…just move the whole thing onto the baking sheet). Repeat for the other half of the dough.

Bake for 11-12 minutes**. Turn the oven off, but leave the crackers in to get crisp. Remove after 10 min. You can run the pizza cutter over the cut lines again to help separate the squares before the dough completely cools. Let cool completely. Store in airtight container or in the freezer.

**The crackers should be baked on the top oven rack. It works best to do one pan at a time to avoid burning.

*These are affiliate links. It will not change the cost for you if you buy through the link, but I will get a small commission. It helps me earn a small amount to keep putting in the time and effort to do what I do 🙂