Home » main dish » Page 2

Tag: main dish

Rustic Chicken Zucchini Pie With Olive Oil Crust | Homemade Dutch Apple Pie

Rustic Chicken Zucchini Pie with Olive Oil Crust

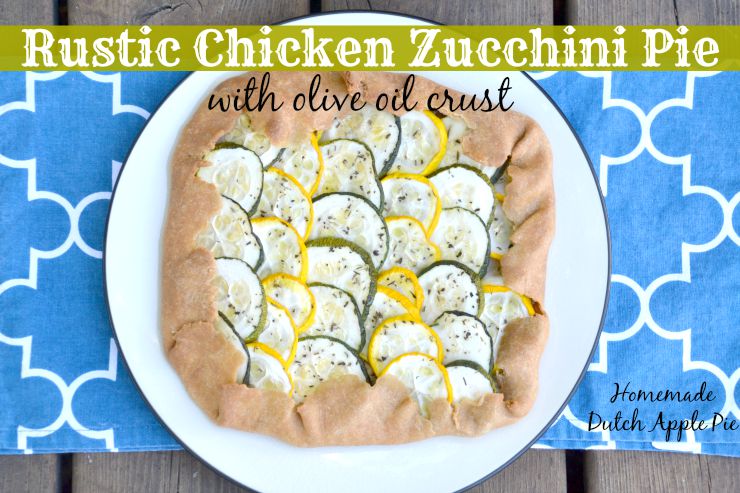
Looking for a new way to use up your abundance of zucchini? Rustic chicken zucchini pie with olive oil crust makes the perfect breakfast, lunch or dinner! Serve it warm or cold any time of day for a filling and nutritious meal.

Rustic Chicken Zucchini Pie With Olive Oil Crust | Homemade Dutch Apple Pie

Summer is about having fun, getting outside and being active. That includes riding bikes, picnics at the park and pool parties.

But summer is also about slowing down, taking it easy and enjoying the simple pleasures. Think lounging on the beach, sitting by the fire watching the stars and snuggling with your kids on a quiet rainy day.

When it comes to soaking up the summer I think of simple, comfort food that utilizes fresh produce.

Rustic Chicken Zucchini Pie With Olive Oil Crust | Homemade Dutch Apple Pie

Summer food.

Rustic chicken zucchini pie is comfort and summer all wrapped up in a pie crust.

It is a cross between pie and pizza.

The crust is a simple soaked dough made with flour, water, olive oil and salt. The filling is chicken and a bit of squash simmered in bone broth until a thick sauce forms. Finally a layer of zucchini tops the pie for a beautiful and delicious dish.

Simple and versatile.

Rustic chicken zucchini pie is fancy enough for dinner guests. Though you might want to make two! It will go quickly.

It is also simple enough for a weeknight meal that the kids will devour.

Eat it with a fork and knife or your hands. Serve it at the dinner table or pack it in a picnic.

Breakfast, lunch or dinner. Warm or cold.

A full meal all wrapped up in a delicious package, rustic chicken zucchini pie is really that good and that versatile.

Rustic Chicken Zucchini Pie With Olive Oil Crust | Homemade Dutch Apple Pie

Allergen friendly.

The thing I love about it is that it is naturally dairy, egg, nut, corn and coconut free. I did use a wheat crust, but gluten free flour can replace the wheat. So it is safe for just about everyone!

If you can tolerate cheese some fresh mozzarella mixed into the sauce or grated parmesan on top would taste great.

No chicken on hand? Swap it for another meat like sausage. Or simply make it a veggie pie. The sauce underneath can be made without the meat. Simply add a little extra squash to the broth for a creamy base.

Lunch time!

For all of the busy moms out there chicken zucchini pie is perfect for a grab and go lunch. It’s hard enough to feed the kids let alone find time to make your own lunch. Make a pie at the beginning of the week and grab a slice or two each day for lunch.

If you want to get a head start on school lunches you could make a few chicken zucchini pies, cut them into slices and freeze individual pieces. Simply pull out a piece when you need it for adding to a lunch box or even for an easy breakfast.

I don’t know about you but any time I can get my kids to eat broth while at school is great. Vegetables on top of it is a bonus.


Check out the Lunch Box ebook for more fun recipes (35% off through 9/7/15!)


Don’t let that pile of zucchini go to waste! Create a simple summer dish the family will love. Rustic chicken zucchini pie with olive oil crust is perfect for any occasion.

How do you like to use zucchini – in sweets like zucchini bread, cake and scones or in a savory dish?

Rustic Chicken Zucchini Pie With Olive Oil Crust | Homemade Dutch Apple Pie

Rustic Chicken Zucchini Pie with Olive Oil Crust
Serves 4
Creamy chicken, fresh zucchini and a simple olive oil crust - the perfect breakfast, lunch or dinner!
Write a review
Print
Crust
  1. 1 cup whole wheat, all purpose or gluten free flour
  2. 1/2 tsp. unrefined sea salt
  3. 3 Tbsp. extra virgin olive oil
  4. 2-3 Tbsp. cold water
  5. 1 Tbsp. lemon juice
Filling
  1. 2 Tbsp. pureed squash
  2. 2 medium zucchini
  3. 1 cup cooked, shredded or diced chicken
  4. 3/4 cup chicken broth
  5. 1/4 tsp. unrefined sea salt
  6. 1 tsp. of a combination of basil, rosemary and thyme
Crust
  1. In a food processor combine the flour, salt and olive oil. Pulse until crumbly.
  2. Add the water and lemon juice.
  3. Process until a ball of dough forms.
  4. Wrap in plastic wrap and refrigerate 7-24 hours.
Filling
  1. Slice the zucchini and lay it on a cooling rack.
  2. Sprinkle with salt and let sit 20 minutes. Flip and repeat. (This will remove a lot of the water.)
  3. Pat the zucchini dry with paper towel when done draining.
  4. While the zucchini is draining, cook the chicken, squash and salt in broth. Simmer until it is thick and the liquid is evaporated, 5-10 minutes.
  5. Heat oven to 350*F.
  6. Roll the dough into a 12" round on parchment paper.
  7. Spread the chicken filling on the dough, leaving a 2" border.
  8. Layer the zucchini on top of the chicken.
  9. Season with herbs.
  10. Fold edges of dough onto zucchini.
  11. Drizzle the top with olive oil.
  12. Bake for 70 minutes.
  13. Allow to cool for 10 minutes before slicing.
Notes
  1. This can be served warm, room temp or cold.
  2. This can be frozen whole or in slices.
  3. You can add 1/2 cup shredded cheese to the filling and/or the top.
  4. To make a meatless pie omit the chicken and increase the squash to 1/2 cup.
Just Take A Bite https://justtakeabite.com/
Rustic Chicken Zucchini Pie With Olive Oil Crust | Homemade Dutch Apple Pie

In order for me to support my blogging activities, I may receive monetary compensation or other types of remuneration for my endorsement, recommendation, testimonial and/or link to any products or services from this blog.

Green Bean and Bacon Casserole | Homemade Dutch Apple Pie

Green Bean and Bacon Casserole

Green bean and bacon casserole is a real food version of the classic side dish. With nourishing ingredients like bacon, raw milk and fresh beans it is healthy and filling enough to be a main dish.

Green Bean and Bacon Casserole | Homemade Dutch Apple Pie

Every summer we have a garden with a variety of vegetables. We change up what we grow each year.

But one thing we always have is beans!

I am in the kitchen freezing beans a couple times a week all through July and into August so we can enjoy them all year.

Our favorite way to enjoy beans is cooked fresh. My son always has to have second and sometimes third helpings. He knows what’s good!

Green Bean and Bacon Casserole | Homemade Dutch Apple Pie

A new twist on an old favorite.

This year I decided to use some of our abundance to recreate the classic green bean casserole.

The original includes canned beans, canned cream soups and fried “onions” on top. To me that means MSG, thickeners and all sorts of strange ingredients I don’t care to consume.

My homemade green bean and bacon casserole is made with fresh beans, homemade bone broth, raw milk and pastured bacon. It really doesn’t get any better than that!

Green bean and bacon casserole can be served traditionally as a side dish. But my version is so filling that I served it as the main course! Give me a big pile of green bean and bacon casserole and a slice of sourdough bread and I am a happy mama.

The kid seal of approval.

This was the first time eating a green bean casserole for my kids. They couldn’t get enough! My husband thoroughly enjoyed it as well.

Green bean and bacon casserole is great when beans are fresh. It also works with frozen beans. So you can enjoy it year round.

Green Bean and Bacon Casserole | Homemade Dutch Apple Pie

Make it work for your schedule.

It is perfect for potlucks, family gatherings and holidays. You can even make it for an easy week night meal. Green bean and bacon casserole can be prepared in advance and baked at dinner time.

As a busy mom I love meals like this. I prepare it during the day while the kids are napping or at school. Then when dinner time rolls around and everyone needs my attention I just pop it in the oven.

No time to bake it? No problem. Green bean and bacon casserole is great straight from the pan. Serve it on a bed of rice and you’ve got a complete meal.

If you enjoy the crispy onions on top of green bean casserole simply fry up some onion slices until crispy. Add them to the top after it is done baking.

If you don’t have bacon on hand you can substitute cooked chicken. Then use whatever fat you have on hand in place of the bacon grease (lard, tallow, butter, etc.).

Whether you’ve got fresh summer beans or you’re working through your freezer stash green bean and bacon casserole is sure to please the whole family.

My only regret when making this was that I didn’t have time to take better photos before my kids devoured it!

Did you grow up on green bean casserole? You’ll love this updated, nutrient dense version.

Green Bean and Bacon Casserole | Homemade Dutch Apple Pie

Green Bean and Bacon Casserole
Serves 6
An updated version of the classic green bean casserole. This one is filled with nourishing ingredients and can be served as a main dish.
Write a review
Print
Ingredients
  1. 1 lb. green/yellow beans, snipped, cut
  2. 1 cup chicken broth
  3. 1 cup milk (can be replaced with broth to make it dairy free)
  4. 2 Tbsp. all purpose flour, tapioca flour or cornstarch
  5. 1 tsp. salt
  6. 1/2 tsp. pepper (optional)
  7. 1/2 tsp. garlic powder
  8. 1/2 lb. pastured, nitrite/nitrate free bacon, cooked, crumbled, grease reserved
  9. 2 Tbsp. bacon grease
  10. 1/2 small onion. sliced (optional)
Instructions
  1. Cook the beans in water until tender, 30 - 40 minutes. Drain.
  2. Heat the bacon grease in a large skillet.
  3. Stir in all purpose flour OR mix tapioca or cornstarch with 1/4 cup of the broth and add to grease.
  4. Cook 1 minute.
  5. Slowly stir in the broth and milk.
  6. Season and simmer until it thickens.
  7. Add the cooked beans and simmer on low 5 minutes.
  8. Add the bacon.
  9. Transfer to a 1 1/2 qt. casserole dish.
  10. Bake at 350*F for 20 minutes.
  11. Cook onion slices in bacon grease until crispy.
  12. Top casserole with onion slices when serving.
Notes
  1. This can be served straight from the pan without baking.
  2. This can be prepared in advance and baked when ready to eat.
Just Take A Bite https://justtakeabite.com/
In order for me to support my blogging activities, I may receive monetary compensation or other types of remuneration for my endorsement, recommendation, testimonial and/or link to any products or services from this blog.

Sweet Potato Salmon Burgers | Homemade Dutch Apple Pie

Sweet Potato Salmon Burgers

Get out of your summer burger rut with these sweet potato salmon burgers! They are simple, nutritious and even make great finger food for the little ones.Sweet Potato Salmon Burgers | Homemade Dutch Apple Pie

You’ve had the grill going all summer with the usual fare – hamburgers, hot dogs, barbecue chicken.

Those are all great. But are you ready to change it up?

Sweet potato salmon burgers are a delicious alternative to traditional hamburgers that you can eat all year long.

They only require a few simple ingredients and minimal preparation time. Sweet potato salmon burgers make a great, quick weekday lunch.

Keep them in mind when it’s time to pack lunches again! They are great eaten cold.Sweet Potato Salmon Burgers | Homemade Dutch Apple Pie

You can decide if you make them heavier or lighter on the meat or potato. By using less salmon these burgers make a very budget-friendly meal.

I love how easily these burgers come together. All of the ingredients can be eaten as-is so it’s just mixing and warming. No need to worry about how well done they are.

But what I love even more is how much my kids enjoy them.

You can eat them on a bun or just dip them in ketchup.

It is fun and easy to spruce up sweet potato salmon burgers.

We top them with homemade pesto. You could eat them open face with a fried egg. Here are some other delicious toppings for sweet potato salmon burgers:

Now that my little one is eating a lot of solids I have to cook things she can eat as well. Sweet potato salmon burgers make a perfect finger food.

All of the ingredients are safe for babies six months and older. Break up the burger into small pieces and let them feed themselves.Sweet Potato Salmon Burgers | Homemade Dutch Apple Pie

Let’s not forget the nutrition factor!

Sweet potato salmon burgers have healthy starch and vitamins from the sweet potatoes. The egg yolks are packed with vitamins. Salmon has essential fatty acids. Then they are cooked in healthy fat for a balance of protein, carbohydrates and fat all in one burger.

Be sure to make a big batch of sweet potato salmon burgers. You can freeze some for later. And leftovers are great cold or warm.

Add pieces of burger to your salad, cut it up for dipping or mix it into your scrambled eggs! I like to slather mine with pesto and eat it plain.

If you don’t tolerate potatoes you can use another orange vegetable like pumpkin or squash. The burgers will still taste just as great.

Are you ready for something different on your grill? Sweet potato salmon burgers are the perfect summer or year round meal.Sweet Potato Salmon Burgers | Homemade Dutch Apple Pie

Sweet Potato Salmon Burgers
Yields 6
A light burger perfect for summer picnics. It even makes great finger food for babies.
Write a review
Print
Ingredients
  1. 1 cup cooked and mashed sweet potato (or pumpkin or carrot)
  2. 6 - 14 oz. canned boneless skinless salmon (one 6 oz. can, two 6 oz. cans or one 14 oz. can - however meaty you like it)
  3. 2 egg yolks
  4. 1 tsp. unrefined sea salt
  5. 1/4 tsp. garlic powder
  6. 1/2 tsp. dill weed
  7. 1/2 tsp. organic cane sugar
  8. lard, tallow or coconut oil for frying
  9. optional - crumbled bacon or bacon strips, pesto, grilled onions, avocado, tartar sauce, Miracle Whip®
Instructions
  1. Add the potato, salmon, egg, salt, garlic powder and sugar to a medium size bowl. Puree with an immersion blender. Add crumbled bacon at this point if desired.
  2. Chill 30 minutes.
  3. Heat a skillet over medium heat. Add the frying oil.
  4. Divide the mixture into 6 burgers.
  5. Cook in the pan until browned on both sides, about 5 minutes per side.
  6. Place burgers on buns and add favorite toppings (bacon strips, grilled onions, pesto, avocado, tartar sauce, Miracle Whip®)
Notes
  1. These burgers make great finger food for babies 6 months and older.
  2. You can substitute tuna for the salmon.
  3. You can add anchovies or sardines to the burger for extra nutrition.
Just Take A Bite https://justtakeabite.com/


In order for me to support my blogging activities, I may receive monetary compensation or other types of remuneration for my endorsement, recommendation, testimonial and/or link to any products or services from this blog.

This post is linked to Savoring Saturdays.

Nightshade Free Nutrient Dense Pizza Sauce

Have you ever heard of putting broth in your pizza? It sounds crazy. But now you can with my nightshade free nutrient dense pizza sauce.

Nightshade Free Nutrient Dense Pizza Sauce | Just Take A BiteIn a house with multiple people that are dairy free pizza is a tricky thing to make. Especially when one of them is a child.

It is also hard to make pizza when some are sensitive to nightshades. When you take away cheese and tomatoes you don’t have many traditional pizza components left.

So I came up with a solution for both problems that is also packed with nutrition.

I use butternut squash as the base. It mimics the flavor of both tomatoes and cheese. Then I simmer it with broth and seasoning. The end result is a flavorful sauce that creates a pizza everyone can enjoy. And it only takes about five minutes to make.Nightshade Free Nutrient Dense Pizza Sauce | Just Take A Bite

My oldest is not dairy free. But she ate her pizza without cheese when I used this sauce. She said it was the best pizza she had ever had!

The real test, though, was my husband.  I made a “regular” pizza for him with wheat crust and cheese. I simply swapped regular pizza sauce for my nightshade free sauce. He said he couldn’t really tell the difference!  He ate his pizza with no complaints.

That sounds like a winning recipe to me.Nightshade Free Nutrient Dense Pizza Sauce | Just Take A Bite

Do you miss pizza because you can’t have nightshades or dairy? Now you can enjoy it! Plus you’ll get a nutritional boost with the added broth.

I make a gluten free pizza crust, spread the sauce on and add our favorite toppings. The whole family gets a fun, satisfying and allergen friendly meal.

This is a great option for kids. It’s even great for a birthday party or packed in a school lunch.

How do you like your pizza? Have you ever tried it without cheese and tomatoes?Nightshade Free Nutrient Dense Pizza Sauce | Just Take A Bite

Nightshade Free Nutrient Dense Pizza Sauce
Pizza sauce made without tomatoes with an added nutritional boost from chicken broth.
Write a review
Print
Ingredients
  1. 1 cup pureed squash (butternut or another sweet squash works best)
  2. 1/2 cup chicken broth
  3. 3/4 tsp. unrefined sea salt
  4. 3/4 tsp. garlic powder
  5. 3/4 tsp. dried basil
  6. 1/2 tsp. dried oregano
  7. 1 tsp. cane sugar
Instructions
  1. In a small saucepan combine all of the ingredients.
  2. Heat and stir for about five minutes, until thick and warm.
  3. Spread on prepared pizza dough and add favorite toppings.
  4. Bake according to pizza dough directions.
Notes
  1. This makes enough sauce for two 12-14" pizzas.
  2. You can prepare this in advance and freeze it.
  3. You can make a large batch to freeze in single pizza portions and have on hand for easy pizza night.
Just Take A Bite https://justtakeabite.com/
Quick and easy salmon salad

Simple Supper Series: Salmon Salad

Quick and easy salmon saladFor the final installment in my simple supper series I have a recipe so easy it doesn’t even require any cooking!  We all have nights where we need something this easy.

Five-Minute Salmon Salad

Salmon salad takes about five minutes to prepare. You can do it right before you eat or you can prepare it in advance.

Canned salmon is combined with celery, cranberries and mayonnaise for a delicious, easy meal. The celery adds a nice crunch. The cranberries give a little sweet and tart flavor.

Then add some seasoning to taste and you’re all set.

Kid-Friendly Salmon Salad

My kids LOVE salmon salad.  They enjoy anything with salmon. But they really liked this salad. 

I served it on bread/rolls for sandwiches. You can put it on a bed of lettuce or rice or even eat it with crackers.Quick and easy salmon salad

I packed the leftovers in my daughter’s lunch (she requested it!). For the lunch I just served it plain. What an easy and nutritious lunch.

I try to serve seafood once a week. This salmon salad is a really easy way to do that and be sure the kids will eat it.

Salmon salad is perfect for a meal where you need to walk in the door and eat. It’s even great on the go.

If you don’t have salmon on hand you can use tuna or roast chicken or turkey.Quick and easy salmon salad

Salmon Salad Appetizer

Salmon salad can be spruced up a bit to make it fancy enough for guests. Add chopped nuts and diced avocado for a really rich flavor. Serve it on crackers for a delicious appetizer.

This is a great recipe for the holidays.  The red of the cranberries and green of the celery make it look very festive.

I saved the simplest for last. Salmon salad is perfect for breakfast, lunch or dinner. It only takes five minutes to prepare. And everyone loves it. I call that a winning recipe.Quick and easy salmon salad

Simple Supper Series: Salmon Salad
Serves 4
A simple salad that comes together in minutes.
Write a review
Print
Ingredients
  1. 2 (6 oz.) cans boneless skinless salmon
  2. 2 celery stalks, diced
  3. 1/4 cup dried cranberries or dried cherries
  4. 1/2 cup mayonnaise (preferably homemade - see post for link)
  5. 1 tsp. unrefined sea salt
  6. 1/2 tsp. pepper (optional)
  7. 1/2 tsp. garlic powder
  8. 1 tsp. dill weed
  9. 1/2 tsp. dried thyme
Instructions
  1. Combine all of the ingredients in a bowl. Mix until well combined.
  2. Serve immediately or cover and refrigerate until ready to eat.
Notes
  1. The cranberries can be replaced with raisins or cut up apricots.
  2. The salmon can be replaced with tuna, turkey or chicken.
  3. Serve the salad plain, on bread, with crackers or over rice or quinoa.
  4. Additional add-ins include chopped nuts and diced avocado.
Just Take A Bite https://justtakeabite.com/

Simple Supper Series: Beef Stroganoff

Simple Supper Series Beef Stroganoff || Homemade Dutch Apple PieToday I have another recipe that comes together in minutes and incorporates broth. Beef stroganoff is simple and versatile.

Ground beef is simmered with broth and milk or milk substitute to create a creamy sauce. You can go as bold or as simple as you like with the seasoning.

There are several ways to serve this stroganoff. A common way is over noodles. If you prefer noodles you can cook them separately or even add them right to the pan with a little extra broth for a one pot meal.

I served this over mashed potatoes (we had leftover potatoes, so all I had to do was heat and serve!) for those that could have them. For the others I served the beef stroganoff as an open face sandwich on homemade gluten free rolls. My son really enjoyed eating it that way since he could use his hands.Simple Supper Series Beef Stroganoff || Homemade Dutch Apple Pie

Beef stroganoff can be served just about any way you like. Try it on squash or rice. You can even eat it plain!

This is definitely a simple supper. Plus it is full of nutrients from the beef and the broth. It is also very allergen friendly with no dairy, gluten, grains, eggs, nuts or corn.

Another great thing about this beef stroganoff is that it is a very budget friendly meal.  Ground beef, broth and onions are very affordable. So you can serve the whole family for very cheap.

Beef stroganoff is easy to prepare, big on flavor and full of good stuff. The whole family will enjoy it.

Simple Supper Series Beef Stroganoff || Homemade Dutch Apple Pie

Simple Supper Series: Beef Stroganoff
Serves 4
A simple beef stroganoff that incorporates broth and is free of allergens.
Write a review
Print
Ingredients
  1. 1 lb. ground beef (or pork, turkey or chicken)
  2. 1 Tbsp. coconut oil, lard or tallow
  3. 1 small onion, diced (optional)
  4. 1/2 cup beef, chicken or turkey broth
  5. 1/2 cup milk or milk substitute
  6. 1 Tbsp. arrowroot or tapioca flour
  7. 1 tsp. unrefined sea salt (to taste)
  8. 1/2 tsp. pepper
  9. 1/2 tsp. garlic powder
Instructions
  1. In a large skillet heat the coconut oil.
  2. Brown the meat and onions.
  3. Add seasoning, broth and milk.
  4. Simmer for five minutes.
  5. Combine the arrowroot with 1 Tbsp. cold water.
  6. Add the arrowroot mixture to the pan and simmer until thickened, about 3 minutes.
  7. Adjust seasoning to taste.
  8. Serve over mashed potatoes, noodles, rice, bread or squash.
Notes
  1. If you want to make a one pot dish simply add 1 cup any variety of noodles and another 1 cup of broth to the pan. Simmer until the noodles are cooked. Add extra liquid if the noodles absorb too much.
  2. This recipe can easily be doubled.
Just Take A Bite https://justtakeabite.com/

Simple Supper Series: Broth Burgers

Simple Supper Series Broth Burgers || Homemade Dutch Apple Pie
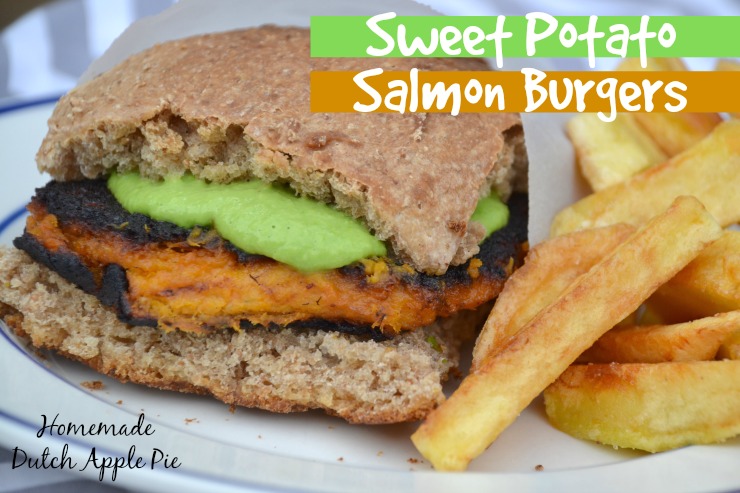
The next recipe in my simple supper series is a fun and nutritious way to eat a burger…without a bun…and with broth added!

Broth burgers are so full of flavor you can eat them with a knife and fork like a steak. No need to figure out how to make a gluten free or grain free bun.

One of the great things about this recipe is that it only takes about fifteen minutes to prepare.  While the burgers are cooking you can make a simple side – saute some vegetables, prepare a salad or even cook some rice. You’ll have a full dinner on the table in no time.Simple Supper Series Broth Burgers || Homemade Dutch Apple Pie

You can make the burger as simple or complex as you like. I usually just do ground beef with a little seasoning. We like it simple.

You could also add grated or pureed vegetables, egg or even mashed beans or lentils to boost the nutrition and stretch your meat a bit.

While the burgers rest you create the sauce. Then pour the sauce right over the burgers or soak a bun in the broth.

Broth burgers are also good served on a bed of rice, mashed potatoes or squash.

I made our broth burgers with sauteed onions. If you don’t like or don’t tolerate onions you can simply make the sauce. The onions just add extra flavor and texture.Simple Supper Series Broth Burgers || Homemade Dutch Apple Pie

The next time you need a nutritious meal on the table quickly try making broth burgers.  Fast food does not have to be junk food. You can make broth burgers in the same amount of time it would take to drive to a restaurant and order. But you’ll be fueling your body with good stuff by making your meal at home.

This is also a great way to sneak more broth into your family’s diet. Every little bit helps!

Simple Supper Series Broth Burgers || Homemade Dutch Apple Pie

Simple Supper Series: Broth Burgers
Serves 4
A juicy burger topped with a rich, brothy sauce. No need for a bun. This burger eats like a steak.
Write a review
Print
Ingredients
  1. 1 lb. ground beef (or turkey, chicken or pork)
  2. salt, pepper, garlic powder, herbs to taste
  3. 2 Tbsp. coconut oil, tallow or lard
  4. optional: 1/4 cup pureed vegetable, 1 egg, 1/4 cup mashed beans
  5. 1/2 - 1 cup chicken or beef broth
  6. 1/2 medium onion, sliced
Instructions
  1. Heat the oil in a cast iron or stainless steel skillet.
  2. Combine the ground meat, seasoning and vegetables/egg (if desired).
  3. Form 4-6 burgers.
  4. Cook in hot skillet over medium heat until browned, about 5 minutes per side. Cook the onions in the pan at the same time.
  5. Remove the burgers from the pan and cover to keep warm.
  6. Add the broth to the pan (with onions still in the pan).
  7. Turn heat to high and simmer for about 3 minutes, until the broth reduces and thickens.
  8. Serve the broth/onion sauce on the side with the burgers.
Just Take A Bite https://justtakeabite.com/

Simple Supper Series: Pumpkin Pasta Two Ways {grain free, gluten free, dairy free, nut free, corn free}

Simple Supper Series: Pumpkin Pasta Two Ways || Homemade Dutch Apple Pie
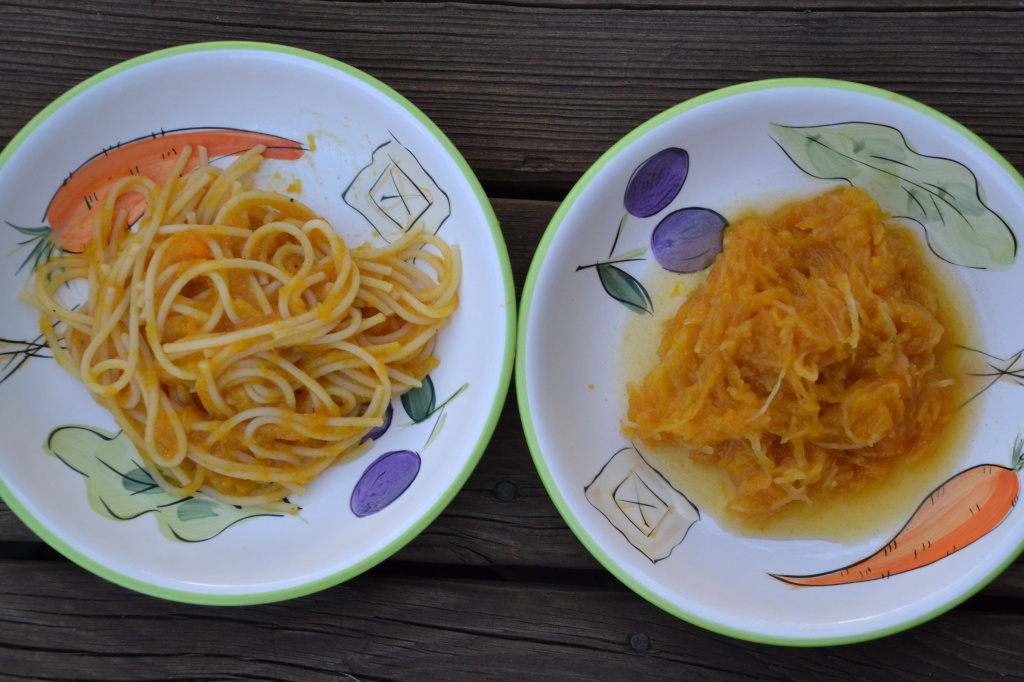
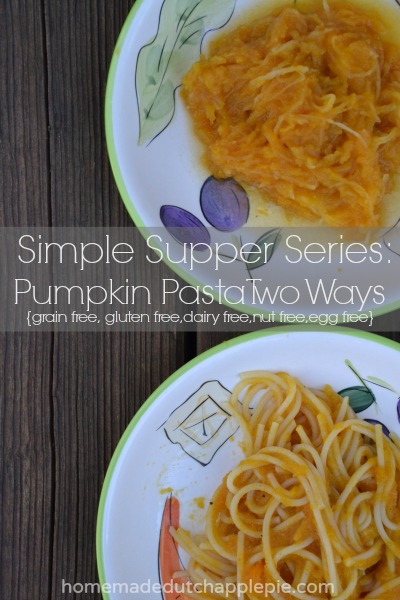
Today I’m sharing another simple supper that comes together in minutes. Pumpkin pasta two ways.

Pumpkin pasta is a dish anyone can eat (unless you are allergic to pumpkin!). You can make it gluten free or grain free, however you like it.

I love that it’s one more way to add broth to a meal…and the kids won’t even know it.

If you tolerate dairy, grated Parmesan cheese is great on top of this pasta.Simple Supper Series: Pumpkin Pasta Two Ways || Homemade Dutch Apple Pie

The grain free version uses spaghetti squash as the “pasta.”  So you have to prepare that in advance. A simple solution is to roast, scoop and freeze a bunch in the fall when squash is in season. Then you’ve got precooked pasta ready whenever you need it. You can also roast it in the morning or the night before if you are making it fresh.

The gluten free version can be made using any variety of gluten free noodles – corn, rice, bean, etc. You can even cook these in advance and keep them in the fridge until you are ready to make dinner.Simple Supper Series: Pumpkin Pasta Two Ways || Homemade Dutch Apple Pie

Once you have your noodles add broth, pumpkin and spices. Then dinner is ready in about ten minutes.

Pair this pasta with a green vegetable or a salad and bread. It makes a filling, nourishing dinner that the whole family will love.

If you don’t like or don’t tolerate pumpkin you can substitute pureed squash. Butternut or buttercup work best. The squash will give it a slightly sweeter flavor.

Pumpkin pasta is an easy weeknight meal that will keep everyone nourished. Lots of vegetables, broth and healthy fat. That is how supper should be.Simple Supper Series: Pumpkin Pasta Two Ways || Homemade Dutch Apple Pie

Pumpkin Pasta Two Ways {grain free, gluten free, dairy free, nut free, egg free, corn free}
Serves 4
A nutrient dense pasta perfect for fall.
Write a review
Print
Ingredients
  1. 2 cups gluten free noodles, cooked OR 2 cups roasted/scooped spaghetti squash (or a combination)
  2. 1 cup chicken broth (or turkey broth)
  3. 1 cup pureed pumpkin (or squash)
  4. 2 Tbsp. coconut oil or butter
  5. 1 tsp. unrefined sea salt
  6. 1 tsp. garlic powder
  7. 1/2 tsp. cinnamon
  8. 1 Tbsp. cane sugar or coconut sugar (optional)
Instructions
  1. In a large saucepan combine all of the ingredients.
  2. Simmer until the broth reduces and the sauce thickens, about 10 minutes.
  3. Adjust seasoning to taste.
  4. Top with cheese if desired.
Notes
  1. The spaghetti squash will not absorb liquid like the pasta, so it will take a few more minutes to thicken than pasta.
  2. You can add coconut oil or butter to individual servings to increase the healthy fat content.
  3. If your child has problems with spice in their food start with just a small amount of cinnamon and add more if tolerated.
  4. The sugar will help balance the spice. Add extra sugar if the cinnamon is too strong.
Just Take A Bite https://justtakeabite.com/

Zucchini Pizza Bites

Zucchini Pizza Bites || Homemade Dutch Apple Pie

Is your refrigerator still overflowing with zucchini? Are you wondering what to do with it besides baking with it or grilling it? Why not make pizza!

Zucchini pizza bites make a great snack, lunch or appetizer. They are very kid-friendly. They are naturally grain free and can be made dairy free as well.

We had them recently and made them a variety of ways. I made some with pureed squash or tomato sauce and toppings to be dairy free. I added cheese to some as well. They all had great flavor.

I actually had a little bit of leftover spaghetti meat sauce to use up. So there was practically no prep work involved. It was perfect for our Sunday evening simple dinner.

I love how the smaller ones are the perfect size for little hands and little mouths.  Plus most kids will eat just about anything that you call pizza. So they are getting lots of vegetables and enjoying pizza without you having to make pizza crust!

I have a picky vegetable eater. So he was hesitant when he saw the zucchini. But once it was in his mouth he was all smiles. If your child is not a fan of zucchini, try peeling the zucchini first. Then once the pizza bites are topped you can’t even tell it’s a vegetable on the bottom.

The zucchini rounds are first baked to make sure they are cooked through and have good flavor. Then you add the toppings and bake them again for a few minutes.

Zucchini pizza bites make a fun, easy, allergen-friendly meal.  Have you ever made pizza with your zucchini? If not, you should!

Zucchini Pizza Bites || Homemade Dutch Apple Pie

Zucchini Pizza Bites
A fun finger food pizza that is free of allergens.
Write a review
Print
Ingredients
  1. Zucchini, sliced in 1/2 - 3/4" thick rounds
  2. Extra virgin olive oil for brushing
  3. Sea salt
  4. Preferred pizza toppings
Instructions
  1. Slice the zucchini and place the round on a parchment lined baking sheet.
  2. Brush the zucchini with olive oil and sprinkle with salt.
  3. Bake at 450*F for about 30 minutes.
  4. Allow the rounds to cool for about 10 minutes.
  5. Transfer the rounds to a clean piece of parchment paper on a baking sheet.
  6. Add desired pizza toppings to each round (don't overfill them or they will be hard to pick up).
  7. Bake at 400*F for about 15 minutes.
  8. Allow the pizza bites to cool for about 5 minutes before serving.
Notes
  1. Pureed squash makes a great substitute for cheese and/or pizza sauce.
  2. Do not slice the zucchini too thinly or it will be difficult to pick up.
Just Take A Bite https://justtakeabite.com/

Zucchini Pesto Pasta

Zucchini Pesto Pasta || Homemade Dutch Apple Pie
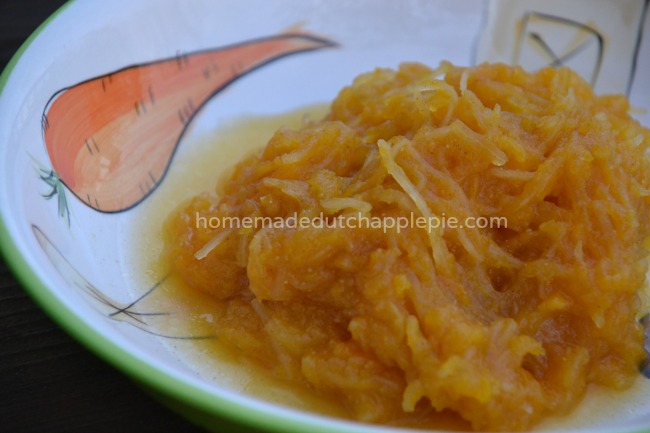
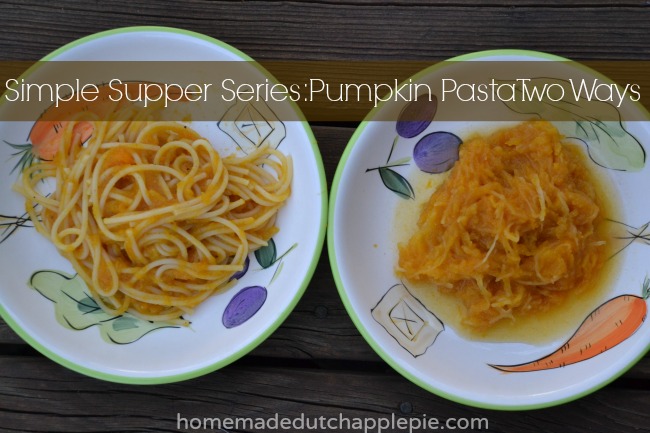
Zucchini is a wonderful summer vegetable that can be used in so many ways. One delicious (and sneaky) way to add zucchini to your meal is to mix it with your pasta.

Zucchini pesto pasta incorporates zucchini in two ways. First it is blended in the pesto. Then grated zucchini is sauteed until it the liquid is released and the zucchini becomes soft and creamy. It can then be mixed right in with the pasta.

Even my picky vegetable eater didn’t notice it was there!  But it added big flavor and lots of nutrition. As an added bonus this dish uses chicken broth. So it is very nutrient dense.

The pesto and the sauteed zucchini can be prepared in advance. Then when dinner rolls around all you have to do is cook noodles, add the remaining ingredients and let it simmer for about 10 minutes.

You can keep the pasta simple or add cooked chicken and/or grated cheese for a well-balanced meal.

I love dishes that have lots of vegetables mixed right in. And zucchini pesto pasta definitely does just that!Zucchini Pesto Pasta || Homemade Dutch Apple Pie

Zucchini Pesto Pasta
Serves 4
A nutrient-dense easy pasta dish filled with zucchini.
Write a review
Print
Pesto
  1. 1 cup frozen peas (thawed)
  2. 1/2 zucchini, grated or cut in chunks
  3. 1/4 cup extra virgin olive oil
  4. 1/4 cup water
  5. sea salt and garlic powder to taste
Pasta
  1. 2 cups grated zucchini
  2. 1 Tbsp. coconut oil or butter
  3. 1 tsp. sea salt
  4. 2 cups dry noodles (any variety - wheat, rice, corn)
  5. 1 cup chicken broth
  6. 1 cup cooked chicken (optional)
  7. 1/2 cup grated cheese (optional)
  8. seasoning to taste (salt, pepper, garlic powder)
Pesto
  1. Combine the pesto ingredients in a blender.
  2. Blend until smooth. Add extra water or olive oil if the pesto is too thick.
  3. Adjust seasoning to taste.
Pasta
  1. Saute the zucchini in the oil/butter with salt until creamy and soft, about 15 minutes.
  2. Cook the pasta until almost done. Drain.
  3. Add the broth, sauteed zucchini, 1 cup pesto, chicken and seasoning to the cooked pasta.
  4. Simmer and stir occasionally until the broth reduces and the sauce thickens, about 10 minutes.
  5. Add cheese if desired.
Notes
  1. Extra pesto can be served on the side or reserved for use as a salad dressing or dip.
  2. The pesto, sauteed zucchini and cooked chicken can all be prepared in advance.
Just Take A Bite https://justtakeabite.com/

In order for me to support my blogging activities, I may receive monetary compensation or other types of remuneration for my endorsement, recommendation, testimonial and/or link to any products or services from this blog. If you order by clicking on any of my Tropical Traditions links and have never ordered from Tropical Traditions in the past, you will receive a free book on Virgin Coconut Oil, and I will receive a discount coupon for referring you.