Home » Kid-friendly Recipes » dessert » Page 18

Category: dessert

Sour Cream Ice Cream (grain free, nut free, GAPS-legal)

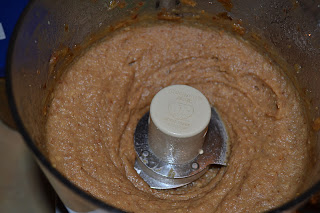
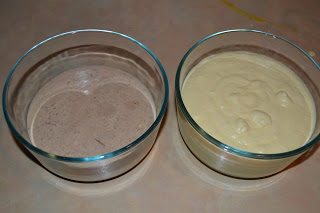
Now that I’ve been eating raw sour cream for a few weeks I figured it was safe to finally make sour cream ice cream!! I’ve been anxious to make it for some time now. A dairy ice cream I can actually eat? I haven’t had that since before Abram was born. And anyone that knows how much I love ice cream knows that 7 months without ice cream is like pure torture for me. The basic recipe comes from the GAPS book. This particular version and quantities are from Hanah at Gapalicious. I only made a half batch yesterday and mostly eyeballed quantities. It doesn’t have to be exact. I made vanilla. Then I reserved a small amount and added some cocoa to try making chocolate.

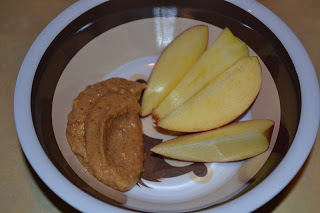
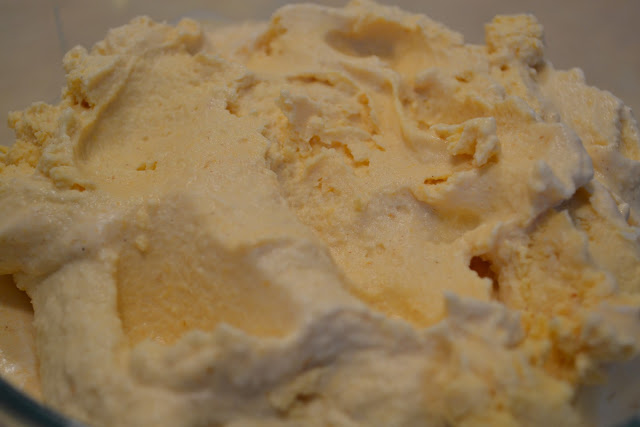
Overall verdict…good! But after several tries now at making ice cream sweetened with honey I’m just not crazy about the flavor it gives vanilla ice cream. I may have to go non-GAPS and use maple syrup next time. Or maybe try using date paste. I am happy with the texture of the ice cream. And I like how safe/healthy it is. It’s basically the same ingredients I use to make smoothies and russian custard…just in a frozen version. I’ll have to play around with flavors. I really like the chocolate version I made (at the moment I allow myself a little cocoa). Crispy nuts would be a nice addition too.

This post is linked to Fat Tuesday on Real Food Forager.

Sour Cream Ice Cream

4 cups sour cream
4 farm fresh eggs, separated
1/2 cup raw honey
1/4 cup vanilla extract

In a small bowl whip the eggs whites until stiff. In a separate bowl whip egg yolks until pale yellow and thickened.

In a large bowl whip together sour cream and honey until well combined and fluffy. Add the yolks and vanilla to the whipped cream and mix well. Then gently fold in the egg whites. Transfer the ice cream to a freezable container and freeze until solid.
If you want to make any variations just add your favorite combination in place of the vanilla.

Salted Caramel Dip (grain free, dairy free, egg free, GAPS-legal)

One of the moms at my MOPS table posted a link for a caramel dip from My New Roots on FB recently. It looked super easy and sounded good. Plus it’s sugar free and GAPS legal!! Last week I finally got around to buying dates so I could try it. I made it yesterday morning. It was very easy to make. And it’s good!! Honestly I like it better plain than using it for an apple dip. Although I did really enjoy it last night as a dip for dried apple chips. It’s a great way to get your sugar fix without actually eating sugar. I’m glad I tried this. It’s a healthy, delicious treat. Plus I discovered that I love dates!! And they are great natural sweeteners. I will be using dates more often for sure. I even reserved the soaking liquid and have been using it to sweeten smoothies and drinks.

Unfortunately Rebecca doesn’t like it. I think it’s a texture issue with her. I’m guessing if I made it a bit thicker (increased the ratio of nuts to dates) she’d like it. Maybe I’ll try that next time.

This is a great treat for breakfast, a snack or a dessert.

This post is linked to Fat Tuesday at Real Food Forager.

Salted Caramel Dip
Makes 2 cups

2 cups pitted Medjool dates
¼ cup raw nut or seed butter (almond, cashew, sesame tahini, sunflower) (I used some whole crispy almonds and some natural crunchy peanut butter…I used more than 1/4 cup)
4 tsp. fresh lemon juice
½ tsp. sea salt (or more to taste)
1 vanilla bean, seeds scraped (I used a little splash of homemade vanilla)
soaking water as needed

1. Soak dates for at least 4 hours in water.
2. Drain dates, reserving the soak water**.
3. Add dates to a food processor along with all other ingredients, except for soaking water. Blend on high until dates are smooth. Add soaking water, 1 tablespoon at a time until the desired consistency is reached (for a sauce to pour or drizzle, add more water).
4. Store in an airtight glass container in the fridge for up to a week.

**Reserve remaining soaking water to use as a simple syrup/sweetener.

Pumpkin Cheese Pie/Cake (Updated Version)

A while back I made a dessert called pumpkin cheese pie. It was pretty simple. Mostly buy a few things, mix them and bake them.

I decided to make it again for Thanksgiving this year…but revamp it to make it a lot healthier. My husband says I should call it pumpkin cheesecake to sound a bit more appetizing. And since I did a graham cracker crust instead of a pie crust that seems more fitting. 

Since I was hosting Thanksgiving and only had so much time I did have to buy one canned ingredient…sweetened condensed milk. I would have liked to make my own, but I just didn’t have time. I did find a great recipe for it, though, at Kitchen Stewardship. You could also replace the sweetened condensed milk with a little milk and honey.

The crust was made of homemade graham crackers, and the filling was made with homemade cream cheese (from our homemade yogurt) and freshly baked pumpkin. Topped with a dollop of homemade raw whipped cream. Perfect.

Since this makes a lot of filling I used the extra to make a mini crustless version. It’s perfect if you are grain free.

This is a cross between pumpkin pie and cheesecake. It’s the perfect holiday dessert!

Pumpkin Cheesecake

2 cups graham cracker crumbs (I make the crumbs in the food processor)
1/2 cup melted butter or coconut oil (or a combination)
3 Tbsp. honey or cane sugar (optional…depends how sweet you like your crust)

1 cup cream cheese
2 cups pureed pumpkin
1 (14 oz.) can sweetened condensed milk (or make your own!) OR 1 cup whole milk + 2 Tbsp. honey
3 eggs
1 tsp. pumpkin pie spice

Prep ahead:

whole wheat graham crackers or gluten free graham crackers then make into crumbs
yogurt…then turn into cream cheese
pureed pumpkin

When ready to bake:

Combine graham cracker crumbs with butter/oil and sugar. Pat into pie dish. Put in refrigerator to get firm (this can be done well in advance).

Preheat oven to 350

Mix cream cheese and condensed milk until smooth (with mixer). Stir in the pumpkin, spice and eggs. Mix until well combined.

Pour into crust (this makes a lot…if you have extra pour it into a small baking dish to make a mini version).

Bake for 1 hour, or until knife inserted 1″ from the edge comes out clean. Refrigerate until ready to serve. Serve plain or with whipped cream.

Creme Caramel (grain free, dairy free, nut free, GAPS-legal)

Last night I tried another GAPS book recipe. It’s another single serving, nourishing dessert. This one does require baking, so you have to plan ahead. But the preparation takes about 30 seconds. This creme caramel turned out well. It’s kind of custard-like in the middle. Slightly sweet. I enjoyed it. And it was good to get another egg in my diet at the end of the day. I’m sure I’ll make this again. I bet it would be good with a little sweetened sour cream on top. If you’re looking for ways to get your kids to eat eggs give this a try. I ate this right out of the oven. Next time I’ll let it cool a while first I think.

Creme Caramel
serves 1

1 egg
3 Tbsp. water
1 tsp. honey
cinnamon to taste

Mix egg, water and honey in small oven safe dish. Sprinkle with cinnamon. Bake at 300 degrees for 30-40 minutes. Let cool slightly before serving.

Russian Custard (grain free, dairy free, nut free, GAPS-legal)

I often read through the recipes in the GAPS book. There really aren’t many. And I don’t know that I’ve actually made any of them aside from the ferments and cultured products. But there are a couple simple recipes I’ve been wanting to try. I finally got around to one of them last night…Russian custard. Sounds fancy. But really it’s just egg yolks 😛  The recipe is for single servings, which is nice.

I made one serving for my snack last night. A nice little nourishing treat.

This is a great snack for those days where you want something just a little sweet. There is only a little bit of honey. And you can make it in minutes. You can serve it over fruit or mix things in. I added a few sweet cherries and some crispy almonds. It can also be used in recipes (*see note from GAPS below). I’m glad I finally tried this. Any way to get extra egg yolks down is good. By having a little treat I added 2 to my intake yesterday. Love it.

This is also a great substitute if you can’t have yogurt. I like to add fruit and homemade cereal for a little parfait.

I use my hand mixer to make this. It gets thick and gooey. My whole family enjoys it. I have adjusted the recipe to my liking. This is how I make one serving for an easy breakfast or snack.

 
 Russian Custard

serves 1

3 egg yolks
1 Tbsp. honey

Whip egg yolks and honey until it gets thick and almost white, about 3-5 minutes with a hand mixer, depending on the speed of the mixer.

*”Russian custard can be used instead of cream on fruit or you can serve it on its own with some chopped nuts on the top or pieces of fruit. It can also be used instead of cream in making cakes.”

Guest Post – Pumpkin Smoothie…Plus GAPS-legal Pumpkin Ice Cream!

Today I have a guest post at Gapalicious! My first guest post. Go check it out. Thanks, Hannah for asking me!

A little add on to my smoothie post…you can turn it into ice cream! Yesterday morning I made my usual smoothie. Then I put half of it in my ice cream maker. 15 minutes later…GAPS-legal, nourishing pumpkin pie ice cream 🙂  If you don’t have an ice cream maker you can just freeze it as is. I’ve done that too. Still a tasty cold treat 🙂  And you can freeze it in single servings so it’s all set to go when you want it…and so you don’t go overboard 😉  Ice cream is my absolute favorite food…and the hardest thing I had to give up. But I’m finding ways to get my fix again…the healthy way.

Pumpkin Pie Pudding Parfait

We are currently getting 3 gallons of milk a week. And since I can’t drink milk yet, that is a fair amount to use. So I was trying to think of things to make with it last week and decided to make a batch of creamy chocolate pudding. Then as I was thinking about what dessert to make when we have guests this weekend I thought it would be fun to do a parfait. So I came up with the idea of a pumpkin pie pudding parfait. I didn’t want my first experiment to be on guests, so I made some last night. I made a slightly sweetened pie crust and a pumpkin cream cheese mixture. And layered that with the pudding. Turned out great! When I make it for real I’ll use vanilla pudding. But it was good with chocolate too. And I love that this uses all (well, mostly all…I did use some powdered sugar) good, homemade ingredients…even the cream cheese was from our homemade raw yogurt. I didn’t measure anything when I made the pumpkin filling. And I only made a small batch. So I’ll have to guess on that. This is a fun, healthy, fall dessert.

This post is linked to Fat Tuesday at Real Food Forager.

Pumpkin Pie Pudding Parfait
serves 2

Pie Crust:
1 cup whole wheat flour
1/2 cup palm shortening or butter
1 tsp. salt
1/4 cup cane sugar
1/4 cup water

Mix flour, salt and sugar. Blend in shortening until crumbly. Add water until soft dough forms. Roll onto parchment paper and bake at 375 for about 25-30 minutes…until golden. Let cool.

Pumpkin Filling:
1/2 cup pumpkin
1 cup cream cheese (preferably homemade)
1/2 cup powdered sugar
2 Tbsp. honey or maple syrup

Mix all ingredients together. Adjust sweetness to taste. Chill.

Creamy Vanilla Pudding (Heavenly Homemakers recipe):
(this is a full recipe of pudding…you don’t need this much for 2 parfaits)

2 1/2 cups milk
3 egg yolks
1/2 cup real maple syrup (grade B is best for you) or honey
4 Tbsp. arrowroot powder (or organic corn starch)
1/4 tsp. sea salt
1 Tbsp. butter
1 tsp. vanilla

In a medium saucepan, whisk together milk, egg yolks, maple syrup, arrowroot powder and salt. Cook over medium heat, stirring CONSTANTLY until pudding begins to thicken. Stir over the heat for about 15 more seconds. Remove immediately from the heat, and continue to stir until pudding is creamy. (I use my whisk the whole time for stirring and find this works great!) Add butter and vanilla and continue to stir until mixed. Pour into a glass container, cover and chill.

Parfait:

Just before ready to serve assemble the parfait. Layer chunks of pie crust, pumpkin filling and pudding. Then repeat. End with pie crust.

Pumpkin Ice Cream

We are finally getting raw milk again. We had our first pick up on Monday. So of course on Tuesday we had to make ice cream…in November 😛

I used the usual Nourishing Traditions recipe and tweaked it a little to make pumpkin ice cream. YUM!!! All three of us like it.

I used a combination of honey and syrup for the sweetener to give a neutral flavor.

Pumpkin ice cream made with fresh raw cream is the perfect fall treat. If you can’t have dairy coconut milk would work too.

Pumpkin Spice Ice Cream
Makes 1 quart

3 egg yolks (optional)
1/2 cup maple syrup, honey or cane sugar (or any combination)
2 tsp. vanilla extract
2 1/2 cups heavy cream (preferably raw, not ultrapasteurized)
1/2 cups whole milk (preferably raw, not ultrapasteurized)
1 cup pureed pumpkin
2 tsp. cinnamon
1 tsp. pumpkin pie spice

In a blender mix all of the ingredients. Taste. Make sure it is a little extra sweet (the sweetness decreases when it freezes).

Pour into an ice cream maker and process according to instructions (It took about 20 min. in my Kitchen Aid ice cream maker attachment).

Transfer to a shallow container, cover and store in freezer.

Pumpkin Spice Cake

My in-laws are here this weekend, and today happens to be my father-in-law’s birthday. So I wanted to make a cake. I had thought about doing carrot cake. Then I wondered if I could add pumpkin and make a pumpkin carrot cake. I did some searching and found a recipe for pumpkin spice cake on Joy of Baking. So I went with that. And I’m glad I did. It turned out great!! Very easy to make. Rebecca helped me with it. Everyone enjoyed it last night. The original recipe uses a cream cheese frosting. I forgot to buy cream cheese this week 😛  So I made a maple buttercream. It worked very well with the pumpkin cake. I went for a simple decoration with crispy almonds (mostly due to time constraints…i.e. a fussy baby and a 3 year old trying to help :P). I had to have a taste too of course. I can’t make a new cake and not taste it 😛  It’s times like this that I wish I could eat grains 🙂  Yum!!! This is a perfect fall treat. Not the best frosting job…but I had a little helper 🙂  Since we are doing letter F this week Rebecca got to Frost Grandpa’s cake. We still need to work on her technique a bit 😉

Pumpkin Spice Cake

1/2 cup unsalted butter, room temperature
1 1/4 cups light brown sugar
2 large eggs
1 cup fresh or canned pure pumpkin (about 1/2 of a 15 ounce can)
1 tsp. pure vanilla extract
2 cups sifted cake flour
1/4 tsp. baking powder
1 tsp. baking soda
1/2 tsp. salt
1/2 tsp. ground cinnamon
1/4 tsp. ground ginger
1/8 tsp. ground cloves
1/2 cup buttermilk, room temperature

Note: To make your own buttermilk combine 1/2 cup of milk with 1/2 tablespoon vinegar or lemon juice. Stir and let stand for 10 minutes before using.

For Garnish:

1/2 cup toasted and chopped walnuts or pecans

1 recipe maple buttercream (see recipe below) or cream cheese frosting

Preheat the oven to 350 degrees F and place rack in center of oven. Butter and flour (or spray with Baker’s Joy) two – 8 inch (20 cm) cake pans (I use palm shortening and parchment paper…cake comes out perfectly every single time)

In the bowl of your electric mixer (or with a hand mixer), beat the butter and sugar until light and fluffy (about 2-3 minutes). Add the eggs, one at a time, mixing well after each addition. Scrape down the sides of the bowl as needed. Add the pumpkin puree and vanilla extract and beat until incorporated.

In a separate bowl, whisk together the flour, baking soda, baking powder, salt and spices. Add the flour mixture and buttermilk alternately to the pumpkin batter, in three additions, beginning and ending with the flour mixture. Divide the batter in half and then pour the batter into the prepared pans. Bake for approximately 25 – 30 minutes, or until a toothpick inserted in the center of the cake comes out clean. Cool on a wire rack for 10 minutes and then invert and remove the cakes from their pans. Cool completely before frosting.

Place one of the cake layers, top side down, on a serving plate. Frost with a layer of icing. Place the second cake, top side down, onto the first layer and frost the top and sides of the cake. Garnish with chopped nuts, if desired. Refrigerate but bring to room temperature before serving.

Maple Buttercream

1/2 cup butter, softened
1/2 cup palm shortening
3 cups powdered sugar
1/4 cup pure maple syrup
2 – 4 Tbsp. milk

Cream butter and shortening. Add sugar and maple syrup. Mix well. Add milk a little at a time until desired consistency. Use immediately or store in refrigerator.

Dutch Letter Cookies

This week we are learning the letter D. So what’s more fitting for a Dutch girl than Dutch letter cookies? 🙂  I had actually never heard of these before. I just did a search for Dutch desserts and found this recipe on All Recipes.  So Rebecca and I made them yesterday. They turned out pretty well. I can’t say they are the easiest cookie to make with a small child. But still a fun one. The dough and filling are super easy to make. Rebecca liked helping with that. The assembly was a bit tougher. I think I should have made my dough a tiny bit wetter and rolled it a bit thinner. But the phone was ringing, baby crying, little hands trying to help and eat all the dough, etc. So I had to just do what I could. I didn’t end up making many actual letters. But we managed a couple. In the end they turned out ok and taste pretty good (this coming from someone who doesn’t really like almond/almond paste). I forgot to do the milk/sugar topping until after I had them in the oven already. So I quick took them out and just sprinkled a little sugar on. No milk. I had some filling leftover, so I just put that in a little dish and baked it with the cookies. That’s the grain free version of this dessert 😛  A fun experiment. Maybe we’ll try it again when Rebecca is a little older. And we have more time to roll and shape the cookies properly. I didn’t take any good pics since I was dealing with a baby that just woke up, trying to finish the cookies and get Rebecca to eat lunch.

Dutch Letter Cookies

2 cups all-purpose flour (I used organic whole wheat flour)
1/4 tsp. salt
1 cup butter, chilled
1/3 cup ice water
8 ounces almond paste
1 egg
1/4 cup white sugar (I used organic cane sugar)
2 Tbsp. milk
1/3 cup granulated sugar for decoration (I used organic cane sugar)

In a medium bowl, stir together flour and salt. Cut in chilled butter until the texture of the mix is mealy with pea sized lumps (I made the dough in my food processor). Add ice water gradually while stirring with a wooden spoon until dough forms a ball. Cover your dough and chill for 1/2 hour.

To make filling, in a small bowl, mix together the almond paste and sugar. Add the egg and mix well.

Preheat oven to 375 degrees F (190 degrees C ). On a lightly floured surface, roll out the dough to 1/4 to 1/8 inch thickness, making as square as possible (I did this in two batches). Cut the dough into strips 6 inches long and 1 1/2 inches wide (about the width of a ruler) (I made my strips much longer, else you’d never be able to shape it into a letter). Using a pastry bag or a strong plastic bag with a small hole cut from the corner, pipe almond filling down the center of the strip starting halfway down. Fold the top half of the strip down over the almond filling to match the bottom (I experimented with lengths/folds. And I made sure to seal the edges well).

Shape strips into desired letters, brush with milk and sprinkle with sugar. Bake in preheated oven for about 20 minutes or until golden brown. Remove from the oven and cool on a wire rack.