Home » Kid-friendly Recipes » Page 18

Category: Kid-friendly Recipes

It is so important to cook homemade, healthy food. But it’s not always easy to find kid-friendly recipes.

That’s where I come in. I’ve got hundreds of kid-tested and approved recipes that won’t keep you in the kitchen for hours or stretch your budget too thin.

I focus on allergy-friendly, whole foods. But I always cook with kids in mind. I take all sorts of feeding challenges into account too.

We’ve dealt with every allergy possible, so I’ve created recipes that are gluten free, nut free, dairy free, egg free, soy free, corn free, coconut free and more!

Kid-friendly recipes don’t have to be boring. And they are certainly not limited to chicken nuggets and pizza every night.

A nourished child will enjoy a wide variety of fruits, vegetables, proteins, carbohydrates and fats. Get your kids in the kitchen with you and start cooking! Have fun with food and your kids will learn to love eating.

Simple Soaked Series: Gluten Free Crackers

These gluten free crackers are made with properly prepared soaked grains and are free of dairy, eggs, nuts and corn. They make the perfect snack whether at home or on the go.Simple Soaked Series: Crackers | Homemade Dutch Apple Pie

If there is one snack most kids love it’s crackers! But it’s pretty rare to find a store-bought cracker that is not made with vegetable oils. Not to mention the grains are not properly prepared.  Both of which create a recipe for disaster.

That means one thing – it’s time to make your own crackers!  Really, crackers are so easy to make. I’ve made them many times before.

But recently I made a soaked version so I can feel really good about giving them to my kids (and myself!). So I’m finishing my simple soaked series with a basic gluten free cracker recipe that can be used in so many ways.

These soaked gluten free crackers have great crunch and just the right balance of salt and sweetness.

Simple Soaked Series: Crackers | Homemade Dutch Apple Pie

The base recipe is a Wheat Thin® style cracker.  It is made with a variety of gluten free flours for a mild flavor (I used tapioca, amaranth and sorghum). Then a bit of salt and cane sugar balance each other to make the Wheat Thin® flavor.

You can also create a rye version using teff or more of a basic butter cracker.  Both of these will use a little less sugar than the Wheat Thin® version. Try adding some  herbs and spices for a more sophisticated cracker.

Soaked gluten free crackers come together so quickly. It takes about two minutes to get the flour soaking. Then another five minutes to mix the dough and five minutes to roll and cut the dough.

Less than fifteen minutes of hands on time and you’ve got delicious, nutritious homemade crackers that your kids will love. Even better – your kids can help make them! Get in the kitchen and make a delicious snack together.

Simple Soaked Series: Crackers | Homemade Dutch Apple Pie

If you really want to make them fun use small cookie cutters and create crackers in your child’s favorite shapes.  My kids love it when I make fish shaped crackers.

These make a great addition to school lunches with slices of raw cheese. Homemade gluten free crackers are also a perfect accompaniment to a bowl of soup for lunch.  My kids love to use them for dipping!

I also like to serve homemade crackers with hummus and salsa. Since my son can’t eat wheat, rice or corn it’s so nice for him to have something to use with dips. A pile of homemade crackers with a bowl of hummus makes him one happy boy.

Make a big batch of gluten free crackers and store them in the cupboard or freezer. You’ll have a healthy snack on hand that you know is good for your kids and is something they’ll love. Homemade crackers are also a perfect snack to keep in the diaper bag.

Have you  ever made your own crackers? Try this simple, properly prepared and allergen friendly version. It’ll be a hit with the whole family.

Simple Soaked Series: Crackers | Homemade Dutch Apple Pie

Simple Soaked Series: Gluten Free Crackers
Yields 50
A simple soaked cracker that is gluten, dairy, egg, nut and corn free.
Write a review
Print
Ingredients
  1. 2 cups any combination of gluten free flour (see notes for flavor combinations)
  2. 4 Tbsp. melted coconut oil or butter
  3. 6 Tbsp. warm water
  4. 1 tsp. lemon juice, whey, kefir or yogurt
  5. 1 1/2 tsp. unrefined sea salt
  6. 8 tsp. coconut sugar or cane sugar
  7. 3-6 Tbsp. water
Instructions
  1. Combine the flour, fat, warm water and lemon juice.
  2. Cover and let sit 7-24 hours.
  3. Heat oven to 350*F.
  4. Add the salt, sugar and 3 Tbsp. water to the soaked mixture.
  5. Mix and knead dough by hand until a ball forms. Add more water if needed.
  6. Split the dough into three equal parts.
  7. Cut four pieces of parchment paper (the size of a baking sheet).
  8. Place on piece of dough on one piece of parchment paper. Top with another sheet of parchment paper.
  9. Roll the dough between the paper until it is about 1/8" thick.
  10. Remove the top layer of paper.
  11. Cut into desired shapes with a pizza cutter or cookie cutters.
  12. Sprinkle extra salt on top of the dough if desired.
  13. Transfer the parchment paper to a baking sheet.
  14. Repeat with the remaining portions of dough.
  15. Bake the crackers for about 20 minutes, until golden.
  16. Turn off oven. Leave the crackers in the oven for 7-10 minutes, until crisp.
  17. Remove from oven and let cool completely.
  18. Store crackers in an airtight container at room temperature or in the freezer for long term storage.
Notes
  1. The base recipe creates a "Wheat Thin" style cracker with a slight sweetness.
  2. For a rye flavored cracker use 1/2 cup teff flour in your flour mixture. Reduce sugar to 4 tsp.
  3. For a butter cracker use at least 1 cup of "white" flour like rice or tapioca. Reduce sugar to 4 tsp.
  4. You can add herbs and seasonings like garlic powder to the dough for a variety of flavors.
  5. You can add 1/3 cup finely grated cheese to the dough to make cheese crackers.
Just Take A Bite https://justtakeabite.com/


In order for me to support my blogging activities, I may receive monetary compensation or other types of remuneration for my endorsement, recommendation, testimonial and/or link to any products or services from this blog.

Simple Soaked Quinoa Bars Just |Take A Bite

Simple Soaked Series: Quinoa Bars

These quinoa bars are a great alternative to granola bars. They are soaked and gluten, dairy, egg and nut free.

Simple Soaked Quinoa Bars Just |Take A Bite

Granola bars are so delicious! But not everyone can tolerate oats. Not to mention it’s good for everyone to have variety in their diet (help avoid those allergies!!).

So I came up with an oat free bar made with quinoa. This is another simple, soaked bar that kids love.

First the quinoa is soaked. Then it is cooked. Then mix and bake the bars. Each step takes very little hands on time. 

Buy Healthy Snacks to Go eBook Recipes Online

I actually made two versions of quinoa bars. One with and one without coconut oil. In the end I liked them somewhere in the middle! There is a little bit of coconut oil to help bind the bars. But not so much that they are oily when you hold them.

Simple Soaked Series: Quinoa Bars | Just Take A Bite

No refrigeration.

So they are not as easy to eat on the go like the crunchy granola bars.  But you can always pack them in a mini cooler. I would even pack them in my daughter’s lunch box since it has a cooler.

The texture of the quinoa bars is great for  young children since they are so soft. They are also gluten, dairy, egg, nut and corn free. So they are suitable even for one year olds and those with allergies. I love having them on hand for an easy addition to lunches for my little ones still at home.

Great for nursing mamas.

Quinoa is great for boosting milk supply. So make a big batch and stock your freezer. Snack on one every day to keep your milk supply up.

Quinoa bars really pack a punch with nutrition from the flax seeds, quinoa and coconut oil. They have protein, starch and lots of healthy fat!

Are you getting sick of granola bars? Switch it up and try quinoa bars. 

Simple Soaked Quinoa Bars Just |Take A Bite

Simple Soaked Series: Quinoa Granola Bars
Yields 20
An oat free granola bar made with soaked quinoa.
Write a review
Print
Ingredients
  1. 1 cup quiona
  2. 3 cups warm water + 2 Tbsp. lemon juice, whey, kefir or yogurt
  3. 3 cups water
  4. 1/2 cup ground flax seeds
  5. 1/2 cup shredded coconut
  6. 3 Tbsp. melted coconut oil or butter
  7. 1 cup coconut sugar
  8. 1/2 tsp. unrefined sea salt
  9. 1/2 cup chopped dried fruit, nuts, seeds and/or chocolate chips
Instructions
  1. Combine the quiona, water and lemon juice.
  2. Let sit 24 hours.
  3. Drain and rinse the quiona.
  4. In a medium saucepan combine the quinoa and 3 cups of water.
  5. Bring to a boil, cover and simmer for 1 hour.
  6. Turn off heat. Let quinoa sit for 15 minutes, covered.
  7. Transfer the cooked quinoa to a large bowl. Let sit 15 minutes.
  8. Heat the oven to 350*F. Grease a 9x13 pan.
  9. Add the flax seed and coconut to the cooked quinoa.
  10. Let sit 5 minutes for the flax seeds to absorb liquid.
  11. Add the remaining ingredients.
  12. Spread the mixture into the prepared pan.
  13. Bake for 70 minutes.
  14. Let cool 5 minutes.
  15. Cut into bars.
  16. Place the bars upside down on a parchment lined baking sheet.
  17. Return to the oven and bake 30 minutes.
  18. Let cool completely. Refrigerate to solidify.
  19. Store in an airtight container in the refrigerator or freezer for long term storage.
Just Take A Bite https://justtakeabite.com/
Skip the boxed granola bars loaded with HFCS and non-food like glycerin and was. Homemade crunchy granola bars made with soaked oats are easy and healthy!

Simple Soaked Series: Crunchy Granola Bars

Skip the boxed granola bars loaded with HFCS and non-food like glycerin and was. Homemade crunchy granola bars made with soaked oats are easy and healthy!

Skip the boxed granola bars loaded with HFCS and non-food like glycerin and was. Homemade crunchy granola bars made with soaked oats are easy and healthy!
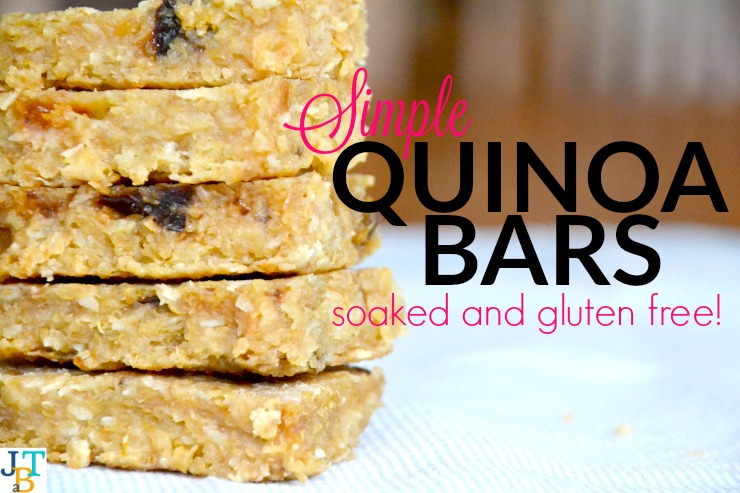
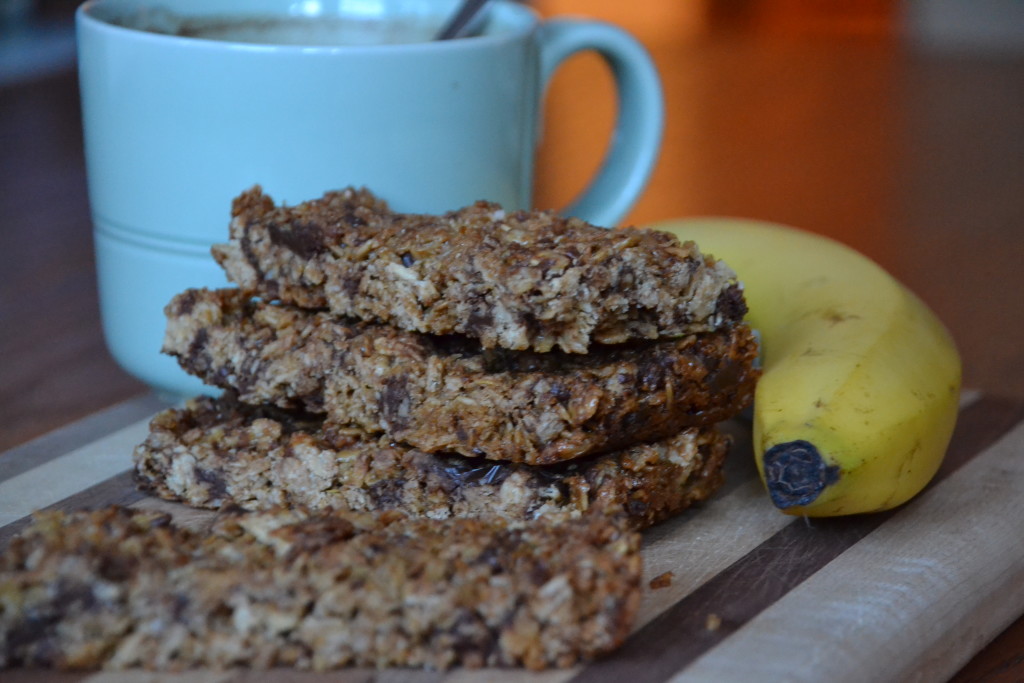
Next up in my simple soaked series is a staple in my house – granola bars!  These are definitely a family favorite.

One batch of granola bars makes a big batch so you can stock the freezer for easy breakfasts and snacks.  The really great thing about them is that you don’t even have to thaw them! Just grab one out of the freezer and start eating.

Soaked Crunchy Granola Bars

I’ve made many different versions of granola bars over the years. But I haven’t always prepared them the right way.

This version of granola bars uses soaked oats to reduce phytic acid content and make them easier on your tummy.  The oats are first soaked and dried. You’ll have to do this step in advance, so plan ahead. Then all you have to do is mix and bake. Homemade granola bars are so easy to make.

They are also very budget friendly! No need to pay for a box. Just make your own granola bars for a fraction of the cost…and get sixteen at a time instead of six. Making your own also means you decide on the flavor. Add any dried fruit, nuts, seeds and chocolate chips you like.

Skip the boxed granola bars loaded with HFCS and non-food like glycerin and was. Homemade crunchy granola bars made with soaked oats are easy and healthy!

Allergen Free Granola Bars

The other unique thing about this recipe is that it makes crunchy granola bars. I grew up eating crunchy granola bars (anybody else remember the green package of the oats and honey flavor?). I’ve always like them better than chewy.

But most homemade granola bar recipes make chewy bars. So I’ve created a crunchy version. My kids like this better than chewy as well. Making crunchy granola bars also means you don’t have to use any eggs. So they are naturally gluten, egg and nut free! They can also be made dairy free.

Easy Snack on the Go

Soaked crunchy granola bars hold up really well. There is no need to refrigerate them to make them stay together. You can easily pack them in a lunch or even toss them in a diaper bag when you’re on the go.

I like to make a big batch and wrap them individually. I store them in the freezer and take individual bars out as needed.

A crunchy granola bar pairs well with whole yogurt drizzled with honey, fruity yogurt, eggs or even a handful of crispy nuts. Add a piece of fruit and you’ve got a balanced, nutritious, ready in minutes breakfast.

Are you a crunchy or chewy granola bar lover? Give this crunchy granola bar a try. Your whole family will love it.

If you like granola bars but don’t tolerate oats, stay tuned…I’ve got another great breakfast bar coming your way!

Skip the boxed granola bars loaded with HFCS and non-food like glycerin and was. Homemade crunchy granola bars made with soaked oats are easy and healthy! 

Simple Soaked Series: Crunchy Granola Bars
Yields 16
A crunchy granola bar made with soaked oats.
Write a review
Print
Ingredients
  1. 3 cups rolled oats
  2. 1 1/2 cups warm water + 2 Tbsp. lemon juice, yogurt, whey or kefir
  3. 1/2 cup shredded coconut
  4. 1/2 cup ground flax seeds
  5. 6 Tbsp. butter or coconut oil
  6. 1/3 cup honey
  7. 1/3 cup maple syrup
  8. 1/2 cup coconut sugar or cane sugar
  9. 1/2 tsp. unrefined sea salt
  10. optional: 1/2 cup dried fruit, chopped nuts, seeds or chocolate chips; 1 tsp. cinnamon
Instructions
  1. Combine the oats and the soaking liquid.
  2. Cover and let sit 24 hours.
  3. Rinse and drain the oats.
  4. Spread the soaked oats on a dehydrator tray and dry for 8 hours (this can also be done in an oven at the lowest heat setting)
  5. Allow the dried oats to cool.
  6. Heat the oven to 325*F. Grease a 9x13 pan.
  7. Crumble the dried oats into a large bowl.
  8. Add the coconut, flax seeds, sugar and salt to the oats. Gently mix.
  9. Heat the butter, honey and syrup in a small saucepan until melted and combined.
  10. Add the butter mixture to the oat mixture. Mix well.
  11. Add any optional add-ins.
  12. Spread the mixture into the prepared pan.
  13. Bake for 30 minutes.
  14. Allow to cool for 10 minutes. Cut into bars.
  15. Allow to cool completely before removing the bars from the pan.
  16. Store in an airtight container.
Notes
  1. The granola bars can be kept in the refrigerator to stay fresh longer. They can also be stored in the freezer for long term storage. There is no need to thaw granola bars.
Just Take A Bite https://justtakeabite.com/

Simple Soaked Series: Sweet Bread

Simple Soaked Series: Sweet Bread | Homemade Dutch Apple Pie

Now that we’ve learned why it’s important to properly prepare grains and how to use some common whole grains it’s time to share some simple soaked recipes. I’m starting out with sweet bread.

One of things I bake most often is sweet bread. It is perfect for breakfast, a snack or along side a big bowl of soup. Plus we all love it.

Sweet bread is a great medium for adding lots of healthy fat like butter and coconut oil to your diet. We like to really pile it on! I love a bit sea salt on top as well for a great salty sweet combination. 

A basic sweet bread recipe is the perfect starting point for many varieties of bread. You can keep it simple. Or you can create various flavor combinations by adding dried fruit, fresh fruit, nuts, seeds, spices and chocolate chips.

The great thing about this sweet bread is that it is soaked for easier digestion and nutrient absorption.  So you can feel good about serving it to your family.

Simple Soaked Series: Sweet Bread | Homemade Dutch Apple Pie

My kids LOVE sweet bread. I need to start making double batches so some of it can actually make it to the freezer.  We go through these two loaves in a couple days. It makes a great addition to lunch boxes for school…again piled high with butter.

If you manage to get some of your bread in the freezer it makes an easy no-prep breakfast on busy mornings. Just grab it out of the freezer, top it with butter or coconut oil and pair it with some eggs, bacon, yogurt or raw milk. Breakfast is served in no time.

This bread can also be used to make amazing french toast.  Dip slices in a dish of beaten eggs and milk and fry it in butter. Then top it with maple syrup or honey and you have a special Saturday morning breakfast.

This recipe is for gluten, dairy, nut and corn free bread. If you tolerate gluten you can make it with whole wheat, spelt or kamut flour.

No matter how you serve it or what you add to it sweet bread is delicious.  Try this base recipe and then get creative making flavors your family loves. 

Simple Soaked Series: Sweet Bread | Homemade Dutch Apple Pie

Simple Soaked Series: Sweet Bread
Yields 2
A basic sweet bread recipe that is soaked and gluten/dairy/nut/corn free.
Write a review
Print
Ingredients
  1. 2 cups any combination of gluten free flour, stirred together to remove any clumps
  2. 3/4 cups total soaking liquid (2 Tbsp. lemon juice, whey, yogurt or kefir + enough water or milk to equal 3/4 cups)
  3. 1/2 cup melted coconut oil, butter or organic palm shortening
  4. 3/4 cups coconut sugar or cane sugar
  5. 1/2 tsp. baking soda
  6. 1 tsp. cream or tartar (or baking powder)
  7. 1 tsp. tapioca flour or arrowroot (omit if using baking powder)
  8. 1/2 tsp. unrefined sea salt
  9. 2 eggs
  10. optional: 1/2 cup add-ins: spices, nuts, fruit, dried fruit, chocolate chips
Instructions
  1. Combine the flour and the soaking liquid.
  2. Cover and let sit 7-24 hours.
  3. Grease a large and a medium loaf pan. Heat oven to 350*F.
  4. Add the melted fat and the dry ingredients to the soaked flour. Mix.
  5. Add the eggs. Mix.
  6. Stir in any add-ins.
  7. Pour the batter into the prepared pans.
  8. Bake for 50 minutes.
Notes
  1. This bread freezes well.
  2. This bread can be made with whole wheat/splet/kamut/einkorn flour in place of the gluten free flour.
Just Take A Bite https://justtakeabite.com/


In order for me to support my blogging activities, I may receive monetary compensation or other types of remuneration for my endorsement, recommendation, testimonial and/or link to any products or services from this blog.

Vanilla Coconut Yogurt Butter Cream {gluten free, nut free}

Vanilla Coconut Yogurt Butter Cream | Homemade Dutch Apple Pie 2The other day I made cupcakes as a special treat. But I ran out of time to make frosting. So I ended up not serving my cupcakes at our family gathering. I actually stuck most of them in the freezer to use later.

Then as I was pondering what to make with my Stonyfield Petite Creme vanilla yogurt it occurred to me it might be fun to make frosting out of yogurt! So I did.

I had also just made a batch of coconut milk and the leftover coconut shreds had just come out of the dehydrator. Instead of grinding them into flour I added them to my frosting.

Vanilla Coconut  Yogurt Butter Cream is so easy to make. It takes about two minutes. It also only requires five ingredients.  You can even leave the coconut out if you don’t like coconut.Vanilla Coconut Yogurt Butter Cream | Homemade Dutch Apple Pie

One of the things I love about this frosting is that it is not overly sweet. The only sweetener is what is in the yogurt. Nothing else is added.

My husband and my daughter both really enjoyed yogurt butter cream on their cupcakes.

I make gluten free cupcakes (this is a delicious and healthy version), but you can use whatever cupcake you like. This butter cream would even be really good on chocolate cake.

The petite creme yogurt is fat free. Normally I am not a fan of fat free stuff. But in this recipe it is balanced with the butter in the frosting.  Full fat plain yogurt would also work. Simply add some maple syrup or cane sugar to it to make a homemade vanilla yogurt.

A note of caution – the Stonyfield yogurt does contain corn starch. So if you are allergic to corn be sure to use an alternative yogurt. My little guy was pretty disappointed about this. It meant he couldn’t try it.

If you need a quick frosting, grab a bowl, a mixer and some yogurt. You’ll have delicious butter cream in no time.Vanilla Coconut Yogurt Butter Cream | Homemade Dutch Apple Pie

Vanilla Coconut Yogurt Butter Cream {gluten free, nut free}
A lightly sweet, simple butter cream.
Write a review
Print
Ingredients
  1. 2/3 cup vanilla yogurt (or plain yogurt with 3 Tbsp. maple syrup or cane sugar added)
  2. 2/3 cup shredded unsweetened coconut
  3. 2/3 cup tapioca flour (use less if you don't want the frosting as thick)
  4. 1/2 cup butter, at room temperature
  5. 2 tsp. vanilla extract
Instructions
  1. Combine all of the ingredients in a large mixing bowl.
  2. Beat on high until well combined.
  3. Use immediately to frost cupcakes.
  4. Store extra frosting in the refrigerator. Bring to room temperature before using.
Notes
  1. This makes enough frosting for 1 dozen cupcakes. The recipe can easily be doubled or tripled.
Just Take A Bite https://justtakeabite.com/
 I received products from Stonyfield to create this recipe. But all opinions are my own.

In order for me to support my blogging activities, I may receive monetary compensation or other types of remuneration for my endorsement, recommendation, testimonial and/or link to any products or services from this blog.

Basic Grains: Amaranth

Basic Grains Amaranth | Homemade Dutch Apple PieThe final grain I am highlighting in my basic grains series is amaranth. If you are new to baking and cooking with alternative grains you may have never even heard of it.

Amaranth is one of my favorite grains for baking.  I grind the whole grain to make fresh flour. Then I usually use it for about half of my flour mixture.

Not only is amaranth great as a flour, it can also be used as the whole grain. It cooks very similarly to oats and can be used as an oatmeal substitute.

Amaranth is also similar in texture to quinoa when it cooks. It can be used in place of quinoa in your favorite recipes. The grains are small and have a little bite to them. They remind me of really tiny grains of rice.

Serve amaranth as a breakfast porridge, a warm side cooked in broth, in place of noodles or even in a cold salad. Warm it with milk and maple syrup for a rice pudding type dessert.

Like other grains Amaranth must be soaked for 24 hours to eliminate most of the phytic acid content. Then it cooks quickly for easy use in your breakfast, lunch or dinner.

If you are like me and don’t tolerate grains in their whole state very well be sure to try a small amount of amaranth first to see if your body handles it.  I just assumed I’d do well with whole grain amaranth since I use the flour with no problems all the time. But that was not the case.

If you are looking for more variety in your diet or need another gluten free alternative give amaranth a try. 

Basic Grains Amaranth | Homemade Dutch Apple Pie

Basic Grains: Amaranth
Serves 4
How to soak and cook amaranth
Write a review
Print
Ingredients
  1. 1 cup whole amaranth
  2. 1 cup warm water
  3. 2 Tbsp. lemon juice, whey, kefir or yogurt
  4. 1 - 1 1/2 cups water or broth
Instructions
  1. Combine the amaranth, warm water and lemon juice.
  2. Let sit for 7-24 hours (24 is best)
  3. Pour the soaked amaranth in a medium saucepan.
  4. Add one cup of water or broth.
  5. Bring to a boil and simmer until the liquid is absorbed/the grain is cooked - about 10 minutes.
  6. Add extra liquid if necessary.
Notes
  1. This can be served as a porridge (like oats) with honey, maple syrup, coconut sugar, cinnamon, butter, coconut oil, milk, yogurt, fruit, nuts and/or flax seeds.
  2. This can be a savory side dish (like rice) using broth and seasoning.
Just Take A Bite https://justtakeabite.com/

Basic Grains: Rice

Basic Grains Rice | Homemade Dutch Apple PieNext in my basic grains series is another common one – rice. It is a dietary staple for so many cultures.

Rice has one of the lowest phytic acid contents of any grain. So if you forget to soak in advance, go with rice.  That being said if you do plan ahead it still helps to soak rice. It will break down the phytic acid it does contain and create a really soft and easy to digest starch for your meal.

Many people assume that using brown rice (the “whole grain” version) is better. But for many that is not the case.  I rarely use brown rice because it is harder to digest. For so long I didn’t think I tolerated rice…until I switched to white rice.

Although white rice does not have much in the way of nutrients on its own, it does provide a simple starch for energy. It is also a great medium for other nutrient dense food like butter, coconut oil and broth.  So combined they create a balance of nutrition and energy (I learned how important that is when reading The Nourished Metabolism).Basic Grains Rice | Homemade Dutch Apple Pie

A word of caution – as odd as it sounds rice is a pretty common allergen (my son has been rice free for about a year now). So if you eat a lot of rice because you are gluten free, make sure you aren’t eating it every day in order to avoid creating an intolerance or allergy.

Rice can be used in so many ways. It is great as a breakfast porridge with cinnamon, raisins and maple syrup. It makes a great side dish cooked in broth. Rice works well in soups. It is also a great base for things like stir fry, meatballs, stroganoff and tacos.

Let’s not forget that rice even works as a dessert in rice pudding!

One of the best things about rice is that it is so cheap! Bulk up a meal with rice to stretch  your meat and veggies without stretching your wallet. A simple meal for pennies is rice cooked in broth. Add a little butter or coconut oil and you have a perfect balance of protein, starch and fat that is easy on the tummy. Not to mention it tastes great! It’s even a good meal for when you are sick.

No matter how you like to use rice it’s best to properly prepare it. Then add some nutrient dense components and dig in! What is your favorite way to serve rice? Basic Grains Rice | Homemade Dutch Apple Pie

Basic Grains: Rice
Serves 4
Basic soaked rice.
Write a review
Print
Ingredients
  1. 3/4 cup organic white or brown rice
  2. 3 cups warm water + 2 Tbsp. lemon juice, whey, kefir or yogurt
  3. 2 1/2 cups broth and/or water for white rice, 3 1/2 cups for brown rice
  4. 1 Tbsp. butter or coconut oil
  5. seasoning to taste (optional - salt, pepper, garlic powder, herbs)
Instructions
  1. Combine the rice, warm water and soaking agent in a medium bowl.
  2. Cover and let sit 7-24 hours.
  3. Drain and rinse the rice.
  4. Place the rice and the broth/water in a medium saucepan.
  5. Bring to a boil over high heat.
  6. Reduce heat, cover and simmer for 30 minutes (white rice) or 60 minutes (brown rice).
  7. Add extra liquid during cooking if it gets too dry.
Notes
  1. This works well as an oatmeal replacement. Simply add any sweetener, milk, dried fruit, nuts, fat, flax seeds, etc. you like to the cooked rice.
  2. White rice is lower in nutrients, but easier on digestion. It is also great for energy when combined with the nutrient dense components like broth, fat, etc.
Just Take A Bite https://justtakeabite.com/

Basic Grains: Oatmeal

Basic Grains: Oatmeal | Homemade Dutch Apple PieWhen it comes to grains it doesn’t get more basic than oatmeal. It is a breakfast staple for so many.

But oatmeal may be one of the things causing digestive distress and vitamin and mineral deficiencies for many.  This is especially true if your oatmeal comes from a packet with flavorings or if you eat granola out of a box. They don’t have any nutrients to begin with.

But even if you cook plain oats you’re likely to have problems. Ever feel gassy, bloated or really full after eating oatmeal? There’s a reason.

Oats are one of the highest phytic acid containing grains. So if you are not preparing them properly oats are really hard on your body and do more harm than good.

I learned this the hard way. I used to eat store-bought granola every single day…for years. As you can  imagine I also had years of digestive problems. Now I don’t tolerate oats at all, even properly prepared.

That being said, oats are a very budget-friendly and healthy breakfast if you take the time to soak them. Honestly, oatmeal is one of the easiest breakfasts to make. You soak the oats one morning. Then the next morning they cook in five minutes!Basic Grains: Oatmeal | Homemade Dutch Apple Pie 3

I love that you can add so many things to a bowl of oatmeal to bump up the nutrition:

  • butter
  • coconut oil
  • raw milk or cream
  • coconut milk
  • yogurt
  • gelatin
  • cinnamon
  • fresh fruit
  • dried fruit
  • nuts
  • flax seeds
  • nut butter

You can even add probiotics and cod liver oil!

You can make a big pot of oatmeal one morning that will last all week. Then all you have to do is warm it and add new flavors. You can create all sorts of fun combinations like peanut butter banana, cinnamon raisin, strawberries and cream and chocolate chip!

My three year old loves oatmeal. It’s a special treat for him when I make it. He always claims any leftovers. My six year old, on the other hand, can’t do oatmeal. The texture is too much for her oral sensory issues. She does love granola and granola bars, though. Experiment and see what your kids think. You can adjust the liquid content to give it a different texture. Adding extra milk or water makes it more like cereal and not so thick.

Oatmeal for breakfast is great for filling bellies and giving a healthy dose of carbohydrates for energy at the start of the day. Add the nutrient dense components and pair it with some eggs or bacon and you’ve got a powerhouse breakfast.  It’s even gluten free.

If you’re like me and don’t tolerate oats you can replace oats with teff, rice or quiona.

Have you been eating your oatmeal without soaking it for years? Now’s the time to get started preparing it the right way and get the most out of your oats.Basic Grains: Oatmeal | Homemade Dutch Apple Pie 2


Basic Grains: Oatmeal
Serves 2
Basic soaked oatmeal.
Write a review
Print
Ingredients
  1. 1 cup oats (old fashioned/rolled oats)
  2. 1 cup warm water + 2 Tbsp. lemon juice, kefir, yogurt or whey
  3. 1 cup water
  4. 1/2 tsp. sea salt
  5. 2-4 Tbsp. coconut sugar, maple syrup or honey (optional)
  6. gelatin, cinnamon, dried fruit, fresh fruit, nuts, seeds, butter, coconut oil, yogurt, milk to taste
Instructions
  1. Combine the oats and warm water plus lemon juice in a bowl. Cover and let sit for 24 hours (or longer).
  2. Put soaked oats in a medium saucepan.
  3. Add the water, salt and sweetener.
  4. Cook over medium heat about five minutes, until liquid is absorbed and oats are cooked through.
  5. Add optional ingredients to pot or to individual bowls.
  6. Store leftovers in a sealed container in the refrigerator.
Notes
  1. To reheat leftover oatmeal place it in a saucepan with a small amount of milk or water and heat until warm.
Just Take A Bite https://justtakeabite.com/


In order for me to support my blogging activities, I may receive monetary compensation or other types of remuneration for my endorsement, recommendation, testimonial and/or link to any products or services from this blog.

Basic Grains: Quinoa

Basic Grains: Quinoa | Homemade Dutch Apple PieNow that you understand why it’s so important to properly prepare your grains (and nuts and seeds) it’s time to start learning how. Let’s start with the basics.

Today I’m starting my basic grain series with quinoa.  Although it is technically a seed it is treated the same as a grain. Plus it is a delicious and nutritious addition to your diet, even if you are gluten free.

It took a long time for me to understand how to work with quinoa. I treated it like I did rice – add water, boil, done. But quinoa needs more care than that to make it digestible.

The first step is soaking the quinoa to remove the bitter coating and start the fermenting process.

Then the quinoa is rinsed. Finally it is cooked, preferably in broth for a nutrient boost and easier digestion.

If you look at the directions on a package of quinoa it will usually say to cook about twelve minutes and then let it sit for fifteen minutes.

But to really cook it properly quinoa should be cooked for about an hour.

After the soaking, rinsing and long cooking you’ll have a flavorful dish that is easy on the tummy.

If using the quinoa for something that is not savory you can simply cook it in water. It will still be prepared well for easier digestion.

Quinoa can be cooked in advance and used in cold salads, added to soups or even used as a replacement for oatmeal for breakfast. It will add great texture and flavor to your food. Plus it has a lot of protein.

Are you sick of rice or just want something different? Thinking about trying quinoa? Get it soaking a day ahead and you’ll be all set for an easy and nutritious part of your meal.Basic Grains: Quinoa | Homemade Dutch Apple Pie

Basic Grains: Quinoa
Serves 4
Basic cooking directions for properly prepared quinoa.
Write a review
Print
Ingredients
  1. 1/2 cup quinoa
  2. 2 cups warm water
  3. 2 Tbsp. lemon juice, kefir or whey
  4. 1 1/2 cups water or broth
  5. seasoning (optional - salt, garlic powder, herbs)
  6. 1-2 Tbsp. EVOO, coconut oil or butter (optional)
Instructions
  1. Combine the quinoa, water and lemon juice.
  2. Let sit 24 hours.
  3. Drain and rinse the quinoa.
  4. Place the quinoa in a medium saucepan.
  5. Add the broth/water and seasoning.
  6. Bring to a boil. Simmer, covered about one hour. Add extra liquid if getting too dry.
  7. Remove from heat and add fat if desired. Adjust seasoning to taste.
Notes
  1. If using the quinoa for a breakfast cereal or something not savory use water for cooking and don't add seasoning.
  2. Quinoa can be cooked in advance and kept in the refrigerator until needed. Simply reheat with a bit of broth or water.
  3. Cooked quinoa can be added to soups and salads.
  4. Cooked/cooled quinoa can be used in place of polenta.
Just Take A Bite https://justtakeabite.com/

The Hows and Whys of Preparing Grains

The Hows and Whys of Grains | Homemade Dutch Apple PieOne of my goals this year is to get back on track with properly preparing my grains. I’ve been doing it for years now, but got off track with pregnancy and a new baby.

Some may say to just avoid grains. But I tried that and learned that my body needs them! The most unhealthy I’ve ever been was when I went grain free.  Grains can be a very healthy part of a real food, traditional diet. Even Nourishing Traditions and GAPS mention the benefit of properly prepared grains.

So to help us all get to where we need to be I’m sharing some information about why you need to treat your grains in a special way if you are going to consume them and how it’s done.  I actually wrote most of this a couple years ago! But never shared it here. It’s a good reminder for myself. Hopefully it’s a great starting point or reminder for you as well.

In the weeks following this introduction I’ve got some basics and some fun recipes coming that all involve properly prepared grains. I hope you enjoy!

One of the oddest and most confusing aspects of real food is the idea of soaking grains. Switching to butter instead of margarine? No problem. Drinking raw milk instead of pasteurized? You bet. Using honey instead of corn syrup? Done. Get your flour wet before using it? Say that again? Wet flour? How could that work? And why would you want to?  But if you understand why you might find yourself turning your favorite baked goods into healthier soaked versions. The Hows and Whys of Grains | Homemade Dutch Apple Pie

It turns out there is actually a good reason to soak grains. Little things called phytates. Grains contain anti-nutrients as a protective mechanism. This protects them from weather and animals. But it also makes them difficult to digest. Your digestive juices are enemies of the grains just like any external enemy. Grains also have compounds that prevent active enzyme activity in your digestive system. This puts stress on your pancreas. 

In the unsoaked state grains contain phytates, which makes the minerals in the grains unavailable to you. This can lead to mineral deficiencies and poor bone density (one more thing I learned the hard way when I found out I have seven cavities!). Both enzyme inhibitors and phytic acid can be mostly neutralized by soaking the grains. This makes them easier to digest and makes the nutrients available to your body. This process also begins to pre-digest the grains, breaking down complex starches and tannins that can irritate your stomach, as well as beginning to break down proteins like gluten.The Hows and Whys of Grains | Homemade Dutch Apple Pie

So without soaking the grains they are very difficult to digest and are actually harmful to your body. This holds true for gluten-containing grains like wheat and rye but also for alternative grains like oats, amaranth and teff. In fact oats, such a dietary staple for so many, has the highest phytate content of any grains!

Grains that are not properly prepared are harmful. So how do you make them healthy? It’s not as hard as you might think. And, honestly, soaking often makes baking easier! It breaks up the process into very short steps that only take a few minutes here and there. The main thing you have to be willing to do is plan ahead. Soaking does take time. So if you want soaked pancakes in the morning, you have to plan and get them started the day before.The Hows and Whys of Grains | Homemade Dutch Apple Pie

The basic idea is that you use cultured dairy or another acid medium like lemon juice to soak the grains for at least 7 hours (ideally 24 hours) before using them. The length of time required will depend on the grain.

The easiest way to start is by using recipes that give exact instructions on what ingredients to use, how much and how long. Once you get the hang of it you can start experimenting. Simply replace the liquid in the recipe with a cultured/acidic medium (kefir, buttermilk, yogurt or warm water mixed with lemon juice), mix it with the grains, cover the bowl and let it sit. Then proceed with the recipe after the grains have soaked. You can also add the fat/oil during the soaking step.

Soaking can be used on all kinds of grains…wheat, oats, rice, etc. It is also used for lentils, beans and nuts. There are a few exceptions to the rule. Coconut flour, white rice, millet and flax seed are relatively low in phytic acid. Although soaking them will still be beneficial it is not as critical.

Although millet is low in phytic acid, it is goitrogenic. So limit your  millet intake if you have thyroid problems.

So what do you do if you don’t have time to soak your flour before baking, or what if you forgot to plan ahead? An alternative is to sprout the grains.  This is helpful for those times you have to do some last minute baking. Simply sprout the grains, dry them and grind them into flour. Then the phytates are already neutralized and you don’t have to soak it. You can buy sprouted grains if you do not want to make your own.The Hows and Whys of Grains | Homemade Dutch Apple Pie

A third option for dealing with phytates is sourdough. Sourdough also breaks down the phytates and makes the grains easier to digest. Sourdough can be used for all kinds of baked goods. If you want bread, sourdough is the way to go.

Soaking grains is a critical step in the baking process if you are not using sprouted grains or a sourdough starter. It is important for aiding digestion for everyone. It is especially crucial for anyone with a leaky gut, food allergies or food intolerances.  Even if you avoid some of the common grains like wheat and corn, you still have to properly prepare your food. If you have cut gluten out of your diet but have not noticed any improvement, try soaking the gluten free grains you eat. 

Some alternative grains and flours are teff, amaranth, tapicoa, millet, rice (white and brown), quinoa, coconut, hemp and garbanzo bean. These can be prepared in the same manner as their traditional counterparts. The Hows and Whys of Grains | Homemade Dutch Apple Pie

The next time you start baking ask yourself one question: “Is my flour wet?” If it is you’re on your way to a tasty treat that will be easier on your gut and provide your body with important vitamins and minerals.

Do you consume grains? What is your favorite way to prepare them?