Forewarning…this is long 🙂 And I’m still just figuring things out/learning (I haven’t even read the whole book yet). So bear with me. But I wanted to get this out for those that have read my blog and are wondering what in the world GAPS is and why I’m on this path.
GAPS – Gut and Psychology Syndrome
I heard about GAPS quite a while ago. And it intrigued me. But it sounded pretty extreme. I put the book on my Christmas list just in case someone might buy it for me. Nobody did. Oh well. I continued to hear more and more about it. I did some research. I read numerous testimonials of healing. I started to wonder if this might be what I need. I put the book on my birthday list (at the top of my book list this time). Still didn’t get it. I did more research. I finally broke down and bought the book. And I LOVE it. It’s very eye-opening. And it makes so much sense to me.
I should have jumped on it the first time I heard the title. A brain/gut connection? Hello. I’ve know that’s my problem for years now. But this is a new way of looking at it. Instead of always being told that half of my problems are psychological and that I have to cure that to get my gut in order, I now see that it’s quite the opposite. And honestly I’ve always known that. But no doctor ever believed it. I’ve been seeing a psychologist for 5 years to treat anxiety and OCD. And I know I have seen a lot of benefits from it. But at the same time I always kept wondering…how much of this is mental and how much of it is truly a physical problem? That has always been my biggest struggle. Sure, I can force myself to not stick to my daily routine, but I know I’ll be in so much pain if I do. I’m told it’s all in my head. But I know it’s not. When my stomach is in knots day after day it’s not something that relaxing or forcing myself to try to ignore is going to take away.
GAPS has really shed some light on everything for me. The digestive problems did not come from anxiety/ocd. The anxiety/ocd came from major problems in my gut. I first have to heal that…then the mental stuff will get better. I kept trying to tell my doctor that. If I didn’t feel sick all of the time I wouldn’t worry about the OCD stuff. I don’t believe any amount of CBT or exposure therapy is going to make me better. I firmly believe that I have to get my gut healthy first. Then I will be able to fully get over the other stuff. Like I said, I’ve kind of known that all along. But when doctors tell you otherwise you believe them.
So, what is GAPS and how did it all start for me? Basically normal functioning of all parts of your body start in the gut. If your gut is unhealthy then it will eventually lead to other health problems. This is especially true for conditions like autism, ADD/ADHD, dyslexia, allergies, depression, OCD and schizophrenia. We all start out with a sterile gut. And then inherit our gut flora from our parents. Then as we get older other factors help improve it or make it worse. If it gets worse and harmful things are piled on then the body gets worse and worse…resulting in various illnesses. In order to get healthy a person needs to get his/her gut flora back in balance…back to having the good outweigh the bad. If the bad bacteria takes over it leads to gut dysbiosis/leaky gut. And the intestines can no longer process food the way they should. Partially digested food “leaks” through the gut wall and causes lots of problems/allows toxins into the body.
Obviously I can’t say what my gut was like when I was born. I’m sure I inherited some degree of damage from my parents (most people probably do). But that alone doesn’t mean I was destined to have problems. Childhood vaccinations are a potential harm. For a healthy child they aren’t a problem. But for a child that already has a compromised gut they can be harmful. Again, I can’t say that this was an issue for me, but it could be a factor. The first major thing I can pinpoint is that I had a lot of ear infections when I was little…which means lots of antibiotics. And that is a BIG factor when talking about the health of your gut. Every time you take antibiotics it kills off the good stuff with the bad. I had ear infections every year, some pretty severe, until about 6th grade. And that was about when I started having days here and there when I could barely sit up in school because I had so much pain in my side. I now know that it was gas/GI pain. But back then I had no idea. I just knew I needed to lay down for a while to make it go away. In addition to yearly antibiotics I know diet had a big impact. We grew up eating plenty of processed foods…HFCS, white flour, white sugar, frozen/packaged food, etc. Which added to the deterioration of my gut health. The good was killed and replaced with bad. Late jr. high/early high school was when things really started to decline…when it took a toll on me mentally. This is when the eating disorder and very skewed self-perception kicked in. I thought I was fat. I did not like the way I looked. So I started to eat a lot less. And I stopped eating fat almost entirely. This was very detrimental to my physical and mental health. But I didn’t know it at the time. My fat intake was very low, which means severe lack of critical fat-soluble vitamins like A, D, E and K…leading to a very compromised immune system. My protein intake went down (not good for a growing teen), which means all kind of nutrient deficiencies. And of course then I craved carbs and sweets…so that became the bulk of my diet. Which leads to zero nutrients, hormonal imbalance, messed up insulin levels, and your body starts to store fat. So the vicious cycle continues. You try to eat less and less food and fat…your body stores more and more fat…you get sicker and sicker…your gut gets majorly damaged…your mental condition gets worse and worse. Here are the typical stages of an eating disorder (summarized from GAPS):
“1. multiple nutritional deficiencies…lowered immune system…illness…antibiotics…damage to the gut flora.
2. GAPS develops where the abnormal gut flora start producing toxins…these toxins get into the brain causing problems with mood, behavior, learning, concentration, memory and sensory perception…namely self perception.
3. Gut degeneration…it becomes porous and “leaky” and unable to fulfill its functions. The person cannot digest and absorb food properly, which leads to more nutritional deficiencies. The person suffers from digestive problems that get worse when they are coaxed to eat as their gut is in no fit state to handle food.
4. Hormonal exhaustion. Hormones rule metabolism, growth and repair. The lack of hormones leads to developmental issues (sexual development, fatigue, emotional problems, sleep problems, skin problems, etc.).
5. GAPS comes with a craving for carbohydrates, from swinging blood sugar levels. Patients binge on processed carbohydrates, feeding abnormal gut flora and perpetuating the whole problem further.”
That is like reading my life story from early high school to just a year or two ago. I hardly ate anything. I got sicker. I craved sweets (anyone who knows me knows about my obsession with massive amounts of ice cream)…and that’s mostly what I ate. I got sicker. My GI issues got worse. I tried certain diets (for IBS, etc.)…which were based on white, starchy foods. I got sicker. My GI issues got worse. I tried various medications. I got worse. My mental condition got worse. My whole body has been out of whack for a long time. And it has led to major GI issues, major mental issues and infertility.
It doesn’t end there. Many medications can cause further damage to the gut. One big one is birth control. I regret now ever taking it (for 5 years). I obviously didn’t need it 😛 And I’m sure it did a lot of damage. I have also been taking thyroid medication for quite a few years.
I’m kind of condensing a lot of stuff here. But the major factors for me were antibiotics (as a child and as an adult due to surgeries, etc.), diet and drugs (birth control, anti-depressants, GI meds, thyroid meds). Which led to a whole host of problems that all started in the gut. Even though I was told they were in my head.
I am very thankful that over the past year I have already made a lot of progress towards healing my body by cutting out a lot of the damaging food I was eating (processed, white, refined, etc.). And more recently really focusing on very nourishing and healing foods. But I know I still have a long road ahead of me. My gut has been so severely damaged…and it shows (inability to digest food properly, anxiety, ocd, infertility). So I need to really start from square one and heal it. Sounds easy…but I know it’s not.
This is where the GAPS diet comes in. There are different stages of the diet. To truly heal you have to start with the intro…which is mostly eating bone broth all day every day for a couple weeks. Then other foods are gradually added back in one at a time, ending with the full GAPS diet. This process of healing can take up to 2 years, which is likely for someone like me. Sounds a bit daunting. But is it worth it? Absolutely!!! For my own sake and the sake of my family.
Where does that leave me now? Well, I can’t start with the GAPS intro while I’m pregnant. When you start healing your gut and getting rid of all of the toxins there is a lot of die off. Your body gets the bad stuff out. Not good for a growing baby. It can even be harmful while breastfeeding. So my full healing process will obviously have to wait a while. However, I can start on the full GAPS diet right away. That has all of the nutrition you need. And it will be much easier on my body. Will it totally heal me? No, not completely. But will it really help me to live more pain free, be more stable, function more normally and be prepared for intro when I’m able? YES! So far I have only taken some steps towards the full GAPS diet (mainly eating grain free). And I can already see differences. For the past 3 days I have been reducing my OCD behavior/compulsions. It wasn’t a conscious choice. It just kind of happened. And my anxiety didn’t get out of control. It was pretty amazing. Did I feel great the rest of the day? No. I still had problems. But not really anything worse than usual. If that can happen after only small steps towards the full GAPS diet, I’m excited to see how much better I can feel on the full GAPS diet (and once my digestive organs aren’t being smushed by a big baby :P). With only a few weeks left before having this baby I don’t intend to even get to full GAPS by then. I will not be cutting out all dairy and sugar yet. I don’t want to make too many more changes right now. But after the baby is here and is a couple months old I’ll hopefully be ready to jump into full GAPS. Then someday down the road I’ll start from the beginning.
I’ve wanted this change for so long. I’m ready. For me to feel better. But I have another motivation…Rebecca. I want to be a good mother. But more than that I want her to be healthy too. So I will be gearing her diet more towards GAPS foods as well. Not as extreme as my diet. But definitely make sure she’s eating plenty of nourishing foods and not too much starchy/grain food. Sadly I know I passed some of my GI issues on to her. I want her to have healing from a very young age and hopefully prevent her from going down the road I did. And I want her sibling(s) to have a better start as well. I’m anxious to see in the coming weeks/months if I can tell a change in Rebecca’s GI patterns and behavior from a diet modification.
I mentioned that I have been seeing a psychologist for quite some time now. Well, I’m not sure I want to continue at the moment. The last time I was there I felt very uneasy. Like she was telling me the same things over and over and talking down to me a bit. I have the tools. I know the process. I am doing the stuff…but it doesn’t work!!! Until I get the physical healing started the mental will not change. And I’m guessing she won’t agree with me. I left my last appt. feeling like I didn’t want to go back for a long time (normally I feel great when I leave). Like she was going to want me to do things that would actually push me in the wrong direction. Trying too hard to work on the mental stuff if the gut is not healed will just backfire. I do have an appt. scheduled in a few weeks. And I’ll go. But beyond that I’m not sure. We’ll see where this leads and how I’m doing after the baby.
Another thing that stood out to me in the book was the mention of medications. Just because you are starting GAPS doesn’t mean you can stop all of your current medications. First you have to heal the gut…then wean off the stuff that you don’t need anymore. So as much as I would love to stop taking my thyroid med and miralax, I know they are necessary to function right now. As I get healthier I can then work on getting rid of the medication.
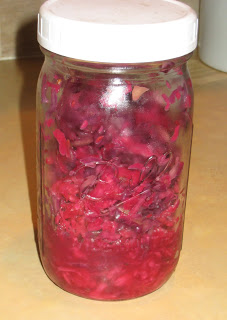
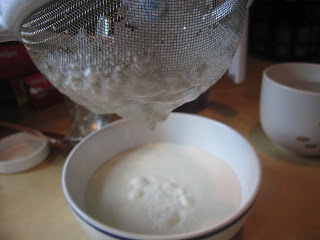
That’s a condensed version of my story. Now…what is the GAPS diet? You can read a lot of the details, the steps and what’s allowed/what isn’t on the GAPS website. Some of the main things to avoid are grains, starchy food, carbohydrates, sugar (in any form aside from fruit), dairy (at first…some is allowed on full GAPS), anything processed, bad oils/fats, anything containing gluten and caesin, anything artificial. You don’t just avoid bad stuff. You fill your body with good stuff…bone broth, eggs, meat, fish, veggies, fruit, nuts, seeds, lots of healthy fat (from meat, butter, ghee, coconut oil, olive oil), kefir and fermented food.
I am taking baby steps to get started. Right now I’m focusing on eating grain free and adding more bone broth to my diet. At some point I’ll work on cutting out sugar and most dairy.
This is both scary and exciting. But I truly believe it’s where I need to be. And I’m anxious to finish reading the book! God is guiding me through this long journey one step at a time…and in his perfect time.