Home » Kid-friendly Recipes » beverage » Page 3

Category: beverage

Simple Smoothie Series: Sunrise Smoothie

Simple Smoothie Series Sunrise Smoothie || Homemade Dutch Apple PieThe next simple smoothie in this series is called the sunrise smoothie. It’s the perfect morning drink.

The combination of orange, banana and strawberry gives a burst of flavor and also great color. It almost looks like a sunrise. Though you don’t need to take warning for this red sky.

By adding yogurt and egg yolks to these fruits you create a vitamin powerhouse.

My oldest really loves this smoothie. And she can be picky about smoothies. It is bright and fresh and a great thing to boost your energy for the day. She renamed it the morning milkshake.Simple Smoothie Series Sunrise Smoothie || Homemade Dutch Apple Pie

If you want to add some healthy fat to the smoothie avocado, coconut oil and flax seed all work well.

Don’t forget to pair it with some properly prepared starch (quinoa, rice, sourdough bread, fried potatoes, etc.) for better absorption and digestion. Then you’ll have a good balance of protein, fat and carbohydrates.

Even if it’s cold and the sun isn’t shining during the winter you can start your day with a nutritious sunrise – in a smoothie! Take your fermented cod liver oil with it to boost your vitamin D, just like the sun does.Simple Smoothie Series Sunrise Smoothie || Homemade Dutch Apple Pie

Simple Smoothie Series: Sunrise Smoothie
Serves 1
A fruity smoothie that looks like a sunrise in a glass.
Write a review
Print
Ingredients
  1. 1/2 medium banana
  2. 1 clementine (or half an orange)
  3. 1/3 cup strawberries (fresh or frozen)
  4. 1/2 cup yogurt (or kefir, coconut milk or coconut milk yogurt)
  5. 1 egg yolk
  6. 2 Tbsp. honey (or maple syrup), if desired
  7. 1/4 tsp. sea salt
Instructions
  1. Combine all of the ingredients in a blender.
  2. Blend until smoothie.
  3. Serve immediately or store in the refrigerator.
Notes
  1. You can add 1/2 small avocado, 1 Tbsp. melted coconut oil or 2 tsp. flax seeds for extra fat.
  2. Leave out the honey if serving this smoothie to a child under one year of age.
Just Take A Bite https://justtakeabite.com/

In order for me to support my blogging activities, I may receive monetary compensation or other types of remuneration for my endorsement, recommendation, testimonial and/or link to any products or services from this blog.

*If you order by clicking on any of my Tropical Traditions links and have never ordered from Tropical Traditions in the past, you will receive a free book on Virgin Coconut Oil, and I will receive a discount coupon for referring you.

Simple Smoothie Series: Kiwi Strawberry

Simple Smoothie Series: Kiwi Strawberry || Homemade Dutch Apple PieIt’s that time of year – time to get back on track with nourishing foods.

So this month I’m doing a simple smoothie series. Smoothies are a great way to pack in nutrition, and they can be tailored to meet any dietary restrictions. Plus kids love them!

The other great thing about smoothies is that they can be prepared in advance and are great for on the go breakfasts or lunches. They can even be frozen to make a breakfast popsicle your kids will love.

If you have a little one just starting solids you can spoon feed a thick smoothie. It’s an easy way to give them things like probiotics and cod liver oil.  Be sure to leave out the honey if giving it to a child under one year of age.

A smoothie can be a meal on its own. I personally need to have a salty/starchy component to my meal or else I will feel cold. So if I drink a smoothie (which has lots of fat and protein) I like to pair it with a muffin or slice of bread or bowl of rice with salt. That gives a good fat/protein/carbohydrate balance and a good sugar/salt/saturated fat/starch balance – both of which are ideal for good health. It is especially important for adrenal health.

My first simple smoothie is kiwi strawberry. It’s perfect for the winter months. Kiwi is readily available in the store. Then add some strawberries from your summer freezer stash. It’s a delicious combination that is rich in vitamin C.

An added bonus of using strawberries is that they are the best source of ellagic acid. According to Nourishing Traditions, “strawberries contain a compound called ellagic acid, which is an antioxidant that helps detoxify carcinogens.”Simple Smoothie Series: Kiwi Strawberry || Homemade Dutch Apple Pie

The yogurt or kefir in the smoothie provides probiotics and enzymes to help digest lactose. The egg yolks provide so many nutrients – fat soluble vitamins A, D, E and K plus calcium, iron, phosphorus, zinc, thiamin, folate, vitamin B6 and vitamin B12.

I add a pinch of sea salt to smoothies for trace minerals. You can also add gelatin (use the non-gel form) and coconut oil.

Probiotic powder and liquid fermented cod liver oil can also be added in small amounts. You can also add avocado for thickness and dates for sweetness.

The end result is a refreshing kiwi strawberry drink. But when you look a bit deeper you see it is a nutrition powerhouse and a great way to start your day.

I sometimes make a large batch of smoothie on Sunday and pour it into individual cups. Then I can use them as needed throughout the week.  If you are going to make the smoothies in advance leave out the coconut oil and gelatin. They will change texture as they sit in the refrigerator.

This recipe makes enough for two adults (average size smoothies) or three to four children.

A few words of caution. Do not add raw greens to your smoothies. Most of them contain oxalates in their raw forms. If you want to add greens be sure to cook them first.

Also, I don’t advise drinking smoothies every day. It’s a good addition a couple times a week. Change it up with other breakfasts throughout the week.

A strawberry kiwi smoothie is the perfect breakfast treat for the whole family. Stay tuned for more delicious flavors.Simple Smoothie Series: Kiwi Strawberry || Homemade Dutch Apple Pie

Simple Smoothie Series: Kiwi Strawberry
Serves 2
A power packed smoothie to start the day.
Write a review
Print
Ingredients
  1. 1 cup total yogurt, kefir, sour cream, milk, coconut milk and/or coconut milk yogurt
  2. 2 egg yolks
  3. 1 cup strawberries (fresh or frozen)
  4. 1 kiwi, peeled and cut up
  5. 1/4 tsp. sea salt
  6. 2-4 Tbsp. honey and/or maple syrup (to taste)
  7. 2 tsp. gelatin (optional)
  8. 1 Tbsp. melted coconut oil (optional)
  9. 1/2 small avocado (optional)
  10. 2 dates (optional - leave out some or all of the honey if adding dates)
Instructions
  1. In a blender combine the yogurt/milk, egg yolks, strawberries, kiwi, salt and sweetener. Blend until smooth.
  2. Adjust sweetness to taste.
  3. Add gelatin and blend.
  4. While the blender is running slowly pour in the melted coconut oil.
  5. Pour into glasses and serve immediately or store in the refrigerator.
Notes
  1. If making the smoothie for a child under one year of age leave out the honey. It is not safe for a small child. They should not need extra sweetener besides the fruit. Or you can add a bit of banana for extra sweetness.
  2. If making the smoothies in advance leave out the gelatin and coconut oil.
  3. If you do not tolerate eggs you can make the smoothie without egg yolks. The taste will not change.
  4. You can substitute a different kind of berry if you do not tolerate strawberries.
Just Take A Bite https://justtakeabite.com/


In order for me to support my blogging activities, I may receive monetary compensation or other types of remuneration for my endorsement, recommendation, testimonial and/or link to any products or services from this blog.

Dairy Free Egg Free Egg Nog

Dairy Free Egg Free Egg Nog || Homemade Dutch Apple PieChristmas will be here before we know it. That means time for presents, family gatherings and of course egg nog!

I’ll be honest – I hated egg nog when I was younger.  It wasn’t until just a few years ago that I could even handle more than a sip or two.

But in the last few years it has really grown on me once we started buying good quality, locally made egg nog.  It figures that now that I really enjoy egg nog I can’t have it.  My little one is sensitive to both dairy and eggs.

Instead of resigning myself to the fact that I’ll have to skip the egg nog this year I decided to create a dairy and egg free version.  It’s not easy to recreate that thick, rich texture and flavor without the eggs.

But I have come up with a version that even those that can have dairy will enjoy.Dairy Free Egg Free Egg Nog || Homemade Dutch Apple Pie

I’m not going to lie – this stuff is rich!  There is lot of sweetener to overpower the coconut flavor and to mimic the richness of the eggs. The combination of cane sugar and honey really works well.

You only need a small glass of this egg nog at a time. But it is a wonderful treat for the holiday season that everyone can enjoy. Even my three year old loves it.

The other key component to this egg nog is sea salt.  It creates the perfect balance with the sweet and the spice.

If you’re not a fan of drinking your dessert you can simply double the recipe and turn it into delicious egg nog ice cream.

Are you not totally convinced that a white egg nog can taste good? Add a couple tablespoons of pureed pumpkin or squash for color. You’ll have your yellow egg nog without the eggs.

No dairy? No egg? No problem. Now you can enjoy egg nog this Christmas too.Dairy Free Egg Free Egg Nog || Homemade Dutch Apple Pie

Dairy Free Egg Free Egg Nog
Serves 5
A rich holiday drink that is both dairy and egg free.
Write a review
Print
Ingredients
  1. 1 can full fat coconut milk
  2. 1/2 cup organic cane sugar
  3. 1/4 cup honey
  4. 3/4 tsp. nutmeg (or to taste)
  5. 1 Tbsp. tapioca flour
  6. 2 tsp. organic vanilla
  7. 1/2 tsp. unrefined sea salt
Instructions
  1. Combine all of the ingredients in a blender.
  2. Blend until smooth.
  3. Adjust spice to taste.
  4. Serve immediately or chill.
Notes
  1. The egg nog will thicken as it chills.
  2. To make egg nog ice cream simply double the recipe and process in an ice cream maker.
  3. Add 2 Tbsp. pureed pumpkin or squash to create the yellow color of egg nog.
Just Take A Bite https://justtakeabite.com/
If you are not dairy/egg free please check out Raising Generation Nourished’s amazing egg nog recipe!

In order for me to support my blogging activities, I may receive monetary compensation or other types of remuneration for my endorsement, recommendation, testimonial and/or link to any products or services from this blog.

How To Use Up Extra {RAW} Milk

How To Use Up Extra Raw Milk || Homemade Dutch Apple Pie
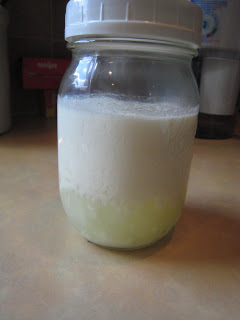
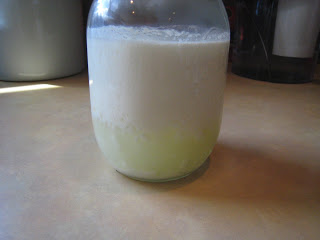
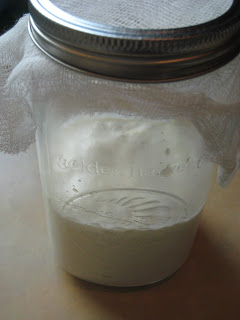
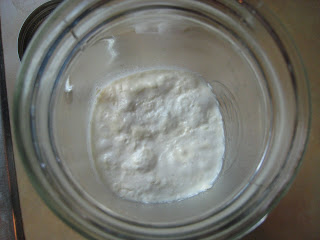
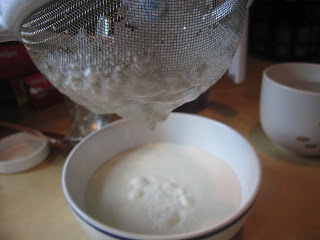
We LOVE our raw milk. We’ve been getting it since I was pregnant with my son (he’s now 3 1/2). Once you taste the real stuff there is no going back.

Even my kids can tell the difference in taste. When my daughter was younger and she tasted conventional milk she would call it “cheese milk” because it tasted strange.

For most of the year we get three gallons of milk a week. We’ve had times where we barely make it through the week with three gallons (like when I’m pregnant and drinking milk like crazy).  How To Use Up Extra Raw Milk || Homemade Dutch Apple Pie

Then there are times like now where only two members of the family are drinking milk since my son is allergic and I have to avoid it for the baby. We are barely using two gallons a week now, if that.

That leaves me with a lot of extra milk sometimes. I don’t want any of it to go to waste. So I use it to make other things. My go-to’s are pudding, ice cream and yogurt.

Raw milk is a healthy addition to your diet. If you are fortunate enough to have access to it you don’t want any of it to go to waste. So if you find yourself with a surplus of milk, here are over thirty ways to transform it enjoy it.

Take note that most of these recipes can be made with milk that is pasteurized as well. But the health benefits won’t be quite the same.How To Use Up Extra Raw Milk || Homemade Dutch Apple Pie

Yogurt, Sour Cream and Kefir

How To Make Yogurt In Your Oven from Oh The Things We’ll Make
Homemade Yogurt from Yearning and Learning
Homemade Yogurt from Our Small Hours
Cooked Yogurt from Homemade Dutch Apple Pie
Raw  Yogurt from Homemade Dutch Apple Pie
Milk Kefir and Kefir Cream from Delicious Obsessions
How To Make Kefir from Oh The Things We’ll Make
Dairy Kefir from Homemade Dutch Apple Pie
Sour Cream from Homemade Dutch Apple Pie

Pudding

Homemade Chocolate Pudding from Our Small Hours
Homemade Vanilla Pudding from Our Small  Hours
Homemade Vanilla Pudding from Real Food RN
Gluten Free Chocolate Pudding from Simply  Healthy Home
Homemade Fudgesicles from Recipes To Nourish

 How To Use Up Extra Raw Milk || Homemade Dutch Apple Pie

Ice Cream

Vanilla Bean Ice Cream from Live Simply
Easy Chocolate Chocolate Chip Ice Cream from Raia’s Recipes
Persian Love Ice Cream from And Here We Are
Affogato from And Here We Are
Kefir Ice Cream from Delicious Obsessions
The Best Chocolate Ice Cream from Homemade Dutch Apple Pie
Classic Vanilla Ice Cream from Homemade Dutch Apple Pie
Salted Dark Chocolate Ice Cream from Homemade Dutch Apple Pie
Blueberry Cheesecake Ice Cream from Homemade Dutch Apple Pie

Drinks

Spiced Hot Chocolate With Vanilla Whipped Cream from The Organic Kitchen
Peanut Butter Banana Smoothie from Raia’s Recipes
Honey Sweetened Hot Chocolate from Recipes To Nourish
Mexican Hot Chocolate from Recipes To Nourish

Soup

Creamy Fish Chowder from Raia’s Recipes
Condensed Cream of Chicken Soup from Raising Generation Nourished

Cheese

Yogurt Cream Cheese Dip from Real Food RN
Cottage Cheese at Home from Urban Overalls
Homemade Paneer Cheese from Economies of Kale
Homemade Cheese from Raia’s Recipes
Homemade Cream Cheese from Homemade Dutch Apple Pie
Farmer’s Cheese from Homemade Dutch Apple Pie

Breakfast

Easiest Fluffiest Buttermilk Pancakes from Raia’s Recipes
Breakfast Lapsha from Raia’s Recipes


 Raw milk can be used in so many ways. I love drinking it plain. But there are so many delicious ways to enjoy it. Do you ever have extra milk? How do you use it?

Simple Strawberry Slush (egg free, dairy free, nut free, gluten free)

This simple strawberry slush is a fun, fruity, allergen-friendly drink for kids and adults. It contains no eggs, dairy, nuts, grains, soy or coconut.Simple Strawberry SlushDo you want to treat your kids to a really fun drink? Try a simple strawberry slush!  It is a perfect way to cool down in the summer and consume fresh, nutritious produce.

I grew up drinking Slushies® all the time. We would bike to the local drug store all summer to get them. Of course they were made of food coloring, high fructose corn syrup and artificial flavor.

This simple strawberry slush is a much-improved version. It only uses a few simple ingredients. It is also very allergen-friendly.

My kids LOVE these. I’ll be honest – my husband and I do too!

As always, the best part for me is that it only takes about 60 seconds to make a simple strawberry slush. Plus I can add collagen for a nutrition boost.

Strawberries work very well in this drink – even frozen! But if you don’t have any or want a different flavor you can try blueberries, raspberries or even cherries. You really can’t go wrong.

This summer the whole family can cool down with a nourishing simple strawberry slush.

Simple Strawberry Slush 2

Simple Strawberry Slush
Serves 2
A fun, refreshing and healthy summer drink that is free of allergens.
Write a review
Print
Ingredients
  1. 6 ice cubes
  2. 3/4 cups strawberries (fresh or frozen) (or other fruit)
  3. 1 - 2 Tbsp. sweetener (honey, syrup, sucanat) (depending on the sweetness of the fruit)
  4. 1/4 tsp. sea salt (optional)
  5. 1/2 tsp. collagen (optional)
Instructions
  1. Combine all of the ingredients in a high powered blender.
  2. Blend until desired consistency.
  3. Serve immediately.
Notes
  1. This makes enough for two children or one adult.
  2. You can blend it completely smooth (for small children) or leave a bit of slushiness from the ice.
  3. Blueberries, raspberries and cherries can be combined with or substituted for the strawberries.
Just Take A Bite https://justtakeabite.com/
 
In order for me to support my blogging activities, I may receive monetary compensation or other types of remuneration for my endorsement, recommendation, testimonial and/or link to any products or services from this blog.

Hydrating Iced Cocoa

iced cocoa

Last year I shared my “secret” recipe for hot chocolate that I drink daily. It tastes great and keeps me  going all day.

This past week we went from chilly to hot! Though now it’s back to chilly again. That’s Michigan for you.

As much as I love my hot chocolate, when I’m dripping with sweat from playing outside with the kids it just doesn’t sound that appealing.

So now it’s time for an iced version! When I tried it I was pleasantly surprised that the iced cocoa kept me just as hydrated as the hot version. It was also just as easy to drink without feeling like I had a belly full of liquid.

I don’t know the science behind it, but just a small amount of cocoa helps my body absorb liquids and stay hydrated. Cocoa is also full of minerals like potassium and magnesium. It even has quite a bit of iron and fiber.

I’ve talked before about the importance of not drinking tons of plain water throughout the day. It will actually flush the vitamins and minerals out of your body and leave you dehydrated…and feeling even thirstier! It will also lower your metabolism (you can read more about that in Eat for Heat and The Nourished Metabolism).

I stick to my mug of hot chocolate in the morning and now my mug of iced cocoa in the afternoon. My thirst is quenched for the whole day. As an added bonus I no longer have the overactive bladder I had from childhood on. I’m not running to the bathroom all day long.

Do you play sports? Skip the neon-colored sports drinks and fill your water bottle with iced cocoa.

My kids often ask me to make hot chocolate for them. But it’s tough to get it just the right temperature so that it’s still warm but not too hot. They are going to love this new treat.

If you’re looking for a delicious, refreshing and hydrating drink this summer try some iced cocoa. It only takes a few minutes to make and tastes great! 

iced cocoa collage

Hydrating Iced Cocoa
Serves 1
A delicious, hydrating drink to keep you going all summer long.
Write a review
Print
Prep Time
2 min
Prep Time
2 min
Ingredients
  1. 1 - 2 tsp. organic cocoa powder (you can substitute carob powder)
  2. 1 Tbsp. honey, maple syrup, coconut sugar and/or cane sugar
  3. 1/8 - 1/4 tsp. unrefined sea salt
  4. 1-2 tsp. gelatin or collagen (optional)
  5. 1/4 cup milk or milk substitute (optional)
  6. ice cubs
  7. hot water
  8. cold water
Instructions
  1. Add cocoa powder, sweetener, salt and gelatin to a heat-safe cup (I like to use a pint jar/mug).
  2. If using gelatin, add 1/8 cup of water, stir and let sit for about 30 seconds to dissolve.
  3. Add 1/4 cup boiling water to the cup. Stir to dissolve the cocoa/sweetener/salt mixture.
  4. Add 4-6 ice cubes to cool the cocoa.
  5. Add milk for richness.
  6. Fill the rest of the glass with cold water.
  7. Stir and serve immediately.
Just Take A Bite https://justtakeabite.com/
Easy Pink Lemonade | Just Take A Bite

Easy Pink Lemonade

Refreshing and hydrating, this easy pink lemonade is made with only real ingredients. No artificial flavors or colors. It’s the perfect summer drink!

Easy Pink Lemonade | Just Take A Bite

Whether it’s the middle of summer or you’re just looking forward to the start of spring, pink lemonade is the perfect drink.

Dye-free Pink Lemonade

This easy pink lemonade only takes minutes to make. It is free of anything artificial (i.e. no food coloring!). And a simple addition of sea salt turns it into a hydrating homemade sports drink.
 
Sometimes I even go a step further and add grass-fed collagen and powdered probiotic to really bump up the nutrition factor.
 
You can make a single cup or a big pitcher. I usually make a half gallon at a time. It doesn’t last long in my house.

Allergen-Free Drinks

Having kids with all sorts of allergies means they don’t get much to drink besides water (they don’t even have any milk alternatives they tolerate). So I like to treat them to hydrating pink lemonade once in a while, especially when they are playing hard or after illness.

This is also a fun surprise in my daughter’s lunch once in a while. She tends to forget to drink while she’s at school. But if I give her pink lemonade she comes home with an empty cup.

Keep everyone hydrated and satisfied with pink lemonade. All the great flavor. Nothing artificial.

Easy Pink Lemonade | Just Take A Bite

Easy Pink Lemonade

makes 1/2 gallon

6 1/2 cups water
1/3 – 1/2 cup lemon juice
1/4 – 1/3 cup pure grape juice or pure blueberry juice
1/2 cup organic cane sugar (you can also use honey or maple syrup, but it will change the flavor a bit)
1 tsp. unrefined sea salt (optional…makes it very hydrating)
2 Tbsp. grass-fed collagen (optional)
1 capsule powdered probiotic (optional)
ice

Combine all of the ingredients in a 1/2 gallon container. Mix well, allowing the sugar to dissolve. Adjust the lemon juice and grape juice to taste if needed. Refrigerate.

Water Kefir

A little while back I started making my own dairy kefir. I’m doing whatever I can to get my gut healthy and repopulated with good bacteria. Kefir is a great way to do that. A wonderful probiotic. I eat dairy kefir every day. Then my SIL tried water kefir. I had heard of that, but hadn’t thought about trying it. Last weekend my SIL and I swapped grains 🙂  I gave her some dairy to try, she gave me some water to try. I made my first batch yesterday. I haven’t tried it yet. But will today. I’m very excited. I love having something to drink that is actually good for you that isn’t just plain water. That’s pretty much all I drink. But it’s nice to have something else sometimes. And I’m hoping this will be a great alternative for Justin. He stopped drinking pop (most of the time) a little while ago in order to get healthier (in general and for our IVF cycle). But sometimes he likes it with things like pizza or when he wants a treat. It’ll be nice to have something to offer. For my first attempt I used the method my SIL posted. I can tell it’s working…lots of bubbles/foaming 🙂  I can’t wait to try adding new flavors to it. I want to try blueberries while they are in season. It’ll be great to be able to have dairy kefir and water kefir every day. So good for your gut.

Water Kefir

Equipment:
*1 large broad opening glass container with lid – exact size depending on the amount of liquid per batch you want to make. If you make the basic recipe exactly as listed below, probably a 1.5 liter capacity container will suffice. If your glass container does not have a lid, you can simply cover it by placing a plate on top or with some plastic wrap or cloth tied with a rubber band around the opening. (I used a quart mason jar… just make sure whatever kind of container you are using, you only fill it 3/4 of the way full!)

*1 strainer and/or pouch – depending on method used (I used a strainer this time, but will be making a pouch eventually)

*1 spoon, non-metallic

*1 glass jar

There are 2 known methods of dealing with the grains: the “loose grains” method and the pouch method. In the first one, you just toss the grains in the glass container along with all the other ingredients, so you will need to use a strainer for pouring each batch and washing the grains afterwards. The pouch method seems easier and better to keep your grains separate from other stuff you may want to add to the recipes and to manage the grains for washing purposes. You can easily make your own pouch with some porous cloth, like gauze or cheesecloth, folding and sewing the sides together, and using a string to tie up the top. Just make sure there’s more than enough room in it for the new grains to grow in there, as they multiply.

Ingredients:

3 Tbsp. water kefir grains
1/4 cup brown sugar or 3 Tbsp. honey (I used honey this time)
1 or 2 dried figs – or any other dried fruit you prefer like dried prunes, apricots, dates, raisins, etc. (I used 2 prunes)
1/2 lemon
1 quart filtered water – only water without any chlorine should be used (it will kill your grains), so tap water is not suitable unless it’s filtered

Mix in the glass container and stir.

There are 3 different brews you can make: 24, 48, and 72 hour fermentations. 72 hours is the maximum a batch should be let to ferment. The longer it is allowed to ferment, the stronger it becomes. Note that the carbonic acid increases each day, so if your container is air-tight sealed, it could explode. (I only filled my jar up 3/4 of the way and did not tighten the lid all the way.) Covering prevent flies or bugs from getting into it. Keep out of direct sunlight and at room temperature.

It is said that 24-hour kefir acts as a laxative…and that 48-hour kefir regulates and re-establishes intestinal function. Once the fermenting time has passed, strain the liquid, squeeze the juice of the half lemon used in it, and it’s ready to drink(you can chill it first).

Wash the grains under running water. You can store them in a small jar of water in the fridge for about a week (add a small amount of sugar to feed them), or else you should dehydrate them. Or if you use them regularly you don’t have to worry about storing them 🙂
 
We’ll see if I can keep up with both kinds of kefir 😛  I’ll update later when I’ve tried this/tried some flavors.

Dairy Kefir – Take 2

Last week I got some kefir grains and made my first attempt at making some. I wasn’t really sure what I was doing or what it was supposed to look like/taste like. And it didn’t seem to work that well. So I did a little more research, watched a few videos and tried again this week. Well, I think it worked this time 🙂  And it really wasn’t hard at all. I think I just hadn’t given my grains enough time to adjust/grow before. My first batch of kefir is still probably on the thin side. But it’s way thicker than the stuff I made last week. I mixed kefir and yogurt together yesterday for lunch. That worked well. The kefir does have a pretty strong sour taste. I love the tangy taste of plain yogurt. But kefir is different. I haven’t accquired the taste for eating it plain yet. But maybe I will over time. I’m excited to have kefir and to try in various recipes. And mostly excited about its impact on my gut 🙂

In addition to dairy kefir there is also water kefir. Which also is great for your digestive system. I’ve read about it many places. Maybe I’ll try that next (thanks for the suggestions Sara and Donielle!).

Here’s the basic idea of how to make dairy kefir:

Kefir

1. Put kefir grains in a clean container (a mason jar works well)
2. Poor milk into the jar (how much milk you use depends on how many grains you have and how much kefir you want to make. To start out I’m only using about a cup of milk.) and stir with non-metallic spoon.

3. Cover jar loosely (I use cheesecloth secured with a ring)
4. Set in a warm spot, away from sunlight (I put mine in a kitchen cupboard…above my oven)
5. In 12 – 48 hours you should have kefir (The time depends on your grains and how strong you like the kefir)

6. Strain the kefir into another jar. (I pour it through a strainer)

7. Put the grains back into the old jar and pour milk on top. Repeat steps 3 – 6 for more kefir. Or store in the refrigerator if you want a break from making kefir.

8. Cover the kefir you just  made. You can put it right in the refrigerator. Or you can let it set out a while to continue to thicken and separate. If it separates the top portion will be thicker, like yogurt. The bottom will be whey. You can use them together or separate, just like you do with yogurt.

Fermented Punch

Keeping with my June goals I’m trying some fermented drinks. These can be more beneficial to your digestive system and overall health than only drinking water. And some of them are so easy to make. So I’m giving it a shot. I’m starting with punch. It’s a Nourishing Traditions recipe. It’s kind of like lemonade (basically lemon juice, water and sugar). Not sure how the fermenting will impact the taste. It’s still in the fermenting process. I’ll have to update once I’ve tried it (tonight or tomorrow). I hope it turns out well. It was simple to make. And a perfect way to use up some of the organic lemons I have. I only made a half recipe to try it. If it’s good it’ll be a very cheap, healthy and easy drink to have on hand in place of things like juice.

**Edited 6/2/10 – This is very good! Tastes like lemonade. Now I have a great replacement for my grape juice. I was wondering how I was going to be able to cut out juice. This is it! Cheap, easy and good for my tummy.

Fermented Punch
Makes 2 quarts

juice of 6-8 lemons
1/2 cup Rapadura (I used organic cane sugar)
1/2 cup whey
1/2 tsp. grated nutmeg
2 quarts filtered water

Place all ingredients in a 2 quart glass container (I used a 1 quart mason jar to make a half batch). Cover tightly and leave at room temperature for 2-3 days (I shook it up a bit when I first put it in the jar). Skim off any foam that may have risen to the top. Cover tightly and refrigerate. The punch will develop more flavor over time.