Home » Kid-friendly Recipes » dessert » Page 13

Category: dessert

Soaked Gluten Free Graham Crackers | Just Take A Bite

Soaked Gluten Free Graham Crackers (gluten free, egg free, dairy free, nut free, corn free)

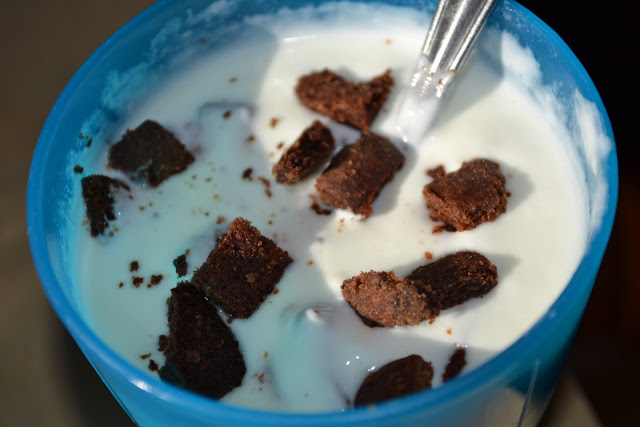
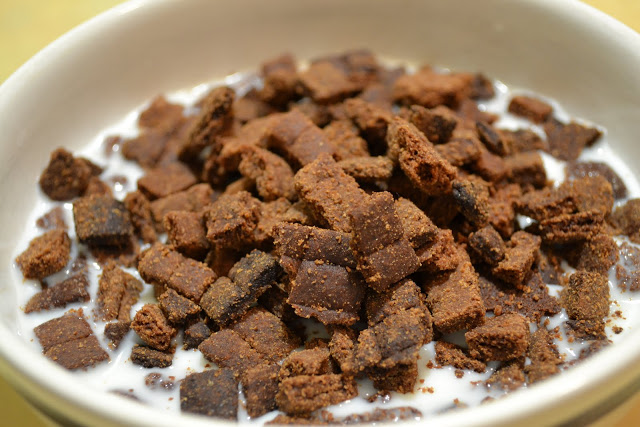
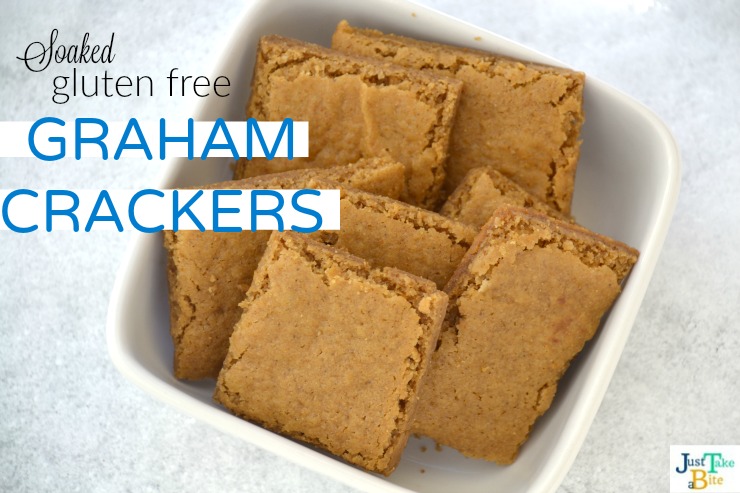
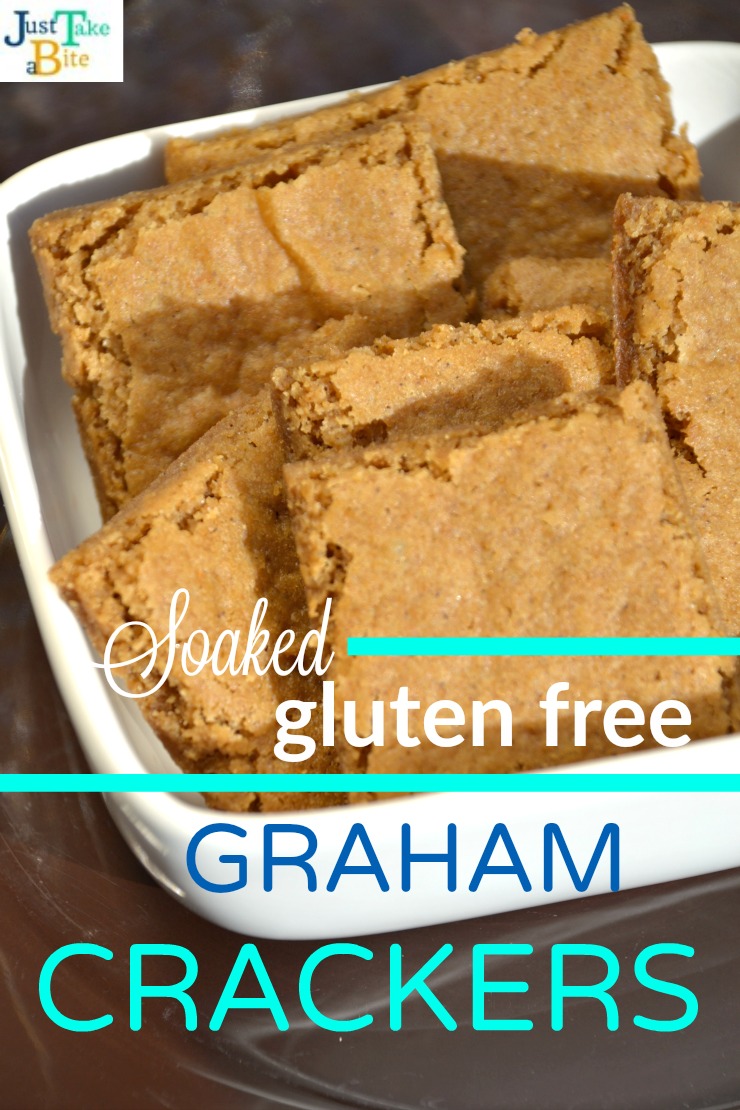
No need to reach for a box. These soaked gluten free graham crackers are easy to make and properly prepared. Your kids will love them. And so will you!

Soaked Gluten Free Graham Crackers | Just Take A Bite

If you’ve been reading my blog for very long you know that I have a small obsession with graham crackers.

I don’t know why. But they have been one of my absolute favorite foods for many many years now.

They are my go-to snack when I don’t feel well. Not too sweet. But just sweet enough. Always the perfect treat.
I’ve made quite a few varieties of graham crackers over the years. Every time I have a new dietary restriction I think…will I have to give up my beloved graham crackers?!

Recently I started eating gluten free. Which means I can’t have my yummy homemade whole wheat grahams.

So of course I got to work creating a gluten free version. Pure heaven.

Buy Healthy Snacks to Go eBook Recipes Online

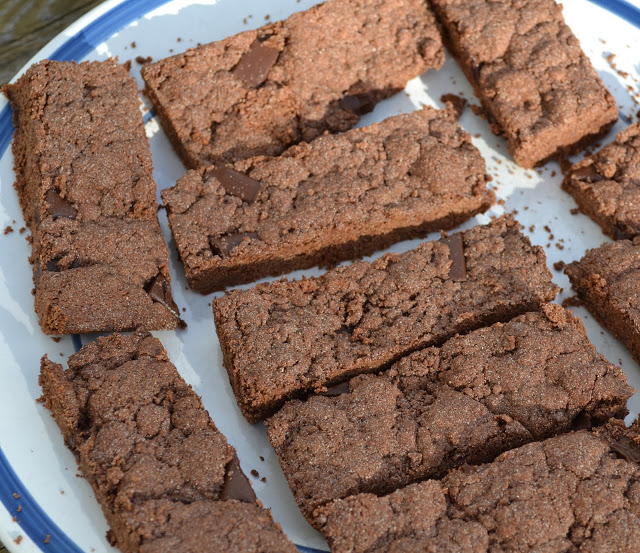
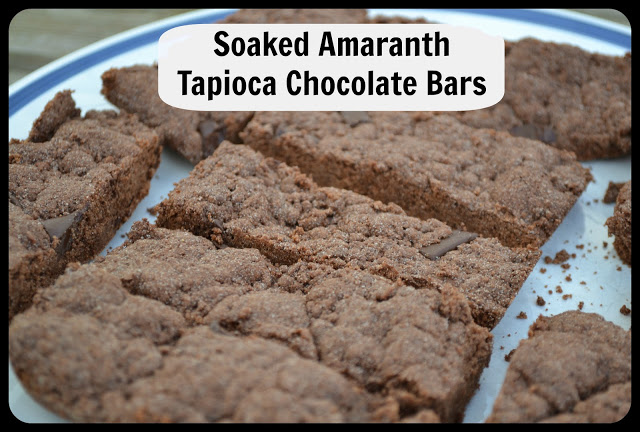
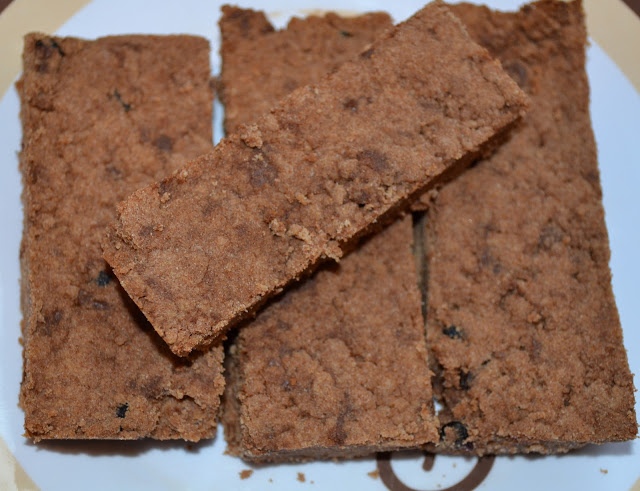
These crackers are very easy to make, the grains are soaked (which makes them easier to digest) and they are very allergen friendly.

No eggs, dairy, gluten, rice, corn, oats or nuts. I think they are even vegan (although I don’t know much about it…is honey vegan?).

I’m so happy that I don’t have to give up one of my favorite foods…and that I can eat it without getting a stomach ache (or a whole host of other symptoms).

Do you like graham crackers?

Give these soaked gluten free graham crackers a try. Even if you don’t have to eat gluten free these are a great snack to get some variety in your diet.

Want to learn more ways to feed nutritious food to kids with allergies or picky eaters?

Check out my book Why Won’t My Child Eat?!

Soaked Gluten Free Graham Crackers | Just Take A Bite


Soaked Gluten Free Graham Crackers
Yields 40
Write a review
Print
Ingredients
  1. 1 1/2 cups "whole grain" gluten free flour(s) (amaranth, brown rice, teff, sorghum, garbanzo bean, oat)
  2. 1/2 cup starchy gluten free flour (tapioca, cassava, white rice, arrowroot, potato starch)
  3. 1/2 cup coconut oil, butter, lard or tallow, melted
  4. 1 cup warm water
  5. 1 Tbsp. lemon juice
  6. 1/3 cup cane sugar
  7. 4 Tbsp. honey
  8. 2 Tbsp. molasses (you can skip this and add more honey or use maple syrup)
  9. 1 tsp. baking soda
  10. 1/2 tsp. sea salt
Instructions
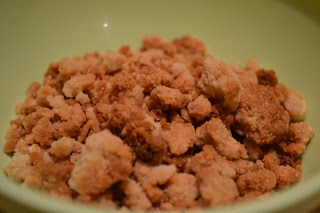
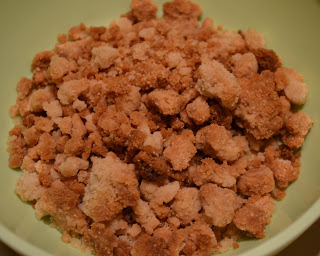
  1. Mix the flours, oil, water and lemon juice. Cover and let soak for 24 hours.
  2. Heat oven to 350 degrees. Line two baking sheets with parchment paper.
  3. Add the remaining ingredients to the flour mixture. Mix until well combined.
  4. Add more sugar, honey or molasses to make them sweeter if desired.
  5. Spread half of the batter on each pan.
  6. Bake 10 minutes.
  7. Using a pizza cutter, cut into squares (if they are sticking to the pizza cutter try again in 3-5 minutes). Return to the oven for 5 minutes.
  8. Remove from the oven and transfer the crackers on the parchment paper to dehydrator trays. Dry at highest heat setting until crisp, removing the parchment paper part way through (about 6 - 8 hours).
  9. Let cool. Store in an airtight container.
Notes
  1. These crackers freeze well.
Just Take A Bite https://justtakeabite.com/
In order for me to support my blogging activities, I may receive monetary compensation or other types of remuneration for my endorsement, recommendation, testimonial and/or link to any products or services from this blog. It will not change the cost of any products or services for you.

Amaranth Tapioca Chocolate Bars (gluten free, egg free, dairy free, oat free, nut free)

Yesterday I made another version of a gluten free bar. This time I used amaranth and tapioca. I also added some cocoa powder to make them a little more of a treat. Another big hit!

As you can see my little baking helper/taste tester approved. If it’s chocolate, he will come 🙂

**I made a new batch this morning that is soaked…even easier on the tummy!! They taste great. I also baked them in the form of scones/cookies instead of bars. Either way works well. The recipe is updated below.

Amaranth Tapioca Chocolate Bars
makes 10 bars

1 1/2 cups amaranth flour
1/2 cup tapioca flour
1/4 cup organic cocoa powder
1/3 cup coconut oil
1/3 cup honey
3 Tbsp. organic cane sugar
1 tsp. baking soda
1/2 tsp. salt
1/2 tsp. cream of tartar
1/2 tsp. cinnamon (optional)
1/3 cup chocolate chips or chunks (optional)

Heat oven to 350 degrees. Grease a 9″ baking dish.

Heat the coconut oil, honey and sugar over low heat until melted and bubbling, about 3 minutes. Set aside.

Mix the flours, cocoa, baking soda, salt, cream of tartar and cinnamon. Add the oil/sugar mixture. Add extra honey if the mixture is still crumbly. Stir in chocolate chunks.

Press into the prepared pan. Bake 20 minutes. Allow to cool in the pan for 20 minutes. Cut into bars. Carefully transfer to a plate and refrigerate until firm. Store in an airtight container in the refrigerator or freezer.

To Soak The Bars:

Melt 1/3 cup coconut oil. Mix the flours, coconut oil, 1 Tbsp. lemon juice and 1/3 cup water. Cover and let sit for 7-24 hours.

Heat oven to 350 degrees. Grease a 9″ baking dish or line a baking pan with parchment paper.

To the soaked mixture add 1/4 cup cocoa powder, 1/3 cup + 1 Tbsp. honey, 3 Tbsp. organic cane sugar or coconut sugar, 1/2 tsp. baking soda, 1/2 tsp. sea salt and 1/2 tsp. cream of tartar. Mix well (this can be done by hand or with a mixer). Add chococlate chips and mix.

Press into the perpared pan or drop large mounds onto prepared baking sheet (10-12 scones). Bake 20 – 25 minutes. Allow bars to cool in the pan for 20 minutes. Cut into bars (about 10). Transfer to a plate and refrigerate. Allow scones to cool for 3 minutes and transfer to a plate. Eat warm or place in the refrigerator to firm.

Store in an airtight container in the refrigerator or freezer.

Teff and Rice "Granola" Bars (gluten free, egg free, nut free, dairy free, oat free, soaked)

I’m still working on making safe snacks for myself that I can stock up and then just grab when I need them. Yesterday I decided to make some “granola” bars. Although oats are technically gluten free I haven’t tolerated them for years now. So I have to come up with other ways to make granola.

My grains for yesterday were teff and rice. I used a combination of the two to make a very simple, very tasty treat! They got approval from every family member. And that says a lot from some picky eaters and texturally challenged pallets.

These come together in minutes and fit the bill for a filling, healthy snack. Exactly what I need. I actually ended up eating about four of them yesterday 😛  They were my carb/grain for the day…I didn’t feel like doing any other baking.

These are fine at room temp. But they hold together better if they are refrigerated. And you can make a big batch and freeze them. These are gluten free, egg free, dairy free, nut free, oat free and vegan)

**I just made a soaked batch of these bars. They taste great!! And I’m sure they will be easier on my tummy. I’ve updated the recipe so you can try them either way.

Teff and Rice “Granola” Bars
makes 10 bars

1 cup teff flour
1 cup rice flour (I use white rice because it is easier to digest)
1/4 cup + 2 Tbsp. coconut oil
1/4 cup + 2 Tbsp. honey
1/4 tsp. sea salt
1/2 tsp. baking soda
1/2 tsp. cream of tartar
1/3 cup dried fruit (I used blueberries and cranberries)
1/3 cup mini chocolate chips

Heat oven to 350 degrees F. Grease a 9″ square baking pan.

Heat coconut oil and honey in a pan over low heat until both are melted.

Mix the teff, rice, salt, baking soda, cream of tartar, dried fruit and chocolate chips. Pour oil/honey mixture over top and stir until combined.

Spread the mixture into the prepared pan. Bake about 20 minutes. Let the bars cool for 15 minutes. Cut into bars. Gently transfer the bars from the pan to a plate. Refrigerate until ready to eat.

Store them in a sealed container in the refrigerator or freezer.

**To make soaked granola bars:

Melt 1/4 cup of coconut oil. Combine the teff flour, rice flour, coconut oil and 2 Tbsp. lemon juice + enough water to equal 1/2 cup. Cover and let soak 7 – 24 hours.

Heat oven to 350 degrees F. Grease a 9″ square baking pan.

Heat 2 Tbsp. coconut oil, 1/4 cup + 1 Tbsp. honey in a pan over low heat until liquid.

Add 1/2 tsp. sea salt, 1/4 tsp. baking soda, 1/2 tsp. cream of tartar, 1/3 cup dried fruit and 1/3 cup mini chocolate chips to the soaked flour. Mix. Pour the honey/oil over top and mix well.

Spread the mixture into the prepared pan. Bake 20-25 minutes. Let the bars cool for 15 minutes. Cut into bars. Gently transfer the bars from the pan to a plate. Refrigerate until ready to eat.

Raw Cheesecake

Rebecca and I were browsing recipes this week. We came across these mini st(raw)berry cheesecakes from Lexie’s Kitchen. A simple recipe that looked perfect for a Valentine’s Day treat.

So we tried them. They are wonderful!! A big hit with the whole family. And they really are super easy to make. No baking required.


I substituted almonds for the other nuts since that’s what I had on hand. They still turned out very well.

Since they were so good I decided to try making a modified version that I can eat. So I came up with a nut free blueberry cheesecake. Equally as delicious!!

Here are both recipes. Mix and match fruits and crusts. A perfect little treat that is quite healthy.


Mini St(raw)berry Cheesecake
makes ~ 12 mini cakes

Crust:
3/4 cups crispy macadamia nuts or almonds
1/8 cup raw coconut flakes
1/2 cup pitted dates
pinch sea salt

Filling:
1 1/2 cups crispy cashew nuts or almonds
1/3 cup lime juice or lemon juice
1/3 cup honey
1/3 cup coconut oil
1/2 cup fruit (strawberry, blueberry, raspberry, etc.)
2 tsp. vanilla
pinch sea salt

In a food processor or high powered blender process the crust ingredients until a sticky dough forms.

Press into 12 paper muffin cups in a pan. Freeze or refrigerate while making the filling.

In a food processor or high powered blender process the filling ingredients until smooth. Pour into the muffin cups. Freeze or refrigerate until set.


Mini Blueberry Cheesecake
makes ~ 12 cakes

Crust:
3/4 cups white rice flour
1/8 cup raw coconut flakes
1 cup pitted dates
pinch sea salt

Filling:
1/2 cup white rice flour
1/3 cup lemon juice
1/3 cup honey
1/3 cup coconut oil
3/4 cups blueberries
pinch sea salt

In a food processor or high powered blender process the crust ingredients until a sticky dough forms.

Press into 12 paper muffin cups in a pan. Freeze or refrigerate while making the filling.

In a food processor or high powered blender process the filling ingredients until smooth. Pour into the muffin cups. Freeze or refrigerate until set.

Candy Bar Ice Cream (gluten free, egg free, nut free, dairy free option)

I had some raw cream to use up this week. Of course that means ice cream 🙂  So the kids and I made a fresh batch yesterday.

With all of my food restrictions I was wondering what flavor to make, besides plain old vanilla again. I had just made some crunchy crumble the day before. And we like ice creams that are fruit pie/cobbler/crumble flavors. So I thought we’d try a crumble ice cream…without the fruit.

I made a larger batch of the white rice crumble, using white rice flour, palm shortening and maple syrup. I added it to a batch of egg free vanilla ice cream. It was really good!

As I was scooping it out of the ice cream maker we all tasted it…and instead of tasting like a cobbler it tasted like a crunchy/nutty candy bar. So I added a few mini dairy free, egg free, gluten free chocolate chips to make candy bar ice cream! Amazing!!

I can only eat it once in a while (every four days at most). But what a treat!!

Do you like candy bars but have a lot of food restrictions? Give this candy bar ice cream a try. You can swap the cream for coconut milk to make it dairy free. You could even try making the crumble with coconut flour or almond flour to make it grain free. There is a version for almost everyone.

Candy Bar Ice Cream

Ingredients:

3 cups raw cream (or coconut milk)
1/3 – 1/2 cup maple syrup (or honey or a combination)
1 tsp. organic vanilla (optional)

1/2 cup white rice flour
2 Tbsp. palm shortening, lard or butter
2 Tbsp. maple syrup or honey

1/4 cup dairy free, egg free, gluten free mini chocolate chips (optional)

Directions:

Heat oven to 400 degrees F.

Combine the flour, shortening and syrup until crumbly. Spread on a baking sheet. Bake 10-15 minutes, until golden. Let cool completely.

Combine cream, syrup and vanilla in a blender. Adjust sweetness to taste (make it a little sweeter than seems right since the sweetness goes down as it processes).

Process ice cream in an ice cream maker according to directions (mine takes 15 – 20 minutes in a Kitchen Aid attachment). Add the crumble during the last minute or two of processing.

Transfer the ice cream to a freezer safe container. Stir in chocolate chips. Freeze until firm.

Let ice cream set at room temperature for 5 – 10 minutes before serving.

Crunchy Crumble (gluten free, dairy free, egg free, nut free, corn free)

I made it through a full day on my rotational diet (yay!!), eating three meals that weren’t exactly the same 🙂  Then evening rolled around. And I wondered what in the world I was going to eat?

I have to have a snack before bed. If I don’t my stomach will growl all night, and I can’t sleep well. So I needed something.

I have not had time to make any snacks/baked goods with new grains. I didn’t have any fruits on my list for the day actually in the house. I had already eaten beets and green beans for every meal…and didn’t want more for bedtime snack. There was no leftover pork or rice. I was pretty much out of food for the day.

So I came up with a quick, easy, crunchy snack that was just what I needed. And it was so good!!! I’m actually bummed now that I can’t have it again for four days.

It’s like the topping for a crumble/crisp. But you can eat it plain 🙂  The best part? It took 3 minutes to prepare. And you can actually eat it without baking it if you’re looking for something really quick. It won’t be crunchy that way, but it still tastes great.

This crumble is the perfect crunchy treat at the end of the day. You can eat it plain, sprinkle it on fresh fruit or make a little crumble with it by baking it on fruit. Lots of options. This is a single serving.

Now the wheels are turning. I foresee some dessert baking coming soon 🙂

Crunchy Crumble
serves 1

1/4 cup white rice flour
2 tsp. lard (or palm shortening or butter)
2 tsp. maple syrup (or honey)

Heat oven to 400 degrees F.

Mix flour, lard and syrup. Break into crumbles in an oven safe dish or on a baking sheet. Bake for 12 – 20 minutes, until golden brown. Allow to cool for a few minutes to fully crisp.

Lemon Poppy Seed Muffins

Last week I got a request from a friend for a lemon poppy seed muffin recipe. I’ve never made anything lemon poppy seed. Truth be told I’ve probably only tasted something lemon poppy seed once or twice in my life.

I’ve just never been a big fan of lemon flavored baked goods – bars, pies, muffins, cakes, anything.

At first I was just going to redirect my friend to another blog/recipe. But I quickly realized that none of the food blogs I read had lemon poppy seed recipes either!

So I had to come up with my own.

I did a little recipe searching and experimenting. Here is what I came up with. Moist. Slightly sweet. Lots of lemon flavor.

A real food recipe for lemon poppy seed muffins. I would actually eat these! Especially warm from the oven with lots of real butter.

Lemon Poppy Seed Muffins
makes 12 – 18 muffins

1/2 cup butter, room temperature
1 cup organic cane sugar
2 eggs
2 cups organic whole wheat or all purpose flour (or a combination)
1 tsp. baking powder
1/2 tsp. baking soda
1/2 tsp. salt
1 Tbsp. poppy seeds
6 Tbsp. lemon juice
1/2 cup milk
1/3 cup plain yogurt

Cream butter and sugar. Add eggs. Mix well. Add 1 cup flour, baking powder, baking soda and salt. Mix. Add milk + lemon juice. Mix. Add remaining 1 cup flour and poppy seeds. Mix. Add yogurt. Mix.

Fill paper lined muffin cups 3/4 full. Bake at 375 degrees for 25 – 30 minutes.

Homemade Cocoa Puffs

Cereal. It’s one of the foods we gave up when we switched to a Real food diet. But I think it’s one of the foods my husband misses the most. And once in a while I do too. I used to be a cereal junky (seriously…I HAD to have it for breakfast every single day for about 10 years).

I’ve made soaked cereal (which I think tastes like Wheaties), granola and homemade golden grahams/cinnamon toast crunch. Yesterday I decided to try cocoa puffs.

I never liked cocoa puffs. So it’s not something I was missing. But my husband liked them. Especially for a bedtime snack.

The kids and I made a batch yesterday. They turned out pretty well. Little crunchy chocolaty bites. They aren’t little balls, but you still get the same effect. The butter gives some crunch, while the coconut oil gives the light/crispy texture.

I like to use them to make cookies and cream yogurt. Simply mix a handful into plain or slightly sweetened whole milk yogurt. A real treat.

**You can make this gluten free as well!!!

Do you still eat cereal? Did you give up cereal but miss it? What’s your favorite kind? Are there any real food versions of cereals you’d like to see?

Homemade Cocoa Puffs
makes about 4 cups

1 3/4 cups flour (organic whole wheat, all purpose or a combination)
1/3 cup organic cocoa powder
1/2 cup organic white and/or brown cane sugar or sucanat
1 tsp. baking soda
1/2 tsp. sea salt
2-3 Tbsp. honey
1 – 2 tsp. organic chocolate extract
1 tsp. organic vanilla
1/4 cup butter, melted (you can replace this with coconut oil or palm shortening to make it dairy free)
1/4 cup coconut oil, melted

Heat oven to 350. Melt butter and coconut oil in sauce pan. Set aside. In a mixing bowl, stir together flour, cocoa, sugar, baking soda and salt. Add the liquids: honey, chocolate extract, vanilla, butter/oil. Stir well. Taste dough and adjust honey and chocolate extract to your liking. Mix until a nice ball of dough is formed.  The dough should not be crumbly.  If it is gradually a couple Tbsp. of water.  If it is still crumbly gradually add more honey.

Split dough into 2 equal parts. Cut 3 pieces of parchment paper the size of a cookie sheet. Lay one piece on table. Put 1/2 of dough on the paper. Lay a 2nd piece of parchment on top of dough. Squish the dough down a little with your hand. Use a rolling pin to roll the dough between the parchment paper. Roll until the dough is about 1/8″ – 1/4″ thick. Remove the top piece of parchment paper. Cut into very small squares (with pizza cutter). Place on a baking sheet (on the parchment paper…just move the whole thing onto the baking sheet). Repeat for other half of dough.

Bake for 11-12 minutes. Turn off oven, but leave cereal in to get crisp. Remove after about 10 minutes (if some of the puffs are burning remove the pan). Let cool completely. Separate squares. Store in an airtight container at room temperature or in the freezer.

Soaked Chocolate Covered Donuts

About a year ago I was experimenting with all kinds of soaked recipes. I tried making Adrienne’s soaked whole wheat donuts. They were really good.

But then I forgot about them.

Last week I was playing with my kids with their pretend food/dishes. Rebecca had a donut on her plate, and we were brainstorming baking projects (real ones). So we thought it might it might be fun to make real chocolate covered donuts.

So I did.

And they turned out great!!

These donuts reminded me of my childhood. When we got donuts (which was a rare thing) I always got chocolate covered…and so did my siblings 🙂  One bite brought me back to my youth.

I used the same base recipe and adjusted it a bit so I can tolerate them. Then I made my own chocolate topping.

This is a delicious, warming breakfast treat. You can make them as large or as small as you like. You can make full donuts or donut holes. You can glaze the top or cover them entirely in chocolatey goodness.

You can make other flavors as well. Coat them in chopped crispy nuts. Mix in mini chocolate chips. Or go for the original cinnamon sugar.

Do you like having a donut for breakfast sometimes?  Just because you want to eat Real food does not mean you have to give them up. Just go for a healthier, easier to digest, homemade version.

What is your favorite donut flavor?

Soaked Chocolate Covered Donuts
dairy free options

4 1/2 cups whole wheat flour
4 tsp. baking soda
1/2 tsp. salt
1/2 tsp. nutmeg
1 tsp. cinnamon
3 egg yolks
2 Tbsp. milk or water
1 cup organic cane sugar or sucanat
5 Tbsp. butter or coconut oil, melted
1 cup sour milk, buttermilk, kefir or sour milk substitute. (combine 1 Tbsp. vineager or lemon juice + milk to equal 1 cup to make sour milk)

Donuts:

Combine the flour, sugar, fat and cultured/soured liquid. Let the dough rest for 12-24 hours. Add the remaining ingredients and mix well.

Roll out dough to approximately 1/2″ thickness. Cut out donuts with cutter, ring or shape into desired shapes.

Bake on an ungreased baking sheet  at 425 degrees for 8-10 minutes. Allow to cool.

Topping:

1 cup chocolate chips (I used soy free, dairy free, nut free, egg free)
1/4 cup milk or milk substitute
3 Tbsp. organic all purpose flour (or arrowroot or cornstarch)

Melt chocolate chips in a double boiler (glass bowl on top of a pot of simmering water). When all of the chocolate is melted slowly stir in the milk and flour. Mix until smooth. Remove from heat.

Dip the cooled donuts in the warm chocolate.

Store donuts in an airtight container at room temperature for short term storage. Store in a freezer for long term storage.

Sticks and Stones Ice Cream (Chocolate Chip Pretzel)

Lately we are going through our weekly milk so quickly. We get 3 gallons every Monday. By Sunday we are just getting by. And that is without using it for anything extra, like ice cream and yogurt. So I haven’t been making much of either lately.

Last week we were gone half of the week. So I could finally use some of our yummy raw cream for ice cream. Rebecca and I brainstormed flavors. We decided to do a play on chocolate covered pretzels. We used pretzel pieces and mini chocolate chips. Plus a little swirl of homemade fudge.

We also brainstormed fun names and came up with sticks (pretzels) and stones (mini chips). It’s a fun ice cream name. And a delicious ice cream!! I love my salty/sweet combos. Some runner up names were mud puddle (because of the fudge swirl) and sky tree (Rebecca’s name :).

I debated about posting the recipe since it’s not really much new. But it was too fun not to. We love creating new flavors of ice cream and coming up with fun names.

Sticks and Stones Ice Cream

3 cups cream (preferably raw)
4 egg yolks (you can make it with as many as you like or leave them out)
1/4 cup honey
1/3 cup maple syrup
2 tsp. organic vanilla

1/3 cup pretzel pieces (as big or as small as you like)
1/3 cup mini chocolate chips (I use soy free, dairy free, egg free chips)
1/3 cup fudge sauce (optional)

Combine cream, egg yolks, honey, syrup and vanilla in a blender until well mixed. Check sweetness. Add more honey or syrup if necessary. It should be a little overly sweet since the sweetness goes down after the ice cream is processed.

Process in ice cream maker according to directions (mine took 10 – 15 min.). Transfer ice cream to a freezer safe container. Mix in the pretzels and chocolate chips until evenly distributed. Gently swirl in dollops of fudge sauce (don’t mix it in thoroughly or it will turn into chocolate ice cream). Store in the freezer.