Home » Kid-friendly Recipes » egg free » Page 11

Category: egg free

Crockpot Philly Cheese Steak Soup

Crockpot Philly Cheese Steak Soup | Homemade Dutch Apple PieYes, I know it’s spring. So hot soup may not be the first meal that comes to mind. But soup is really great all year long.

It is packed with nutrition, of course. But what’s great about soup in the spring and summer is how easy it is to make so you have lots of time to play outside! Soup gets even easier when you make it in the crockpot.  Toss the ingredients into the crockpot in the morning, go about your day and dinner is ready when you need it.Crockpot Philly Cheese Steak Soup | Homemade Dutch Apple Pie

This soup was inspired by the classic Philly cheese steak sandwich.  Beef, peppers and onions are simmered all day in a delicious broth. Then you can serve it topped with shredded cheese.

For my dairy free friends you can add a dollop of pureed squash to get the cheesy feel. Or just make the soup creamier with an extra splash of your favorite milk substitute.

Pair the soup with your favorite bread (I like to make garlic bread with this soup) or crackers. Add a fresh salad and dinner is served.Crockpot Philly Cheese Steak Soup | Homemade Dutch Apple Pie

The whole family enjoyed this soup. I love how easy it is to make. The leftovers are great for lunches. Or you can make a big batch and freeze a whole meal’s worth so you have an even easier meal on hand.

This is also a very budget friendly meal. Ground beef, onions and peppers are very affordable!

Do you like Philly cheese steak sandwiches? You’ll love this soup version.Crockpot Philly Cheese Steak Soup | Homemade Dutch Apple Pie

Crockpot Philly Cheese Steak Soup
Serves 6
A simple soup version of a Philly Cheese steak.
Write a review
Print
Ingredients
  1. 1 lb. ground beef
  2. 1 small onion, chopped
  3. 1 - 2 cups bell peppers, chopped
  4. 2 tsp. unrefined sea salt
  5. 1 tsp. garlic powder
  6. 1 tsp. season salt (I use Redmond)
  7. 1 cup milk or milk substitute
  8. 2 cups beef or chicken broth
  9. 2 cups shredded cheese of choice or 1/2 cup pureed squash (optional - for topping)
Instructions
  1. Turn the crockpot to high.
  2. Add the beef, onion, peppers, salt, garlic powder and season salt. Spread out the beef.
  3. Cover and let cook for 1 hour to start browning the meat.
  4. Break up/stir the meat.
  5. Add the broth and milk.
  6. Cover and cook on high 3-6 hours or low 5 - 10 hours.
  7. Top with cheese or squash if desired when serving.
Just Take A Bite https://justtakeabite.com/

Soaked Gluten Free Tortillas {dairy free, nut free, egg free, corn free}

Soaked Gluten Free Tortillas | Homemade Dutch Apple PieWhen you have to eat gluten, corn and rice free there isn’t much convenience food you can buy at the store. So a simple meal like tacos gets pretty boring when you have no shell or chips for your meat – especially for a kid!

But no need to cross taco night off your menu – you can make your own tortillas! My son inspires me to create homemade versions of things you just can’t get at the store without his allergens.  So when we had tacos recently I decided to make homemade tortillas.

This tortilla is soaked and free of gluten, corn, rice, eggs, dairy and nuts.  Simply mix the dough, roll the tortillas, let them sit and then cook for about a minute when you are ready to eat.  If you have a tortilla press (that will be on my next gift list!) they would be even easier to make.

You can also make a double or triple batch and stock your freezer so you have some on hand at all times. They thaw in minutes.Soaked Gluten Free Tortillas | Homemade Dutch Apple Pie

My son loved these!!! He was so happy to be able to eat a regular taco like everyone else (I was pretty happy that I could have one too!).

You can also use them for any sandwich creation – chicken salad, salmon salad, ham and cheese or even peanut butter and honey. Homemade tortillas make a fun substitute for a hot dog bun too!  They are perfect for fun lunch foods.

I personally liked them to snack on – simply spread butter or coconut oil and dash of salt on top for the perfect energy booster.

I use gelatin to bind the flour and give some flexibility to the tortilla. Plus it boosts the nutritional value!

If you need a homemade tortilla because you are allergic to the store bought versions or you simply don’t like all the unhealthy ingredients in them this is the perfect recipe!  Get your flour soaking for delicious tortillas. Taco night just got a little healthier.Soaked Gluten Free Tortillas | Homemade Dutch Apple Pie

Soaked Gluten Free Tortillas {dairy free, nut free, corn free}
Yields 8
A simple homemade tortilla that is very allergen friendly.
Write a review
Print
Ingredients
  1. 1/2 cup tapioca flour
  2. 1 cup amaranth flour
  3. 1/4 cup warm water
  4. 1 Tbsp. lemon juice
  5. 2 tsp. gelatin dissolved in 1/4 cup hot water
  6. 1 1/2 tsp. unrefined sea salt
  7. 2 Tbsp. extra virgin olive oil
Instructions
  1. In a medium bowl, combine all of the ingredients. Mix until a ball of dough forms.
  2. Split the dough into 8 balls.
  3. Roll each ball of dough between two pieces of parchment paper until about 1/8" thick/desired tortilla thickness
  4. Layer tortillas between pieces of parchment paper. Place under a towel or in a bag and let sit 7-24 hours.
When ready to serve
  1. Cook the tortillas on a hot, ungreased skillet - about 20 seconds per side.
  2. Place the warm tortillas in a bag or under a towel until ready to serve to keep them soft and pliable.
To reheat
  1. Place the tortillas in a wet paper towel and warm in the oven/toaster oven for a minute or two. This will also help soften them.
Just Take A Bite https://justtakeabite.com/

In order for me to support my blogging activities, I may receive monetary compensation or other types of remuneration for my endorsement, recommendation, testimonial and/or link to any products or services from this blog.

Honey Sourdough Soft Pretzels With Bacon Cheddar Cheese Sauce

Honey Sourdough Soft Pretzels with Bacon Cheddar Cheese SauceA few months ago I re-introduced wheat into our diets in the form of traditionally prepared sourdough. So far it’s going very well.  It is the only wheat we eat. Since it is fermented most of the gluten is broken down. I also use spelt since it is a milder form of wheat.

Since then I’ve been making a variety of sourdough goodies. Of course I make plenty of bread. But I also make fun food like these soft pretzels.

My kids and my husband really enjoyed these – especially with a delicious bacon cheese sauce!Honey Sourdough Soft Pretzels with Bacon Cheddar Cheese Sauce | Homemade Dutch Apple Pie

Sourdough pretzels are super easy to make. The dough is very easy to work with.

The pretzels are also very filling. You can turn them into a simple Sunday night dinner by paring the pretzels and cheese with a salad (topped with a little protein and homemade dressing with healthy fat).  You’ll get a good balance of protein, carbohydrates and fat.

Need a treat while watching sports? Sourdough soft pretzels are perfect! You can make mini ones for munching like appetizers. Or you can really feel like you’re at the game by indulging in some giant pretzels like you’d get at a concession stand (minus the neon cheese and chemicals).Honey Sourdough Soft Pretzels with Bacon Cheddar Cheese Sauce | Homemade Dutch Apple Pie

These would also be great for a kid’s birthday party. Mini soft pretzels with little cheese cups for dipping.

Honey sourdough soft pretzels with bacon cheddar cheese sauce are fun for kids and adults.  Plus they are properly prepared and don’t contain any unhealthy ingredients. Honey Sourdough Soft Pretzels with Bacon Cheddar Cheese Sauce | Homemade Dutch Apple Pie

Honey Sourdough Soft Pretzels with Bacon Cheddar Cheese Sauce
Yields 10
A traditional sourdough soft pretzel with bacon cheese dipping sauce.
Write a review
Print
Bagels
  1. 2 cups sourdough starter
  2. 3 3/4 cups spelt flour (or kamut, einkorn, whole wheat or rye)
  3. 1/2 Tbsp. sea salt
  4. 1/3 cup cold water
  5. 3 Tbsp. honey
  6. sea salt for topping
Bacon Cheese Sauce
  1. 1 Tbsp. arrowroot or tapioca flour
  2. 1 Tbsp. bacon grease
  3. 1/2 cup milk
  4. 1/2 cup grated cheddar cheese
  5. 1/4 cup cooked, crumbled bacon (optional)
  6. salt and pepper to taste
Bagels
  1. In the bowl of a stand mixer combine the starter, salt, water and honey. Gently mix with a wooden spoon until the salt and honey dissolve.
  2. Add the flour. Mix with the dough hook for 15 minutes.
  3. Remove the dough from the mixer.
  4. Divide it into 10 - 12 equal portions.
  5. Roll the each piece of dough into a long snake and shape it into a pretzel.
  6. Place the pretzels on a greased or parchment lined baking sheet.
  7. Cover and let rise 6-12 hours.
  8. Bake at 350*F for 35 - 40 minutes.
  9. Brush with butter, oil or water and sprinkle on sea salt if desired.
  10. Store unused bagels in a sealed container at room temperature or in the freezer.
Bacon Cheese Sauce
  1. Cook and crumble bacon in advance if you want bacon pieces in your sauce. Reserve the bacon grease.
  2. In a small sauce pan combine the arrowroot and bacon grease. Heat over medium heat until the grease is melted and they combined.
  3. Slowly add the milk, whisking constantly.
  4. Continue to whisk until the milk heats and gets to the point it is about to boil.
  5. Reduce heat and add cheese. Whisk until the cheese is melted and combined into the sauce.
  6. Season with salt and pepper to taste.
  7. Add crumbled bacon if desired.
Notes
  1. If you want the bagel a bit sweeter you can add an extra 1-2 Tbsp. of honey or cane sugar.
  2. Any type of cheese that melts well can be used in place of cheddar.
Just Take A Bite https://justtakeabite.com/

Homemade Quinoa Milk {Nursing Mother’s Drink}

Homemade quinoa milk is a delicious alternative to dairy that is also great for nursing mothers boost milk supply.

Quinoa Milk Nursing Mother's Drink | Homemade Dutch Apple Pie
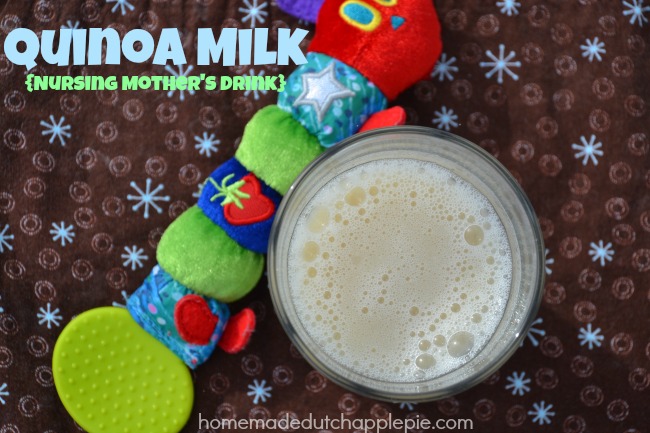
Have you ever tried quinoa milk?  Despite the growing variety of alternative milks available, it is not something I’ve ever seen at the store (though I have seen one brand of it online).

As I mentioned in my oat milk post I’m not a huge fan of nut milks. Especially for young kids and nursing moms.

My first choice is always fresh, raw milk from cows or goats. Unfortunately a dairy intolerance is very common for small babies. Which  means mom needs an alternative.

Coconut milk is a great choice for cooking, baking and adding a splash to tea. But it’s not something most people will drink plain in large quantities. Plus it can also be hard on babies since it can be gassy and even cause reflux.

Enter quinoa milk! It has a very mild flavor – similar to rice milk. It is also very easy to make and very cost effective. One quarter cup of quinoa can make up to six cups of milk!

The best thing about quinoa milk is that it is great for boosting milk supply.   If you tolerate quinoa and are a nursing mother I encourage you to include quinoa in your diet. Even if you can have dairy this is a great alternative milk to have in your diet for variety and nutrition.

Unlike other alternative milks quinoa milk has quite a bit of protein.  You can add both calcium and vitamin D when you make it to boost nutrition even more.

Quinoa milk is not heavy like nut milks. It has a very neutral flavor. It works well for cooking and baking. Plus it is great for boosting milk supply!

Need some variety in your diet? Or are you just looking for an alternative to dairy? Give quinoa milk a try. Quinoa Milk Nursing Mother's Drink | Homemade Dutch Apple Pie

Homemade Quinoa Milk: Nursing Mother's Drink {fermented option}
A delicious alternative drink that helps boost milk supply.
Write a review
Print
Ingredients
  1. 1/4 cup quinoa
  2. 2 tsp. lemon juice
  3. warm water
  4. 5 cups water
  5. 2 Tbsp. coconut sugar, cane sugar, honey or maple syrup OR 3 dates (optional)
  6. 1/2 tsp. sea salt (optional)
  7. Vitamin D drops (optional)
  8. calcium powder (optional)
  9. 2 Tbsp. whey (optional)
Instructions
  1. Place the quinoa and lemon juice in a bowl. Cover with warm water (quantity does not matter, as long as it's covered)
  2. Let soak for 24 hours.
  3. Drain and rinse the quinoa.
  4. Combine the quinoa and 5 cups water in a medium saucepan.
  5. Bring to a boil, reduce heat and simmer, covered, for 2 hours.
  6. If using dates as a sweetener add them to the pan during the last 30 minutes of cooking.
  7. Pour the quinoa and water into a blender.
  8. Blend until smooth.
Non-fermented method
  1. Add sweetener (if desired/if not using dates) and sea salt. Blend.
  2. Pour into a serving container.
  3. Add vitamin D and calcium if desired.
  4. Refrigerate.
  5. Shake before serving.
Fermented Method
  1. Pour the blended mixture into a container.
  2. Add salt and whey.
  3. Cover and let sit at room temperature for 3 days.
  4. Add sweetener and vitamin D/calcium and refrigerate.
  5. Shake before serving.
Notes
  1. You can add 1 tsp. of pure vanilla to the pureed mixture for vanilla quinoa milk.
  2. If the milk is too thick for your taste it can be diluted with extra water or it can be strained.
  3. This should not be used for children under one year of age.
  4. This makes a great dairy alternative for both kids and adults.
  5. This recipe can easily be doubled.
  6. This recipe makes about 5 cups of milk. It can be increased by adding extra water.
Just Take A Bite https://justtakeabite.com/
This post is linked to Savoring Saturdays.

Looking for a unique dairy alternative that does not contain coconut or nuts? This homemade oat mlk is cheap, easy to make, and delicious.

Homemade Oat Milk {fermented option}

Looking for a unique dairy alternative that does not contain coconut or nuts? This homemade oat milk is cheap, easy to make, and delicious.

Looking for a unique dairy alternative that does not contain coconut or nuts? This homemade oat milk is cheap, easy to make, and delicious.

I am a huge fan of raw milk. I’d drink it by the glass full if I could right now.  But my little one would be in a lot of pain if I did.

Being dairy-free is a big adjustment. But it’s nothing new to us. We entered the world of no dairy and alternative milks years ago.

At that time my son was also allergic to nuts and rice. So that eliminates a lot of options.

Homemade Oat Milk Dairy Alternative

We tried different versions of coconut milk. That was a big no. I can’t blame him – coconut milk tastes nothing like dairy milk. Even I can’t drink that plain.

Finally I found oat milk – something he didn’t mind drinking. Something I could use in cooking and baking that would be safe for him.

But oat milk is definitely not cheap. We usually pay about $3.50 for each small box.

Recently I was reading through Nourishing Traditions and saw a recipe for rice milk with an option to use oats. I had to try it immediately!

Looking for a unique dairy alternative that does not contain coconut or nuts? This homemade oat milk is cheap, easy to make, and delicious.

How to Make Oat Milk

First I made a fermented version. I figured it would be the healthiest option if my son would drink it. But it didn’t go over very well.

So I modified it a bit and made an unfermented version. Success!

Let me tell you this is SO much cheaper than buying oat milk. A quarter cup of oats makes over four cups of milk!  Not only that I like that I can make sure the oats are properly prepared since oats are very high in phytic acid.

Nut-Free Milk Alternative

I may be in the minority, but I am not a big fan of nut milks.  I don’t think anyone needs to consume that kind of quantity of nuts on a regular basis. They do contain quite a bit of omega-6’s, which we get more than enough of.

So I’m happy to have a safe alternative to dairy that my kids enjoy and doesn’t cost a ton. It is also extremely easy to make (just cook oats and puree).

The other benefit of having alternative milks is to make sure you get variety in your diet. This is very important when dealing with allergies. Rotating milk sources can help prevent future allergies or sensitivities.

How to Use Oat Milk

Oat milk works very well for baking. I even use it in cream soups and stews. It has a very neutral flavor.

You can also drink it plain or use it on oatmeal or homemade cereal.

As I mentioned you can make it into a fermented drink to boost nutrition. If you are used to ferments you can give that a try. If you are making it for kids that might have a more sensitive palate try it without fermenting.

Are you dairy-free? Are you looking for a unique milk substitute? Try homemade oat milk. It’s a mildly sweet, satisfying drink.

Need more options?

Try homemade rice milk or homemade quinoa milk

Homemade Oat Milk {fermented option}
A simple beverage made from oats.
Write a review
Print
Ingredients
  1. 1/4 cup old fashioned oats
  2. 1 cup warm water
  3. 4 cups water, divided
  4. 4 Tbsp. coconut sugar, honey or maple syrup (optional)
  5. 1/4 tsp. sea salt (optional)
  6. vitamin D drops (optional)
  7. 2 Tbsp. whey (optional)
Instructions
  1. Soak the oats in 1 cup warm water for 24 hours.
  2. Combine the soaked oats and 3 cups water in a medium saucepan.
  3. Bring to a boil and simmer, covered, 2 hours.
  4. Pour the oats and water into a blender.
  5. Proceed with the non-fermented or fermented version from this point.
Non-fermented method
  1. Add the salt and sugar.
  2. Blend well.
  3. Pour into a jar and add another 1 cup water.
  4. Refrigerate.
  5. Add a few drops of Vitamin D (optional).
  6. Shake before pouring.
  7. Add extra water if milk is too thick for your taste.
Fermented method
  1. Blend the oats and water.
  2. Pour into a jar.
  3. Add the whey and 1/2 tsp. sea salt.
  4. Cover and let sit at room temperature for 3 days.
  5. Stir in sweetener and 1 cup extra water.
  6. Add vitamin D if desired.
  7. Store in the refrigerator.
  8. Shake well before serving.
Notes
  1. This recipe easily doubles to make a half gallon of oat milk.
  2. This milk should not be used for children under the age of one since they don't have the enzymes to digest grains.
  3. This makes about 5 cups of milk.
  4. You can add extra water to the milk to thin it out.
Just Take A Bite https://justtakeabite.com/

Sausage Seasoning For Sensitive Palates

Sausage Seasoning For Sensitive Palates | Homemade Dutch Apple Pie

I don’t usually cook breakfast in the morning (except warming my daily mug of soup).  That may seem surprising for someone that gets up early and loves to be in the kitchen.

But here mornings are for easy, get it on the table quickly meals. That means things like yogurt, homemade granola, fruit, baked goods, nuts, cheese, smoothies, gummies, hard boiled eggs and dried fruit.

Morning is my time to get work done before the kids get up. Not to mention I have one child that often wakes up early and is ready for breakfast the moment his feet hit the floor. So breakfast is usually something prepared the night before.

But we do LOVE all breakfast foods – pancakes, waffles, french toast, eggs, bacon and of course sausage! Breakfast foods are some of our favorites. So we have breakfast for dinner once a week.

My daughter has a very sensitive palate…i.e. won’t eat anything “spicy.”  That includes just about any seasoning. It’s rare that she can eat anything in a restaurant without it burning her tongue. If your little one is the same way check out this post on “picky eating.”  And read on to find out how we make sausage that is not spicy but has lots of flavor. 

Sausage Seasoning For Sensitive Palates | Homemade Dutch Apple Pie We often buy our sausage from a local farm. It tastes very good and is high quality meat. My daughter will eat a little bit of it. But not much.

So recently we got a half pig. Part of that included sausage. I opted to just get plain ground pork instead of the butcher adding seasoning. I didn’t want ten pounds of sausage that my daughter wouldn’t touch.

That meant I had to come up with my own sausage spice blend so we could still enjoy sausage on our breakfast for dinner nights or in our squash soup.

This seasoning uses common herbs and spices and is easy on the palate. There is a bit of coconut sugar added to make sure it is well tolerated in a sensitive mouth.

You can mix it up fresh for one batch of sausage or make a large batch and have a jar of it on hand whenever you need it. This sausage seasoning also works well for burgers and chicken.

You can even mix the seasoning into the meat, shape the sausage patties and freeze them on a tray for easy sausage any time.

There is no need to take sausage off the menu if you have a sensitive palate to cook for. Simply make your own spice blend so everyone can enjoy delicious sausage with their favorite breakfast foods. 

Sausage Seasoning For Sensitive Palates | Homemade Dutch Apple Pie

Sausage Seasoning For Sensitive Palates
A very mild, yet flavorful seasoning for homemade sausage.
Write a review
Print
Ingredients
  1. 1 tsp. unrefined sea salt
  2. 1/2 tsp. garlic powder
  3. 1/2 tsp. basil
  4. 1/2 tsp. celery salt
  5. 1 tsp. dill weed
  6. 1/2 tsp. mustard powder
  7. 3 tsp. coconut sugar
  8. 1/4 tsp. cinnamon
Instructions
  1. Combine all of the ingredients.
  2. Add to one pound of ground meat (pork, turkey or chicken).
  3. Use immediately or cover and refrigerate until ready to use.
  4. Form patties and cook in coconut oil, lard or tallow in a skillet.
Notes
  1. The seasoning mix can be prepared in advance. It can also be made in large batches and used as needed.
  2. You can add an egg to the meat and seasoning mixture as a binder.
  3. One batch totals about 7 tsp. So if you make a larger batch you can use 7 tsp. of it per pound of meat.
  4. You can mix the meat and seasoning and form patties in advance. Simply place them on a parchment lined baking sheet, freeze them and then store them in a sealed container. Thaw as many patties as you need at a time.
Just Take A Bite https://justtakeabite.com/

Simple Soaked Series: Gluten Free Crackers

These gluten free crackers are made with properly prepared soaked grains and are free of dairy, eggs, nuts and corn. They make the perfect snack whether at home or on the go.Simple Soaked Series: Crackers | Homemade Dutch Apple Pie

If there is one snack most kids love it’s crackers! But it’s pretty rare to find a store-bought cracker that is not made with vegetable oils. Not to mention the grains are not properly prepared.  Both of which create a recipe for disaster.

That means one thing – it’s time to make your own crackers!  Really, crackers are so easy to make. I’ve made them many times before.

But recently I made a soaked version so I can feel really good about giving them to my kids (and myself!). So I’m finishing my simple soaked series with a basic gluten free cracker recipe that can be used in so many ways.

These soaked gluten free crackers have great crunch and just the right balance of salt and sweetness.

Simple Soaked Series: Crackers | Homemade Dutch Apple Pie

The base recipe is a Wheat Thin® style cracker.  It is made with a variety of gluten free flours for a mild flavor (I used tapioca, amaranth and sorghum). Then a bit of salt and cane sugar balance each other to make the Wheat Thin® flavor.

You can also create a rye version using teff or more of a basic butter cracker.  Both of these will use a little less sugar than the Wheat Thin® version. Try adding some  herbs and spices for a more sophisticated cracker.

Soaked gluten free crackers come together so quickly. It takes about two minutes to get the flour soaking. Then another five minutes to mix the dough and five minutes to roll and cut the dough.

Less than fifteen minutes of hands on time and you’ve got delicious, nutritious homemade crackers that your kids will love. Even better – your kids can help make them! Get in the kitchen and make a delicious snack together.

Simple Soaked Series: Crackers | Homemade Dutch Apple Pie

If you really want to make them fun use small cookie cutters and create crackers in your child’s favorite shapes.  My kids love it when I make fish shaped crackers.

These make a great addition to school lunches with slices of raw cheese. Homemade gluten free crackers are also a perfect accompaniment to a bowl of soup for lunch.  My kids love to use them for dipping!

I also like to serve homemade crackers with hummus and salsa. Since my son can’t eat wheat, rice or corn it’s so nice for him to have something to use with dips. A pile of homemade crackers with a bowl of hummus makes him one happy boy.

Make a big batch of gluten free crackers and store them in the cupboard or freezer. You’ll have a healthy snack on hand that you know is good for your kids and is something they’ll love. Homemade crackers are also a perfect snack to keep in the diaper bag.

Have you  ever made your own crackers? Try this simple, properly prepared and allergen friendly version. It’ll be a hit with the whole family.

Simple Soaked Series: Crackers | Homemade Dutch Apple Pie

Simple Soaked Series: Gluten Free Crackers
Yields 50
A simple soaked cracker that is gluten, dairy, egg, nut and corn free.
Write a review
Print
Ingredients
  1. 2 cups any combination of gluten free flour (see notes for flavor combinations)
  2. 4 Tbsp. melted coconut oil or butter
  3. 6 Tbsp. warm water
  4. 1 tsp. lemon juice, whey, kefir or yogurt
  5. 1 1/2 tsp. unrefined sea salt
  6. 8 tsp. coconut sugar or cane sugar
  7. 3-6 Tbsp. water
Instructions
  1. Combine the flour, fat, warm water and lemon juice.
  2. Cover and let sit 7-24 hours.
  3. Heat oven to 350*F.
  4. Add the salt, sugar and 3 Tbsp. water to the soaked mixture.
  5. Mix and knead dough by hand until a ball forms. Add more water if needed.
  6. Split the dough into three equal parts.
  7. Cut four pieces of parchment paper (the size of a baking sheet).
  8. Place on piece of dough on one piece of parchment paper. Top with another sheet of parchment paper.
  9. Roll the dough between the paper until it is about 1/8" thick.
  10. Remove the top layer of paper.
  11. Cut into desired shapes with a pizza cutter or cookie cutters.
  12. Sprinkle extra salt on top of the dough if desired.
  13. Transfer the parchment paper to a baking sheet.
  14. Repeat with the remaining portions of dough.
  15. Bake the crackers for about 20 minutes, until golden.
  16. Turn off oven. Leave the crackers in the oven for 7-10 minutes, until crisp.
  17. Remove from oven and let cool completely.
  18. Store crackers in an airtight container at room temperature or in the freezer for long term storage.
Notes
  1. The base recipe creates a "Wheat Thin" style cracker with a slight sweetness.
  2. For a rye flavored cracker use 1/2 cup teff flour in your flour mixture. Reduce sugar to 4 tsp.
  3. For a butter cracker use at least 1 cup of "white" flour like rice or tapioca. Reduce sugar to 4 tsp.
  4. You can add herbs and seasonings like garlic powder to the dough for a variety of flavors.
  5. You can add 1/3 cup finely grated cheese to the dough to make cheese crackers.
Just Take A Bite https://justtakeabite.com/


In order for me to support my blogging activities, I may receive monetary compensation or other types of remuneration for my endorsement, recommendation, testimonial and/or link to any products or services from this blog.

Simple Soaked Quinoa Bars Just |Take A Bite

Simple Soaked Series: Quinoa Bars

These quinoa bars are a great alternative to granola bars. They are soaked and gluten, dairy, egg and nut free.

Simple Soaked Quinoa Bars Just |Take A Bite

Granola bars are so delicious! But not everyone can tolerate oats. Not to mention it’s good for everyone to have variety in their diet (help avoid those allergies!!).

So I came up with an oat free bar made with quinoa. This is another simple, soaked bar that kids love.

First the quinoa is soaked. Then it is cooked. Then mix and bake the bars. Each step takes very little hands on time. 

Buy Healthy Snacks to Go eBook Recipes Online

I actually made two versions of quinoa bars. One with and one without coconut oil. In the end I liked them somewhere in the middle! There is a little bit of coconut oil to help bind the bars. But not so much that they are oily when you hold them.

Simple Soaked Series: Quinoa Bars | Just Take A Bite

No refrigeration.

So they are not as easy to eat on the go like the crunchy granola bars.  But you can always pack them in a mini cooler. I would even pack them in my daughter’s lunch box since it has a cooler.

The texture of the quinoa bars is great for  young children since they are so soft. They are also gluten, dairy, egg, nut and corn free. So they are suitable even for one year olds and those with allergies. I love having them on hand for an easy addition to lunches for my little ones still at home.

Great for nursing mamas.

Quinoa is great for boosting milk supply. So make a big batch and stock your freezer. Snack on one every day to keep your milk supply up.

Quinoa bars really pack a punch with nutrition from the flax seeds, quinoa and coconut oil. They have protein, starch and lots of healthy fat!

Are you getting sick of granola bars? Switch it up and try quinoa bars. 

Simple Soaked Quinoa Bars Just |Take A Bite

Simple Soaked Series: Quinoa Granola Bars
Yields 20
An oat free granola bar made with soaked quinoa.
Write a review
Print
Ingredients
  1. 1 cup quiona
  2. 3 cups warm water + 2 Tbsp. lemon juice, whey, kefir or yogurt
  3. 3 cups water
  4. 1/2 cup ground flax seeds
  5. 1/2 cup shredded coconut
  6. 3 Tbsp. melted coconut oil or butter
  7. 1 cup coconut sugar
  8. 1/2 tsp. unrefined sea salt
  9. 1/2 cup chopped dried fruit, nuts, seeds and/or chocolate chips
Instructions
  1. Combine the quiona, water and lemon juice.
  2. Let sit 24 hours.
  3. Drain and rinse the quiona.
  4. In a medium saucepan combine the quinoa and 3 cups of water.
  5. Bring to a boil, cover and simmer for 1 hour.
  6. Turn off heat. Let quinoa sit for 15 minutes, covered.
  7. Transfer the cooked quinoa to a large bowl. Let sit 15 minutes.
  8. Heat the oven to 350*F. Grease a 9x13 pan.
  9. Add the flax seed and coconut to the cooked quinoa.
  10. Let sit 5 minutes for the flax seeds to absorb liquid.
  11. Add the remaining ingredients.
  12. Spread the mixture into the prepared pan.
  13. Bake for 70 minutes.
  14. Let cool 5 minutes.
  15. Cut into bars.
  16. Place the bars upside down on a parchment lined baking sheet.
  17. Return to the oven and bake 30 minutes.
  18. Let cool completely. Refrigerate to solidify.
  19. Store in an airtight container in the refrigerator or freezer for long term storage.
Just Take A Bite https://justtakeabite.com/
Skip the boxed granola bars loaded with HFCS and non-food like glycerin and was. Homemade crunchy granola bars made with soaked oats are easy and healthy!

Simple Soaked Series: Crunchy Granola Bars

Skip the boxed granola bars loaded with HFCS and non-food like glycerin and was. Homemade crunchy granola bars made with soaked oats are easy and healthy!

Skip the boxed granola bars loaded with HFCS and non-food like glycerin and was. Homemade crunchy granola bars made with soaked oats are easy and healthy!
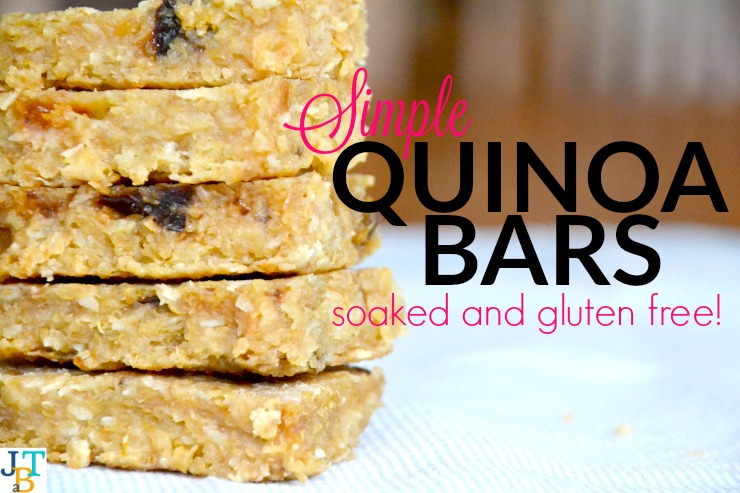
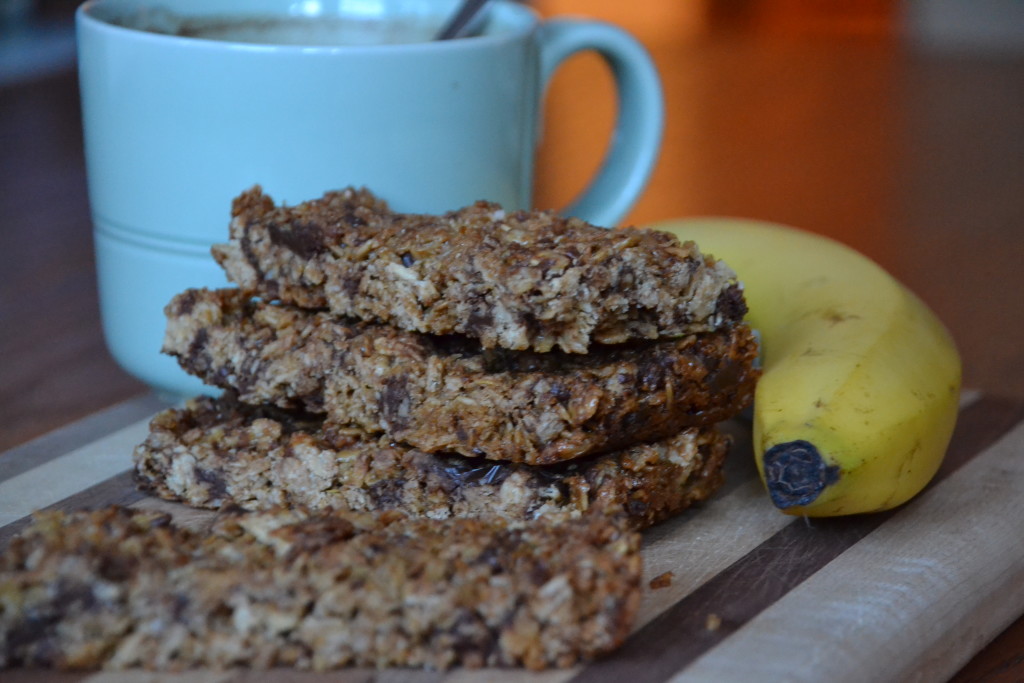
Next up in my simple soaked series is a staple in my house – granola bars!  These are definitely a family favorite.

One batch of granola bars makes a big batch so you can stock the freezer for easy breakfasts and snacks.  The really great thing about them is that you don’t even have to thaw them! Just grab one out of the freezer and start eating.

Soaked Crunchy Granola Bars

I’ve made many different versions of granola bars over the years. But I haven’t always prepared them the right way.

This version of granola bars uses soaked oats to reduce phytic acid content and make them easier on your tummy.  The oats are first soaked and dried. You’ll have to do this step in advance, so plan ahead. Then all you have to do is mix and bake. Homemade granola bars are so easy to make.

They are also very budget friendly! No need to pay for a box. Just make your own granola bars for a fraction of the cost…and get sixteen at a time instead of six. Making your own also means you decide on the flavor. Add any dried fruit, nuts, seeds and chocolate chips you like.

Skip the boxed granola bars loaded with HFCS and non-food like glycerin and was. Homemade crunchy granola bars made with soaked oats are easy and healthy!

Allergen Free Granola Bars

The other unique thing about this recipe is that it makes crunchy granola bars. I grew up eating crunchy granola bars (anybody else remember the green package of the oats and honey flavor?). I’ve always like them better than chewy.

But most homemade granola bar recipes make chewy bars. So I’ve created a crunchy version. My kids like this better than chewy as well. Making crunchy granola bars also means you don’t have to use any eggs. So they are naturally gluten, egg and nut free! They can also be made dairy free.

Easy Snack on the Go

Soaked crunchy granola bars hold up really well. There is no need to refrigerate them to make them stay together. You can easily pack them in a lunch or even toss them in a diaper bag when you’re on the go.

I like to make a big batch and wrap them individually. I store them in the freezer and take individual bars out as needed.

A crunchy granola bar pairs well with whole yogurt drizzled with honey, fruity yogurt, eggs or even a handful of crispy nuts. Add a piece of fruit and you’ve got a balanced, nutritious, ready in minutes breakfast.

Are you a crunchy or chewy granola bar lover? Give this crunchy granola bar a try. Your whole family will love it.

If you like granola bars but don’t tolerate oats, stay tuned…I’ve got another great breakfast bar coming your way!

Skip the boxed granola bars loaded with HFCS and non-food like glycerin and was. Homemade crunchy granola bars made with soaked oats are easy and healthy! 

Simple Soaked Series: Crunchy Granola Bars
Yields 16
A crunchy granola bar made with soaked oats.
Write a review
Print
Ingredients
  1. 3 cups rolled oats
  2. 1 1/2 cups warm water + 2 Tbsp. lemon juice, yogurt, whey or kefir
  3. 1/2 cup shredded coconut
  4. 1/2 cup ground flax seeds
  5. 6 Tbsp. butter or coconut oil
  6. 1/3 cup honey
  7. 1/3 cup maple syrup
  8. 1/2 cup coconut sugar or cane sugar
  9. 1/2 tsp. unrefined sea salt
  10. optional: 1/2 cup dried fruit, chopped nuts, seeds or chocolate chips; 1 tsp. cinnamon
Instructions
  1. Combine the oats and the soaking liquid.
  2. Cover and let sit 24 hours.
  3. Rinse and drain the oats.
  4. Spread the soaked oats on a dehydrator tray and dry for 8 hours (this can also be done in an oven at the lowest heat setting)
  5. Allow the dried oats to cool.
  6. Heat the oven to 325*F. Grease a 9x13 pan.
  7. Crumble the dried oats into a large bowl.
  8. Add the coconut, flax seeds, sugar and salt to the oats. Gently mix.
  9. Heat the butter, honey and syrup in a small saucepan until melted and combined.
  10. Add the butter mixture to the oat mixture. Mix well.
  11. Add any optional add-ins.
  12. Spread the mixture into the prepared pan.
  13. Bake for 30 minutes.
  14. Allow to cool for 10 minutes. Cut into bars.
  15. Allow to cool completely before removing the bars from the pan.
  16. Store in an airtight container.
Notes
  1. The granola bars can be kept in the refrigerator to stay fresh longer. They can also be stored in the freezer for long term storage. There is no need to thaw granola bars.
Just Take A Bite https://justtakeabite.com/

Vanilla Coconut Yogurt Butter Cream {gluten free, nut free}

Vanilla Coconut Yogurt Butter Cream | Homemade Dutch Apple Pie 2The other day I made cupcakes as a special treat. But I ran out of time to make frosting. So I ended up not serving my cupcakes at our family gathering. I actually stuck most of them in the freezer to use later.

Then as I was pondering what to make with my Stonyfield Petite Creme vanilla yogurt it occurred to me it might be fun to make frosting out of yogurt! So I did.

I had also just made a batch of coconut milk and the leftover coconut shreds had just come out of the dehydrator. Instead of grinding them into flour I added them to my frosting.

Vanilla Coconut  Yogurt Butter Cream is so easy to make. It takes about two minutes. It also only requires five ingredients.  You can even leave the coconut out if you don’t like coconut.Vanilla Coconut Yogurt Butter Cream | Homemade Dutch Apple Pie

One of the things I love about this frosting is that it is not overly sweet. The only sweetener is what is in the yogurt. Nothing else is added.

My husband and my daughter both really enjoyed yogurt butter cream on their cupcakes.

I make gluten free cupcakes (this is a delicious and healthy version), but you can use whatever cupcake you like. This butter cream would even be really good on chocolate cake.

The petite creme yogurt is fat free. Normally I am not a fan of fat free stuff. But in this recipe it is balanced with the butter in the frosting.  Full fat plain yogurt would also work. Simply add some maple syrup or cane sugar to it to make a homemade vanilla yogurt.

A note of caution – the Stonyfield yogurt does contain corn starch. So if you are allergic to corn be sure to use an alternative yogurt. My little guy was pretty disappointed about this. It meant he couldn’t try it.

If you need a quick frosting, grab a bowl, a mixer and some yogurt. You’ll have delicious butter cream in no time.Vanilla Coconut Yogurt Butter Cream | Homemade Dutch Apple Pie

Vanilla Coconut Yogurt Butter Cream {gluten free, nut free}
A lightly sweet, simple butter cream.
Write a review
Print
Ingredients
  1. 2/3 cup vanilla yogurt (or plain yogurt with 3 Tbsp. maple syrup or cane sugar added)
  2. 2/3 cup shredded unsweetened coconut
  3. 2/3 cup tapioca flour (use less if you don't want the frosting as thick)
  4. 1/2 cup butter, at room temperature
  5. 2 tsp. vanilla extract
Instructions
  1. Combine all of the ingredients in a large mixing bowl.
  2. Beat on high until well combined.
  3. Use immediately to frost cupcakes.
  4. Store extra frosting in the refrigerator. Bring to room temperature before using.
Notes
  1. This makes enough frosting for 1 dozen cupcakes. The recipe can easily be doubled or tripled.
Just Take A Bite https://justtakeabite.com/
 I received products from Stonyfield to create this recipe. But all opinions are my own.

In order for me to support my blogging activities, I may receive monetary compensation or other types of remuneration for my endorsement, recommendation, testimonial and/or link to any products or services from this blog.