Home » Kid-friendly Recipes » gluten free » Page 31

Category: gluten free

Chili Cheesecake

A couple weeks ago I was watching the show The Best Thing I Ever Ate. One of the dishes featured was a savory cheesecake. It looked pretty good, although I can’t remember at all now what was in it. It got me thinking…maybe I should try making a savory cheesecake.

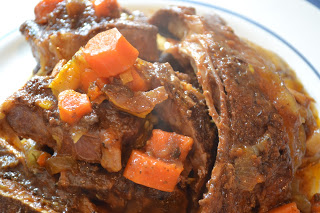
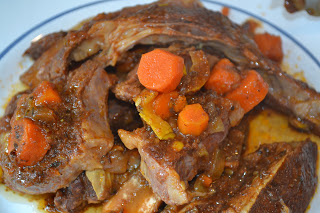
I had some leftover chili I didn’t know what to do with. So I turned it into chili cheesecake.

I honestly had about 5 minutes to prepare this dish after running in the door from a visit to the the doctor and running errands. I thought it might be a huge failure. I didn’t have a recipe. I didn’t measure. I just dumped, mixed and stuck it in the oven. Praying it would have enough time to bake and that it wouldn’t be a pan of slop when it came out.

To my great surprise it actually turned out really well. Both of the kids even loved it.

This is a great way to use up leftovers and come up with any kind of savory cheesecake you can imagine. You can eat it as is or use it as a dip.

It’s been almost a week now since I made it so I’ll do my best to remember what I did 😛  I just made a small dish. You can scale it up to make it in a pie dish or spring form pan.
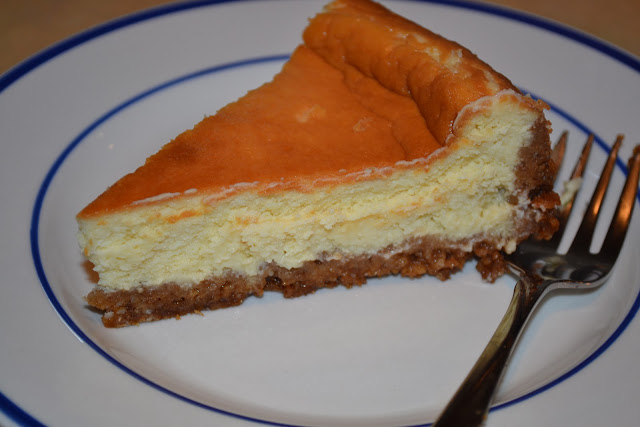
Chili Cheesecake

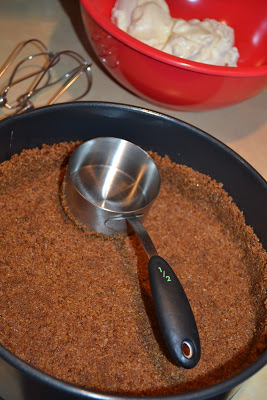
1/2 cup crushed tortilla chips (for a “crust”…this is optional…the chips get soft when baked)
1 cup chili (you could use taco meat, cooked ground meat, shredded chicken, or any vegetables you like)
1 cup homemade cream cheese
3/4 cup homemade sour cream
1 egg
2 egg yolks
seasoning to taste

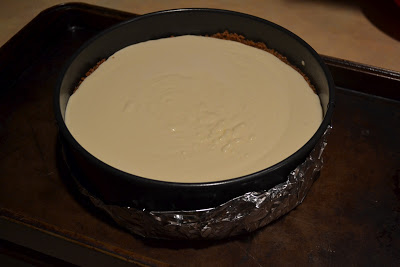
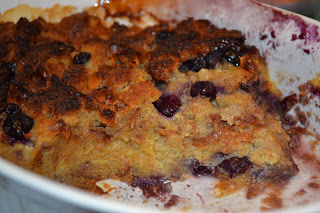
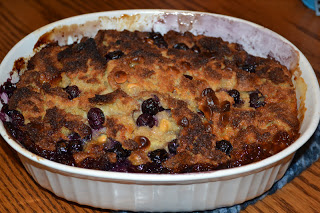
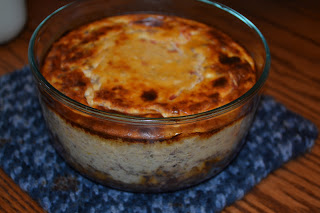
Place tortilla chips in the bottom of a small baking dish (I used a 4 cup pyrex dish). Top the chips with half of the chili.

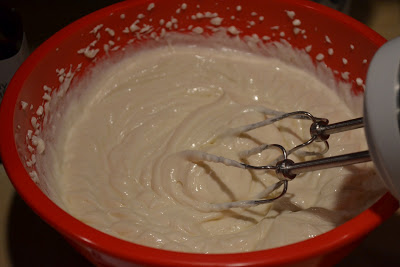
Mix the rest of the chili, the cream cheese, the sour cream and the eggs. Adjust seasoning to taste.

Pour the mixture over the layer of chili.

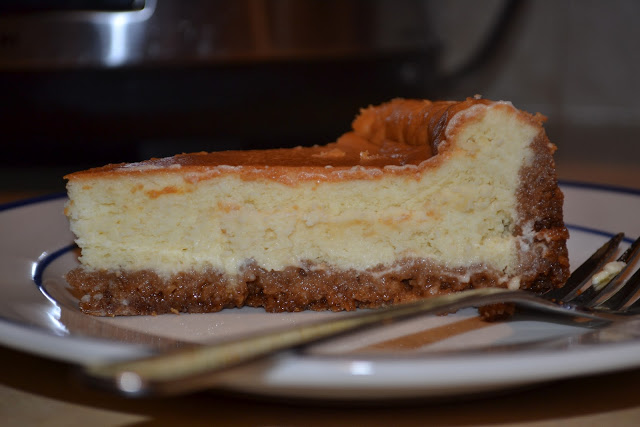
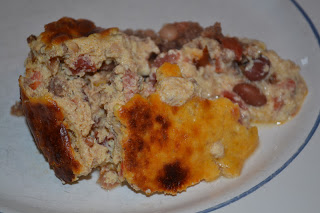
Bake at 400 degrees for about an hour (until set all the way through). Let set 5 minutes before serving.

Chocolate Chip Cheese Ball

I’ve had a recipe for a chocolate chip cheese ball in my list of recipes to try for a long time. I finally decided to make it. I modified it to use real ingredients. I did use regular chocolate chips. I still need to get to the store to try to find better quality chips. Or I need to find time to make my own again. But aside from that it was all good stuff.

It turned out great! A real treat. It’s kind of like eating cookie dough. I served it with a fresh batch of homemade graham crackers. A sweet twist on a cheese ball. Delicious.

The original recipe says to coat it in nuts. I didn’t do that since I can’t eat nuts. I just added some extra chocolate chips to the outside. Dried coconut flakes would be good too. It’s mostly for looks. You really don’t need to coat it in anything.

This post is linked to Fat Tuesday.

Chocolate Chip Cheese Ball

5 oz. homemade cream cheese
1/3 cup white whole wheat flour (you can use cornstarch or arrowroot. Use a little less than 1/3 cup)
1/3 cup maple syrup
1/4 tsp. vanilla
5 Tbsp. butter, softened
2-4 tsp. molasses
mini chocolate chips

Beat the cream cheese and butter. Mix in the flour, syrup, vanilla and molasses. Taste for sweetness. Add extra syrup or molasses if needed. Stir in chocolate chips (as few or as many as you like).

Refrigerate for two hours.

Scoop onto plastic wrap and form into a ball.

Wrap in plastic wrap and refrigerate until ready to serve.

You can roll the ball in chopped crispy nuts, coconut or more chocolate chips.

Banana Split Ice Cream

If you know me, you know I LOVE ice cream. I only eat my homemade ice cream since I know exactly what’s in it. My body does not tolerate all of the fillers, starches, etc. in store-bought ice cream. I’m always trying to come up with new flavors.

On Sunday I had some cream that needed to be used…which means ice cream. I had some bananas that were getting ripe. So I thought I’d make strawberry banana. Which then morphed into banana split ice cream.

I did a strawberry banana ice cream with walnuts and fudge swirled in. Delicious! And so easy. Using banana really thickened the ice cream. It was done in 10 minutes instead of the usual 20. Love it.

Banana Split Ice Cream

3 cups heavy cream (preferably raw)
3 egg yolks
1 ripe medium banana
1/2 cup frozen strawberries (fresh will work, but frozen helps it thicken and freeze faster)
1/4 cup honey
1/3 cup maple syrup (you can do all honey or all maple syrup)
1/3 cup chopped crispy nuts
hot fudge sauce (recipe below)

In a blender mix cream, yolks, banana, strawberries, honey and syrup. Taste. Make sure it is a little overly sweet (the sweetness will go down after it freezes).

Pour into ice cream maker and process until done (mine took 10 minutes in a Kitchen Aid mixer attachment).

During the last minute of processing add nuts.

Put the ice cream in a freezer safe container. Drop small spoonfuls of fudge into the ice cream and mix very gently. Don’t mix it in. Just fold over the ice cream so the drops of fudge stay in tact as much as possible. It’ll be like pieces of fudge when it freezes. Freeze until firm.

Hot Fudge Sauce
(prepare this in advance so it is cold when you make the ice cream)

1 cup organic cane sugar
1/3 cup cocoa
2 Tbsp. organic all purpose flour (or arrowroot or cornstarch)
1/4 tsp. salt
1 cup boiling water
1 Tbsp. butter
3/4 tsp. vanilla
 
Blend sugar, cocoa, flour and salt in sauce pan.
 
Turn on heat and add boiling water. Bring to a boil.
 
Cook, stirring constantly, until thick, about 3-6 minutes.
 
Remove from heat. Stir in butter and vanilla. Store in refrigerator.

Breakfast Cups

A couple weeks ago I made a simple breakfast for dinner. I made egg cups and french toast cups. They came together very quickly, and we all enjoyed them. I even got them prepped mostly one handed since that’s about the only way to make dinner without running into the other room every five seconds to get Abram down from something he’s climbed on.

The basis of the recipe is putting bread in muffin cups. Then add whatever to it you want. I did eggs and cheese in some. I did eggs and maple syrup in some.

You could also use the bread in a muffin cup idea with things like sloppy joes or cheeseburger cups or pot pie. The bread is kind of the crust. Then be creative and go from there.

It’s fun to have individual servings, especially for kids. And it’s much faster than making a crust 🙂

These are great for a brunch or for a party. They are also a great prep ahead breakfast. Make them the night before or freeze a bunch and warm them when you need them.

Breakfast Cups

Mini quiche breakfast cups

3 slices whole wheat bread (or whatever bread you tolerate…gluten free, grain free, etc.)
5 eggs
1/2 cup milk
1/2 cup shredded cheese
salt and pepper to taste

Grease 6 cups of a muffin tin. Mix eggs, milk and seasoning. Place 1/4 slice of bread* in each muffin cup. Top with a little cheese. Evenly distrbute the eggs among the cups. Add another 1/4 slice of bread to each cup and push down so it absorbs the eggs. Top with extra cheese if desired. Bake at 350 for 25 – 30 minutes.

Mini french toast cups

3 slices whole wheat bread (or whatever bread you tolerate…gluten free, grain free, etc.)
6 eggs
1/2 cup milk
1/3 cup pure maple syrup
cinnamon (optional)

Grease 6 cups of a muffin tin. Mix eggs, milk and cinnamon. Place 1/4 slice of bread* in each muffin cup. Pour a little maple syrup on top. Repeat with another 1/4 slice of bread and syrup. Evenly distribute the eggs among the cups. Push bread down to be sure it all gets saturated with the eggs. Bake at 350 for 25 – 30 minutes.

*You can also do it with bread torn into chunks instead of keeping it as slices. This works espically well for french toast.

Zucchini Soup | Homemade Dutch Apple Pie

Zucchini Soup

Zucchini soup is a great way to use up some of your larger zucchini and get kids to eat it! Pair it with zucchini crackers and cheese…lunch is served.

Zucchini Soup | Homemade Dutch Apple Pie

Zucchini just keeps coming.

I’m still working on using up the last of the zucchini from our garden. Sound familiar? You can only make so much zucchini bread!

One nourishing way to use that extra zucchini is in zucchini soup. It is so good! And so simple. Just cook and puree some vegetables in broth. It turns into a creamy, flavorful nourishing soup.

Zucchini is the base. But you can add any vegetables to complement the zucchini.

I like to use the zucchini that gets a little too big for soup. You can’t tell the difference.

Getting ready for fall.

As fall approaches and I think about school…I also think about sickness. Once all of those kids are together the germs start spreading.

Eating zucchini soup during the summer is a great way to build up the immune system ahead of time. Getting your family to consume broth year round is a great idea.

Soup for breakfast.

I eat soup for breakfast most days. I love it when I have leftover soup that I can just grab out of the fridge and eat cold. Zucchini soup is perfect for an easy breakfast or lunch that you don’t have to cook.

It also makes a great dip for raw vegetables or crackers.

Are you struggling to come up with more ways to use your zucchini? Try zucchini soup!

Zucchini Soup

3 medium zucchinis, chopped
1 small carrot, chopped
1 small red onion, chopped
2 cups chicken broth
salt, pepper, garlic powder to taste
1 cup diced, cooked chicken (optional)

  1. Cook vegetables in broth until very tender, about 30 minutes.
  2. Add seasoning.
  3. Puree with an immersion blender or regular blender.
  4. Return soup to pot, taste and adjust seasoning.
  5. Add diced, cooked chicken and simmer for 10 minutes.

Here are a few more zucchini recipes you may enjoy:

Zucchini cake with two frostings

Zucchini crackers

Zucchini pizza bites

Chocolate zucchini scones

Zucchini salmon cakes

Chocolate zucchini cupcakes

Real Cheesecake

I love cheesecake.  It comes in a close second for my all time favorite food. Right behind ice cream. I don’t make it often. And I haven’t made it in quite some time. I’ve been wanting to make a REAL cheesecake for a while. But it takes work to make all of the ingredients before you can even make the cheesecake.

This week it just so happened that we had a lot of yogurt (I made a little extra to use up milk) and some sourdough graham crackers that needed to be used up. So it was the perfect time to experiment.

I used the yogurt to make real cream cheese (next time you want to buy cream cheese at the store check the ingredients…you might be surprised by the fillers/thickeners they add). I also made raw sour cream this week.

Then it was cheesecake time.

The outcome…AMAZING! Real cheesecake with totally real ingredients. I’m  in heaven 🙂  It did turn out a tiny bit softer than I like (I like my cheesecake really firm…like almost crumbly…I usually let mine sit in the freezer for a while :). But for most people it would be just right. I scaled back the cream in the recipe below. You could also add a little arrowroot, cornstarch or AP flour to make it thicker.

This is about as real as it gets when it comes to dessert. A totally from scratch cheesecake. A cheesecake I feel comfortable calling healthy 🙂  It’s great on its own…even better with some homemade fudge sauce over top.

This can be made gluten free by using gluten free or soaked gluten free graham crackers. Or you can make a special holiday dessert using pumpkin spice graham crackers or chocolate graham crackers!

Do you love cheesecake? Give this version a try. Let me know if you love real cheesecake as much as I do.

This post is linked to Fat Tuesday and Real Food Wednesday.


Cheesecake

2 cups graham cracker crumbs (whole wheat, sourdough, gluten free, soaked gluten free, pumpkin spice, chocolate or soaked) (pulse in food processor to make crumbs)
1 1/4 cup cane sugar
1/2 cup butter or coconut oil (or a combination)
2 cups homemade cream cheese (It took about 1 1/2 qts. of homemade yogurt to get this)
1 cup homemade sour cream
3 eggs
1 tsp. vanilla extract
1 Tbsp. lemon juice (optional)

Melt the butter and stir into the crumb mixture. Press into the bottom of a greased 9″ spring form pan. Set aside.
 
Using an electric mixer blend the cream cheese, sour cream and the remaining sugar until creamy, wiping down the sides of the bowl and the beaters with a spatula to incorporate all the cheese. Add the eggs 1 at a time, beating after each addition. Slowly stir the lemon juice into the cheese mixture.

Meanwhile preheat the oven to 350. Place aluminum foil under the springform pan and up the sides (this prevents any water from getting in). Put the prepared pan into a slightly larger rectangular pan. Pour cheese mixture into the springform pan. Set both pans in the oven and fill the rectangular pan with water, half way up the sides of the round pan. Bake until firm and golden brown, about 90 min. Turn off oven, open slightly and let cheesecake set for about 30 min. Remove from water bath. Let cool on counter for 60 min. Cover and let cool completely in refrigerator (at least 4 hours).

Place cheesecake in the freezer for an hour or two before serving to make it really firm.

Crockpot Peppercorn Steak

We still have quite a bit of beef in our freezer from last year. I’m always looking for new ways to cook it. After searching for a steak recipe I found a simple one on A Year of Slow cooking. I modified it a little, using what I had on hand.

It turned out great! I used rib steak…which I don’t generally care about much. But it was very tender and flavorful this way. I would definitely make this again. I served it over rice. It would also work well over mashed potatoes or polenta. You could also add potatoes right in the crockpot and make it a one pot meal. I’ll post the recipe the way I made it.

Crockpot Peppercorn Steak

Steak (any kind you like. I used one large rib steak. There was plenty of sauce. I could have cooked two steaks in it)
1 pint tomato soup (preferably homemade, else plain tomato sauce)
1/2 cup water
1 small onion, chopped
4 large carrots, chopped
1 medium zucchini, sliced
(any vegetables you like will work here)
2 tsp. sea salt
2 tsp. Italian seasoning
1//2 tsp. pepper

Place meat in crockpot. Add vegetables. Pour in tomato soup, water and seasoning. Cook on low 7 or more hours (the longer it cooks the more tender it will be) or on high 5 or more hours.

Red, White and Blue Parfait

I made this dessert for the Fourth of July…but never got around to posting the recipe. Oops. This was a simple, fun treat that everyone enjoyed. Layers of vanilla pudding, graham crackers, sweetened cream cheese and fresh berries – delicious! A perfect holiday summer treat.

Red, White and Blue Parfait

Vanilla Pudding (from Heavenly Homemakers)

2 1/2 cups milk
3 egg yolks
1/2 cup real maple syrup (grade B is best for you) or honey
4 T. arrowroot powder (or organic corn starch)
1/4 tsp. sea salt
1 Tbsp. butter
1 tsp. vanilla

In a medium saucepan, whisk together milk, egg yolks, maple syrup, arrowroot powder and salt. Cook over medium heat, stirring CONSTANTLY until pudding begins to thicken. Stir over the heat for about 15 more seconds. Remove immediately from the heat, and continue to stir until pudding is creamy. Add butter and vanilla and continue to stir until mixed. Allow to cool at least 30 minutes. You can prep this ahead and keep it in the refrigerator.

Cream Cheese Filling

2 cups yogurt
3-5 Tbsp. sweetener (honey, maple syrup, sucanat)
1 tsp. vanilla (optional)

Strain yogurt in cheesecloth to make cream cheese (do this ahead of time). Stir sweetener into cream chhese until it is to your liking.

Parfait:

Crumble thin layer of graham crackers (organic store bought or whole wheat homemadesoaked homemade, sourdough or gluten free. Use gluten free grahams or cookies to make this gluten free.) into the bottom of small dishes or 1/2 pint mason jars. Layer pudding, then fruit, then cream cheese. Add another layer of graham crackers and repeat other layers. Repeat process until the jar is filled. Top with graham cracker crumbs and berries. Chill and serve.

I made a couple full jars, and I made a couple not quite so full for a kid’s portion.

Blueberry Bread Pudding

Last night I tried a new bread pudding recipe that I got from our local newspaper. It was submitted by Sharon Heethuis. It’s called Over the Top Blueberry Bread Pudding. If you make it exactly according to the recipe it would be quite over the top with a white chocolate sauce to pour over top! I scaled it back a little (no sauce, less chocolate). But it was still so good  (then again I’ve never met a bread pudding I didn’t like :P)! The main thing that makes it a bit more over the top is adding white chocolate chips. I know they aren’t healthy. But I did add a few. Blueberries are in season right now, so it’s the perfect time to make this. We all enjoyed it. I would definitely make it again. It would be great with some peaches added as well. Blueberries and peaches always go well together. You can absolutely make it without the chocolate chips…it just won’t be so over the top 🙂

I only made a half recipe. I’ll post the full recipe, with some healthier substitutes. You can make it gluten free by using gluten free bread. You could even try making it grain free using a nut butter, almond flour or coconut flour bread.

This makes a great breakfast, brunch, snack or dessert! I served it with scrambled eggs for dinner.

The pictures don’t really do it justice. I had to bake it in the toaster oven, so the top got a little dark.

Over The Top Blueberry Bread Pudding

3 eggs
4 cups cream (I used a combo of raw cream and milk)
1 cup cane sugar/sucanat (maple syrup or honey would probably work as well)
3 tsp. vanilla
2 cups fresh or frozen blueberries
1 (12 oz.) package of white chocolate chips (you can omit this or use less)
1 loaf bread, cut into 1″ cubes (use whatever bread you like…we used fermented wheat bread. This is a great job for little kids…Rebecca loves to rip up all the bread)

Sauce:
1 (12 oz.) pkg. white chocolate chips
1 cup cream

In a large bowl combine the eggs, cream, sugar and vanilla. Stir in blueberries and chips. Stir in bread. Let stand for 15 minutes. Pour into a greased 9×13 pan. Bake at 350 degrees for 50-60 minutes. Let stand 5-10 minutes before serving.

For the sauce, place chocolate chips in a small bowl. Heat the cream in saucepan just to a boil. Pour over the chocolate. Whisk until smooth. Serve with bread pudding.

You can add coconut and pineapple for variation. Drain pineapple before adding.

RR – Rice Balls

It’s time for this’s week’s Rebecca’s Recipe. Rebecca decided to have rice balls for dinner. I’ve never made or eaten a rice ball. But it sounded good. We came up with a very simple recipe that actually was really good! Even Justin really enjoyed them. They are basically a combination of rice, cheese, egg and seasoning. You can dip them in pretty much anything (salsa, spaghetti sauce, honey mustard, ketchup, pesto…whatever) or eat them plain. They are delicious either way. You can add variety by using different cheeses. I used garlic and onion last night. A sharp cheddar or parmesan would be great too. They reheat very well. I’ll make these again for sure! Another winning recipe from my little chef 🙂

Rice Balls

1 cup cooked rice (I used white rice since I’m experimenting with how my tummy handles it…you could use any kind of rice you like)
1 egg
1/2 cup finely grated cheese (I used garlic and onion)
seasoning of choice (I just used salt + the seasoning in my bread crumbs)
bread crumbs (use gluten free bread crumbs to make this gluten free)
oil for frying (I used coconut oil)

Cook rice and let cool partially (or cook the rice ahead of time/use leftovers and warm it slightly). Add egg, cheese and seasoning. Mix well. One at a time roll a small portion into a ball and cover with bread crumbs. They will be fragile, so I found it easiest to sprinkle the breadcrumbs over the rice ball in my hand and gently lay it in the pan.

Cook in hot oil (enough to cover the bottom of the pan) in large skillet. Cook over medium heat on all sides until golden brown, about 15 minutes total. Serve plain or with dipping sauce. They would also be good on a salad.