Home » Kid-friendly Recipes » Page 21

Category: Kid-friendly Recipes

It is so important to cook homemade, healthy food. But it’s not always easy to find kid-friendly recipes.

That’s where I come in. I’ve got hundreds of kid-tested and approved recipes that won’t keep you in the kitchen for hours or stretch your budget too thin.

I focus on allergy-friendly, whole foods. But I always cook with kids in mind. I take all sorts of feeding challenges into account too.

We’ve dealt with every allergy possible, so I’ve created recipes that are gluten free, nut free, dairy free, egg free, soy free, corn free, coconut free and more!

Kid-friendly recipes don’t have to be boring. And they are certainly not limited to chicken nuggets and pizza every night.

A nourished child will enjoy a wide variety of fruits, vegetables, proteins, carbohydrates and fats. Get your kids in the kitchen with you and start cooking! Have fun with food and your kids will learn to love eating.

Dairy Free Egg Free Egg Nog

Dairy Free Egg Free Egg Nog || Homemade Dutch Apple PieChristmas will be here before we know it. That means time for presents, family gatherings and of course egg nog!

I’ll be honest – I hated egg nog when I was younger.  It wasn’t until just a few years ago that I could even handle more than a sip or two.

But in the last few years it has really grown on me once we started buying good quality, locally made egg nog.  It figures that now that I really enjoy egg nog I can’t have it.  My little one is sensitive to both dairy and eggs.

Instead of resigning myself to the fact that I’ll have to skip the egg nog this year I decided to create a dairy and egg free version.  It’s not easy to recreate that thick, rich texture and flavor without the eggs.

But I have come up with a version that even those that can have dairy will enjoy.Dairy Free Egg Free Egg Nog || Homemade Dutch Apple Pie

I’m not going to lie – this stuff is rich!  There is lot of sweetener to overpower the coconut flavor and to mimic the richness of the eggs. The combination of cane sugar and honey really works well.

You only need a small glass of this egg nog at a time. But it is a wonderful treat for the holiday season that everyone can enjoy. Even my three year old loves it.

The other key component to this egg nog is sea salt.  It creates the perfect balance with the sweet and the spice.

If you’re not a fan of drinking your dessert you can simply double the recipe and turn it into delicious egg nog ice cream.

Are you not totally convinced that a white egg nog can taste good? Add a couple tablespoons of pureed pumpkin or squash for color. You’ll have your yellow egg nog without the eggs.

No dairy? No egg? No problem. Now you can enjoy egg nog this Christmas too.Dairy Free Egg Free Egg Nog || Homemade Dutch Apple Pie

Dairy Free Egg Free Egg Nog
Serves 5
A rich holiday drink that is both dairy and egg free.
Write a review
Print
Ingredients
  1. 1 can full fat coconut milk
  2. 1/2 cup organic cane sugar
  3. 1/4 cup honey
  4. 3/4 tsp. nutmeg (or to taste)
  5. 1 Tbsp. tapioca flour
  6. 2 tsp. organic vanilla
  7. 1/2 tsp. unrefined sea salt
Instructions
  1. Combine all of the ingredients in a blender.
  2. Blend until smooth.
  3. Adjust spice to taste.
  4. Serve immediately or chill.
Notes
  1. The egg nog will thicken as it chills.
  2. To make egg nog ice cream simply double the recipe and process in an ice cream maker.
  3. Add 2 Tbsp. pureed pumpkin or squash to create the yellow color of egg nog.
Just Take A Bite https://justtakeabite.com/
If you are not dairy/egg free please check out Raising Generation Nourished’s amazing egg nog recipe!

In order for me to support my blogging activities, I may receive monetary compensation or other types of remuneration for my endorsement, recommendation, testimonial and/or link to any products or services from this blog.

Simple Soup Series: Beef Stew

Simple Soup Series Beef Stew || Homemade Dutch Apple Pie

 Last on the list in this simple soup series is beef stew. Normally when I think of stew I think of simmering something all day long.

But not here. This stew comes together in under thirty minutes. It’s packed with flavor and nutrition. And it’s very filling.

It starts with a few fresh vegetables. Add them to rich beef broth for the base.

Then add the beef and seasoning. Finally a little thickening and you’ve got a delicious dinner. 

Simple Soup Series Beef Stew || Homemade Dutch Apple Pie

Don’t forget to have an adorable assistant to help clean up vegetable peelings. That makes the preparation even more fun.

Making a simple soup is definitely something even young kids can help with. They can chop some vegetables (while being supervised of course) and then help add everything to the pot. This is a great way to get your children to eat nourishing soups. Let them help.

All of my kids love to help in the kitchen. Then when dinner is served they are so proud that they contributed. 

Simple Soup Series Beef Stew || Homemade Dutch Apple Pie

Beef stew is another great lunch box addition. It will keep your child’s belly full and give them plenty of energy.

This is also a soup that freezes well for easy weeknight meals.

Do you have more time in the morning to make food? You can either prepare the stew in a pan and put in the fridge to warm at dinner time. Or you can toss the ingredients in the crockpot and let it simmer for a few hours.

Beef stew is a simple soup that will satisfy your appetite and give your body the nourishment it needs. 

Simple Soup Series Beef Stew || Homemade Dutch Apple Pie

Simple Soup Series: Beef Stew
Serves 5
Write a review
Print
Ingredients
  1. 4 cups beef broth
  2. 4 Tbsp. cornstarch, arrowroot or tapioca flour
  3. 3 large carrots, cut in small chunks
  4. 1 large potato, cut in small chunks (optional)
  5. 1/2 onion, diced
  6. 1-2 cups any other vegetables (peas, broccoli, cauliflower, beans) (optional)
  7. 1 cup cooked, cut up beef roast
  8. sea salt, garlic powder, parsley and basil to taste
Instructions
  1. In a large saucepan combine the cold broth and cornstarch until dissolved.
  2. Add the remaining ingredients.
  3. Bring to a boil. Turn down heat and simmer 20 - 30 minutes, until the vegetables are tender and the stew is thickened.
Notes
  1. You can use 1/2 lb. cooked ground beef in place of the roast beef.
  2. You can use all frozen vegetables. If so the cook time will only be about 15 minutes.
  3. An easy way to have two delicious meals in one week is to cook a bone-in beef roast in the crockpot one day, then use the bone to make broth over night. The next day use the broth and the leftover meat to make stew.
  4. If you like the stew thicker, add more cornstarch to a small amount of cold water or broth and stir it into the stew. If you like it thinner cut down on the cornstarch or omit it completely.
Just Take A Bite https://justtakeabite.com/

Simple Soup Series: Split Pea Soup

Simple Soup Series Split Pea Soup || Homemade Dutch Apple PieHands down my favorite kind of soup is split pea!  Growing up it was such a treat when my mom would make a pot of split pea soup with big chunks of ring sausage. You could smell it simmering on the stove for hours in anticipation of dinner.

So of course I make it for my family now. But I generally do not have time to monitor a pot of soup for hours.

I make my split pea soup in the crockpot. It really doesn’t get any easier. Add peas. Add broth. Add meat. Add seasoning. Dinner is ready. It only takes about five minutes to get it going. It’s so easy my three year old can pretty much prepare it for me!Simple Soup Series Split Pea Soup || Homemade Dutch Apple Pie

What we add to the pea soup just depends what we have on hand. Sometimes I make it pure pea soup – peas, broth, salt. Sometimes I add diced ham, ring bologna or diced carrots. It would even be good with cooked sausage or leftover roasted chicken.

For the batch I photographed I used large chunks of ring bologna as a nod to how my mom made it growing up. I would eat the soup and save the sausage for the end. It was fun. But if you have small children it is easier to cut up the meat into smaller pieces.

You can make split pea soup as thin or as thick as you like. I prefer mine thicker.

One of the best parts about this soup is how much my kids love it.  I was going to take a picture of my son eating it, but he finished his bowl before I could get the camera. He just shoveled it in barely taking a breath between bites.Simple Soup Series Split Pea Soup || Homemade Dutch Apple Pie

This is even an easy soup for very young children to eat. You can thin it out with extra broth and leave out the meat chunks for little ones.

Split pea soup is very allergen-friendly. So it’s great for people with all types of dietary needs. It also freezes well.

I believe split pea soup is a Dutch soup. Maybe that’s why my grandma and my mom always made it. And maybe that’s why my family and I love it so much!

This is also a very budget friendly soup.  Make broth from chicken bones and add some dried split peas. You’ll feed the whole family for a few dollars.Simple Soup Series Split Pea Soup || Homemade Dutch Apple Pie

Note that split peas are similar to beans. They are not like sweet peas. So if you don’t tolerate beans you should only try a small amount of split pea soup to see if you can handle it. It can be gassy like beans. I learned that quickly as a nursing mom. My little one doesn’t appreciate me eating too much pea soup.

This really is the most delicious and easiest to prepare soup I make. The whole family loves it, and it’s full of vegetables and broth. It doesn’t get much better.  I even love to eat the leftovers for breakfast. Leftovers never last long here. My daughter loves it in her lunch too.

As with other soups that I make I like to add a little coconut oil or butter to individual bowls to balance it with healthy fat. Then I pair it with muffins or bread. Dinner has never been easier or tastier.

Simple Soup Series Split Pea Soup || Homemade Dutch Apple Pie


Simple Soup Series: Split Pea Soup
Serves 6
A simple, nourishing split pea soup.
Write a review
Print
Ingredients
  1. 1 lb. dried split peas (green or yellow)
  2. 6 cups chicken broth (you can substitute water if you don't have broth)
  3. 2 cups any meat of choice (cubed ham, sliced ring bologna, cooked sausage, cooked chicken)
  4. 2 tsp. sea salt (to taste)
  5. 2 tsp. garlic powder (to taste)
Instructions
  1. Rinse the split peas in a strainer.
  2. Put the split peas in the crockpot.
  3. Add the broth, meat and seasoning.
  4. Cover and cook on high 6-8 hours or low 7-12 hours, until the peas are fully cooked and the soup reaches desired thickness.
  5. Stir the soup every 3-4 hours if possible to make sure there is enough liquid. Add mor if necessary.
Notes
  1. You can make the soup thinner by adding extra broth or water.
  2. This soup freezes well.
  3. It is helpful to add a little water or broth when reheating pea soup.
  4. You can make this soup in a pot. Simmer 2-4 hours, until peas are cooked and soup thickens. Stir it periodically.
Just Take A Bite https://justtakeabite.com/

Simple Soup Series: Chicken Noodle Soup

Simple Soup Series Chicken Noodle Soup || Homemade Dutch Apple PieWhen it comes to soup chicken noodle is a classic. It’s also one of the easiest soups to make!

 Combine rich bone broth with roasted chicken and vegetables. Then add your favorite noodles. Dinner is served.

I grew up eating noodle soup out of a packet.  Powdered chemicals. Not exactly something that young children should be consuming daily. But I did. Noodle soup, toast and egg salad.

As a mom myself I understand just how important nutrition is. Soup and eggs are two very healthy foods. But instead of soup out of a box my kids now get homemade nourishing chicken noodle soup to fuel their minds and bodies.  It also helps boost their immune systems to ward off illness in the winter.

My kids love chicken noodle soup. I love that they are getting a good dose of broth. Plus I can make a couple versions to meet everyone’s needs without spending hours in the kitchen.

For some of the family I use corn noodles and for some I use rice noodles. For some I add carrots, for some I add peas. Everyone gets a healthy meal. All I have to do is mix and heat.

Chicken noodle soup is also great for school lunches or even quick lunches at home.  For young kids don’t fill a lunch container with too much of the broth. The noodles and vegetables soak up broth while it cooks, so there is still plenty of good stuff…but without the risk of spilling everywhere.

This is a great meal when feeding a crowd. Simply double or triple the recipe and pack it with veggies and noodles. Nobody will go hungry. When I make a large batch I often use half water and half broth. As much as I love nourishing broth I don’t always have ten cups of it to use in one pot of soup. It still tastes great and has plenty of nutrition. You can also add collagen to boost nutrition if you don’t have enough broth.

Chicken noodle soup. It’s easy. It’s good. It’s good for you.

Simple Soup Series Chicken Noodle Soup || Homemade Dutch Apple Pie

Simple Soup Series: Chicken Noodle Soup
Serves 5
A simple nourishing soup filled with chicken and vegetables.
Write a review
Print
Ingredients
  1. 4 cups chicken broth
  2. 4 large carrots, cut into small chunks
  3. 1 cup peas and/or corn
  4. 1 cup cooked, cut up chicken
  5. 1 cup gluten free noodles
  6. 1 tsp. sea salt (to taste)
  7. 1 tsp. garlic powder (to taste)
  8. 1/2 tsp. dried parsley (to taste)
Instructions
  1. In a large saucepan combine all ingredients, except the noodles
  2. Simmer for 20 minutes, until the carrots are tender.
  3. Add the noodles. Cook another 10 minutes.
  4. Adjust seasoning to taste.
Notes
  1. This soup freezes well.
  2. You can replace half of the broth with water.
  3. You can add 1-2 Tbsp. grass-fed collagen for added nutrition.
  4. You can replace the noodles with white rice. Increase the cooking time by 10 minutes.
Just Take A Bite https://justtakeabite.com/
Simple Squash Soup

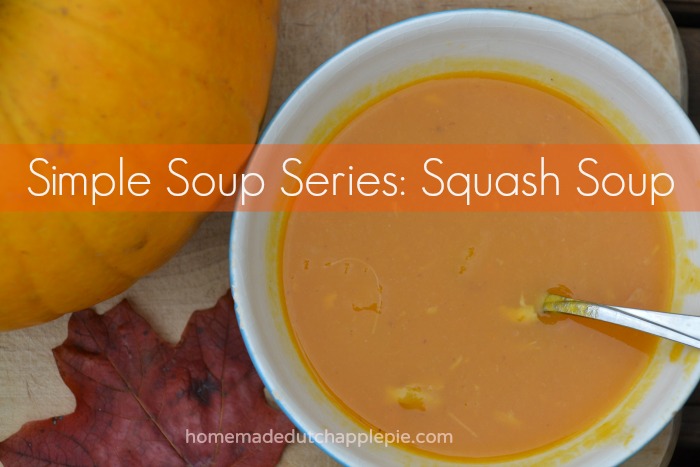
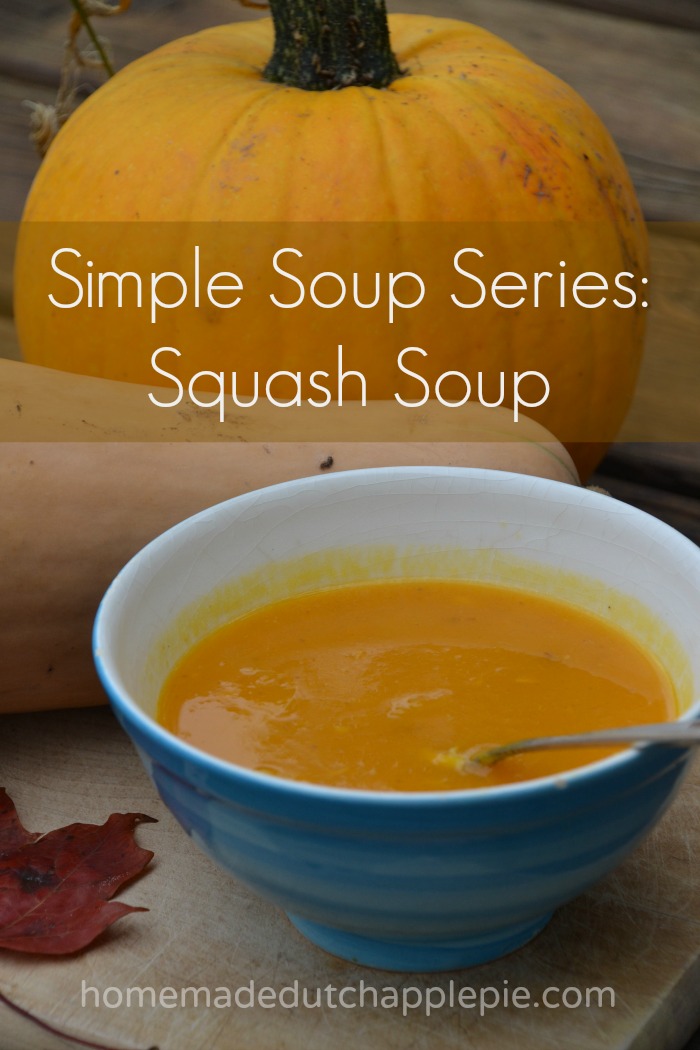
Simple Soup Series: Squash Soup

 This simple squash soup is full of homemade chicken broth and comes together in minutes. Pair it with some soaked teff crackers for a complete meal! Simple Soup Series Squash Soup || Homemade Dutch Apple Pie

 Today I am kicking off my Simple Soup Series. I make soup all the time. But I always forget to post the recipes. So I’m starting by sharing some of my simplest soups.

They take very little time to prepare. They can be prepared in advance. They can be made in a soup pot or the crockpot. Best of all they are so nutritious and very allergen friendly.

Homemade Squash Soup

I have two absolute favorite soups – squash and split pea. I could eat one or the other every single day. I especially love having them for breakfast.

So today I’m sharing my simple recipe for squash soup. It’s very versatile. You can keep it pure squash. Or you can add meat and vegetables for texture.

Simple Soup Series Squash Soup || Homemade Dutch Apple Pie

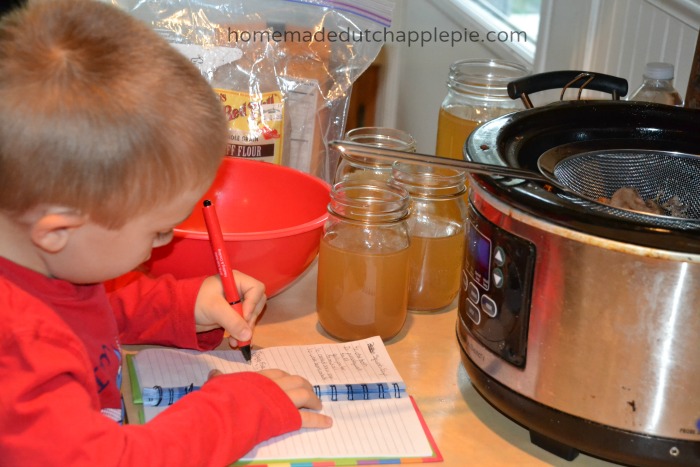
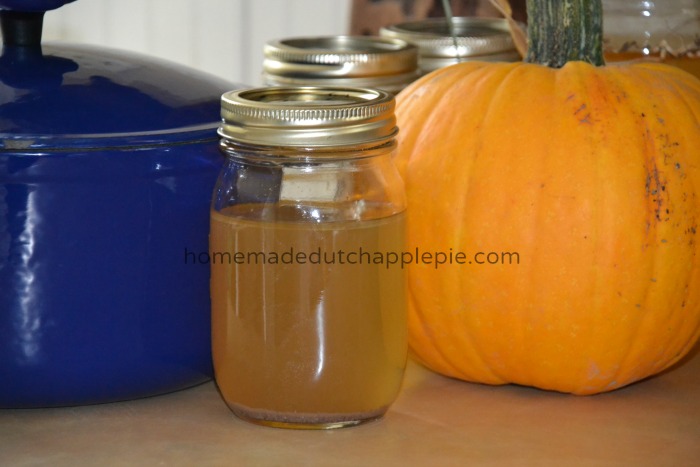
 The first two things you need for good squash soup are bone broth and a cute helper to write your recipe. One is more critical than the other, but they both help.

How to Easily Roast Squash

Then you need cooked and pureed squash. I like to roast three or four squash at a time. Simply wash them, place them on a large baking sheet, add water to the bottom and bake at 400*F for about two hours. Then you can easily cut them open, remove the seeds, scoop the flesh into a bowl and puree it with an immersion blender or a regular blender.

Put your squash in storage containers. Use some fresh and freeze the rest. Then you can quickly make squash soup any time.

You can also buy pureed squash at the store. It is in the frozen section. 

Simple Soup Series Squash Soup || Homemade Dutch Apple Pie

Nourishing Soup with Squash

Once you have your broth and your squash this soup comes together in minutes.  Add any seasoning you like. Add any meat or vegetables you like. Simmer for about ten minutes. Dinner is served.

Squash soup makes a great school lunch. It is a thick soup, so it won’t spill very easily. It’s also easy for young kids to eat without making a mess.  Squash soup also tastes great cold. That is always a bonus when packing lunches.

I like to add coconut oil or butter to squash soup for some added healthy fat. If you are going to serve some of the leftovers cold then it is best to only add coconut oil to individual bowls when it’s warm. Else it will solidify in the cold soup.

How to Serve Squash Soup to Kids

I usually pair soup with muffins or scones. Crackers and cheese are an easy accompaniment as well.

Squash soup can be ready in about fifteen minutes. It is very nutrient dense with vegetables and broth. And the leftovers make a great breakfast or lunch.

You can also make a double or triple batch of soup and freeze some of it. Then all you have to do for dinner is warm and serve. It’s so simple.

Do you enjoy squash soup? What do you like to add to yours?

Simple Soup Series Squash Soup || Homemade Dutch Apple Pie

Simple Soup Series: Squash Soup
Serves 5
A simple squash soup that is ready in 20 minutes.
Write a review
Print
Ingredients
  1. 4 cups chicken broth (homemade)
  2. 4 cups pureed squash
  3. 1 tsp. sea salt (to taste)
  4. 1/2 tsp. garlic powder (to taste)
  5. 2 Tbsp. coconut oil (optional)
  6. 1 cup cooked, cut up chicken or cooked sausage (optional)
  7. 1 cup cooked white beans (optional)
  8. 1 Tbsp. collagen (optional)
Instructions
  1. In a large saucepan combine the broth, squash, salt, garlic powder, coconut oil (if adding, see note), collagen (if adding), meat and beans.
  2. Bring to a boil, reduce heat and simmer for 10 minutes.
  3. When the soup reaches the desired thickness adjust the seasoning to taste.
Notes
  1. If the soup is thinner than you'd like continue to simmer until it thickens.
  2. If you will be eating leftovers cold do not add coconut oil to the soup. It will harden. You can add coconut oil to individual bowls when the warm soup is served.
  3. You can replace the beans with peas, corn or tomatoes.
  4. You can also make this soup in the crockpot. Add all of the ingredients to the crockpot and cook on low for 3-4 hours.
Just Take A Bite https://justtakeabite.com/
This post is linked to From The Archives Friday.

How To Use Up Extra {RAW} Milk

How To Use Up Extra Raw Milk || Homemade Dutch Apple PieWe LOVE our raw milk. We’ve been getting it since I was pregnant with my son (he’s now 3 1/2). Once you taste the real stuff there is no going back.

Even my kids can tell the difference in taste. When my daughter was younger and she tasted conventional milk she would call it “cheese milk” because it tasted strange.

For most of the year we get three gallons of milk a week. We’ve had times where we barely make it through the week with three gallons (like when I’m pregnant and drinking milk like crazy).  How To Use Up Extra Raw Milk || Homemade Dutch Apple Pie

Then there are times like now where only two members of the family are drinking milk since my son is allergic and I have to avoid it for the baby. We are barely using two gallons a week now, if that.

That leaves me with a lot of extra milk sometimes. I don’t want any of it to go to waste. So I use it to make other things. My go-to’s are pudding, ice cream and yogurt.

Raw milk is a healthy addition to your diet. If you are fortunate enough to have access to it you don’t want any of it to go to waste. So if you find yourself with a surplus of milk, here are over thirty ways to transform it enjoy it.

Take note that most of these recipes can be made with milk that is pasteurized as well. But the health benefits won’t be quite the same.How To Use Up Extra Raw Milk || Homemade Dutch Apple Pie

Yogurt, Sour Cream and Kefir

How To Make Yogurt In Your Oven from Oh The Things We’ll Make
Homemade Yogurt from Yearning and Learning
Homemade Yogurt from Our Small Hours
Cooked Yogurt from Homemade Dutch Apple Pie
Raw  Yogurt from Homemade Dutch Apple Pie
Milk Kefir and Kefir Cream from Delicious Obsessions
How To Make Kefir from Oh The Things We’ll Make
Dairy Kefir from Homemade Dutch Apple Pie
Sour Cream from Homemade Dutch Apple Pie

Pudding

Homemade Chocolate Pudding from Our Small Hours
Homemade Vanilla Pudding from Our Small  Hours
Homemade Vanilla Pudding from Real Food RN
Gluten Free Chocolate Pudding from Simply  Healthy Home
Homemade Fudgesicles from Recipes To Nourish

 How To Use Up Extra Raw Milk || Homemade Dutch Apple Pie

Ice Cream

Vanilla Bean Ice Cream from Live Simply
Easy Chocolate Chocolate Chip Ice Cream from Raia’s Recipes
Persian Love Ice Cream from And Here We Are
Affogato from And Here We Are
Kefir Ice Cream from Delicious Obsessions
The Best Chocolate Ice Cream from Homemade Dutch Apple Pie
Classic Vanilla Ice Cream from Homemade Dutch Apple Pie
Salted Dark Chocolate Ice Cream from Homemade Dutch Apple Pie
Blueberry Cheesecake Ice Cream from Homemade Dutch Apple Pie

Drinks

Spiced Hot Chocolate With Vanilla Whipped Cream from The Organic Kitchen
Peanut Butter Banana Smoothie from Raia’s Recipes
Honey Sweetened Hot Chocolate from Recipes To Nourish
Mexican Hot Chocolate from Recipes To Nourish

Soup

Creamy Fish Chowder from Raia’s Recipes
Condensed Cream of Chicken Soup from Raising Generation Nourished

Cheese

Yogurt Cream Cheese Dip from Real Food RN
Cottage Cheese at Home from Urban Overalls
Homemade Paneer Cheese from Economies of Kale
Homemade Cheese from Raia’s Recipes
Homemade Cream Cheese from Homemade Dutch Apple Pie
Farmer’s Cheese from Homemade Dutch Apple Pie

Breakfast

Easiest Fluffiest Buttermilk Pancakes from Raia’s Recipes
Breakfast Lapsha from Raia’s Recipes


 Raw milk can be used in so many ways. I love drinking it plain. But there are so many delicious ways to enjoy it. Do you ever have extra milk? How do you use it?

French Toast Muffins {gluten free, dairy free, nut free}

French Toast Muffins {Gluten Free Dairy Free Nut Free} || Homemade Dutch Apple Pie

 I love breakfast! It’s my favorite meal of the day.  Savory or sweet. I like almost all breakfast foods. I’m ready to eat the moment I get out of bed.

That being said I don’t have a lot of time to make breakfast in the morning. So I stick to simple.

Yogurt, granola, muffins – they are all staples in our house. And I thoroughly enjoy them.

But one of my absolute favorite breakfasts is french toast. Growing up my mom made french toast almost every Saturday morning. It never got old.

Eggy and buttery goodness is how I think of french toast. Top it with maple syrup. Divine.

 I do make french toast once in a while now when we have breakfast for dinner. But not very often. Especially now with so many allergies. I don’t even have bread that my son can eat. So french toast usually isn’t even an option.

French Toast Muffins {Gluten Free Dairy Free Nut Free} || Homemade Dutch Apple Pie 3

So I created a new version of french toast – in muffin form!

French toast muffins capture the flavor of french toast without needing bread. Plus they don’t involve standing at the stove, and they are easier for kids to eat.

 These muffins also make a very easy weekday morning breakfast. Make a big batch. Freeze them. They can go straight from the freezer into the oven for a few minutes. Dip the muffins into syrup or honey and breakfast is ready.

If you’re in a rush you can grab a muffin for the car. There is syrup in the muffin so it still tastes great without anything on top.

Do you need something different for school lunches? A french toast muffin pairs well with a cup of soup for a nourishing lunch.

No matter when or how you serve them french toast muffins are great. Now you can have french toast even if you can’t have bread.

French Toast Muffins {Gluten Free Dairy Free Nut Free} || Homemade Dutch Apple Pie 2

French Toast Muffins {Gluten Free, Dairy Free}
Yields 18
French toast in the form of a muffin.
Write a review
Print
Ingredients
  1. 1 cup white gluten free flour (white rice, tapioca)
  2. 1 cup whole grain gluten free flour (brown rice, amaranth, teff, sorghum)
  3. 1/3 cup organic cane sugar or coconut sugar
  4. 1 tsp. baking powder
  5. 1/2 tsp. baking soda
  6. 1/2 tsp. sea salt
  7. 4 eggs
  8. 1/2 cup melted coconut oil, palm shortening, lard or butter
  9. 1/2 cup honey and/or maple syrup
  10. 1 tsp. vanilla
Instructions
  1. Preheat oven to 350*F.
  2. Line a muffin pan with muffin cups or grease well.
  3. In a large bowl combine the dry ingredients.
  4. Add the eggs, syrup and vanilla. Mix.
  5. Add the melted fat. Mix until well combined.
  6. Pour the batter into the prepared muffin cups, filling 3/4 full.
  7. Bake for 25 minutes.
  8. Serve warm with honey or syrup.
  9. Store leftovers in a sealed container at room temperature.
Notes
  1. These muffins freeze well. When ready to serve simply thaw and warm in the oven for a few minutes.
  2. If you like french toast that is eggier, add one or two extra eggs to the batter.
Just Take A Bite https://justtakeabite.com/


In order for me to support my blogging activities, I may receive monetary compensation or other types of remuneration for my endorsement, recommendation, testimonial and/or link to any products or services from this blog.

Creamy Broccoli Noodle Soup {Gluten Free, Dairy Free}

Creamy Broccoli Noodle Soup {Gluten Free Dairy Free} || Homemade Dutch Apple PieDuring the winter I serve soup for dinner a lot. It’s about the easiest way to make sure my family is consuming a good amount of nourishing bone broth. In fact, every Wednesday is soup night so I make sure we’re getting a healthy dose at least once a week. Then leftovers go in lunches for more nourishment.

But it wasn’t until recently that I realized I rarely post soup recipes! So I need to start posting more of the soups we eat. Today I’m starting with this creamy broccoli noodle soup…that is gluten and dairy free!

The broccoli gets pureed into the soup, so even picky vegetable eaters will enjoy it. And it has a rich, creamy taste without using dairy. The whole family will love it.

If you’re not a fan of broccoli you can swap it for another vegetable like spinach, zucchini, squash or carrots. The soup is also great without the noodles if you want it grain free.

I like to serve a warm bowl of salty soup with a sweet baked good like chocolate zucchini scones, pumpkin muffins or cornbread. Add salad or some raw veggies and you’ve got a great meal.

You can add cooked chicken to the soup to make it meatier and give it texture. But there is plenty of protein in the soup from the broth without added meat.

Broccoli noodle soup is sure to be a family favorite and it’s great for those with allergies. It is also very easy to make and can feed a whole family at a very low cost.

Do you eat much soup in the winter? What is your favorite kind?

Are you looking for more soup recipes? Stay tuned. I’ve got a soup series coming up soon!!
 Creamy Broccoli Noodle Soup {Gluten Free Dairy Free} || Homemade Dutch Apple Pie 2

Creamy Broccoli Noodle Soup {gluten free, dairy free}
Serves 4
A creamy, nourishing soup filled with broccoli and noodles.
Write a review
Print
Ingredients
  1. 2 cups chicken broth
  2. 1 cup milk or milk substitute
  3. 2 cups broccoli florets (fresh or frozen)
  4. 1 cup gluten free noodles (corn, rice, etc.)
  5. seasoning to taste - sea salt, garlic powder, celery salt, parsley
  6. optional - 1 cup cooked chicken or sausage
Instructions
  1. In a large saucepan combine the chicken broth, milk, broccoli and seasoning.
  2. Bring to a boil, reduce heat and simmer until the broccoli is cooked, about 10 minutes.
  3. Roughly puree the soup with an immersion blender or in a blender.
  4. Bring the soup back to a boil. Add the noodles, reduce heat and simmer until the noodles are cooked, about 10 minutes.
  5. Add meat if desired and simmer until warmed.
  6. Adjust seasoning to taste.
Notes
  1. I used oat milk. Any milk substitute will work, but coconut milk might give a strong flavor. A milder milk like oat, rice or almond is best.
Just Take A Bite https://justtakeabite.com/

The Perfect Gluten Free Dairy Free Chocolate Chip Cookie

The Perfect Gluten Free Dairy Free Chocolate Chip Cookie || Homemade Dutch Apple PieNow that my daughter is in school all day my son helps me with most of my baking. He HAS to help if he knows I’m working in the kitchen. And he likes to decide what we make.

Of course one of his first requests was chocolate chip cookies. I happily obliged.

I’ve made gluten free dairy free cookies before. Some turn out better than others. It’s hard to find the right combination of flour and the right amount of fat that will create a good cookie that isn’t grainy and doesn’t crumble.

But with the help of my budding baker I think I did it! These are the best gf df cookies we’ve ever made. They are slightly crispy yet still a bit soft in the middle.

The best part is that they are very easy to make and do not require any strange ingredients like xanthan gum.

One key to these cookies is using palm shortening. As much as I LOVE coconut oil, it just doesn’t work that well for cookies. Using at least half palm shortening really helps bind the cookies and gives them the right texture. You could also try lard if you don’t have palm shortening.

Think you don’t have time to scoop cookies? Try turning them into bars. Then you simply pour the batter into one pan, pop it in the oven and you’re done! That’s my favorite thing to do when I’m short on time.

These cookies freeze very well. So make a big batch, eat some fresh and store some in the freezer for later.

If you’re searching for a delicious cookie that is gluten and dairy free search no further. This is the perfect cookie recipe. Not a fan of chocolate chips? Swap them for dried fruit, nuts or seeds. No matter what you add these cookies will be a hit.

The Perfect Gluten Free Dairy Free Chocolate Chip Cookie || Homemade Dutch Apple Pie

The Perfect Gluten Free Dairy Free Chocolate Chip Cookies
Yields 30
A delicious gluten and dairy free chocolate chip cookie or bar.
Write a review
Print
Ingredients
  1. 1 cup tapioca flour
  2. 1/2 cup amaranth flour
  3. 1/3 cup organic cane sugar
  4. 1/3 cup organic brown cane sugar or coconut sugar
  5. 1/2 tsp. baking powder
  6. 1/2 tsp. baking soda
  7. 1/4 tsp. unrefined sea salt
  8. 2 eggs
  9. 6 Tbsp. organic palm shortening (see notes for whether or not to melt it)
  10. 1 tsp. vanilla
  11. 3/4 cups dairy free chocolate chips
Instructions
  1. Preheat the oven to 325*F.
  2. In a large bowl cream the shortening and sugars.
  3. Add the eggs and vanilla. Beat well.
  4. Add the flours, powder, soda and salt. Beat well.
  5. Stir in the chocolate chips.
  6. Place 2 Tbsp. mounds on ungreased baking sheets.
  7. Bake for 15 minutes.
  8. Turn off the oven. Leave cookies in the oven for about 6 minutes.
  9. Allow the cookies to cool and remove from baking sheet.
  10. Store in an airtight container at room temperature or in the freezer for long term storage.
Notes
  1. If you like cookies that are wider and flatter melt the shortening first. If you like puffy cookies do not melt the shortening.
  2. The palm shortening can be replaced with butter if you tolerate dairy (either melted or at room temp).
  3. The palm shortening can be replaced with coconut oil, but the cookies may not hold together as well.
  4. To make the cookies into bars add an extra egg to the batter. Pour the batter into a greased 7x11 pan. Bake at 350 for 30 minutes.
Just Take A Bite https://justtakeabite.com/


In order for me to support my blogging activities, I may receive monetary compensation or other types of remuneration for my endorsement, recommendation, testimonial and/or link to any products or services from this blog.

Honey Mustard Four Ways

Honey Mustard Four Ways || Homemade Dutch Apple Pie

Hands down my favorite dip/dressing is honey mustard.  It has been my favorite for many, many years. I think I got hooked in college when I started eating salads more frequently.

Now if I make a salad for myself, 95% of the time I use honey mustard dressing. It’s just such a great flavor.

My kids love honey mustard for dipping when we make chicken nuggets.

Over the years I’ve made it countless times. It seems like I make it a little different each time. There really are many ways to make delicious honey mustard.

Honey Mustard Four Ways || Homemade Dutch Apple Pie

Today I’m sharing my top four ways to make honey mustard.  They are all very easy, and they all taste great! Three of the varieties take about one minute to make, each.

The fourth version of honey mustard uses homemade mayonnaise. I always have some on hand, so it doesn’t add any prep time for me. But if you don’t have it, making the mayonnaise will add about three minutes to the preparation.

Try any of them as a salad dressing, a dip or a condiment on sandwiches and burgers. Honey mustard goes with just about anything.

Honey mustard can be prepared in advance so it’s ready when you need it. All of these varieties will last for several weeks (at a minimum) in the refrigerator. Double or triple the recipe to have a full bottle of dressing on hand for lots of salads year round.

How about you? Do you like honey mustard? What do you use it for?

Honey Mustard Four Ways || Homemade Dutch Apple Pie

Honey Mustard I
A simple honey mustard dressing or dip.
Write a review
Print
Ingredients
  1. 1/3 cup honey
  2. 1/3 cup mustard
Instructions
  1. Mix the honey and the mustard until well combined.
  2. Serve immediately or refrigerate until ready to use.
Just Take A Bite https://justtakeabite.com/
Honey Mustard II
A simple honey mustard dressing or dip.
Write a review
Print
Ingredients
  1. 1/3 cup honey
  2. 1/3 cup mustard
  3. 1/4 cup extra virgin olive oil
Instructions
  1. Combine the honey and the mustard. Mix well.
  2. Gradually pour in the oil as you mix/whisk. Mix until well combined.
  3. Serve immediately or refrigerate until ready to use.
Notes
  1. You can add 1-2 tsp. apple cider vinegar to this recipe if you are using it as a salad dressing.
Just Take A Bite https://justtakeabite.com/
Honey Mustard III
A simple honey mustard dressing or dip.
Write a review
Print
Ingredients
  1. 1/3 cup honey
  2. 1/3 cup mustard
  3. 1 egg yolk
  4. 3 Tbsp. extra virgin olive oil
Instructions
  1. Combine the honey and mustard. Mix well.
  2. Add the egg yolk. Mix until well combined.
  3. Gradually add the oil while mixing/whisking. Mix until well combined.
  4. Serve immediately or refrigerate.
Notes
  1. The honey mustard will get thicker if it is chilled.
Just Take A Bite https://justtakeabite.com/
Honey Mustard IIII
A simple honey mustard dressing or dip.
Write a review
Print
Ingredients
  1. 1/3 cup homemade mayonnaise (see post for recipe link)
  2. 1/3 cup honey
  3. 1/3 cup mustard
Instructions
  1. Combine all three ingredients. Mix until well combined.
  2. Serve immediately or refrigerate until ready to serve.
Notes
  1. The honey mustard will thicken as it chills.
  2. This honey mustard works well as a dip since it is a little thicker.
Just Take A Bite https://justtakeabite.com/