Home » Kid-friendly Recipes » Page 24

Category: Kid-friendly Recipes

It is so important to cook homemade, healthy food. But it’s not always easy to find kid-friendly recipes.

That’s where I come in. I’ve got hundreds of kid-tested and approved recipes that won’t keep you in the kitchen for hours or stretch your budget too thin.

I focus on allergy-friendly, whole foods. But I always cook with kids in mind. I take all sorts of feeding challenges into account too.

We’ve dealt with every allergy possible, so I’ve created recipes that are gluten free, nut free, dairy free, egg free, soy free, corn free, coconut free and more!

Kid-friendly recipes don’t have to be boring. And they are certainly not limited to chicken nuggets and pizza every night.

A nourished child will enjoy a wide variety of fruits, vegetables, proteins, carbohydrates and fats. Get your kids in the kitchen with you and start cooking! Have fun with food and your kids will learn to love eating.

Classic Vanilla Ice Cream

Classic Vanilla Ice Cream I LOVE ice cream! I make it almost weekly during the summer. I usually try to create unique and fun flavors.

But there really isn’t anything better than the classic vanilla ice cream.

I love to top mine with gluten free hot fudge or dairy free chocolate sauce. A little sprinkle of sea salt really adds to the flavor as well.

Vanilla ice cream goes well with just about anything. Serve it with pie, on brownies or make a sundae.

It is also very easy to make. Add all of the ingredients to a blender. Mix. Process. It’s really that simple.

Through my years of ice cream experimentation I have perfected the classic vanilla ice cream flavor. Now I’m sharing it with you!

The next time you want a refreshing summer dessert, go with a classic – pure, simple vanilla ice cream. It’s delicious and nutritious.
Classic Vanilla Ice Cream 2

Classic Vanilla Ice Cream
A simple and nourishing version of classic vanilla ice cream.
Write a review
Print
Ingredients
  1. 2 1/2 cups. cream (preferably raw)
  2. 1/2 cup whole milk (preferably raw)
  3. 1 - 3 egg yolks (optional)
  4. 1 Tbsp. organic vanilla
  5. 1 Tbsp. tapioca flour
  6. 1/4 tsp. sea salt
  7. 1/2 cup any combination of sweetener (honey, maple syrup, cane sugar)
Instructions
  1. Combine all of the ingredients in a blender. Blend until well mixed.
  2. Adjust sweetness to taste.
  3. Process in an ice cream mixer according to manufacturer's directions.
  4. Transfer the ice cream to a freezer safe container.
  5. Freeze until firm.
Notes
  1. For a very neutral sweetener flavor use cane sugar alone or a combination of half honey and half maple syrup.
  2. The cream and milk can be replaced with coconut milk for a dairy free version. You may have to increase the sweetener a little to get the desired flavor.
Just Take A Bite https://justtakeabite.com/

In order for me to support my blogging activities, I may receive monetary compensation or other types of remuneration for my endorsement, recommendation, testimonial and/or link to any products or services from this blog.

Gluten Free Dairy Free Double Strawberry Shortcake

Gluten Free Dairy Free Double Strawberry ShortcakeWhat’s summer without strawberry shortcake? If you are gluten and dairy free you don’t have to go without!

This shortcake has double the berries – both in and on the cake!  Strawberry puree adds just enough moisture to the cake. Sweetened strawberries on top add a burst of flavor.

Double strawberry shortcake is a great baking project for kids. My three-year old loved helping. He especially liked to mash the berries for the topping. 

For an extra treat, add vanilla ice cream on top of the cake before adding the sweetened strawberries.Gluten Free Dairy Free Double Strawberry Shortcake Collage

If you don’t have any fresh strawberries left you can simply defrost frozen berries. So you can make this treat year round.

My kids definitely approved of double strawberry shortcake. I hope you do too.
Gluten Free Dairy Free Double Strawberry Shortcake 2

Gluten Free Dairy Free Double Strawberry Shortcake
A delicious strawberry shortcake that is allergen-friendly and has a double dose of berries.
Write a review
Print
Cake
  1. 1 cup any combination of gluten free flour (i.e. sorghum, tapioca, rice, amaranth)
  2. 1/2 cup organic cane sugar, sucanat or coconut sugar
  3. 1 tsp. baking powder
  4. 1/2 tsp. baking soda
  5. 1/2 tsp. sea salt
  6. 1/3 cup strawberries, pureed
  7. 2 eggs
  8. 1/4 cup coconut oil, melted
Topping
  1. 2 cups strawberries, hulled
  2. 2 Tbsp. honey, maple syrup, sucanat or coconut sugar
Cake
  1. Heat the oven to 350*F. Grease an 8" square baking dish.
  2. Combine the dry ingredients in a medium bowl.
  3. Add the wet ingredients. Beat until well mixed.
  4. Pour into the greased pan.
  5. Bake for 25 - 30 minutes.
  6. Allow to cool completely.
Topping
  1. Add sweetener to the strawberries.
  2. Mash lightly with a potato masher.
  3. Store in the refrigerator until ready to use.
Shortcake
  1. Serve the cake topped with sweetened strawberries. Add ice cream or whipped cream if desired.
Notes
  1. If using frozen strawberries, allow them to thaw before making the shortcake.
  2. The strawberries can be replaced with blueberries or raspberries.
Just Take A Bite https://justtakeabite.com/

In order for me to support my blogging activities, I may receive monetary compensation or other types of remuneration for my endorsement, recommendation, testimonial and/or link to any products or services from this blog.
If you order by clicking on any of my Tropical Traditions links and have never ordered from Tropical Traditions in the past, you will receive a free book on Virgin Coconut Oil, and I will receive a discount coupon for referring you.

Zucchini Salmon Cakes (grain free, dairy free, nut free)

Zucchini Salmon Cakes - Homemade Dutch Apple Pie

One meal that I know my kids will always devour is salmon cakes. It’s kind of an odd meal for small children to love. But they do. And it makes me so happy.

Recently I decided to change things up a bit and make zucchini salmon cakes since zucchini is in season. I wondered if my kids (one with texture issues and one that is very picky with vegetables) would still enjoy them.

To my great surprise and delight they did!! Both kids loved them!

These zucchini salmon cakes still have the flavor of a salmon cake. But there is actually way more zucchini than salmon in them. So you get the benefits of salmon combined with vegetables. And even if your kids won’t eat another vegetable with the meal you know they are at least getting some. That is my kind of meal!

Zucchini salmon cakes are very easy to make. They also work well for a lot of special diets since they are grain, dairy and nut free.

We had these as our main dish for dinner. But they were also great cold the next day for lunch. I honestly think my kids liked them better that way. I even love them cold for breakfast. It’s a great way to start my day with fish, eggs and vegetables. Plus it’s already prepared, so breakfast is easy.

I serve them with homemade mayonnaise. They would also be good with pesto. These zucchini salmon cakes are even meaty enough to be used as burgers! Put one on a bun with your favorite toppings for a change of pace.

 If you’re looking for a delicious and nourishing summer meal this is it. There is no need to turn on the oven. Just fry up some zucchini salmon cakes. They are great for the whole family. 

Zucchini Salmon Cakes - Homemade Dutch Apple Pie 2 

Zucchini Salmon Cakes
Yields 8
A salmon cake packed with zucchini and lots of flavor.
Write a review
Print
Ingredients
  1. 2 cups finely grated zucchini, drained (about 3 medium zucchinis)
  2. 1 6 oz. can of boneless skinless salmon
  3. 3 eggs
  4. 1/3 cup coconut flour
  5. seasoning to taste (salt, pepper, garlic powder)
  6. Lard, coconut oil or palm shortening for frying
Instructions
  1. Grate the zucchini. Place in a strainer to drain for about one hour. Squeeze out excess liquid.
  2. Combine the zucchini, salmon, eggs, flour and seasoning.
  3. Cover the bottom of a large pan with fat. Heat over medium heat.
  4. Scoop balls of zucchini mixture and form into patties. Place in hot pan.
  5. Cook until browned on bottom, about 7 minutes. Flip. Cook until the other side is browned.
  6. Serve warm.
Notes
  1. If you like the cakes to be really firm add 1/2 cup coconut flour instead of 1/3 cup.
  2. The zucchini salmon cakes can be used as burgers and served on buns.
  3. The zucchini salmon cakes can be served warm or cold, as breakfast. lunch or dinner.
  4. Homemade mayonnaise or pesto make great dipping sauces for the zucchini salmon cakes.
  5. The salmon can be replaced with tuna.
Just Take A Bite https://justtakeabite.com/

In order for me to support my blogging activities, I may receive monetary compensation or other types of remuneration for my endorsement, recommendation, testimonial and/or link to any products or services from this blog.

Simple Strawberry Slush (egg free, dairy free, nut free, gluten free)

This simple strawberry slush is a fun, fruity, allergen-friendly drink for kids and adults. It contains no eggs, dairy, nuts, grains, soy or coconut.Simple Strawberry SlushDo you want to treat your kids to a really fun drink? Try a simple strawberry slush!  It is a perfect way to cool down in the summer and consume fresh, nutritious produce.

I grew up drinking Slushies® all the time. We would bike to the local drug store all summer to get them. Of course they were made of food coloring, high fructose corn syrup and artificial flavor.

This simple strawberry slush is a much-improved version. It only uses a few simple ingredients. It is also very allergen-friendly.

My kids LOVE these. I’ll be honest – my husband and I do too!

As always, the best part for me is that it only takes about 60 seconds to make a simple strawberry slush. Plus I can add collagen for a nutrition boost.

Strawberries work very well in this drink – even frozen! But if you don’t have any or want a different flavor you can try blueberries, raspberries or even cherries. You really can’t go wrong.

This summer the whole family can cool down with a nourishing simple strawberry slush.

Simple Strawberry Slush 2

Simple Strawberry Slush
Serves 2
A fun, refreshing and healthy summer drink that is free of allergens.
Write a review
Print
Ingredients
  1. 6 ice cubes
  2. 3/4 cups strawberries (fresh or frozen) (or other fruit)
  3. 1 - 2 Tbsp. sweetener (honey, syrup, sucanat) (depending on the sweetness of the fruit)
  4. 1/4 tsp. sea salt (optional)
  5. 1/2 tsp. collagen (optional)
Instructions
  1. Combine all of the ingredients in a high powered blender.
  2. Blend until desired consistency.
  3. Serve immediately.
Notes
  1. This makes enough for two children or one adult.
  2. You can blend it completely smooth (for small children) or leave a bit of slushiness from the ice.
  3. Blueberries, raspberries and cherries can be combined with or substituted for the strawberries.
Just Take A Bite https://justtakeabite.com/
 
In order for me to support my blogging activities, I may receive monetary compensation or other types of remuneration for my endorsement, recommendation, testimonial and/or link to any products or services from this blog.

Soaked Gluten Free Cereal

soaked gluten free cerealBreakfast takes on so many forms in my house. One day it might be soup. The next day it might be muffins and fruit. Another day it might be eggs and vegetables. It just depends what we have on hand and what we are in the mood for.

But when it is HOT and I don’t feel like baking or cooking it is so nice to be able to grab a bowl of cereal.  I’ve mentioned before why we don’t buy cereal. That doesn’t mean we don’t enjoy a bowl as a special treat once in a while.

Not buying cereal doesn’t mean you can’t enjoy the flavors you love. I’ve made gluten free “Golden Grahams,” gluten free peanut butter cocoa puffs, grain free granola, grain free muesli, whole wheat cocoa puffs, whole wheat “Golden Grahams,” homemade “Frosted Mini Wheats,” homemade oat squares and soaked granola.

This is another one of my solutions for the cereal dilemma. It is soaked and gluten free. It is great topped with fresh, raw milk.

It also makes a great granola substitute for people like me that don’t tolerate oats. Use it as is or mix nuts, dried fruit and/or coconut into the container of cereal. What a treat for a granola-lover like myself! I love mixing it into whole milk yogurt.

I recommend making a double or triple batch. I don’t think the single batch I made is going to last long. It’s just too good!

I made it with dairy, but this cereal can easily be made dairy free. It is naturally free of eggs, gluten, corn, soy and nuts.

What does your typical breakfast look like? If you’ve already ditched the cereal, now you can treat yourself to a bowl once in a while. 

soaked gluten free cereal 2

Soaked Gluten Free Cereal
A simple cold cereal for busy mornings or a special treat.
Write a review
Print
Ingredients
  1. 2 cups any combination of gluten free flours (i.e. white rice, sorghum, amaranth, tapioca)
  2. 1 cup of soaking liquid - buttermilk, yogurt, kefir, milk + vinegar or water + lemon juice
  3. 1/4 cup butter or coconut oil, melted
  4. 1/4 cup maple syrup or honey
  5. 1/4 cup organic cane sugar, sucanat or coconut sugar
  6. 1/2 tsp. sea salt
  7. 1 tsp. baking soda
  8. 1/2 tsp. organic vanilla
Soak The Flour
  1. Combine the flour and soaking liquid. Cover and let sit 7 - 24 hours.
Bake The Cereal
  1. Add the remaining ingredients to the soaked flour.
  2. Mix well with a hand mixer or stand mixer.
  3. Pour the batter into a greased 8x11 or 9x13 pan.
  4. Bake at 350*F for 25 minutes.
  5. Allow to cool for 10 minutes.
Dry The Cereal
  1. Crumble the cereal into large chunks and place on a baking sheet or dehydrator tray.
  2. Dry at 150*F in an oven or dehydrator for about 3 hours, until cereal is dry and crunchy.
  3. Crumble the cereal into desired sized pieces.
  4. Store in an airtight container in the cupboard or the freezer.
  5. Serve topped with milk or mixed into yogurt.
Notes
  1. This is a very portable snack for kids.
  2. The cereal can be turned into muesli/granola by adding chopped nuts, dried fruit and/or coconut.
Just Take A Bite https://justtakeabite.com/

In order for me to support my blogging activities, I may receive monetary compensation or other types of remuneration for my endorsement, recommendation, testimonial and/or link to any products or services from this blog.

Blueberry or Cherry Yogurt

No need to buy flavored yogurt. Make your own! Blueberry or cherry yogurt are a cinch with just a few simple ingredients and none of the bad stuff.Blueberry Or Cherry Yogurt - Homemade Dutch Apple Pie

Yogurt is one of my favorite foods! But if you gave me a container of store-bought flavored yogurt I probably wouldn’t touch it.

Most yogurt contains artificial flavor and color in addition to fillers and chemical sweeteners. Regardless of the health status of most yogurts, I think they are just way too sweet. Anybody else?

My family’s palates have definitely changed when it comes to how sweet our food is. So I’ve been making yogurt at home for years. Sometimes I make it from our raw milk. When we don’t have enough milk to spare I just buy plain, whole milk yogurt and add our own flavor.

When flavoring your own yogurt the possibilities are endless!  I come up with all sorts of creations, depending on what we have in the house. It’s fun to have variety.

I like to make cookies ‘n’ cream yogurt when we have homemade cocoa puffs, oreos® or brownies on hand. I’ve even been known to make caramel apple, strawberry swirl, cherry pie and a few other crazy flavors.

But two of our favorites (and two of the easiest) are blueberry and cherry. Just a few simple ingredients and you have the best yogurt you’ve ever tasted. No overpowering sweetness. No artificial flavor. Just pure, simple ingredients.

With blueberries and cherries in season this yogurt makes the perfect breakfast or snack any time of day. When the fresh fruit isn’t in season any more you can still enjoy delicious yogurt using frozen fruit.

If the flavor and health benefits aren’t enough, making your own flavored yogurt from large containers of plain yogurt really saves money. A single serving yogurt is about $1.00. You can buy a tub of plain yogurt for about $2.00 and make six servings out of it. That is a huge savings.

I like to take five minutes in the evening to prepare individual yogurts. Then breakfast is ready when we get up in the morning. You can even take it on the go.

If you like fruit on the bottom yogurt you’ll love my versions of blueberry and cherry yogurt. Stir in some homemade granola for a complete breakfast treat. What is your favorite yogurt flavor?

Blueberry Or Cherry Yogurt - Homemade Dutch Apple Pie 2

This post is linked to From The Archives Friday.

Blueberry or Cherry Yogurt
Serves 1
A quick and flavorful variation of yogurt without any fillers.
Write a review
Print
Ingredients
  1. 1 cup whole milk yogurt or coconut milk yogurt
  2. 2 Tbsp. pure blueberry juice or cherry juice
  3. 1 Tbsp. maple syrup
  4. 1/4 cup fresh or frozen blueberries or cherries
Instructions
  1. Combine the yogurt, juice, syrup and fruit.
  2. Serve immediately or store in the refrigerator until ready to eat.
Notes
  1. If using frozen fruit it is best to let the yogurt sit for at least one hour to let the fruit thaw.
Just Take A Bite https://justtakeabite.com/

In order for me to support my blogging activities, I may receive monetary compensation or other types of remuneration for my endorsement, recommendation, testimonial and/or link to any products or services from this blog. It will not change the cost of any products for you.

Dairy Free Egg Free Creamy Butterscotch Pudding

df ef butterscotch pudding

Homemade pudding is such a tasty treat! But typical pudding is made with milk and eggs. That eliminates pudding for many people with allergies.

I recently made a dairy free chocolate pudding for my son. It was a huge hit. But over the last few weeks I’ve been wondering if eggs are bothering him again. I didn’t want to take away his special treat.

So I experimented with a new pudding that is also egg free.

This butterscotch pudding is creamy and delicious! It is so “buttery” that I almost called it caramel pudding. It is also very healthy with its gut-healing gelatin.

My son likes to eat it with crushed graham crackers mixed in. It’s like his own little pudding trifle.

I just love that it’s safe for him to eat, easy to make and filled with good stuff.

Are you looking for an easy treat that is dairy, egg, nut and gluten free? This is it! It only takes about ten minutes to make so you can have it in no time.

df ef butterscotch pudding 2

Dairy Free Egg Free Creamy Butterscotch Pudding
Serves 4
A creamy butterscotch pudding that is gluten, egg and dairy free.
Write a review
Print
Ingredients
  1. 1 cup coconut milk
  2. 3/4 cup milk substitute (oat, rice, almond, etc.)
  3. 3/4 cup coconut sugar or sucanat
  4. 1 tsp. gelatin
  5. 2 1/2 Tbsp. tapioca flour
  6. 1/4 tsp. sea salt
  7. 1 tsp. organic vanilla
Instructions
  1. In a medium saucepan combine the milks, sugar, gelatin, flour and salt.
  2. Let set one minute while gelatin is absorbed.
  3. Cook pudding over medium heat, whisking frequently.
  4. When pudding thickens remove from heat (this takes about 10 minutes).
  5. Add vanilla. Whisk.
  6. Pour into serving dishes.
  7. Serve immediately or refrigerate. The pudding will become firmer as it cools.
Just Take A Bite https://justtakeabite.com/


In order for me to support my blogging activities, I may receive monetary compensation or other types of remuneration for my endorsement, recommendation, testimonial and/or link to any products or services from this blog.

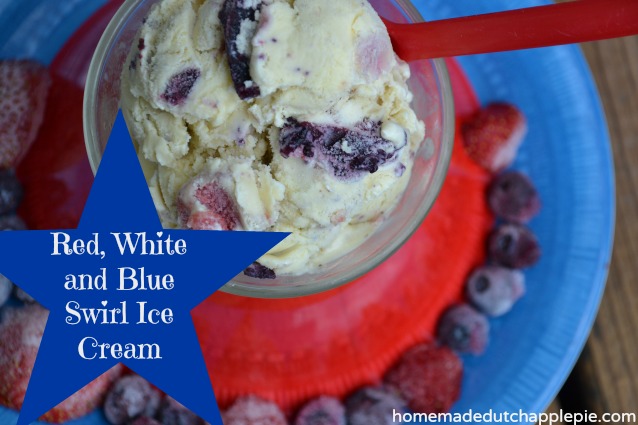
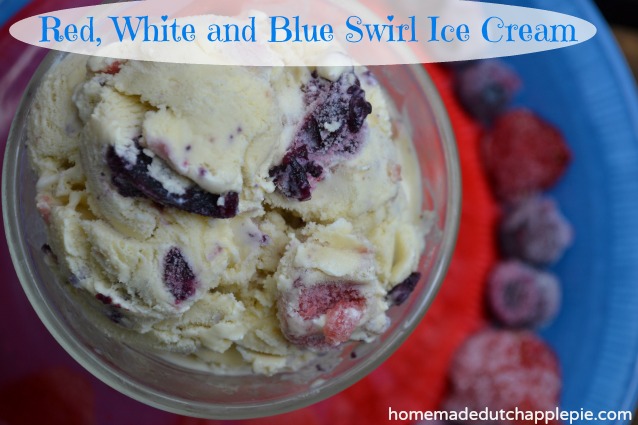
Red White and Blue Swirl Ice Cream

Red white and blue swirl ice cream is a colorful and festive ice cream made with raw cream, fresh fruit and grass-fed gelatin. The perfect summer treat!red white and blue swirl ice creamRed, white, and blue in your ice cream too? YES!
As I was planning my weekly ice cream flavor recently I decided to make something for Independence Day.

There are plenty of red, white, and blue foods you can buy at the store. But it’s hard to find one without food coloring.

This red, white, and blue swirl ice cream uses only real ingredients to create a colorful treat.

Raw cream, egg yolks, and natural sweeteners are used as the ice cream base. Then as an added bonus it has grass-fed gelatin (use code TAKE10 for 10% off) to bump up the nutrition.red white and blue swirl ice cream 3

You can make it with dairy or without. We made a batch of each so the whole family could enjoy it!

My kids love this fun, festive ice cream. Not to mention the swirl is great plain!

There is no need to resort to junk food to celebrate a holiday with bright colors. Real food is good food. And it can be just as colorful and flavorful.

This Independence Day enjoy a big dish of red, white, and blue swirl ice cream.

red white and blue swirl ice cream 2

Red, White and Blue Swirl Ice Cream
A colorful and festive ice cream made with real ingredients.
Write a review
Print
Red Swirl
  1. 1 cup strawberries (or raspberries) (fresh or frozen)
  2. 1 tsp. gelatin
  3. 1/3 cup sweetener (cane sugar, coconut sugar, honey)
Blue Swirl
  1. 1 cup blueberries (fresh or frozen)
  2. 1 tsp. gelatin
  3. 1/3 cup sweetener (cane sugar, coconut sugar, honey)
Ice Cream
  1. 2 1/2 cups cream (preferably raw) (can be replaced with coconut milk)
  2. 1/2 cup whole milk (preferably raw) (can be replaced with coconut milk)
  3. 1/2 cup sweetener (any combination of cane sugar, coconut sugar, honey or maple syrup)
  4. 1 Tbsp. organic vanilla
  5. 1 - 3 egg yolks (optional)
  6. 1 Tbsp. tapioca flour or arrowroot (optional, helps thicken, especially if not using yolks)
  7. 1/4 tsp. sea salt
Red and Blue Swirls
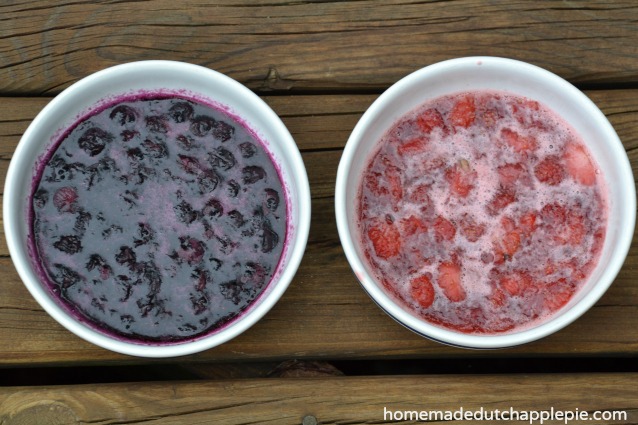
  1. In a small saucepan combine the strawberries and gelatin.
  2. Let sit one minute.
  3. Add the sweetener.
  4. Cook over med-low heat until mixture begins to bubble.
  5. simmer for two minutes.
  6. Pour strawberry mixture into a bowl.
  7. Refrigerate until fully gelled, about 30 minutes.
  8. Repeat this process with the blueberries.
  9. Set aside half of the mixtures for later use.
Ice Cream
  1. Cut the strawberry and blueberry jellies into small chunks if really firm. Set aside.
  2. In a blender combine the cream, milk, sweetener, vanilla, egg yolks, flour and salt. Blend until smooth.
  3. Process the ice cream in an ice cream mixer according to manufacturer's directions.
  4. During the last 2 minutes of processing add the strawberry and blueberry jelly.
  5. Transfer the ice cream to a freezer-safe container.
  6. Freeze until firm.
Notes
  1. This recipes makes enough strawberry and blueberry swirl for two batches of ice cream. You can also use the leftover swirl to eat plain or use as jelly.
Just Take A Bite https://justtakeabite.com/

Honeyed-Dew

honeyed-dewI often serve some kind of fruit side dish with our dinner. I try to have variety or simply make fruit salads with whatever fruit we have on hand and is in season.

Recently as I was preparing dinner I was trying to think of what to do with the fruit we had on hand. My son is allergic to grapes and bananas. So those were out. That left honeydew.

We all enjoy honeydew plain. But I wanted to spruce it up a bit. So our honeydew became honeyed-dew.

The honeyed-dew only took about 30 seconds to prepare. It was so refreshing at dinner, and everyone liked it. My son kept sucking on the fruit like a popsicle.

You can make it in a bowl to serve to a group or put the honeydew on sucker or popsicle sticks for a cool treat kids will eat any time of day.

If you don’t have honeydew you can use a different type of melon. You could even use grapes or berries. No matter what fruit you choose this is a healthy, simple side dish or snack.honeyed-dew 2

Honeyed-Dew
A simple and refreshing side dish or fun treat for kids.
Write a review
Print
Ingredients
  1. 1 cup honeydew, cut into chunks
  2. 1 Tbsp. honey
  3. 1/4 tsp. sea salt (optional)
Instructions
  1. Place the honeydew in a bowl or on sticks.
  2. Drizzle with honey.
  3. Sprinkle with salt.
  4. Mix or spread over the fruit.
  5. Freeze the fruit for about 60 minutes.
  6. Stir before serving to make sure the syrup covers the fruit.
Notes
  1. This recipe can easily be doubled, tripled, etc. depending on how many you are serving.
  2. The "popsicles" can stay in the freezer for an easy snack.
Just Take A Bite https://justtakeabite.com/

Homemade Chocolate Covered Toffee

chocolate covered toffee

Did you grow up eating candy bars like Heath and Skor? I did. They were two of my favorites!!

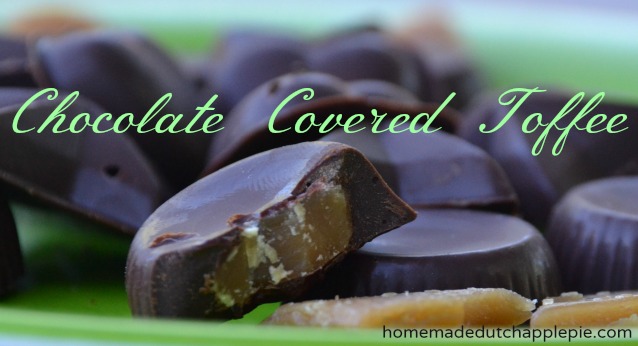
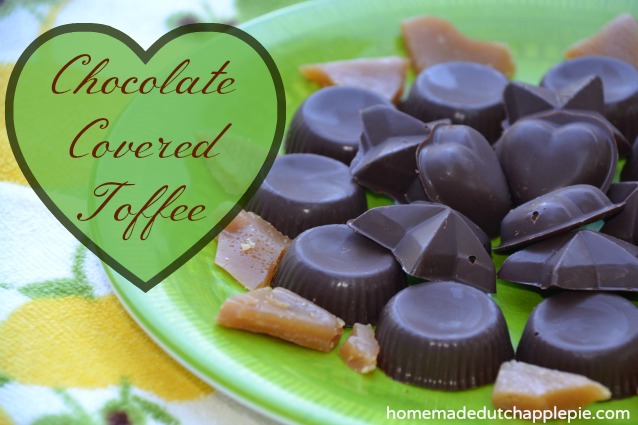
I recently made a homemade version of chocolate covered toffee. It reminds me of my childhood favorites. Milk chocolate outside. Buttery toffee inside.

Homemade Chocolate Covered Toffee

The best part is that these chocolates only contain real ingredients and are super easy to make!

I made them for a Father’s Day treat. They would also be perfect for Valentine’s Day. I wouldn’t mind having them on hand any time for a sweet treat.

Easy Grain-Free Dessert

I used candy molds to make them into individual chocolates. You could also make a batch in a large pan and break it into pieces to be more like a candy bar. Either way you can’t go wrong.

These chocolates are gluten, grain, nut and egg free. So they are a perfect treat for someone with allergies.

chocolate covered toffee 2

Homemade Chocolate Covered Toffee
Yields 30
Homemade buttery toffee topped with milk chocolate.
Write a review
Print
Ingredients
  1. 3 Tbsp. honey
  2. 1/4 cup butter
  3. 1/2 cup brown cane sugar, sucanat or coconut sugar
  4. 1/4 - 1 tsp. salt (to taste)
  5. 12 oz. chocolate chips
Instructions
  1. In a small sauce pan combine the honey, butter, sugar and salt.
  2. Cook over medium heat until the mixture begins to bubble, stirring frequently.
  3. Continue to simmer the mixture for about 5 minutes.
  4. Remove from heat and pour the toffee into a parchment lined 8" baking dish.
  5. Allow to cool in the refrigerator for about 20 minutes.
  6. While the toffee is cooling melt the chocolate chips over a double boiler.
  7. Fill the bottom of candy molds with chocolate (1/4 - 1/3 full) or pour 1/3 of chocolate into a parchment lined 8" baking dish.
  8. Allow the chocolate to firm in the fridge.
  9. When the toffee is cool enough to handle, break or cut it into small pieces (if using molds).
  10. Place a piece of toffee on top of the chocolate layer in each mold or lay the entire toffee piece on the layer of chocolate in a baking pan.
  11. Top the toffee with the remaining melted chocolate.
  12. Allow to cool in the refrigerator until completely firm (at least 30 minutes).
  13. Remove chocolates from mold or break chocolate into bars/large chunks.
  14. Store in a closed container in the refrigerator.
Notes
  1. If you are making individual chocolates, there will be leftover toffee. This makes enough toffee for about two batches of chocolates (use 24 oz. chocolate chips to use up all of the toffee).
  2. The toffee is great on its own.
  3. If you add extra honey the toffee will be more like chewy caramel for chocolate covered caramels.
Just Take A Bite https://justtakeabite.com/