Home » Kid-friendly Recipes » nut free » Page 11

Category: nut free

Homemade lunch meat makes packing healthy lunch a breeze. Plus it's great for little ones too!

Homemade Lunch Meat

Lunch time just got easier and healthier with homemade lunch meat! It is perfect for school lunches or even for babies. Add it to your to-do list!!

Homemade lunch meat makes packing healthy lunch a breeze. Plus it's great for little ones too!

Warning.

You may want to cover your ears.

I’m going to use the dreaded L word – LUNCHES.

There. I said it.

As much as I don’t like to think about it, before we know it we’ll be packing school lunches again.

Homemade lunch meat makes packing healthy lunch a breeze. Plus it's great for little ones too!

You want to send your kids to school with nutritious food. But you also don’t want to make their lunches too different or “weird” (liver pate or sardines anyone?). Not to mention you don’t want to spend an hour making lunch.

Just the other day my seven year old asked why I never put “normal” sandwiches in her lunch like her friends have. She mentioned peanut butter and jelly and ham and cheese.


Need more ideas? Check out Katie’s healthy lunch box e-book!


I don’t send peanut products often because I don’t want to make the school an unsafe place for those with allergies.

The ham and cheese? Well, we just don’t have any lunch meat.

Until now.

Homemade lunch meat makes packing healthy lunch a breeze. Plus it's great for little ones too!

Did you know you can make your own lunch meat?

Homemade lunch meat is so easy to make. It literally takes five minutes of hands on time.

Want to learn how?

Head on over to Kitchen Stewardship where I share my simple homemade lunch meat recipe.

And don’t forget to check out the Healthy Lunch Box ebook!

Homemade lunch meat makes packing healthy lunch a breeze. Plus it's great for little ones too!

In need of a few more ideas for the lunch box? Try some of these:

Sweet potato salmon burgers

Teff and sorghum cherry bars

Gluten free pizza crackers

Strawberry apple salad

Fruit on the bottom  yogurt

Soaked gluten free bread (great for sandwiches with lunch meat!!)

Gluten free crackers

Quinoa bars

Salmon salad

In order for me to support my blogging activities, I may receive monetary compensation or other types of remuneration for my endorsement, recommendation, testimonial and/or link to any products or services from this blog.

Five Minute Peach Jam | Homemade Dutch Apple Pie

Five Minute Peach Jam

Peach jam in five minutes? Yes! And only three ingredients. Simple, healthy and bursting with flavor. Five minute peach jam is a great way to capture summer in a jar.

Five Minute Peach Jam | Homemade Dutch Apple Pie

Growing up I ate one thing on my toast – grape jelly. Always.

Now that I’m older and cook for myself and my family I like to have a lot more variety. So I make strawberry jam, cherry jam and raspberry jam.

This year I tried peach jam. Wow! It’s like summer in a jar.

Chop. Mix. Simmer.

For real – that is all there is to it. Cut up fresh peaches, add sweetener and grass-fed gelatin. Simmer about five minutes.

Fresh peach jam awaits.

You can even make peach jam without any sweetener if your peaches are sweet enough. Else a couple tablespoons of sweetener really kicks up the flavor.

Five Minute Peach Jam | Homemade Dutch Apple Pie

Let the kids help.

This is a great project for getting your kids in the kitchen. Peal and pit the peaches and let your child cut them into small chunks. A dull knife is just fine for chopping peaches.

Then let them measure the sugar and gelatin.

Older kids can help with the cooking as well. If you are making a pureed jam this is a great way to teach older kids how to use an immersion blender.

Five Minute Peach Jam | Homemade Dutch Apple Pie

Spread it on. Stir it in.

Once the jam has chilled for a few hours it will be gelled enough to serve. Spread it on homemade gluten free bread, sourdough bread or your favorite muffin. My kids couldn’t get enough of this peach jam on freshly baked bread alongside a big bowl of soup.

Another great way to use peach jam is mixed into plain, whole milk yogurt. It makes instant peach yogurt without any thickeners, gums or added flavorings.

Spruce up your oatmeal by stirring in peach jam. Top with some crispy pecans and breakfast is served.

Five Minute Peach Jam | Homemade Dutch Apple Pie

Stock the freezer.

This recipe is for a small batch to eat fresh. You can easily triple it (or more!) and freeze the jam. Then you can enjoy it all year long.

Peach jam in the middle of winter is a real treat! Not to mention it’s very cost-effective. One jar of homemade jam costs about $1.25 (give or take).

The same amount of quality store-bought peach jam would cost about $5.00.

Grab a few peaches and your kids and mix up a quick batch of five minute peach jam. Then enjoy this allergen free spread all year long to change up your breakfast.

What is your favorite type of jam or jelly? Do you make your own?

Five Minute Peach Jam | Homemade Dutch Apple Pie

Five Minute Peach Jam
Yields 1
Simple and healthy, five minute peach jam is a great way to capture summer in a jar. Only three ingredients and tons of flavor.
Write a review
Print
Ingredients
  1. 1 cup peaches, peeled, pitted, cut into small pieces (juice reserved)
  2. 3/4 tsp. grass-fed gelatin
  3. 1 - 3 Tbsp. organic cane sugar or honey
Instructions
  1. Add peaches and juice to a small saucepan.
  2. Add the gelatin and stir. Let sit 1 minute.
  3. Add the sugar.
  4. Bring to very low simmer and let cook 5 minutes, stirring frequently.
  5. Mash or puree if desired.
  6. Pour into a half pint jar.
  7. Chill until gelled.
  8. Store in the refrigerator for up to 3 weeks or in the freezer for up to 1 year.
Notes
  1. An easy way to reserve the peach juice is to cut the peach directly over the pan and let the juice drip down while you cut.
  2. You can leave out the sweetener to make this sugar free jam.
  3. This makes one half pint of jam. Multiply the recipe by how many jars you want to make.
Just Take A Bite https://justtakeabite.com/

In order for me to support my blogging activities, I may receive monetary compensation or other types of remuneration for my endorsement, recommendation, testimonial and/or link to any products or services from this blog.

Peaches and Cream Overnight Oats | Homemade Dutch Apple Pie

Peaches and Cream Overnight Oats

Peaches and cream overnight oats make a satisfying breakfast. Prepared in advance, they are a grab ‘n’ go breakfast everyone will love. Use fresh peaches in the summer and frozen or canned peaches in the winter.

Peaches and Cream Overnight Oats | Homemade Dutch Apple Pie

I try my best to do breakfast preparation in advance. In the morning I want everything ready to go.

When my husband is getting ready for work…breakfast is ready.

When one kid wakes up early and is instantly begging for food…breakfast is ready.

When the baby needs to nurse and everyone else is hungry…breakfast is ready.

Since we don’t eat store-bought cereal I need other quick and easy breakfasts that are ready for the family even if I’m busy.

Peaches and cream overnight oats are the perfect solution.

Peaches and Cream Overnight Oats | Homemade Dutch Apple Pie

Simple, simple, simple.

It only takes about five minutes to prepare overnight oats. I line up jars for however many servings I’m going to make. Then just add the ingredients to each jar and mix.

Peaches and cream overnight oats only contain five ingredients. All of them except for the peaches are pantry and refrigerator staples. So you can whip up a batch just about any time.

Give them a boost.

In addition the five base ingredients you can add collagen for protein and egg yolk for vitamins. This will make peaches and cream overnight oats a very balanced breakfast. That includes three components:

  1. Proteinyogurt, collagen, egg yolk
  2. Carbohydrates – oats, peaches, maple syrup
  3. Fat – whole milk yogurt or coconut yogurt

One other thing I love is that the overnight soaking makes the oats much better for you!

Peaches and Cream Overnight Oats | Homemade Dutch Apple Pie

Get ready to host.

These overnight oats are great for the whole family on a school day morning. But that’s not all.

Peaches and cream overnight oats are fancy enough for hosting overnight guests or a brunch. Mix up a bunch of small jars of the oats and leave the peaches on top. They look so elegant. Plus you can just pull them out of the fridge in the morning and have time to visit with your guests. No cooking necessary.

Change it up.

If you aren’t a fan of peaches in your yogurt or you just don’t have any on hand you can swap another fruit. Stone fruits like plums, apricots and nectarines work very well.

Or you can use berries and cherries. They can be fresh or go right from the freezer to the oat mixture. By morning they will be thawed and ready to go!

No matter what flavor you choose overnight oats are a perfect prep ahead breakfast. You can make them for a busy weekday morning or even make a batch while you enjoy some end of summer travel. All of the ingredients are available wherever you go.

On the go.

Peaches and cream overnight oats are also great for school lunches and snacks. Just mix it up the night before. Put a lid on and pack it in the lunch box. It is ready to go when your child is ready to eat.

By using gluten free oats this breakfast is not only delicious but also gluten, egg, nut, corn, soy and rice free. If you use coconut yogurt it is also dairy free. There is a version for just about everyone!

In need of an easy breakfast? Peaches and cream overnight oats are the way to go!

Peaches and Cream Overnight Oats | Homemade Dutch Apple Pie

Peaches and Cream Overnight Oats
Serves 2
Peaches and cream overnight oats make a satisfying breakfast. Prepared in advance with fresh peaches, they are a grab 'n' go breakfast everyone will love.
Write a review
Print
Ingredients
  1. 1 cup old fashioned oats (be sure to get gluten free oats if you are gluten free)
  2. 1 cup plain whole milk yogurt or coconut yogurt
  3. 4 Tbsp. maple syrup (adjust to your liking)
  4. 1/4 tsp. unrefined sea salt
  5. 1 large peach, peeled and cut up (over oats)
  6. optional - 2 tsp. collagen, 1 egg yolk
Instructions
  1. Divide the oats, yogurt, maple syrup and salt (and collagen and egg yolk if desired) between two small jars or dishes. Mix well.
  2. Cut up the peaches over the jars so the juice drips into the jars.
  3. Cover and refrigerate 7-24 hours.
  4. Stir in peaches when ready to eat.
Just Take A Bite https://justtakeabite.com/

In order for me to support my blogging activities, I may receive monetary compensation or other types of remuneration for my endorsement, recommendation, testimonial and/or link to any products or services from this blog.

Grain-free peach cobbler creamsicle

Grain-Free Peach Cobbler Creamsicles

Nothing says summer like fresh peaches! Enjoy them in a frozen treat with these simple grain-free peach cobbler creamsicles. Just a few whole-food ingredients and no refined sweeteners! Your kids will go crazy for this special summer dessert.

Looking for a delicious way to cool down in August? These grain-free peach cobbler creamsicles are made with just a few simple ingredients and kids love them! Put your extra peaches to good use with this fun summer treat. #peaches #summer #frozentreat #popsicle

If you want to know what summer tastes like all you have to do is bite into a fresh, juicy peach. There is nothing quite like it.

Peach cobbler creamsicles transform that summer flavor into a frozen treat you can’t resist.

Start with a simple grain free crumble that only has three ingredients! A quick mix by hand and it’s in the oven.

While the cobbler is baking you can mix up the rest of the creamsicle. Whole milk yogurt and raw milk are combined with pure maple syrup for a sweet, creamy base.

Then cut up fresh peaches right over the bowl so you don’t miss a drop of the juice. Stir them in to create peach cream.

Once the cobbler is done you can mix it into the creamy mixture, pour it into molds and freeze.

Looking for a delicious way to cool down in August? These grain-free peach cobbler creamsicles are made with just a few simple ingredients and kids love them! Put your extra peaches to good use with this fun summer treat. #peaches #frozentreat #summerfood #kidfood

How to Use up Extra Peaches

My kids went crazy for these peach cobbler creamsicles! In fact my husband did too.

I happened to make them when it as about 90 degrees here. Talk about a refreshing treat when it’s hot!

Peach cobbler creamsicles are very allergen friendly. You can swap coconut milk and yogurt for the dairy. They are naturally free of grains, gluten, eggs, nut, corn and soy.

If you can’t have or don’t have tapioca you can substitute for it with cassava or rice. Note that it will not be grain free if you use rice. But it will still be gluten free.

How to Feed Kids that Don’t Like Chunks

If your child doesn’t like food with chunks simply puree all of the ingredients before filling the molds. You’ll still get the peach cobbler flavor in a smooth form. Go with whatever texture works!

When I think of summer I envision sitting on the porch, soaking up the sunshine with peach juice dribbling down my chin (because there is no other way to eat a fresh peach!). Now that summer vision is kicked up a notch with peach cobbler creamsicles (you can let them dribble down your chin too).

Looking for a delicious way to cool down in August? These grain-free peach cobbler creamsicles are made with just a few simple ingredients and kids love them! Put your extra peaches to good use with this fun summer treat. #peaches #frozentreat #summerfood #kidfood

What is the Best Popsicle Shape

When it comes to popsicles I’m kind of old fashioned. I like to use cups and popsicles sticks instead of fancy molds (though these certainly would be a great gift!!!). It reminds me of how I made them as a child. These creamsicles work with whatever you’ve got.

You can use a traditional mold or even these silicon molds to make them more like push pops.

Peach cobbler creamsicles are so refreshing and bursting with flavor, yet full of healthy ingredients. That is an essential part of a great summer.

If you are celebrating a summer birthday these would also make a great birthday treat.

Are you a peach fan? What is your favorite peach treat?

Looking for a delicious way to cool down in August? These grain-free peach cobbler creamsicles are made with just a few simple ingredients and kids love them! Put your extra peaches to good use with this fun summer treat. #peaches #frozentreat #summerfood #kidfood

Grain Free Peach Cobbler Creamsicles
Yields 4
Nothing says summer like fresh peaches! Enjoy them in a frozen treat with these simple grain free peach cobbler creamsicles.
Write a review
Print
Cobbler
  1. 1/4 cup tapioca flour (or cassava or white rice)
  2. 2 tsp. butter (or lard or coconut oil)
  3. 2 tsp. pure maple syrup (or honey)
Creamsicle
  1. 3/4 cup plain whole milk yogurt or coconut yogurt
  2. 1/4 cup whole milk (raw if possible) or coconut milk
  3. 3-4 Tbsp. pure maple syrup (adjust to your liking)
  4. 1/8 tsp. unrefined sea salt
  5. 1 large peach, cut into small chunks, juice reserved
Instructions
  1. Heat the oven to 350*F. Line a baking sheet with parchment paper.
  2. In a bowl combine the flour, butter and syrup until crumbly.
  3. Spread on the parchment paper. Bake for 20 minutes.
  4. Allow to cool and crumble into small chunks.
  5. In a bowl combine the yogurt, milk, syrup and salt.
  6. Cut the peach over the bowl so the juice drips into the yogurt.
  7. Stir in the peaches.
  8. Stir in the cooled cobbler.
  9. Pour into popsicle molds and freeze until solid.
Just Take A Bite https://justtakeabite.com/

In order for me to support my blogging activities, I may receive monetary compensation or other types of remuneration for my endorsement, recommendation, testimonial and/or link to any products or services from this blog.

This post is linked to Savoring Saturdays.

Fruity Breakfast Cake | Homemade Dutch Apple Pie

Fruity Breakfast Cake: Super Healthy Kids Post

Fruity breakfast cake is a great way to start the day! Soaked gluten free grains and healthy fat mixed with fresh fruit is a winning combination.

Fruity Breakfast Cake | Homemade Dutch Apple Pie

Cake for breakfast?

You bet! When made with colorful fruit and nutritious ingredients, cake can be great way to start the day and help your kids enjoy fruit in a different way. Fruity Breakfast Cake tastes delicious which is important so that kids will eat something and feel satisfied until lunch!

Fruity breakfast cake is a combination of whatever berries, cherries or stone fruit you like topped with a low sugar, soaked cake.  It is also free of many allergens – gluten, dairy, nuts, corn and soy.

What makes a breakfast nutritious?

Balance!

Create a balance of macronutrients by pairing the breakfast cake with a protein like scrambled eggs cooked in coconut oil or butter, sausage or whole milk yogurt. Then you get carbohydrates, protein and fat in your meal. This is great for providing energy and balancing blood sugar.

Fruity Breakfast Cake | Homemade Dutch Apple Pie

Want to hear more about how to create a balanced breakfast and how to make this delicious breakfast cake? Head over to Super Healthy Kids for the full post and recipe!

Homemade Tallow French Fries | Homemade Dutch Apple Pie

Homemade Tallow French Fries

Nothing goes better with your grilled burger than fresh-out-of-the-pan tallow french fries! No vegetable oil. No fillers. Just pure potato and real fat.

Homemade Tallow French Fries | Homemade Dutch Apple Pie

You’ve got the grill fired up. The burgers are under way. There is a pile of fresh vegetables from the garden to create a salad.

But something is missing.

What is the perfect side with a grilled burger and garden vegetables? French fries, of course!

Convenience Food for Real Foodies

There is very little convenience food that I buy. But I confess that french fries are almost always in my freezer. They are easy when you don’t have time to cut up potatoes.

Plus with a kid that is allergic to wheat, rice and corn but refuses to eat potatoes in any form except french fries or chips…you serve french fries a little more than you would like.

Since I don’t really care for the vegetable oils in the frozen variety I do sometimes make my own tallow french fries.

If you have never had homemade french fries you are really missing out! They are better than anything you’ll get from a bag or even from a restaurant.

My whole family goes crazy for these tallow french fries. I go crazy for them too…because they are made with healthy fat and have no fillers, gums or acids. Some frozen french fries even have corn! A big no-no with a corn allergy.

Homemade Tallow French Fries | Homemade Dutch Apple Pie

The Secret to Crispy Homemade French Fries

When making homemade tallow french fries there is an important step you can’t forget. Soak and dry the potatoes! This is critical so they will fry up nicely. The soaking removes some of the starch. And oil and water really don’t mix.

Another key to great french fries is using enough fat. I don’t have a fryer. I don’t like to use up all of my tallow at one time either. But I do make sure that there is a plenty of fat in the pan. When I’m done making the french fries I pour the leftover tallow back into a jar to use later.

Of course the final step is to sprinkle the tallow french fries with lots of quality unrefined sea salt. The saltier the better in my opinion.

Then pair them with quality ketchup or make your own!

Homemade Tallow French Fries | Homemade Dutch Apple Pie

Freshly Cooked French Fries

Homemade tallow french fries are best eaten fresh out of the pan. There really is nothing like it.

But if you have leftovers (something that pretty much never happens here with homemade fries) you can reheat them in the oven.

You could make a big batch when you have some time in the kitchen and freeze them so you have homemade french fries on hand for quick meals.

French Fries Without Potatoes

Maybe you don’t like potatoes? Or maybe you’re like me and don’t tolerate them?

Try another vegetable! You can use the same cooking method with carrots, parsnips, sweet potatoes and rutabagas. Pretty much any root vegetable will work.

Is your mouth watering yet? I know mine is. Grab some potatoes, tallow and salt. Fry up the best french fries you’ve ever tasted.  Just a warning…your family will want them all the time once they’ve tried tallow french fries.

Have you ever made your own french fries?

Homemade Tallow French Fries | Homemade Dutch Apple Pie

Homemade Tallow French Fries
Serves 4
Homemade french fries with real fat and real salt.
Write a review
Print
Ingredients
  1. 3 medium russet potatoes
  2. sea salt to taste
  3. tallow (enough to fill pan)
Instructions
  1. Peel the potatoes. Cut into 1/2" sticks.
  2. Soak the potatoes in cold water for 30 minutes.
  3. Dry the potatoes completely.
  4. Heat tallow in a large skillet over medium heat (use enough to fill the pan about 1/4" deep).
  5. Cook the potatoes in the tallow until golden, turning once in a while to make sure all sides are browned, about 10 - 15 minutes.
  6. Place the finished fries on a paper towel and sprinkle liberally with sea salt.
  7. Serve immediately.
Notes
  1. Lard or palm shortening will work in place of the tallow.
  2. Any root vegetable will work in place of the potato.
  3. Store leftover fries in a sealed container in the refrigerator. Heat in the oven to warm.
Just Take A Bite https://justtakeabite.com/
 In order for me to support my blogging activities, I may receive monetary compensation or other types of remuneration for my endorsement, recommendation, testimonial and/or link to any products or services from this blog.

Sweet Potato Salmon Burgers | Homemade Dutch Apple Pie

Sweet Potato Salmon Burgers

Get out of your summer burger rut with these sweet potato salmon burgers! They are simple, nutritious and even make great finger food for the little ones.Sweet Potato Salmon Burgers | Homemade Dutch Apple Pie

You’ve had the grill going all summer with the usual fare – hamburgers, hot dogs, barbecue chicken.

Those are all great. But are you ready to change it up?

Sweet potato salmon burgers are a delicious alternative to traditional hamburgers that you can eat all year long.

They only require a few simple ingredients and minimal preparation time. Sweet potato salmon burgers make a great, quick weekday lunch.

Keep them in mind when it’s time to pack lunches again! They are great eaten cold.Sweet Potato Salmon Burgers | Homemade Dutch Apple Pie

You can decide if you make them heavier or lighter on the meat or potato. By using less salmon these burgers make a very budget-friendly meal.

I love how easily these burgers come together. All of the ingredients can be eaten as-is so it’s just mixing and warming. No need to worry about how well done they are.

But what I love even more is how much my kids enjoy them.

You can eat them on a bun or just dip them in ketchup.

It is fun and easy to spruce up sweet potato salmon burgers.

We top them with homemade pesto. You could eat them open face with a fried egg. Here are some other delicious toppings for sweet potato salmon burgers:

Now that my little one is eating a lot of solids I have to cook things she can eat as well. Sweet potato salmon burgers make a perfect finger food.

All of the ingredients are safe for babies six months and older. Break up the burger into small pieces and let them feed themselves.Sweet Potato Salmon Burgers | Homemade Dutch Apple Pie

Let’s not forget the nutrition factor!

Sweet potato salmon burgers have healthy starch and vitamins from the sweet potatoes. The egg yolks are packed with vitamins. Salmon has essential fatty acids. Then they are cooked in healthy fat for a balance of protein, carbohydrates and fat all in one burger.

Be sure to make a big batch of sweet potato salmon burgers. You can freeze some for later. And leftovers are great cold or warm.

Add pieces of burger to your salad, cut it up for dipping or mix it into your scrambled eggs! I like to slather mine with pesto and eat it plain.

If you don’t tolerate potatoes you can use another orange vegetable like pumpkin or squash. The burgers will still taste just as great.

Are you ready for something different on your grill? Sweet potato salmon burgers are the perfect summer or year round meal.Sweet Potato Salmon Burgers | Homemade Dutch Apple Pie

Sweet Potato Salmon Burgers
Yields 6
A light burger perfect for summer picnics. It even makes great finger food for babies.
Write a review
Print
Ingredients
  1. 1 cup cooked and mashed sweet potato (or pumpkin or carrot)
  2. 6 - 14 oz. canned boneless skinless salmon (one 6 oz. can, two 6 oz. cans or one 14 oz. can - however meaty you like it)
  3. 2 egg yolks
  4. 1 tsp. unrefined sea salt
  5. 1/4 tsp. garlic powder
  6. 1/2 tsp. dill weed
  7. 1/2 tsp. organic cane sugar
  8. lard, tallow or coconut oil for frying
  9. optional - crumbled bacon or bacon strips, pesto, grilled onions, avocado, tartar sauce, Miracle Whip®
Instructions
  1. Add the potato, salmon, egg, salt, garlic powder and sugar to a medium size bowl. Puree with an immersion blender. Add crumbled bacon at this point if desired.
  2. Chill 30 minutes.
  3. Heat a skillet over medium heat. Add the frying oil.
  4. Divide the mixture into 6 burgers.
  5. Cook in the pan until browned on both sides, about 5 minutes per side.
  6. Place burgers on buns and add favorite toppings (bacon strips, grilled onions, pesto, avocado, tartar sauce, Miracle Whip®)
Notes
  1. These burgers make great finger food for babies 6 months and older.
  2. You can substitute tuna for the salmon.
  3. You can add anchovies or sardines to the burger for extra nutrition.
Just Take A Bite https://justtakeabite.com/


In order for me to support my blogging activities, I may receive monetary compensation or other types of remuneration for my endorsement, recommendation, testimonial and/or link to any products or services from this blog.

This post is linked to Savoring Saturdays.

Blender To Oven Maple Cherry Baked Oatmeal | Homemade Dutch Apple Pie

Blender To Oven Maple Cherry Baked Oatmeal

Maple cherry baked oatmeal is a simple way to use fresh fruit and soaked grains for a quick prep breakfast. Toss the ingredients in the blender and bake.

Blender To Oven Maple Cherry Baked Oatmeal | Homemade Dutch Apple Pie

During the hottest days of the summer the last thing you want to do is spend a half hour in the kitchen baking.

That doesn’t mean you want to eat cold cereal for breakfast every morning.

The solution?

Soak some oats. Grab your blender. And you are already half way to a great breakfast.

Maple cherry baked oatmeal is so simple to make. All of the ingredients go into the blender. Then simply pour the batter into a baking dish and your work is done.

Change the texture.

I’ve mentioned before that my oldest has problems with certain textures. One of the foods she struggles with most is oats.

Crunchy granola? Fine. Oatmeal? No way!  One bite and she has had enough. She practically gags on it.

My solution is to blend the oats.

Then baked oatmeal tastes more like cake! She loved this.

Blender To Oven Maple Cherry Baked Oatmeal | Homemade Dutch Apple Pie

Cherries add sweetness.

The combination of sweet cherries and maple syrup is perfect. You get a burst of flavor and natural sweetness.

You can do almost all of the preparation for this maple cherry baked oatmeal in advance. Soak the oats the morning before to reduce the phytic acid content. The night before pit your cherries.

Then in the morning all you have to do is put everything in the blender and bake. Freshly baked breakfast will be waiting for you when you are finished getting everyone ready for the day.

An added bonus is that you do your baking before it gets too hot. If you have a toaster oven that is a great solution too!

What about allergens?

If you are gluten free be sure to buy gluten free oats. There is one egg in maple cherry baked oatmeal. It can be replaced with gelatin or flax eggs.

Any type of fat you tolerate can be used in this baked oatmeal.

If you are like me and don’t tolerate oats, simply replace the oats with another gluten free grain like brown rice or amaranth. You’ll never know the difference!

Blender To Oven Maple Cherry Baked Oatmeal | Homemade Dutch Apple Pie

Blender To Oven Maple Cherry Baked Oatmeal
Serves 12
Maple cherry baked oatmeal is a simple way to use fresh fruit and soaked grains for a quick prep breakfast. Toss the ingredients in the blender and bake.
Write a review
Print
Ingredients
  1. 2 1/2 cups oats
  2. 1/2 cup sorghum flour (or brown rice, white rice or amaranth)
  3. 1 1/2 cups warm water
  4. 1 Tbsp. lemon juice
  5. 1 egg
  6. 1/3 cup maple syrup
  7. 1/3 cup organic cane sugar or coconut sugar
  8. 1/2 tsp. unrefined sea salt
  9. 1 tsp. baking soda
  10. 1 tsp. organic vanilla
  11. 3 Tbsp. liquid fat (olive oil, avocado oil, melted butter, coconut oil, lard or tallow)
  12. 1 cup pitted sweet cherries (20 - 25 cherries)
  13. Optional add-ins: chopped nuts, dried fruit, fresh fruit, chocolate chips, coconut flakes, seeds
Instructions
  1. Combine the oats, flour, water and lemon juice. Let sit 24 hours.
  2. Heat the oven to 350*F. Grease a 7x11 baking pan.
  3. Add the soaked oats and the remaining ingredients to a blender.
  4. Blend until pureed.
  5. Pour the pureed mixture into the prepared pan.
  6. Stir in any optional add-ins.
  7. Bake 1 hour.
  8. Let oatmeal cool 10 minutes before serving.
  9. Serve plain, topped with butter, with milk or yogurt.
  10. Store in a sealed container at room temperature for up to 3 days, in the refrigerator for up to a week or in the freezer for up to 9 months.
Notes
  1. Some or all of the oats can be replaced with brown rice flour or amaranth flour.
Just Take A Bite https://justtakeabite.com/

Breakfast is served.

Both of my big kids loved this baked oatmeal. No texture issues at all.

I bumped up the nutrition factor by spreading lots of butter on top, as if it was a muffin.

Maple cherry baked oatmeal can also be served with milk poured on top or whole milk yogurt. I thought it tasted great plain, sprinkled with a bit of sea salt to support my adrenals (until my baby girl got horrible reflux and I couldn’t eat any more of it. If you have reflux use caution. Oats can be problematic).

This makes a great breakfast year round. Use cherries from your freezer stash to make a batch of maple cherry baked oatmeal during the winter. You’ll have a healthy and delicious breakfast all week long.

You can also make a double batch and stock your freezer for easy school morning breakfasts. It makes a simple addition to school lunches as well. It can be eaten like a muffin. What kid wouldn’t love a bowl of chicken noodle soup and baked oatmeal packed in their lunch?!

No cherries left?

No problem. Try blueberries! Or any fruit you like.

Make maple cherry baked oatmeal an extra special breakfast by stirring in chopped nuts, dried fruit, cut up fresh fruit or chocolate chips after you pour the batter in the pan.

Try some maple cherry baked oatmeal this summer. Then enjoy it all winter using your frozen fruit. Pair it with a protein like eggs or bacon and add some healthy fat like butter or yogurt. You’ve got the perfect breakfast your kids will love.

Are you an oatmeal fan or does the texture bother you? Have you tried it with the oats pureed?

Blender To Oven Maple Cherry Baked Oatmeal | Homemade Dutch Apple Pie

In order for me to support my blogging activities, I may receive monetary compensation or other types of remuneration for my endorsement, recommendation, testimonial and/or link to any products or services from this blog.

This post is linked to Savoring Saturdays.

Teff and Sorghum Cherry Bars | Homemade Dutch Apple Pie

Teff and Sorghum Cherry Bars

Teff and sorghum cherry bars combine two flavorful gluten free grains with a sweet summer fruit to make a soaked, allergen friendly bar. Cherry bars are perfect for easy breakfasts, snacks or even dessert!

Teff and Sorghum Cherry Bars | Homemade Dutch Apple Pie

Cherries, cherries everywhere!

Did you take advantage of cherry season this year?

I think I blinked and it was over. It lasted maybe two weeks.

I’m thankful we got a good haul while they were around. I froze most of them. But we still have a small bowl in the fridge that needs to be used up ASAP.

We could eat them fresh. But we are all getting cherried-out after devouring them for a few days straight.

Instead I like to make teff and sorghum cherry bars. My kids go crazy for these.

The dough is made with soaked gluten free grains and can be mixed by hand. The cherries are combined with gelatin and touch of honey for a sweet cherry filling.

Trying to get your kids in the kitchen?

Teff and sorghum cherry bars are perfect for little hands that want to help. The dough is very “hand friendly” and needs to be pressed into the pan. It is also a very firm dough, so it doesn’t spill out of the bowl very easily.

Teff and Sorghum Cherry Bars | Homemade Dutch Apple Pie

Teff and Sorghum Cherry Bars {soaked, gluten free, dairy free, corn free, nut free, egg free, soy free, coconut free}
Serves 12
A simple soaked bar using fresh sweet cherries. It makes the perfect summer breakfast, snack or dessert!
Write a review
Print
Ingredients
  1. 1/2 cup teff flour
  2. 1 1/2 cups sorghum flour
  3. 1/2 cup + 2 Tbsp. warm water
  4. 2 Tbsp. lemon juice
  5. 4 Tbsp. olive oil (or liquid fat of choice)
  6. 1/4 cup + 2 Tbsp. honey
  7. 1/2 tsp. unrefined sea salt
  8. 1/2 tsp. baking soda
  9. 2 tsp. grass-fed gelatin
  10. 1 cup sweet cherries, pitted and roughly chopped
  11. 1 Tbsp. hone
  12. 1 tsp. grass-fed gelatin
Instructions
  1. Combine the teff, sorghum, water, lemon juice and oil. Work the wet ingredients into the flour. It will be crumbly. Cover and let sit 7-24 hours.
  2. Heat oven to 350*F. Grease a 9" square baking pan.
  3. Mix the cherries, 1 Tbsp. honey and 1 tsp. gelatin. Set aside.
  4. Add the remaining ingredients to the flour mixture. Mix until combined.
  5. Press half of the dough into the bottom of the prepared pan.
  6. Spread the cherry mixture on the dough.
  7. Top with the remaining half of dough.
  8. Bake for 35 minutes.
  9. Let the bars cool completely.
  10. Cut into bars.
  11. Store in a sealed container in the refrigerator (for up to a week) or freezer (for up to 6 months).
Notes
  1. The sorghum can be replaced with white or brown rice flour.
  2. Avocado oil, melted butter, lard, tallow or coconut oil will also work in place of the olive oil.
  3. You can add chopped nuts or chocolate chips into the dough or on the cherry layer.
Just Take A Bite https://justtakeabite.com/

Worried about allergens?

No need to be! Teff and sorghum cherry bars are free of:

  • gluten
  • rice
  • dairy
  • nuts
  • corn
  • soy
  • eggs
  • coconut

The grains are also soaked for better digestion and absorption of nutrients. What’s not to love about a treat like that?

Let’s not forget one of the stars of this bar…grass-fed gelatin!

The gelatin helps bind the bars, create a gooey filling and adds nutrients.

If you are looking for a simple breakfast, try teff and sorghum cherry bars. Add a dish of whole milk yogurt, scrambled eggs or  pastured bacon and you’ve got a great start to your day.

Teff and sorghum cherry bars aren’t just for breakfast.

I love using cherry bars as a simple component in lunches. A few slices of raw cheese, fresh in-season fruits and vegetables and a cherry bar…the perfect (and easy!!) summer lunch. Bonus that it can all be eaten with your hands.

Not sure how to use up those last few cherries? Give teff and sorghum cherry bars a try. You many find yourself digging in to your freezer stash to make them all year long!

You can even add chopped nuts and chocolate chips to the batter or spread them on top of the cherries for a really special treat.

Did you miss out on cherries?

No problem. Try these bars with blueberries! Simply mash the berries a bit before adding the gelatin.

No matter what fruit you add these bars are delicious and a perfect summer treat.

What are some fun ways you use your fresh, summer fruit?

Teff and Sorghum Cherry Bars | Homemade Dutch Apple Pie

Sourdough Cherry Granola | Homemade Dutch Apple Pie

Sourdough Cherry Granola

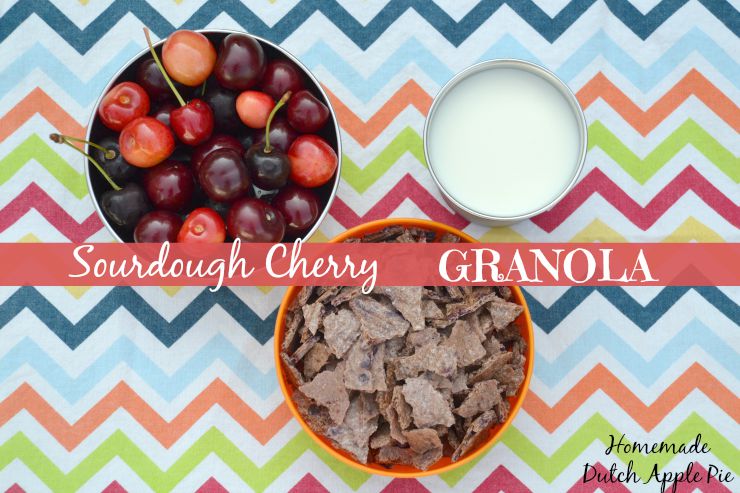
Sourdough cherry granola is a simple, traditionally prepared breakfast cereal that incorporates fresh cherries with a touch of maple syrup and honey. No baking required and only five ingredients! It doesn’t get much easier.

Sourdough Cherry Granola | Homemade Dutch Apple Pie

When I was in college I got hooked on granola. I have no idea what brand they had, but the granola in the cereal bins in our cafeteria was amazing!

Just thinking about it makes me want a bowl. Granola and milk…two things I miss dearly.

I looked forward to it every single day. Yes, I said every day.

If you’ve been around here long you know that eating the same foods every day often leads to an intolerance or even allergy. Which is why I now am on a rotational diet.

Can you guess what I can’t eat now? Oats. Which means no traditional granola.

Sourdough Cherry Granola | Homemade Dutch Apple Pie

There are alternatives.

I’ve made alternative versions of granola over the years like grain free granola and soaked cereal.

Nuts have been out of my diet for a long time now. And lately my little one reacts to so many things that my grain options are dwindling…even many of my usual gluten free grains.

Instead I use a lot of sourdough right now (but of course I try not to eat it every day!)

What do you do with bowls full of cherries?

After cherry picking recently I was trying to brainstorm new ways to use up cherries. I decided to try my hand at making granola using my sourdough starter with added cherries for a sweet twist.

Making granola could not get any simpler! There are only five ingredients in sourdough cherry granola. All you do is mix and dehydrate.

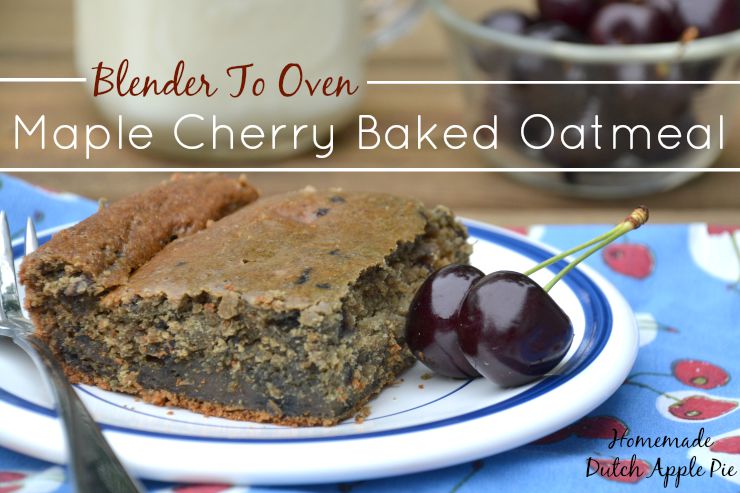
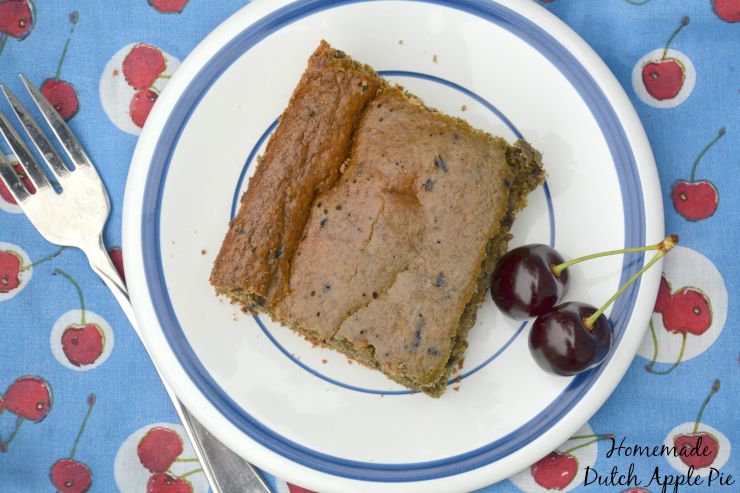
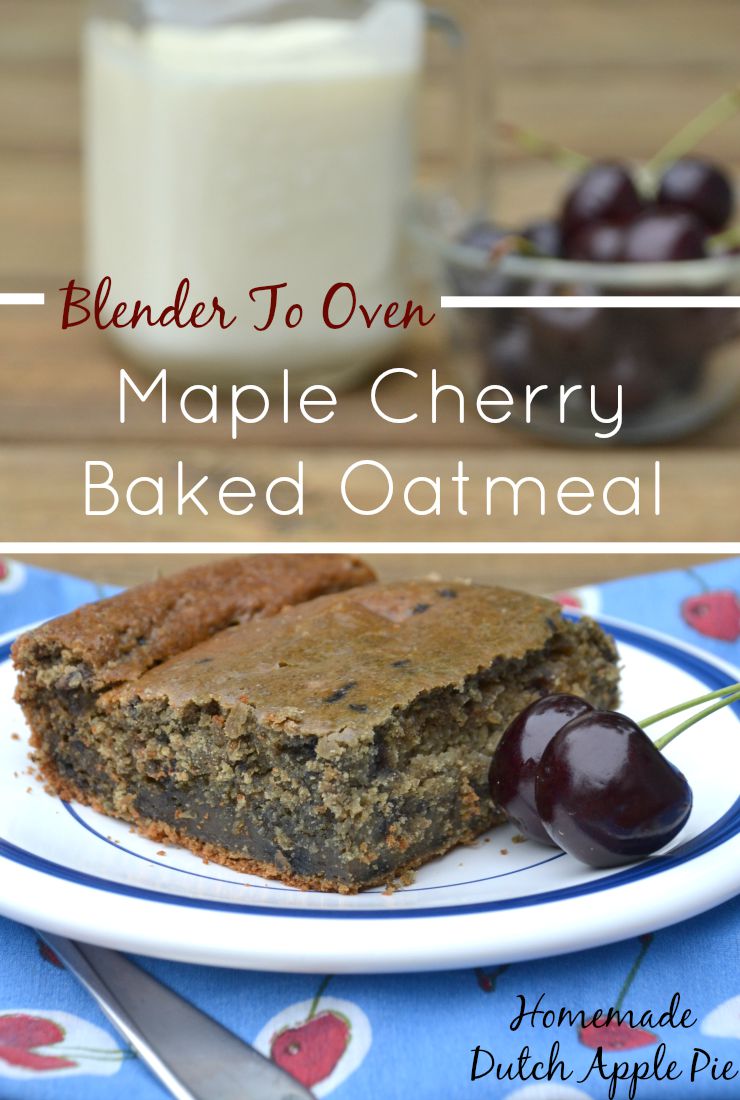
The result is a sweet, fruity, crunchy cereal perfect for snacking or an easy summer breakfast.

Sourdough Cherry Granola | Homemade Dutch Apple Pie

Sourdough Cherry Granola
Serves 12
A sweet, fruity, crunchy granola made with traditional sourdough and sweet cherries.
Write a review
Print
Ingredients
  1. 2 1/2 cups sourdough starter
  2. 1 cup sweet cherries, pitted
  3. 1/4 cup honey
  4. 1/3 cup maple syrup
  5. 1 tsp. unrefined sea salt
  6. optional: 1/2 tsp. baking soda to make it a bit softer
  7. optional after drying: chopped nuts, dried fruit, coconut flakes, min chocolate chips
Instructions
  1. 3 - 9 hours before making the granola feed your sourdough starter so you have at least 3 1/2 cups.
  2. Puree the cherries in a blender.
  3. Mix the cherry puree, sourdough starter, honey, syrup and salt (and soda if using).
  4. Pour the mixture onto parchment lined dehydrator trays (this filled two trays in my Excalibur).
  5. Dry on the highest setting until crisp (this took about 15 hours for me).
  6. Break the granola into small pieces for granola or large pieces for crackers.
  7. Store in a sealed container in the cupboard or in the freezer for long term storage.
Notes
  1. You can replace the cherries with strawberries, blueberries, raspberries or a combination of fruit.
  2. You can use all honey or all maple syrup. The combination gives a neutral/mild sweet flavor.
Just Take A Bite https://justtakeabite.com/
There is no flour added to the sourdough starter so you don’t have to worry about waiting for grains to ferment.

There is also no need to worry about oats!

Are oats really that great?

It’s funny that oats are such a staple in our culture. Oatmeal is thought of as the “perfect breakfast” and great for heart health. But I find that many people have a really hard time digesting oats. Even my mom (that doesn’t know a ton about real food) thinks they are hard on your stomach.

And if they are not properly prepared they are extra hard on your gut due to the high phytic acid content.

I attempted to eat oats once recently…and my baby had such  horrible reflux or stomach pain (she can’t tell us which yet) that she just screamed. So it’s nice to have an alternative to the traditional oat-based cereals.

Sourdough Cherry Granola | Homemade Dutch Apple Pie

But how does it taste?

Now let’s get to the really important part – what my kids think.

They love it!

To be honest we haven’t been eating it as cereal much. But we have been munching on it a lot!

Sourdough cherry granola is the perfect finger food for snacks whether at home or on the go. It is not messy and stays good at room temperature.

I kept my sourdough cherry granola simple. If you want to spruce it up you can add dried fruit, nuts, coconut flakes or chocolate chips after it is dried and crumbled.

Not a cereal fan? Break the dried sheets into larger chunks for crackers!

Sourdough cherry granola is a great way to use fresh summer fruit. If you want to change it up you can swap blueberries, strawberries or raspberries for the cherries.

Give yourself a break.

This summer let yourself sleep in once in a while and wake up to a simple, no prep breakfast. Pour raw milk over your sourdough cherry granola or sprinkle the granola on a dish of whole milk yogurt.

Take five minutes and five ingredients to get sourdough cherry granola going. Then let your dehydrator do the work. Stock your pantry and your freezer with this delicious breakfast.

Are you a granola fan? What is your favorite version?

Sourdough Cherry Granola | Homemade Dutch Apple Pie

In order for me to support my blogging activities, I may receive monetary compensation or other types of remuneration for my endorsement, recommendation, testimonial and/or link to any products or services from this blog.