Home » snack » Page 6

Tag: snack

Sourdough Pumpkin Swiss Cake Rolls | Just Take A Bite

Sourdough Pumpkin Swiss Cake Rolls

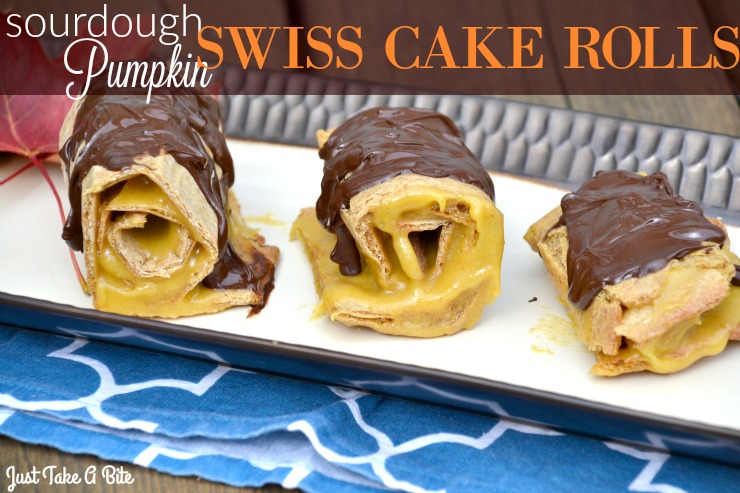
Are you looking for a non-traditional Thanksgiving dessert? Wow your guests with these fancy yet simple sourdough pumpkin swiss cake rolls.

Sourdough Pumpkin Swiss Cake Rolls | Just Take A Bite

Halloween may be over, but fall is just getting started! That means there is another month to indulge in all things pumpkin.

I grew up eating those little chocolate cake rolls out of a box…anyone else? They were good. Cake filled with cream rolled into a little log and covered with chocolate.

It’s been about twenty years since I’ve had one. But that doesn’t mean I don’t enjoy a good roll cake.

Sourdough Pumpkin Swiss Cake Rolls | Just Take A Bite

Free of just about everything.

I created this sourdough pumpkin swiss cake roll with myself in mind. I know that sounds bad, but I get a special treat about once every four months lately. The rest of the time I’m busy making stuff for my kids.

These delicious little cakes are free of dairy, nuts, soy, corn, rice, roots, coconut and eggs.

They are actually almost fat free too! That is NOT something I aim for. But it just happened.

It is not as much fun or as tasty to bake when you can’t use butter or coconut oil. So I ended up just making a dessert without an added fat.

Sourdough Pumpkin Swiss Cake Rolls | Just Take A Bite

Simple.

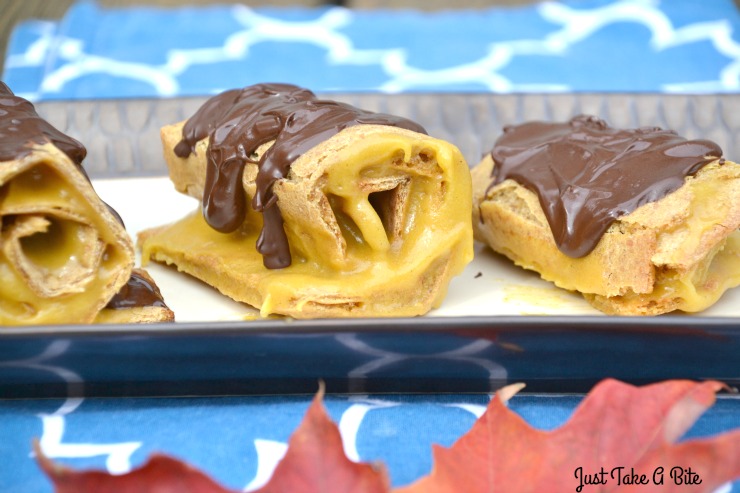
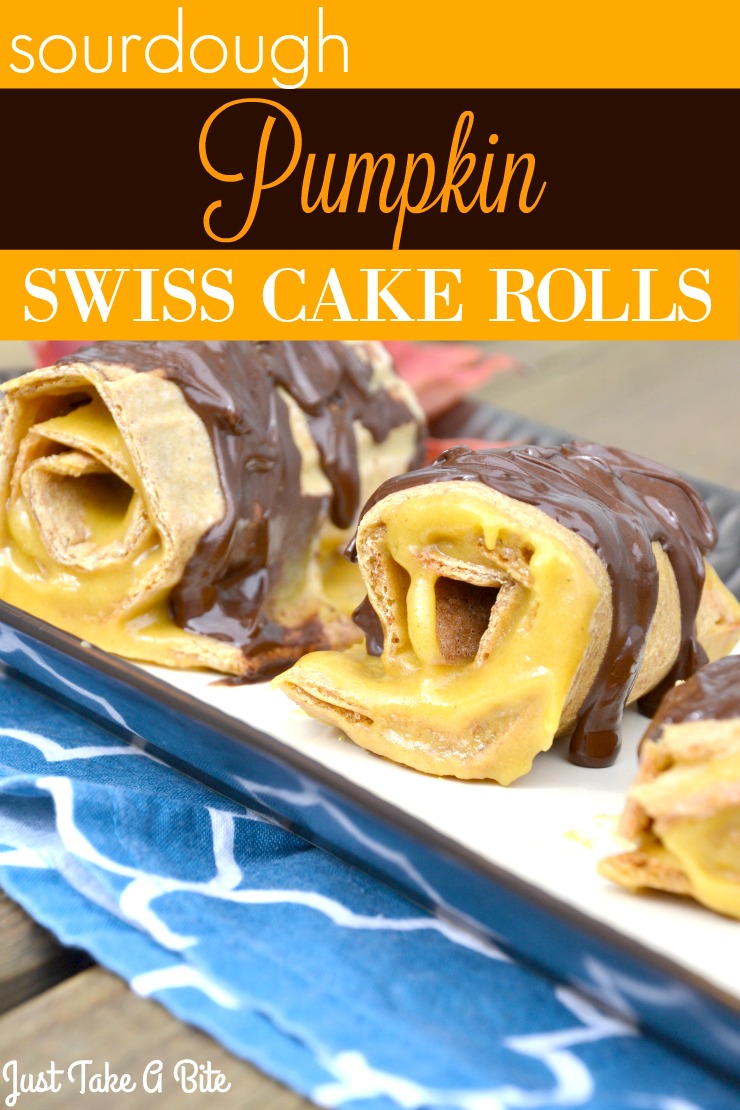
The cake is a simple pumpkin sourdough thin sheet cake. The filling is sugar, flour and pumpkin. That’s all.

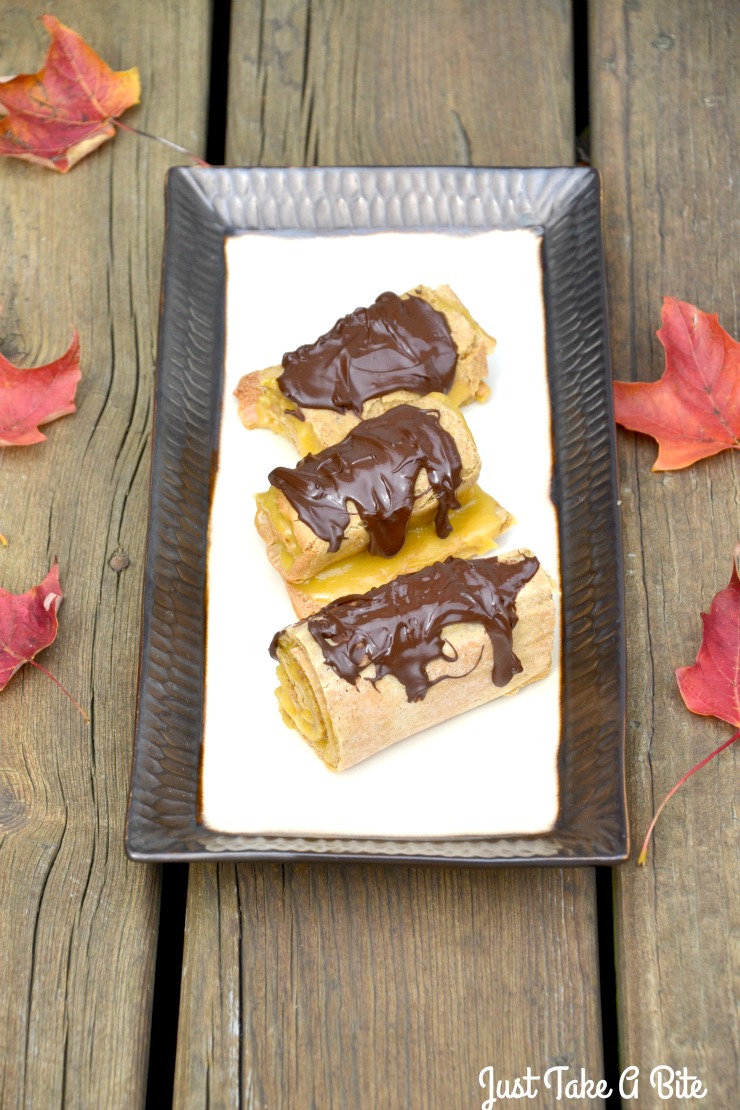
Then top it with melted chocolate. Divine!

Sourdough pumpkin swiss cake rolls can be prepared in advance, up to a week ahead! One more thing to scratch off your Thanksgiving to-do list early.

Surprise your guests with this special dessert. No messing with ice cream or whipped cream. It is ready to eat.

Sourdough Pumpkin Swiss Cake Rolls | Just Take A Bite

The cake tastes great without the chocolate too. But it really adds a good flavor contrast. Pumpkin and chocolate are a perfect match.

And those extra crispy edges you trim off? They make a great snack dipped in the extra filling!

Looking for a unique Thanksgiving dessert this year?

Try sourdough pumpkin swiss cake rolls. You won’t find anything this good in a box!

Sourdough Pumpkin Swiss Cake Rolls | Just Take A Bite

Sourdough Pumpkin Swiss Cake Rolls
Yields 4
Sourdough pumpkin cake filled with pumpkin cream and topped with melted chocolate.
Write a review
Print
Cake
  1. 1/2 cup sourdough starter
  2. 1/2 cup all purpose flour
  3. 2 Tbsp. water
  4. 1/2 cup pureed pumpkin
  5. 1/4 cup organic brown cane sugar
  6. 1/4 tsp. baking soda
  7. 1/4 ts. unrefined sea salt
  8. 1/2 tsp. cinnamon
Filling
  1. 3/4 cup organic cane sugar
  2. 1/2 cup pureed pumpkin
  3. 1/2 tsp. cinnamon
  4. 4 Tbsp. all purpose flour
  5. Topping: 1/4 cup chocolate chips
Cake
  1. Combine the sourdough, flour and water. Let set one hour.
  2. Heat oven to 350*F. Line a medium size baking sheet with parchment paper.
  3. Add the pumpkin, brown sugar, soda, salt and cinnamon to the flour. Mix well.
  4. Spread evenly (not too thin) on the parchment paper.
  5. Bake 40 minutes.
Filling
  1. Blend the sugar on high in a high power blender to create powdered sugar.
  2. In a medium bowl beat the powdered sugar, pumpkin, cinnamon and flour on high for two minutes. Chill.
Assembly
  1. When the cake comes out of the oven cut it in half both vertically and horizontally to create 4 pieces. Trim any crispy edges.
  2. Let the cake cool for about 2 minutes.
  3. Spread filling on each piece of cake and roll. Use a toothpick to hold the cake in the rolled position if necessary.
  4. Chill the cakes in the refrigerator.
  5. When chilled melt the chocolate chips in a double boiler (glass bowl over a small saucepan with an inch of water).
  6. Drizzle the chocolate over the cakes.
  7. Chill.
  8. Keep the cakes in the refrigerator until ready to serve.
  9. Store in a covered container in the refrigerator for up to a week or in the freezer for up to 6 months.
Notes
  1. The filling can be made up to 3 days in advance or while the cake is baking.
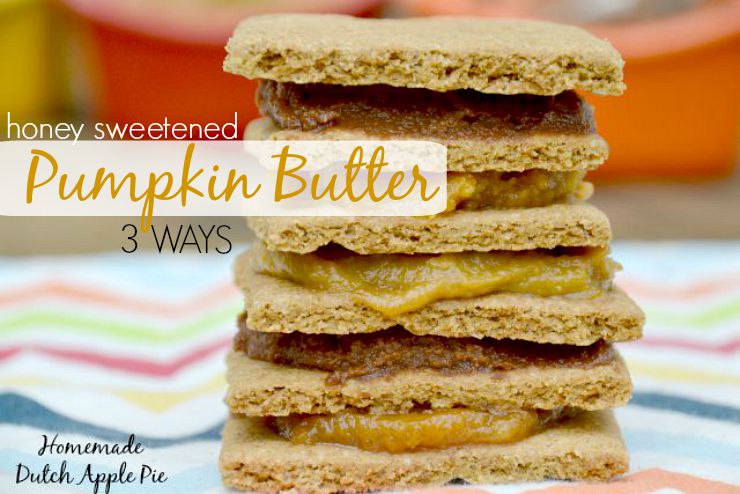
  2. There will likely be extra filling. It is great for dipping graham crackers or using as frosting on muffins or cupcakes. It also tastes great eaten plain with extra melted chocolate swirled in.
Just Take A Bite https://justtakeabite.com/
 In order for me to support my blogging activities, I may receive monetary compensation or other types of remuneration for my endorsement, recommendation, testimonial and/or link to any products or services from this blog. It will not change the cost of any products or services for you.

Einkorn Chocolate Chip Cookies | Just Take A Bite

Einkorn Chocolate Chip Cookies

These einkorn chocolate chip cookies are a remake of the classic. Simple and delicious, yet free of dairy, nuts, soy, corn, rice, coconut and egg whites.

Einkorn Chocolate Chip Cookies | Just Take A Bite

Who doesn’t love chocolate chip cookies? I know I sure do!

Mom’s cookies are the best.

Growing up my mom was famous for her chocolate chip cookies (and still is!). It was rare we didn’t have any in the house.

We would eat two or three fresh out of the oven. 

She still brings her cookies to every family function or church event. They aren’t fancy, just plain old all purpose flour, butter, sugar, etc. But she somehow transforms the ingredients into something unique.

I miss those cookies. I can almost taste one right now.

Einkorn Chocolate Chip Cookies | Just Take A Bite

Finding an alternative.

Even though I can’t eat my mom’s cookies I can indulge in einkorn chocolate chip cookies once in a while.

This version is super easy to make. Plus it doesn’t have dairy, nuts, soy, corn, rice, coconut or egg whites.

Einkorn Chocolate Chip Cookies | Just Take A Bite

Dessert or breakfast.

If you need a quick treat einkorn chocolate chip cookies are perfect. Or use the base and add whatever you like to make it your own.

There is no need to soak the flour, which makes them even easier!

Add dried fruit and seeds to create a breakfast cookie. Or keep it classic with just chocolate chips.

Smart Sweets

No matter what you add they’re good! Especially fresh out of the oven.

Soft cookie dough with melted chocolate.

Who can resist that?!

In need of a cookie fix?

Try something new with einkorn chocolate chip cookies.

Einkorn Chocolate Chip Cookies | Just Take A Bite | A twist on the classic chocolate chip cookie that is free of dairy, nuts, soy, rice, corn and coconut

Einkorn Chocolate Chip Cookies
Yields 12
A twist on the classic chocolate chip cookie using einkorn flour.
Write a review
Print
Ingredients
  1. 1 cup einkorn flour
  2. 1/2 cup whole wheat, all purpose or white rice flour
  3. 1/2 tsp. unrefined sea salt
  4. 1 tsp. baking soda
  5. 1/2 cup honey
  6. 3 egg yolks
  7. 1/4 cup olive oil, avocado oil or melted tallow
  8. 1/4 cup add-ins: chocolate chips, dried fruit, seeds
Instructions
  1. Heat oven to 350*F.
  2. In a large bowl combine all of the ingredients except add-ins. Beat until well combined.
  3. Stir in chocolate chips.
  4. Scoop mounds onto a parchment lined baking sheet.
  5. Bake for 15 minutes.
  6. Cool and store in a sealed container for up to a week or in the freezer for up to a year.
Just Take A Bite https://justtakeabite.com/
 In order for me to support my blogging activities, I may receive monetary compensation or other types of remuneration for my endorsement, recommendation, testimonial and/or link to any products or services from this blog. It will not change the cost of any products or services for you.

Candy Corn Finger Jello | Just Take A Bite

Candy Corn Finger Jello: KS Post

Candy corn finger jello is the perfect Halloween treat. It has bright colors and fruit flavor without anything artificial.

Candy Corn Finger Jello | Just Take A Bite

I’ve never been that crazy about  Halloween.

Don’t get me wrong, getting dressed up is fun. Spending time with friends is great.

Of course as a kid the candy is the real star of the show.

An adult perspective.

But on the whole it’s more of a hassle than anything, especially as a parent. Scrambling to find a costume (I’m cheap and just get creative with what we have on hand…anybody with me?). Spending half the week’s grocery budget on junk food for the neighborhood. Not my cup of tea.

But there is one part of Halloween and fall in general that I have always loved.

Candy corn.

I liked the taste. But more than that it reminded me of my grandparents. They lived on a farm and always kept a chicken feeder on the kitchen table to feed their little chicks – their grandchildren!

For some reason I was more into this tradition than any of my siblings or cousins. If my grandparents knew I was coming they were sure to stock it with candy corn for me. I ran to it first thing when I entered the house to check and have a little chicken feed.

My days of visiting the farm are coming to an end as my grandmother passed away earlier this year and my grandfather is in hospice. But when I do get there the chicken feeder is still sitting there on the table as soon as I walk in the door.

Candy Corn Finger Jello | Just Take A Bite || Candy corn finger jello is the perfect Halloween treat. It has bright colors and fruit flavor without anything artificial.

A new tradition.

I am honored that it will soon be the centerpiece of my own table! I can carry on the tradition of feeding my kids and someday grandkids just like little chicks.

But in a different way.

My candy corn will not come out of a bag. It will not have artificial flavors and food coloring.

Instead it will be full of nourishing gelatin!

Want to see how I made this fun treat? Head over to Kitchen Stewardship! I’ll show you just how easy and healthy candy corn finger jello is.

If you’re looking for more holiday treats check out these great real food dessert books:

Naturally Sweetened Sweets - A Community Cookbook

Smart Sweets

This post is linked to Savoring Saturdays.

No Bake Pumpkin Cheesecake Cups | Just Take A Bite

No Bake Pumpkin Cheesecake Cups

Looking for an easy, prep ahead fall breakfast? These no bake pumpkin cheesecake cups are great for kids and adults. Plus they are packed with nutrition.

No Bake Pumpkin Cheesecake Cups | Just Take A Bite

One of my favorite foods is cheesecake. It comes in a close second behind ice cream. Yes, I love my creamy dairy desserts!

However, I don’t have time to make cheesecake very often. So I came up with a cheater version for fall.

Pumpkin cheesecake cups do require about two minutes of heating to dissolve the gelatin. But there is no baking involved. All of the prep work takes about five minutes of hands on time. In fact pumpkin cheesecake cups are so easy to prepare that even your kids can make them!

No Bake Pumpkin Cheesecake Cups | Just Take A Bite

Nutrition first.

Pumpkin is a superstar when it comes to vitamins. So any way I can add it to our diet is a bonus. Then you add yogurt with probiotics and healthy fat.

Don’t forget about the gelatin! This will help aid digestion and boost the protein content.

I love that I can make a batch of pumpkin cheesecake cups before bed and breakfast is ready in the morning. So when I have a child wake up at 6 am and tell me he’s starving we don’t have a mini crisis (i.e. meltdown).

Pumpkin cheesecake cups also work really well for school lunches. Kids see it as a treat. I see it as a source of protein and vegetables. A win for everyone.

No Bake Pumpkin Cheesecake Cups | Just Take A Bite

Perfect any time of day.

Of course you can always serve these for dessert too. Make a big batch for a crowd. Add some crumbled gluten free pumpkin spice graham crackers to individual cups to mimic crust. You’ll get rave reviews and be able to sit and enjoy some with your guests!

This recipe makes enough for two cheesecake cups. It can easily be scaled up to make as many servings as you need. They will stay good in the refrigerator for up to a week so you can make a batch to enjoy all week long. Though I can guarantee they won’t last very long!

If you like your cheesecake really soft you can reduce the gelatin about 1/2 tsp. If you like it super firm you can increase the gelatin about 1/2 tsp. Adjust it to make your ideal cheesecake.

Are you enjoying all things pumpkin right now?

Add these no bake pumpkin cheesecake cups to your list of must try treats!

No Bake Pumpkin Cheesecake Cups | Just Take A Bite


No Bake Pumpkin Cheesecake Cups
Serves 2
Write a review
Print
Ingredients
  1. 3/4 cup plain greek yogurt or strained whole milk yogurt
  2. 1/4 cup pureed pumpkin
  3. 1/4 cup honey
  4. 3 tsp. grass-fed gelatin
  5. 1/2 tsp. cinnamon
  6. 2 homemade graham crackers or 1 store-bought graham cracker
Instructions
  1. Strain whole milk yogurt for one hour (it takes about 1 1/2 cups of yogurt to get 3/4 cups thick yogurt).
  2. Crush graham crackers and place in the bottom of two small containers (1/2 pint jars work well)
  3. Combine the yogurt, pumpkin, honey, cinnamon and gelatin in a small saucepan.
  4. Let sit one minute.
  5. Heat on low-med until the gelatin is dissolved and the mixture is liquid, about 2-3 minutes.
  6. Pour the mixture over the graham crackers and chill until set.
Notes
  1. Pumpkin cheesecake cups will stay good in the refrigerator for up to a week.
  2. Squash can be used in place of the pumpkin.
  3. Coconut milk yogurt can be used in place of the dairy yogurt.
Just Take A Bite https://justtakeabite.com/

In order for me to support my blogging activities, I may receive monetary compensation or other types of remuneration for my endorsement, recommendation, testimonial and/or link to any products or services from this blog. It will not change the cost of any products or services for  you.

This post is linked to Savoring Saturdays.

Einkorn Pumpkin Scones | Just Take A Bite

Einkorn Pumpkin Scones

Einkorn pumpkin scones are the perfect fall breakfast. They are easy to make and free of dairy, eggs, nuts, soy, rice, corn and coconut.

Einkorn Pumpkin Scones | Just Take A Bite

Have you ever tried einkorn flour? It is quite new to me.

If you haven’t heard of it, einkorn is an ancient variety of wheat that has not been modified or processed like most modern wheat. So it is easier on the gut. Even some people that are sensitive to gluten can tolerate einkorn!

Baking with einkorn.

Einkorn absorbs liquid differently than regular wheat. So you can’t just swap it one for one in your recipes. You will likely need more einkorn.

Since I love to experiment I set to work right away when I got my first bag of einkorn flour. I created einkorn pumpkin scones.

I LOVE scones. Not only are they delicious, but they are easy to make and easy to adapt to an allergen free diet. There are no eggs required and you can use whatever flour and fat you tolerate. You just have to get the ratios right.

Einkorn Pumpkin Scones | Just Take A Bite

Start simple.

I make these even easier by mixing the dough in the food processor. Then you can chill the dough to bake later in the day, freeze the dough for freshly baked scones another day or bake them immediately.

Einkorn pumpkin scones are perfect for fall. Serve them for breakfast, brunch or alongside a hot bowl of soup (my favorite!). Who doesn’t love a warm, pumpkin and cinnamon scone fresh from the oven?!

The thing that stands out to me about einkorn flour is how soft it is. Most wheat has sort of a hard texture. But einkorn is so soft…which makes your baked goods soft! It really takes them to a whole new level.

Einkorn Pumpkin Scones | Just Take A Bite

I also love that you don’t have to soak these scones because they use all purpose einkorn flour. Many baked goods work really well with soaked flour. A scone is not one of them. I’ve tried. They just don’t quite turn out the same. Scones aren’t meant to have much liquid added. Just fat and flour.

Not a huge scone fan? Add an egg to the dough and turn einkorn pumpkin scones into cookies!

If you have never had einkorn flour I encourage you to give it a try. It is much gentler on the tummy than modern varieties of wheat. Plus it makes amazing baked goods.

Start with a batch of einkorn pumpkin scones to see how you like it and how it behaves. Then start your own experimenting.

Do you like scones as much as I do? What is your favorite flavor?

Einkorn Pumpkin Scones | Just Take A Bite

Einkorn Pumpkin Scones
Yields 12
A simple scone made with pumpkin and einkorn flour.
Write a review
Print
Prep Time
10 min
Cook Time
25 min
Total Time
35 min
Prep Time
10 min
Cook Time
25 min
Total Time
35 min
Ingredients
  1. 2 cups all purpose einkorn flour
  2. 1/2 cup cane sugar
  3. 1 tsp. cinnamon
  4. 1 tsp. baking soda
  5. 1/2 tsp. unrefined sea salt
  6. 1/2 cup solid fat (lard, tallow, butter, coconut oil)
  7. 2/3 cup pureed pumpkin
  8. 1 tsp. vanilla
  9. optional: 1/2 cup mini chocolate chips, chopped crispy pecans, dried cranberries
Instructions
  1. Heat the oven to 350*F. Line a baking sheet with parchment paper.
  2. Combine the flour, sugar, cinnamon, soda and salt in a food processor (or bowl). Pulse to combine.
  3. Add the fat. Pulse until the mixture is crumbly (or combine by hand).
  4. Add the pumpkin and vanilla. Process until well combined.
  5. Transfer the dough to a bowl. Mix the chocolate chips/nuts/dried fruit in by hand.
  6. Divide the dough into 12 equal portions. Roll into a ball and flatten on prepared parchment paper.
  7. Sprinkle cane sugar on top if desired.
  8. At this point you can freeze the scones or chill them in the refrigerator until ready to bake.
  9. Bake for 25 minutes.
Notes
  1. To make these into cookies add one egg along with the pumpkin and vanilla. Scoop mounds of dough onto the baking sheet. Reduce baking time to 10 - 15 minutes.
  2. Squash can be used in place of the pumpkin. Butternut works best.
Just Take A Bite https://justtakeabite.com/


In order for me to support my blogging activities, I may receive monetary compensation or other types of remuneration for my endorsement, recommendation, testimonial and/or link to any products or services from this blog. It will not change the cost of any products or services for  you.

This post is linked to Savoring Saturdays.

Spiced Apple Ice Cream | Just Take a Bite

Spiced Apple Ice Cream

It is fall!! That means apple season is definitely here! Celebrate with a dish of spiced apple ice cream. Warm spices, cooked apples, cold cream. Perfection.

Spiced Apple Ice Cream | Just Take a Bite

Fall is a special time in Michigan. There are orchards all around and apples of every variety.

If you have a child in school they will likely have a field trip to an orchard. Facebook is full of family apple picking photos.

Apple goodies abound. Apple cider. Apple donuts. Apple crisp. Apple pie (the Dutch variety too!). Applesauce. Apple pie parfaits. Apple pie cake. The list goes on.

Something new.

This year I created a new way to enjoy apples – in ice cream!

Spiced Apple Ice Cream | Just Take a Bite

Spiced apple ice cream is a mix of sauteed, sweetened apples (think apple pie filling), warm spices and thick raw cream.

Start by sauteing chunks of apples in butter, honey and your favorite blend of spices. Then make a rich cinnamon ice cream. Mix in the apples and let it freeze.

For the spice you can go simple with just cinnamon. Or you can add nutmeg and cloves. I actually used a cinnamon spice blend from Ground 2 Table. It worked really well.

Enjoyment all around.

Spiced apple ice cream was definitely a winner with my family. Even my in-laws got to sample some and thoroughly enjoyed it!

Of course it tastes great plain. But spiced apple ice cream is really good served on vanilla cake or apple crisp!

Spiced Apple Ice Cream | Just Take a Bite

Maybe you’re like me and need a little crunch? Crumble some homemade pumpkin spice graham crackers over the ice cream. It’ll taste like crust so you get the full apple pie effect.

You can also add crunch with chopped crispy pecans. Sprinkle them on top or mix them right in the ice cream. You’ll really bump up the flavor by using sugar coated pecans!

If you want to add to the creaminess and nutrition you can use pastured egg yolks. But if you don’t have access to quality eggs or you don’t tolerate eggs you can leave them out.

For sweetener cane sugar, maple syrup and honey all work. I like to use a combination of two or all three of them to create a more neutral flavor.

No guilt.

Does this sound too indulgent for you? Check out this amazing resource to learn how to Stop Fighting Food and enjoy what you eat. Then dig in!

Now that apple season is in full swing it’s time to create some fall treats. Grab your favorite variety of apple and fresh cream. You’re well on your way to a dish of rich spiced apple ice cream.

What is your favorite way to enjoy fall and the abundance of apples?

Spiced Apple Ice Cream | Just Take a Bite

Spiced Apple Ice Cream
Serves 12
Write a review
Print
Ingredients
  1. 2 medium apples, peeled and diced
  2. 2 tsp. butter (or coconut oil)
  3. 1 tsp. cinnamon
  4. optional: nutmeg, cloves or a cinnamon spice blend
  5. 1 Tbsp. honey
  6. 2 1/2 cups cream (raw if possible) (or coconut milk)
  7. 1/2 cp whole milk (raw if possible) (or coconut milk)
  8. 2 egg yolks (optional)
  9. 1/2 cup cane sugar, maple syrup and/or honey
  10. 1 Tbsp. vanilla or vodka
  11. 1 Tbsp. tapioca flour or arrowroot
  12. 1/4 tsp. unrefined sea salt
  13. 2 tsp. cinnamon
Instructions
  1. Sautee apples in butter, spices and honey over medium heat about 5 minutes, until tender but not mushy. Set aside to cool.
  2. In a blender combine the remaining ingredients. Blend until well mixed.
  3. Process the ice cream in an ice cream mixer according to manufacturer's directions (it takes 15 - 20 minutes in my Kitchen Aid ice cream maker attachment).
  4. Transfer the ice cream to a freezer safe container.
  5. Stir in the apples.
  6. Freeze until firm.
Notes
  1. You can add 1/4 cup chopped crispy pecans or sugar coated pecans when you stir in the apples.
Just Take A Bite https://justtakeabite.com/

In order for me to support my blogging activities, I may receive monetary compensation or other types of remuneration for my endorsement, recommendation, testimonial and/or link to any products or services from this blog. It will not change the cost of any products or services for you.

This post is linked to Savoring Saturdays.

Honey Sweetened Pumpkin Butter Three Ways | | Homemade Dutch Apple Pie

Honey Sweetened Pumpkin Butter Three Ways: SHK Post

Now that fall is here it’s time for pumpkin everything! Use this nutrient packed vegetable to create three variations on pumpkin butter. It is so easy and delicious. Your kids will love it.

Honey Sweetened Pumpkin Butter Three Ways | | Homemade Dutch Apple Pie

Coming up with healthy snacks can be a challenge. Kids want sweet and tasty. You want quick and nutritious.

Honey sweetened pumpkin butter is the perfect solution!

Pumpkin is not a vegetable most people eat very often. But it really is packed with nutrients. Pumpkin contains vitamin A (a lot of it!), vitamin C, potassium, copper and iron in addition to lots of phyto-nutrients. So it makes the perfect component to a healthy snack like pumpkin butter.

There are three variations of pumpkin butter – original, chocolate and sunflower. They each have a unique flavor that your kids are sure to love. And with only three or four ingredients they are all easy to make.

Honey Sweetened Pumpkin Butter Three Ways | | Homemade Dutch Apple Pie

It only takes about ten minutes to make all three pumpkin butters! It is that easy. After a few minutes in the refrigerator they are ready to eat. I like to prepare them in advance. Then snack time is easy. The pumpkin butter will last up to a week in the refrigerator.

Are you ready to whip up one or all three of these tasty fall treats? Head on over to Super Healthy Kids where I show you just how easy it is. Then surprise your kids with a delicious after school treat.

Don’t forget to really add to the fun by making a batch of pumpkin spice graham crackers to go along with the pumpkin butter. Maybe homework time will go a bit smoother with a fun snack. At the very least your kids will have their mouths and bellies full of good stuff.

In order for me to support my blogging activities, I may receive monetary compensation or other types of remuneration for my endorsement, recommendation, testimonial and/or link to any products or services from this blog. It will not change the cost of any products or services for you.

This post is linked to Savoring Saturdays.

Grain Free Sunbutter and Jelly Bars | Homemade Dutch Apple Pie

Grain Free Sunbutter and Jelly Bars

No time to make a sandwich? No problem. Grab some grain free sunbutter and jelly bars from the freezer and an allergen friendly lunch is ready in no time.

Grain Free Sunbutter and Jelly Bars | Homemade Dutch Apple Pie

We’ve been back to school for exactly one week. And I’m already sick of packing lunches. Anybody else?

In all honesty I don’t mind it *too* much. But it sure is nice when I have some easy things to pack that are filling and nutritious.

Skip the nuts.

Of course I’m always conscious of allergies too. So while peanut butter and jelly sandwiches are about the easiest thing to make I don’t pack them in my daughter’s lunch (even though she is not allergic to nuts).

Recently I started using sunbutter in place of nut butters. My kids love it! I love that I don’t have to worry about them getting nuts on their baby sister when they eat it. Plus I can send it to school without potentially causing another child harm.

That means my daughter does get sunbutter sandwiches once in a while. They are easy and delicious.

Grain Free Sunbutter and Jelly Bars | Homemade Dutch Apple Pie

Skip the bread.

But there is something even easier!

Grain free sunbutter and jelly bars are easy to make, easy to pack and easy to eat. You get the added bonus that you don’t have to worry about making or finding decent bread! This is especially key if you are gluten, grain or anything else free.

To make the dough simply dump all of the ingredients in a bowl and mix. The “jelly” filling is just three ingredients pureed in the blender for thirty seconds.

Then pour, bake and eat.

Grain Free Sunbutter and Jelly Bars | Homemade Dutch Apple Pie

Skip the long lunch prep.

I like to make a big batch so I can keep a bunch in the freezer. Then packing lunch is easy and has virtually no preparation. In fact kids can pack it themselves!

A sunbutter and jelly bar paired with veggies and dip and some fresh fruit is a great lunch. Or you can really boost the nutrition factor by pairing it with a thermos of your favorite soup. My daughter loves split pea!

Grain Free Sunbutter and Jelly Bars | Homemade Dutch Apple Pie

Change the flavor.

Let your kids pick the jelly flavor. Strawberry is a favorite here. But raspberry, cherry and blueberry all work well.

If your kids don’t like jelly then you can make the bars without the filling. It will be like a sunbutter and honey sandwich.

Are you in need of another easy lunch component to add to your rotation? Skip the sandwich. Go for grain free sunbutter and jelly bars. They are sure to be a hit!

Don’t need to pack a lunch? Serve them for breakfast. Kids love them any time of day.

Grain Free Sunbutter and Jelly Bars | Homemade Dutch Apple Pie

Grain Free Sunbutter and Jelly Bars
Serves 12
A nut free bar that is easy to pack and takes the place of a sandwich.
Write a review
Print
Bar
  1. 1/2 cup sunbutter
  2. 1/2 cup tapioca flour
  3. 2 eggs (or flax or gelatin eggs)
  4. 1/4 cup honey
  5. 1/4 cane sugar
  6. 1/2 tsp. unrefined sea salt
  7. 1/4 tsp. baking soda
Filling
  1. 1 cup fruit (strawberry, blueberry, cherry, raspberry), thawed and drained if using frozen
  2. 1 1/2 tsp. grass-fed gelatin
  3. 1 Tbsp. honey
Bar
  1. Heat oven to 350*F. Grease a 7x11 baking pan.
  2. In a large bowl combine all of the bar ingredients. Beat until well mixed.
  3. Spread half of the dough into the greased pan.
  4. Blend the filling ingredients in a blender until pureed. Pour the filling over the dough in the pan. Spread.
  5. Pour the remaining half of the dough on top of the filling.
  6. Bake for 40 minutes.
  7. Allow to cool. Cut into bars.
  8. Store in the refrigerator for up to two weeks or in the freezer for up to one year.
Notes
  1. White rice flour can be substituted for tapioca. It will no longer be grain free.
  2. The eggs can be replaced with ground flax seeds.
  3. You can also assemble the bars by pouring all of the batter into the pan and pouring the filling on top.
  4. Any nut or seed butter will work in place of the sunbutter.
Just Take A Bite https://justtakeabite.com/
This post is linked to Savoring Saturdays.

Brain Booster Milkshake | Homemade Dutch Apple Pie

Brain Booster Milkshake

Get the school morning started right with a brain booster milkshake. Full of protein, vitamins and minerals it will keep your kids going all day.

Brain Booster Milkshake - Nutrient-dense drink kids love!

School mornings can be hard. Get breakfast on the table. Feed the baby. Brush everyone’s teeth. Find shoes and backpacks.

You do your best to prepare and have things go smoothly. But even with good planning it is tough to always give your kids the nourishment they need before heading out the door.

Especially if you have a child like mine that eats very slowly and ends up often only managing a few bites of breakfast.

To make sure she starts her day the right way I created my brain booster milkshake.

Brain Booster Milkshake - Nutrient-dense drink kids love!

Are Milkshakes Healthy?

This milkshake is packed with some nutritional powerhouses.

  • raw milk – easy to digest protein, calcium and vitamins
  • raw pastured egg yolks – B vitamins that are critical for brain function and concentration
  • probiotics – for gut health and boosting the immune system
  • grass-fed collagen – easy to digest protein and important amino acids
  • maple syrup – carbohydrates for energy and trace minerals
  • unrefined sea salt – trace minerals

I usually serve the milkshake with something else like a homemade granola bar or even dinner leftovers! But even if she doesn’t take a single bite of her breakfast I know she’s going to be fueled for the morning as long as she drinks her brain booster milkshake.

This is a really good option for kids with oral SPD and chewing problems. A milkshake goes down pretty quickly. It is also easy on the digestive system. The nutrients are very easy to absorb and utilize.

Brain Booster Milkshake - Nutrient-dense drink kids love!

One of the key components is the raw, pastured egg yolk. Have you ever read about them? Though often deemed as unhealthy or bad for your heart the opposite is actually true. And eaten raw (as long as they are pastured) the nutrients are not damaged and are easy to absorb.

Egg yolks are amazing little packages of nutrients, specifically B vitamins that are essential for your child’s brain development and ability to focus. They contain other nutrients such as choline (necessary for methylation), selenium (great for the thyroid) and biotin (helps with blood sugar regulation – perfect for breakfast!).

Milkshake for Breakfast or Lunch

I sometimes put milkshakes in my daughter’s lunch too. She struggles to eat much lunch at school. There just isn’t enough time for her, and she’s busy talking. But she usually comes home with an empty cup!

This is also great for kids going through orthodontic work. The day after adjustments their mouth can be very sore and chewing can be a challenge. A milkshake is always in my daughter’s lunch the day after her expander gets adjusted. I tell her that even if she can’t eat anything she should be sure to drink her brain booster milkshake.

Brain Booster Milkshake - Nutrient-dense drink kids love!

Healthy Chocolate Milkshake

The base milkshake recipe is vanilla. But you can create other flavors too. My kids love when I add a bit of cocoa powder or carob powder for a chocolate shake.

Add some strawberries from your freezer stash for a strawberry shake. Any berry or even cherries will work.

Sometimes we really get creative and add mint extract. It tastes like mint ice cream (my kids’ favorite!).

If you can’t have dairy, coconut milk is a great substitute! Any milk alternative will work.

Serve it in a fun cup with a straw or in a sealed cup to pack in a lunch box.

Whether you serve it for breakfast, lunch or both you’ll know your child is getting essential nutrients with a brain booster milkshake. All they have to know is they get something delicious to drink!

Get your kids excited about breakfast. What flavor do you think they’ll like best?

Brain Booster Milkshake - Nutrient-dense drink kids love!

Brain Booster Milkshake
Serves 1
A delicious shake perfect for breakfast or lunch that will give your kids the nutrients they need to perform their best.
Write a review
Print
Ingredients
  1. 1 cup raw milk or coconut milk
  2. 1 - 2 raw pastured egg yolks
  3. 1 Tbsp. grade B maple syrup
  4. 1/4 tsp. unrefined sea salt
  5. 2 tsp. grass-fed collagen
  6. 1/2 capsule preferred probiotics
  7. 1/2 capsule preferred multi-vitamin
  8. optional: 2 tsp. carob powder or cocoa powder OR 1/4 cup berries or cherries
  9. optional: 1/2 tsp. organic vanilla OR 1/4 tsp. organic mint extract
Instructions
  1. Combine all of the ingredients in a blender or a cup with a lid.
  2. Blend or shake until well combined.
  3. Serve immediately or refrigerate until ready to serve.
Just Take A Bite https://justtakeabite.com/
In order for me to support my blogging activities, I may receive monetary compensation or other types of remuneration for my endorsement, recommendation, testimonial and/or link to any products or services from this blog.

This post is linked to Savoring Saturdays.

Lemon Elderberry Gummies | Homemade Dutch Apple Pie

Lemon Elderberry Gummies

Help ward off the back-to-school illnesses with a fun, fruity treat. Lemon elderberry gummies not only taste great, they are good for you!

Lemon Elderberry Gummies | Homemade Dutch Apple Pie

For many school is already back in session. For others it is only a week away. Either way there is one thing on every parent’s mind when school starts.

How long until the kids start getting sick?

As kids start spending more time inside and around their friends it is inevitable that germs will spread. There are many natural remedies to help your child’s immune system stay strong and avoid some illness.

One simple remedy is elderberry syrup. It helps ward off viruses and minimizes their severity. My kids love taking it right off the spoon.

Lemon Elderberry Gummies | Homemade Dutch Apple Pie

Make it fun.

Another great way to add elderberry syrup into your diet is adding it to gummies. Kids don’t even know they are doing something good for themselves by eating these fun, fruity candies.

The lemon adds some vitamin C along with the elderberry for even more immune support.

These gummies are also packed with grass-fed gelatin that is helpful for healing the gut and supporting the whole body. Plus it provides easy-to-digest pure protein.

Great for everyone.

I like to serve lemon elderberry gummies for breakfast and snacks or pack them in lunches for my oldest. They are great to have around for the younger kids as well. Even toddlers love to munch on gummies!

No need to buy fruit snacks. Most of them are filled with artificial flavors and colors.

Even if you buy the ogranic/natural varieties they still contain “natural flavor” which is actually almost the same thing as artificial flavor. And for kids like mine it has the same effect on their mental clarity and behavior.

Lemon Elderberry Gummies | Homemade Dutch Apple Pie

Fast food.

Although homemade gummies may sound like a daunting snack to make it is actually very simple. Lemon elderberry gummies go from the pan to the fridge in about five minutes.

Simply mix the ingredients, heat and pour. That’s all there is to it.

You can get the kids involved with this project by letting them pick the shapes. See what candy molds your grocery store carries or buy some online. I like to use silicon molds so I don’t have to worry about putting hot liquid in plastic. Plus gummies are much easier to remove from the silicon molds.

If you don’t have any molds you can simply pour the warm liquid into a glass pan. When the lemon elderberry gummies are gelled you can cut them into squares or any shape you like.

No lemon juice on hand? You can use blueberry, cherry or lime juice instead. Try all four varieties and see what your kids like best.

Are you looking for easy, healthy snacks for school lunches? Are you looking for easy ways to help keep your kids healthy?

Lemon elderberry gummies are just what you’re looking for! Fruity, fun and healthy. Whip up a batch to start the school year right.

Lemon Elderberry Gummies | Homemade Dutch Apple Pie

Lemon Elderberry Gummies
Yields 25
A fun, fruity treat to help ward off colds.
Write a review
Print
Ingredients
  1. 1 cup organic lemon juice
  2. 2 Tbsp. elderberry syrup
  3. 1/2 cup honey
  4. 4 Tbsp. grass-fed gelatin (NOT collagen)
  5. 1/4 tsp. unrefined sea salt
Instructions
  1. In a small saucepan combine the lemon juice, elderberry syrup, honey and salt. Whisk to combine.
  2. Add the gelatin and whisk to combine.
  3. Let sit one minute.
  4. Heat over low-medium heat, stirring frequently, until mixture is warm and has become liquid again.
  5. Pour mixture into molds or a glass pan (smaller pan for thicker gummies, larger pan for thinner).
  6. Refrigerate until firm, about thirty minutes.
  7. Remove from molds or cut into shapes.
  8. Store in a sealed container in the refrigerator for up to two weeks.
Just Take A Bite https://justtakeabite.com/

In order for me to support my blogging activities, I may receive monetary compensation or other types of remuneration for my endorsement, recommendation, testimonial and/or link to any products or services from this blog.

This post is linked to Savoring Saturdays.