Home » Kid-friendly Recipes » dairy free » Page 9

Category: dairy free

Salted Caramel Cupcakes with Maple Bacon Glaze | Homemade Dutch Apple Pie

Salted Caramel Cupcakes with Maple Bacon Glaze

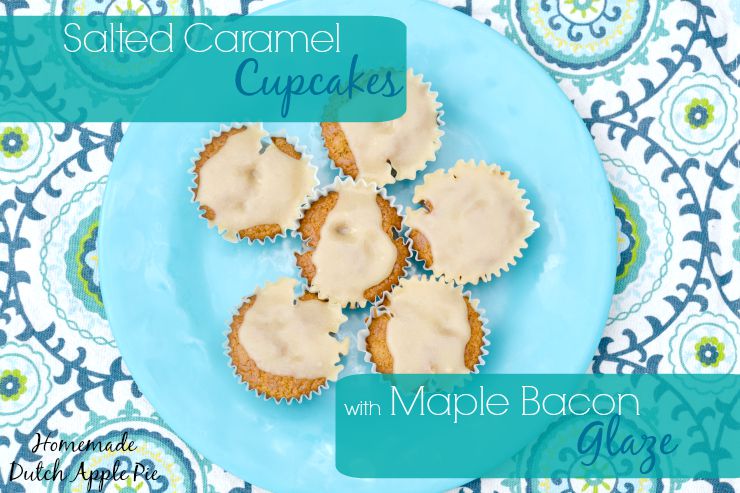
Looking for a unique treat that is both salty and sweet? Salted caramel cupcakes with maple bacon glaze are the perfect solution. They are free of gluten, dairy, corn and nut but full of flavor.

Salted Caramel Cupcakes with Maple Bacon Glaze | Homemade Dutch Apple Pie

When it comes to dessert cupcakes top the list for fun, portable and easy to eat. No need to fuss with cutting or plating.

Simple. Just the way I like it.

There are so many cupcake flavors to choose from. Chocolate, vanilla and yellow are traditional flavors. Or you can add some fun with strawberry and coconut.

But if you really want to kick your cupcakes up a notch try a salted caramel cupcake base with maple bacon glaze.

The cake is properly prepared with soaked gluten free grains. The glaze is made with only four simple ingredients, including bacon grease and urefined sea salt!

Salted Caramel Cupcakes with Maple Bacon Glaze | Homemade Dutch Apple Pie

The family consensus.

I thought these salted caramel cupcakes were amazing! I am a sucker for anything sweet with a pop of saltiness. Add bacon on top? You’ve got a winner. I would have gladly eaten the whole batch myself.

And I may have eaten a few for breakfast!

My husband enjoyed them, but wasn’t sure he liked quite so much bacon flavor in his cupcake.

The kids felt the same – good cupcakes, pretty strong on bacon.

You can adjust the bacon flavor to your liking by adjusting the amount of bacon grease used in the glaze. It will also depend on your bacon. Ours is quite smokey and has a very strong flavor.

Salted Caramel Cupcakes with Maple Bacon Glaze | Homemade Dutch Apple Pie

The cake.

Salted caramel cupcakes have a great balance of salty and sweet. They are actually good without adding any frosting or glaze.

You could go for a simple vanilla buttercream on top too if you like more sweet. Chocolate frosting would also pair well with the salty base.

The cake itself is soft and moist from soaking the gluten free grains. Not too dense but also not crumbly. It holds up well in little hands.

Allergen friendly.

These cupcakes are gluten, dairy, nut, corn, rice, soy and coconut free. If you can’t have eggs you could use an egg replacement.

In other words they are safe for just about everyone!

Bring on the birthday parties. Salted caramel and bacon are the perfect combination for a celebration.

Are you a salty and sweet fan? Looking for a confection that’s unique and allergen friendly?

Salted caramel cupcakes with maple bacon glaze give a whole new meaning to dessert. Easy, fun, salty, sweet goodness.

Salted Caramel Cupcakes with Maple Bacon Glaze | Homemade Dutch Apple Pie

Salted Caramel Cupcakes with Maple Bacon Glaze
Yields 12
An allergen friendly salty and sweet cupcake perfect for birthdays and holidays.
Write a review
Print
Cupcake
  1. 1/4 cup amaranth or brown rice flour
  2. 1 cup sorghum or white rice flour
  3. 1/2 cup tapioca flour
  4. 1 cup warm water
  5. 1 Tbsp. lemon juice
  6. 1/4 cup maple syrup
  7. 1 tsp. organic vanilla (use corn free if allergic to corn)
  8. 1 1/2 tsp. unrefined sea salt
  9. 1 tsp. baking soda
  10. 1 egg or egg substitute
  11. 1 1/2 Tbsp. extra virgin olive oil
  12. 1/4 cup organic cane sugar or coconut sugar
Glaze
  1. 2 Tbsp. melted bacon grease
  2. 2 Tbsp. maple syrup
  3. 4 Tbsp. organic cane sugar
  4. pinch sea salt (optional)
Cupcake
  1. Combine the amaranth, sorghum and tapioca flour. Whisk to remove any lumps.
  2. Add the water and lemon juice. Mix and work out any lumps.
  3. Cover and let sit 7-24 hours.
  4. Heat the oven to 325*F. Line a muffin pan with muffin cups.
  5. Add the syrup, vanilla, salt, soda, egg, oil and sugar to the soaked mixture.
  6. Beat until well combined.
  7. Fill muffin cups almost full.
  8. Bake for 45 minutes.
  9. Allow to cool completely before glazing.
Glaze
  1. Combine the melted bacon grease, syrup, sugar and salt. Mix well.
  2. Top the cupcakes with glaze.
  3. Refrigerate to solidify the glaze.
  4. Serve at room temp or straight from the refrigerator.
  5. Store in a covered container in the refrigerator.
Notes
  1. Some or all of the bacon grease can be replaced with melted lard, butter or coconut oil to reduce the bacon flavor.
  2. The cupcakes freeze well. Freeze without glaze.
Just Take A Bite https://justtakeabite.com/
In order for me to support my blogging activities, I may receive monetary compensation or other types of remuneration for my endorsement, recommendation, testimonial and/or link to any products or services from this blog.

This post is linked to Savoring Saturdays.

Nectarine Squash Pops | Homemade Dutch Apple Pie

Nectarine Squash Pops: Sugar Free First Birthday Popsicles!!

When your summer baby turns one you need a safe, sugar free treat. Nectarine squash pops are the perfect solution! Two ingredients, lots of flavor and no allergens.

Nectarine Squash Pops | Homemade Dutch Apple Pie

First birthdays definitely require a celebration.

You made it! You made it through the first year.

The first year of sleepless nights, crying and dirty diapers.

The first year full of firsts! Smiles, coos, laughs, rolling, crawling and maybe even walking. First foods, first teeth, first words.

Nectarine Squash Pops | Homemade Dutch Apple Pie

Let them eat cake.

A birthday celebration requires a special birthday treat. Usually that means cake.

I LOVE decorating cakes. I look forward to our family birthdays each year because I get to create new cakes.

I’ve done Dora, monkeys, dinosaurs, cars, arts and crafts, Legos, cows, Frozen, bulldozers, April showers and princesses for my kids. I’ve even done airplanes, sports and Cat in the Hat for my nephew, basketball and Calvin Knights for my dad, a fall cake for other family members and a neat recital cake for my sister-in-law.

I wanted to continue that tradition with my third child. With the challenges we’ve faced over the last year we are all certainly ready to celebrate.

Of course I set to work experimenting with new recipes that were free of her allergens.

I made a couple batches of cupcakes (that she loved!)…only to find out more foods that bother her.

Nectarine Squash Pops | Homemade Dutch Apple Pie

Who needs cake?

My daughter’s allergies combined with my preference to keep her at least gluten free for now (she’s been grain free up to this point) make birthday cake almost impossible. We can’t use:

  • wheat
  • rye
  • barley
  • oats
  • rice
  • sorghum
  • amaranth
  • buckwheat
  • tapioca
  • potato
  • arrowroot
  • coconut
  • almond
  • nuts
  • quinoa
  • millet
  • beans

Add to that no coconut oil, palm shortening, butter or egg whites and you’re not left with much.

Birthday Pops.

I gave up on the idea of birthday cake and opted to do popsicles! They make a perfect summer treat.

Since these popsicles are for a one year old I made them without any added sweetener. I even added some vegetables to keep them mild and nutritious.

Nectarine squash pops make a birthday dessert you can really feel good about serving to the whole family.

Nectarine Squash Pops | Homemade Dutch Apple Pie

Eat in season.

I chose fruit that is in season here in Michigan in late August. Nectarines are so sweet and have such a bright color. They make a great base for a popsicle.

You can use peaches instead if you prefer the flavor.

I ended up making a second batch since we ate the first batch before the birthday! I added some watermelon to the second batch for extra color and sweetness. Watermelon is another late summer fruit that almost everyone enjoys.

Nectarine Squash Pops | Homemade Dutch Apple Pie

Fun and Fast.

Nectarine squash pops are the easiest birthday dessert you’ll ever make. Puree cooked squash and cut up nectarine with an immersion blender or in a regular blender and pour the puree into the popsicle molds. Done!

They are also easy to serve. Simply take them out of the molds a few minutes before serving to take the chill off. Pass them out and enjoy.

For older kids you can add chunks of fruit like cut up strawberries, whole blueberries or raspberries to the puree before filling the molds. Then you’ll really have a fruity, colorful treat.

You can also add a tablespoon or two of honey for big kids. It really covers up any hint of squash flavor. My oldest is pretty picky about flavors and textures. She said she couldn’t taste the squash at all when I added a bit of honey.

I was very disappointed that I couldn’t make a cake for my baby’s first birthday. But I’m so happy with how these nectarine squash pops turned out! I’m even happier that my daughter likes them…and that they are so healthy and free of allergens.

Do you celebrate any summer birthdays?

Instead of cake try nectarine squash pops. They make summer celebrations delicious and healthy.

Nectarine Squash Pops | Homemade Dutch Apple Pie

Nectarine Squash Pops
Serves 4
A fruity, sugar free summer birthday treat.
Write a review
Print
Ingredients
  1. 3 medium nectarines, peeled and pitted
  2. 3/4 cups cooked butternut squash
  3. optional: 1/2 cup watermelon (seeds removed)
  4. optional: 1 - 2 Tbsp. honey
Instructions
  1. Puree the nectarines and squash (and watermelon and honey) with an immersion blender or in a blender.
  2. Fill popsicle molds and freeze until firm.
Notes
  1. You can replace the nectarines with peaches.
  2. For little ones let the popsicles sit out for a few minutes to soften before serving.
Just Take A Bite https://justtakeabite.com/
In order for me to support my blogging activities, I may receive monetary compensation or other types of remuneration for my endorsement, recommendation, testimonial and/or link to any products or services from this blog.

This post is linked to Savoring Saturdays.

Rustic Chicken Zucchini Pie With Olive Oil Crust | Homemade Dutch Apple Pie

Rustic Chicken Zucchini Pie with Olive Oil Crust

Looking for a new way to use up your abundance of zucchini? Rustic chicken zucchini pie with olive oil crust makes the perfect breakfast, lunch or dinner! Serve it warm or cold any time of day for a filling and nutritious meal.

Rustic Chicken Zucchini Pie With Olive Oil Crust | Homemade Dutch Apple Pie

Summer is about having fun, getting outside and being active. That includes riding bikes, picnics at the park and pool parties.

But summer is also about slowing down, taking it easy and enjoying the simple pleasures. Think lounging on the beach, sitting by the fire watching the stars and snuggling with your kids on a quiet rainy day.

When it comes to soaking up the summer I think of simple, comfort food that utilizes fresh produce.

Rustic Chicken Zucchini Pie With Olive Oil Crust | Homemade Dutch Apple Pie

Summer food.

Rustic chicken zucchini pie is comfort and summer all wrapped up in a pie crust.

It is a cross between pie and pizza.

The crust is a simple soaked dough made with flour, water, olive oil and salt. The filling is chicken and a bit of squash simmered in bone broth until a thick sauce forms. Finally a layer of zucchini tops the pie for a beautiful and delicious dish.

Simple and versatile.

Rustic chicken zucchini pie is fancy enough for dinner guests. Though you might want to make two! It will go quickly.

It is also simple enough for a weeknight meal that the kids will devour.

Eat it with a fork and knife or your hands. Serve it at the dinner table or pack it in a picnic.

Breakfast, lunch or dinner. Warm or cold.

A full meal all wrapped up in a delicious package, rustic chicken zucchini pie is really that good and that versatile.

Rustic Chicken Zucchini Pie With Olive Oil Crust | Homemade Dutch Apple Pie

Allergen friendly.

The thing I love about it is that it is naturally dairy, egg, nut, corn and coconut free. I did use a wheat crust, but gluten free flour can replace the wheat. So it is safe for just about everyone!

If you can tolerate cheese some fresh mozzarella mixed into the sauce or grated parmesan on top would taste great.

No chicken on hand? Swap it for another meat like sausage. Or simply make it a veggie pie. The sauce underneath can be made without the meat. Simply add a little extra squash to the broth for a creamy base.

Lunch time!

For all of the busy moms out there chicken zucchini pie is perfect for a grab and go lunch. It’s hard enough to feed the kids let alone find time to make your own lunch. Make a pie at the beginning of the week and grab a slice or two each day for lunch.

If you want to get a head start on school lunches you could make a few chicken zucchini pies, cut them into slices and freeze individual pieces. Simply pull out a piece when you need it for adding to a lunch box or even for an easy breakfast.

I don’t know about you but any time I can get my kids to eat broth while at school is great. Vegetables on top of it is a bonus.


Check out the Lunch Box ebook for more fun recipes (35% off through 9/7/15!)


Don’t let that pile of zucchini go to waste! Create a simple summer dish the family will love. Rustic chicken zucchini pie with olive oil crust is perfect for any occasion.

How do you like to use zucchini – in sweets like zucchini bread, cake and scones or in a savory dish?

Rustic Chicken Zucchini Pie With Olive Oil Crust | Homemade Dutch Apple Pie

Rustic Chicken Zucchini Pie with Olive Oil Crust
Serves 4
Creamy chicken, fresh zucchini and a simple olive oil crust - the perfect breakfast, lunch or dinner!
Write a review
Print
Crust
  1. 1 cup whole wheat, all purpose or gluten free flour
  2. 1/2 tsp. unrefined sea salt
  3. 3 Tbsp. extra virgin olive oil
  4. 2-3 Tbsp. cold water
  5. 1 Tbsp. lemon juice
Filling
  1. 2 Tbsp. pureed squash
  2. 2 medium zucchini
  3. 1 cup cooked, shredded or diced chicken
  4. 3/4 cup chicken broth
  5. 1/4 tsp. unrefined sea salt
  6. 1 tsp. of a combination of basil, rosemary and thyme
Crust
  1. In a food processor combine the flour, salt and olive oil. Pulse until crumbly.
  2. Add the water and lemon juice.
  3. Process until a ball of dough forms.
  4. Wrap in plastic wrap and refrigerate 7-24 hours.
Filling
  1. Slice the zucchini and lay it on a cooling rack.
  2. Sprinkle with salt and let sit 20 minutes. Flip and repeat. (This will remove a lot of the water.)
  3. Pat the zucchini dry with paper towel when done draining.
  4. While the zucchini is draining, cook the chicken, squash and salt in broth. Simmer until it is thick and the liquid is evaporated, 5-10 minutes.
  5. Heat oven to 350*F.
  6. Roll the dough into a 12" round on parchment paper.
  7. Spread the chicken filling on the dough, leaving a 2" border.
  8. Layer the zucchini on top of the chicken.
  9. Season with herbs.
  10. Fold edges of dough onto zucchini.
  11. Drizzle the top with olive oil.
  12. Bake for 70 minutes.
  13. Allow to cool for 10 minutes before slicing.
Notes
  1. This can be served warm, room temp or cold.
  2. This can be frozen whole or in slices.
  3. You can add 1/2 cup shredded cheese to the filling and/or the top.
  4. To make a meatless pie omit the chicken and increase the squash to 1/2 cup.
Just Take A Bite https://justtakeabite.com/
Rustic Chicken Zucchini Pie With Olive Oil Crust | Homemade Dutch Apple Pie

In order for me to support my blogging activities, I may receive monetary compensation or other types of remuneration for my endorsement, recommendation, testimonial and/or link to any products or services from this blog.

Homemade lunch meat makes packing healthy lunch a breeze. Plus it's great for little ones too!

Homemade Lunch Meat

Lunch time just got easier and healthier with homemade lunch meat! It is perfect for school lunches or even for babies. Add it to your to-do list!!

Homemade lunch meat makes packing healthy lunch a breeze. Plus it's great for little ones too!

Warning.

You may want to cover your ears.

I’m going to use the dreaded L word – LUNCHES.

There. I said it.

As much as I don’t like to think about it, before we know it we’ll be packing school lunches again.

Homemade lunch meat makes packing healthy lunch a breeze. Plus it's great for little ones too!

You want to send your kids to school with nutritious food. But you also don’t want to make their lunches too different or “weird” (liver pate or sardines anyone?). Not to mention you don’t want to spend an hour making lunch.

Just the other day my seven year old asked why I never put “normal” sandwiches in her lunch like her friends have. She mentioned peanut butter and jelly and ham and cheese.


Need more ideas? Check out Katie’s healthy lunch box e-book!


I don’t send peanut products often because I don’t want to make the school an unsafe place for those with allergies.

The ham and cheese? Well, we just don’t have any lunch meat.

Until now.

Homemade lunch meat makes packing healthy lunch a breeze. Plus it's great for little ones too!

Did you know you can make your own lunch meat?

Homemade lunch meat is so easy to make. It literally takes five minutes of hands on time.

Want to learn how?

Head on over to Kitchen Stewardship where I share my simple homemade lunch meat recipe.

And don’t forget to check out the Healthy Lunch Box ebook!

Homemade lunch meat makes packing healthy lunch a breeze. Plus it's great for little ones too!

In need of a few more ideas for the lunch box? Try some of these:

Sweet potato salmon burgers

Teff and sorghum cherry bars

Gluten free pizza crackers

Strawberry apple salad

Fruit on the bottom  yogurt

Soaked gluten free bread (great for sandwiches with lunch meat!!)

Gluten free crackers

Quinoa bars

Salmon salad

In order for me to support my blogging activities, I may receive monetary compensation or other types of remuneration for my endorsement, recommendation, testimonial and/or link to any products or services from this blog.

Five Minute Peach Jam | Homemade Dutch Apple Pie

Five Minute Peach Jam

Peach jam in five minutes? Yes! And only three ingredients. Simple, healthy and bursting with flavor. Five minute peach jam is a great way to capture summer in a jar.

Five Minute Peach Jam | Homemade Dutch Apple Pie

Growing up I ate one thing on my toast – grape jelly. Always.

Now that I’m older and cook for myself and my family I like to have a lot more variety. So I make strawberry jam, cherry jam and raspberry jam.

This year I tried peach jam. Wow! It’s like summer in a jar.

Chop. Mix. Simmer.

For real – that is all there is to it. Cut up fresh peaches, add sweetener and grass-fed gelatin. Simmer about five minutes.

Fresh peach jam awaits.

You can even make peach jam without any sweetener if your peaches are sweet enough. Else a couple tablespoons of sweetener really kicks up the flavor.

Five Minute Peach Jam | Homemade Dutch Apple Pie

Let the kids help.

This is a great project for getting your kids in the kitchen. Peal and pit the peaches and let your child cut them into small chunks. A dull knife is just fine for chopping peaches.

Then let them measure the sugar and gelatin.

Older kids can help with the cooking as well. If you are making a pureed jam this is a great way to teach older kids how to use an immersion blender.

Five Minute Peach Jam | Homemade Dutch Apple Pie

Spread it on. Stir it in.

Once the jam has chilled for a few hours it will be gelled enough to serve. Spread it on homemade gluten free bread, sourdough bread or your favorite muffin. My kids couldn’t get enough of this peach jam on freshly baked bread alongside a big bowl of soup.

Another great way to use peach jam is mixed into plain, whole milk yogurt. It makes instant peach yogurt without any thickeners, gums or added flavorings.

Spruce up your oatmeal by stirring in peach jam. Top with some crispy pecans and breakfast is served.

Five Minute Peach Jam | Homemade Dutch Apple Pie

Stock the freezer.

This recipe is for a small batch to eat fresh. You can easily triple it (or more!) and freeze the jam. Then you can enjoy it all year long.

Peach jam in the middle of winter is a real treat! Not to mention it’s very cost-effective. One jar of homemade jam costs about $1.25 (give or take).

The same amount of quality store-bought peach jam would cost about $5.00.

Grab a few peaches and your kids and mix up a quick batch of five minute peach jam. Then enjoy this allergen free spread all year long to change up your breakfast.

What is your favorite type of jam or jelly? Do you make your own?

Five Minute Peach Jam | Homemade Dutch Apple Pie

Five Minute Peach Jam
Yields 1
Simple and healthy, five minute peach jam is a great way to capture summer in a jar. Only three ingredients and tons of flavor.
Write a review
Print
Ingredients
  1. 1 cup peaches, peeled, pitted, cut into small pieces (juice reserved)
  2. 3/4 tsp. grass-fed gelatin
  3. 1 - 3 Tbsp. organic cane sugar or honey
Instructions
  1. Add peaches and juice to a small saucepan.
  2. Add the gelatin and stir. Let sit 1 minute.
  3. Add the sugar.
  4. Bring to very low simmer and let cook 5 minutes, stirring frequently.
  5. Mash or puree if desired.
  6. Pour into a half pint jar.
  7. Chill until gelled.
  8. Store in the refrigerator for up to 3 weeks or in the freezer for up to 1 year.
Notes
  1. An easy way to reserve the peach juice is to cut the peach directly over the pan and let the juice drip down while you cut.
  2. You can leave out the sweetener to make this sugar free jam.
  3. This makes one half pint of jam. Multiply the recipe by how many jars you want to make.
Just Take A Bite https://justtakeabite.com/

In order for me to support my blogging activities, I may receive monetary compensation or other types of remuneration for my endorsement, recommendation, testimonial and/or link to any products or services from this blog.

Peaches and Cream Overnight Oats | Homemade Dutch Apple Pie

Peaches and Cream Overnight Oats

Peaches and cream overnight oats make a satisfying breakfast. Prepared in advance, they are a grab ‘n’ go breakfast everyone will love. Use fresh peaches in the summer and frozen or canned peaches in the winter.

Peaches and Cream Overnight Oats | Homemade Dutch Apple Pie

I try my best to do breakfast preparation in advance. In the morning I want everything ready to go.

When my husband is getting ready for work…breakfast is ready.

When one kid wakes up early and is instantly begging for food…breakfast is ready.

When the baby needs to nurse and everyone else is hungry…breakfast is ready.

Since we don’t eat store-bought cereal I need other quick and easy breakfasts that are ready for the family even if I’m busy.

Peaches and cream overnight oats are the perfect solution.

Peaches and Cream Overnight Oats | Homemade Dutch Apple Pie

Simple, simple, simple.

It only takes about five minutes to prepare overnight oats. I line up jars for however many servings I’m going to make. Then just add the ingredients to each jar and mix.

Peaches and cream overnight oats only contain five ingredients. All of them except for the peaches are pantry and refrigerator staples. So you can whip up a batch just about any time.

Give them a boost.

In addition the five base ingredients you can add collagen for protein and egg yolk for vitamins. This will make peaches and cream overnight oats a very balanced breakfast. That includes three components:

  1. Proteinyogurt, collagen, egg yolk
  2. Carbohydrates – oats, peaches, maple syrup
  3. Fat – whole milk yogurt or coconut yogurt

One other thing I love is that the overnight soaking makes the oats much better for you!

Peaches and Cream Overnight Oats | Homemade Dutch Apple Pie

Get ready to host.

These overnight oats are great for the whole family on a school day morning. But that’s not all.

Peaches and cream overnight oats are fancy enough for hosting overnight guests or a brunch. Mix up a bunch of small jars of the oats and leave the peaches on top. They look so elegant. Plus you can just pull them out of the fridge in the morning and have time to visit with your guests. No cooking necessary.

Change it up.

If you aren’t a fan of peaches in your yogurt or you just don’t have any on hand you can swap another fruit. Stone fruits like plums, apricots and nectarines work very well.

Or you can use berries and cherries. They can be fresh or go right from the freezer to the oat mixture. By morning they will be thawed and ready to go!

No matter what flavor you choose overnight oats are a perfect prep ahead breakfast. You can make them for a busy weekday morning or even make a batch while you enjoy some end of summer travel. All of the ingredients are available wherever you go.

On the go.

Peaches and cream overnight oats are also great for school lunches and snacks. Just mix it up the night before. Put a lid on and pack it in the lunch box. It is ready to go when your child is ready to eat.

By using gluten free oats this breakfast is not only delicious but also gluten, egg, nut, corn, soy and rice free. If you use coconut yogurt it is also dairy free. There is a version for just about everyone!

In need of an easy breakfast? Peaches and cream overnight oats are the way to go!

Peaches and Cream Overnight Oats | Homemade Dutch Apple Pie

Peaches and Cream Overnight Oats
Serves 2
Peaches and cream overnight oats make a satisfying breakfast. Prepared in advance with fresh peaches, they are a grab 'n' go breakfast everyone will love.
Write a review
Print
Ingredients
  1. 1 cup old fashioned oats (be sure to get gluten free oats if you are gluten free)
  2. 1 cup plain whole milk yogurt or coconut yogurt
  3. 4 Tbsp. maple syrup (adjust to your liking)
  4. 1/4 tsp. unrefined sea salt
  5. 1 large peach, peeled and cut up (over oats)
  6. optional - 2 tsp. collagen, 1 egg yolk
Instructions
  1. Divide the oats, yogurt, maple syrup and salt (and collagen and egg yolk if desired) between two small jars or dishes. Mix well.
  2. Cut up the peaches over the jars so the juice drips into the jars.
  3. Cover and refrigerate 7-24 hours.
  4. Stir in peaches when ready to eat.
Just Take A Bite https://justtakeabite.com/

In order for me to support my blogging activities, I may receive monetary compensation or other types of remuneration for my endorsement, recommendation, testimonial and/or link to any products or services from this blog.

Grain-free peach cobbler creamsicle

Grain-Free Peach Cobbler Creamsicles

Nothing says summer like fresh peaches! Enjoy them in a frozen treat with these simple grain-free peach cobbler creamsicles. Just a few whole-food ingredients and no refined sweeteners! Your kids will go crazy for this special summer dessert.

Looking for a delicious way to cool down in August? These grain-free peach cobbler creamsicles are made with just a few simple ingredients and kids love them! Put your extra peaches to good use with this fun summer treat. #peaches #summer #frozentreat #popsicle

If you want to know what summer tastes like all you have to do is bite into a fresh, juicy peach. There is nothing quite like it.

Peach cobbler creamsicles transform that summer flavor into a frozen treat you can’t resist.

Start with a simple grain free crumble that only has three ingredients! A quick mix by hand and it’s in the oven.

While the cobbler is baking you can mix up the rest of the creamsicle. Whole milk yogurt and raw milk are combined with pure maple syrup for a sweet, creamy base.

Then cut up fresh peaches right over the bowl so you don’t miss a drop of the juice. Stir them in to create peach cream.

Once the cobbler is done you can mix it into the creamy mixture, pour it into molds and freeze.

Looking for a delicious way to cool down in August? These grain-free peach cobbler creamsicles are made with just a few simple ingredients and kids love them! Put your extra peaches to good use with this fun summer treat. #peaches #frozentreat #summerfood #kidfood

How to Use up Extra Peaches

My kids went crazy for these peach cobbler creamsicles! In fact my husband did too.

I happened to make them when it as about 90 degrees here. Talk about a refreshing treat when it’s hot!

Peach cobbler creamsicles are very allergen friendly. You can swap coconut milk and yogurt for the dairy. They are naturally free of grains, gluten, eggs, nut, corn and soy.

If you can’t have or don’t have tapioca you can substitute for it with cassava or rice. Note that it will not be grain free if you use rice. But it will still be gluten free.

How to Feed Kids that Don’t Like Chunks

If your child doesn’t like food with chunks simply puree all of the ingredients before filling the molds. You’ll still get the peach cobbler flavor in a smooth form. Go with whatever texture works!

When I think of summer I envision sitting on the porch, soaking up the sunshine with peach juice dribbling down my chin (because there is no other way to eat a fresh peach!). Now that summer vision is kicked up a notch with peach cobbler creamsicles (you can let them dribble down your chin too).

Looking for a delicious way to cool down in August? These grain-free peach cobbler creamsicles are made with just a few simple ingredients and kids love them! Put your extra peaches to good use with this fun summer treat. #peaches #frozentreat #summerfood #kidfood

What is the Best Popsicle Shape

When it comes to popsicles I’m kind of old fashioned. I like to use cups and popsicles sticks instead of fancy molds (though these certainly would be a great gift!!!). It reminds me of how I made them as a child. These creamsicles work with whatever you’ve got.

You can use a traditional mold or even these silicon molds to make them more like push pops.

Peach cobbler creamsicles are so refreshing and bursting with flavor, yet full of healthy ingredients. That is an essential part of a great summer.

If you are celebrating a summer birthday these would also make a great birthday treat.

Are you a peach fan? What is your favorite peach treat?

Looking for a delicious way to cool down in August? These grain-free peach cobbler creamsicles are made with just a few simple ingredients and kids love them! Put your extra peaches to good use with this fun summer treat. #peaches #frozentreat #summerfood #kidfood

Grain Free Peach Cobbler Creamsicles
Yields 4
Nothing says summer like fresh peaches! Enjoy them in a frozen treat with these simple grain free peach cobbler creamsicles.
Write a review
Print
Cobbler
  1. 1/4 cup tapioca flour (or cassava or white rice)
  2. 2 tsp. butter (or lard or coconut oil)
  3. 2 tsp. pure maple syrup (or honey)
Creamsicle
  1. 3/4 cup plain whole milk yogurt or coconut yogurt
  2. 1/4 cup whole milk (raw if possible) or coconut milk
  3. 3-4 Tbsp. pure maple syrup (adjust to your liking)
  4. 1/8 tsp. unrefined sea salt
  5. 1 large peach, cut into small chunks, juice reserved
Instructions
  1. Heat the oven to 350*F. Line a baking sheet with parchment paper.
  2. In a bowl combine the flour, butter and syrup until crumbly.
  3. Spread on the parchment paper. Bake for 20 minutes.
  4. Allow to cool and crumble into small chunks.
  5. In a bowl combine the yogurt, milk, syrup and salt.
  6. Cut the peach over the bowl so the juice drips into the yogurt.
  7. Stir in the peaches.
  8. Stir in the cooled cobbler.
  9. Pour into popsicle molds and freeze until solid.
Just Take A Bite https://justtakeabite.com/

In order for me to support my blogging activities, I may receive monetary compensation or other types of remuneration for my endorsement, recommendation, testimonial and/or link to any products or services from this blog.

This post is linked to Savoring Saturdays.

Fruity Breakfast Cake | Homemade Dutch Apple Pie

Fruity Breakfast Cake: Super Healthy Kids Post

Fruity breakfast cake is a great way to start the day! Soaked gluten free grains and healthy fat mixed with fresh fruit is a winning combination.

Fruity Breakfast Cake | Homemade Dutch Apple Pie

Cake for breakfast?

You bet! When made with colorful fruit and nutritious ingredients, cake can be great way to start the day and help your kids enjoy fruit in a different way. Fruity Breakfast Cake tastes delicious which is important so that kids will eat something and feel satisfied until lunch!

Fruity breakfast cake is a combination of whatever berries, cherries or stone fruit you like topped with a low sugar, soaked cake.  It is also free of many allergens – gluten, dairy, nuts, corn and soy.

What makes a breakfast nutritious?

Balance!

Create a balance of macronutrients by pairing the breakfast cake with a protein like scrambled eggs cooked in coconut oil or butter, sausage or whole milk yogurt. Then you get carbohydrates, protein and fat in your meal. This is great for providing energy and balancing blood sugar.

Fruity Breakfast Cake | Homemade Dutch Apple Pie

Want to hear more about how to create a balanced breakfast and how to make this delicious breakfast cake? Head over to Super Healthy Kids for the full post and recipe!

Homemade Tallow French Fries | Homemade Dutch Apple Pie

Homemade Tallow French Fries

Nothing goes better with your grilled burger than fresh-out-of-the-pan tallow french fries! No vegetable oil. No fillers. Just pure potato and real fat.

Homemade Tallow French Fries | Homemade Dutch Apple Pie

You’ve got the grill fired up. The burgers are under way. There is a pile of fresh vegetables from the garden to create a salad.

But something is missing.

What is the perfect side with a grilled burger and garden vegetables? French fries, of course!

Convenience Food for Real Foodies

There is very little convenience food that I buy. But I confess that french fries are almost always in my freezer. They are easy when you don’t have time to cut up potatoes.

Plus with a kid that is allergic to wheat, rice and corn but refuses to eat potatoes in any form except french fries or chips…you serve french fries a little more than you would like.

Since I don’t really care for the vegetable oils in the frozen variety I do sometimes make my own tallow french fries.

If you have never had homemade french fries you are really missing out! They are better than anything you’ll get from a bag or even from a restaurant.

My whole family goes crazy for these tallow french fries. I go crazy for them too…because they are made with healthy fat and have no fillers, gums or acids. Some frozen french fries even have corn! A big no-no with a corn allergy.

Homemade Tallow French Fries | Homemade Dutch Apple Pie

The Secret to Crispy Homemade French Fries

When making homemade tallow french fries there is an important step you can’t forget. Soak and dry the potatoes! This is critical so they will fry up nicely. The soaking removes some of the starch. And oil and water really don’t mix.

Another key to great french fries is using enough fat. I don’t have a fryer. I don’t like to use up all of my tallow at one time either. But I do make sure that there is a plenty of fat in the pan. When I’m done making the french fries I pour the leftover tallow back into a jar to use later.

Of course the final step is to sprinkle the tallow french fries with lots of quality unrefined sea salt. The saltier the better in my opinion.

Then pair them with quality ketchup or make your own!

Homemade Tallow French Fries | Homemade Dutch Apple Pie

Freshly Cooked French Fries

Homemade tallow french fries are best eaten fresh out of the pan. There really is nothing like it.

But if you have leftovers (something that pretty much never happens here with homemade fries) you can reheat them in the oven.

You could make a big batch when you have some time in the kitchen and freeze them so you have homemade french fries on hand for quick meals.

French Fries Without Potatoes

Maybe you don’t like potatoes? Or maybe you’re like me and don’t tolerate them?

Try another vegetable! You can use the same cooking method with carrots, parsnips, sweet potatoes and rutabagas. Pretty much any root vegetable will work.

Is your mouth watering yet? I know mine is. Grab some potatoes, tallow and salt. Fry up the best french fries you’ve ever tasted.  Just a warning…your family will want them all the time once they’ve tried tallow french fries.

Have you ever made your own french fries?

Homemade Tallow French Fries | Homemade Dutch Apple Pie

Homemade Tallow French Fries
Serves 4
Homemade french fries with real fat and real salt.
Write a review
Print
Ingredients
  1. 3 medium russet potatoes
  2. sea salt to taste
  3. tallow (enough to fill pan)
Instructions
  1. Peel the potatoes. Cut into 1/2" sticks.
  2. Soak the potatoes in cold water for 30 minutes.
  3. Dry the potatoes completely.
  4. Heat tallow in a large skillet over medium heat (use enough to fill the pan about 1/4" deep).
  5. Cook the potatoes in the tallow until golden, turning once in a while to make sure all sides are browned, about 10 - 15 minutes.
  6. Place the finished fries on a paper towel and sprinkle liberally with sea salt.
  7. Serve immediately.
Notes
  1. Lard or palm shortening will work in place of the tallow.
  2. Any root vegetable will work in place of the potato.
  3. Store leftover fries in a sealed container in the refrigerator. Heat in the oven to warm.
Just Take A Bite https://justtakeabite.com/
 In order for me to support my blogging activities, I may receive monetary compensation or other types of remuneration for my endorsement, recommendation, testimonial and/or link to any products or services from this blog.

Sweet Potato Salmon Burgers | Homemade Dutch Apple Pie

Sweet Potato Salmon Burgers

Get out of your summer burger rut with these sweet potato salmon burgers! They are simple, nutritious and even make great finger food for the little ones.Sweet Potato Salmon Burgers | Homemade Dutch Apple Pie

You’ve had the grill going all summer with the usual fare – hamburgers, hot dogs, barbecue chicken.

Those are all great. But are you ready to change it up?

Sweet potato salmon burgers are a delicious alternative to traditional hamburgers that you can eat all year long.

They only require a few simple ingredients and minimal preparation time. Sweet potato salmon burgers make a great, quick weekday lunch.

Keep them in mind when it’s time to pack lunches again! They are great eaten cold.Sweet Potato Salmon Burgers | Homemade Dutch Apple Pie

You can decide if you make them heavier or lighter on the meat or potato. By using less salmon these burgers make a very budget-friendly meal.

I love how easily these burgers come together. All of the ingredients can be eaten as-is so it’s just mixing and warming. No need to worry about how well done they are.

But what I love even more is how much my kids enjoy them.

You can eat them on a bun or just dip them in ketchup.

It is fun and easy to spruce up sweet potato salmon burgers.

We top them with homemade pesto. You could eat them open face with a fried egg. Here are some other delicious toppings for sweet potato salmon burgers:

Now that my little one is eating a lot of solids I have to cook things she can eat as well. Sweet potato salmon burgers make a perfect finger food.

All of the ingredients are safe for babies six months and older. Break up the burger into small pieces and let them feed themselves.Sweet Potato Salmon Burgers | Homemade Dutch Apple Pie

Let’s not forget the nutrition factor!

Sweet potato salmon burgers have healthy starch and vitamins from the sweet potatoes. The egg yolks are packed with vitamins. Salmon has essential fatty acids. Then they are cooked in healthy fat for a balance of protein, carbohydrates and fat all in one burger.

Be sure to make a big batch of sweet potato salmon burgers. You can freeze some for later. And leftovers are great cold or warm.

Add pieces of burger to your salad, cut it up for dipping or mix it into your scrambled eggs! I like to slather mine with pesto and eat it plain.

If you don’t tolerate potatoes you can use another orange vegetable like pumpkin or squash. The burgers will still taste just as great.

Are you ready for something different on your grill? Sweet potato salmon burgers are the perfect summer or year round meal.Sweet Potato Salmon Burgers | Homemade Dutch Apple Pie

Sweet Potato Salmon Burgers
Yields 6
A light burger perfect for summer picnics. It even makes great finger food for babies.
Write a review
Print
Ingredients
  1. 1 cup cooked and mashed sweet potato (or pumpkin or carrot)
  2. 6 - 14 oz. canned boneless skinless salmon (one 6 oz. can, two 6 oz. cans or one 14 oz. can - however meaty you like it)
  3. 2 egg yolks
  4. 1 tsp. unrefined sea salt
  5. 1/4 tsp. garlic powder
  6. 1/2 tsp. dill weed
  7. 1/2 tsp. organic cane sugar
  8. lard, tallow or coconut oil for frying
  9. optional - crumbled bacon or bacon strips, pesto, grilled onions, avocado, tartar sauce, Miracle Whip®
Instructions
  1. Add the potato, salmon, egg, salt, garlic powder and sugar to a medium size bowl. Puree with an immersion blender. Add crumbled bacon at this point if desired.
  2. Chill 30 minutes.
  3. Heat a skillet over medium heat. Add the frying oil.
  4. Divide the mixture into 6 burgers.
  5. Cook in the pan until browned on both sides, about 5 minutes per side.
  6. Place burgers on buns and add favorite toppings (bacon strips, grilled onions, pesto, avocado, tartar sauce, Miracle Whip®)
Notes
  1. These burgers make great finger food for babies 6 months and older.
  2. You can substitute tuna for the salmon.
  3. You can add anchovies or sardines to the burger for extra nutrition.
Just Take A Bite https://justtakeabite.com/


In order for me to support my blogging activities, I may receive monetary compensation or other types of remuneration for my endorsement, recommendation, testimonial and/or link to any products or services from this blog.

This post is linked to Savoring Saturdays.