Home » Archives for Mary | Just Take A Bite » Page 51

Author: Mary | Just Take A Bite

Tropical Traditions Gold Label Virgin Coconut Oil Review and Giveaway!

gold_label_virgin_coconut_oil_32ozDo you use coconut oil? I sure do! Especially with a son that is allergic to dairy. Coconut oil makes a wonderful substitute for butter when baking or cooking.

I’ve been using coconut oil for a few years now. But recently I tried Tropical Traditions coconut oil for the first time.

I was very impressed with both the taste and texture of the coconut oil. It worked very well for all of my cooking needs. I use it to make things like graham crackers, dairy free crackers, muffins or even meatballs and stir fry. Most days I also add coconut oil to my hot chocolate.

What else do I do with coconut oil? I use it to make homemade toothpaste and deodorant to avoid chemicals. I also use it straight from the jar as lotion. I love how I smell like coconut without any artificial scents. Tropical Traditions Gold Label Virgin Coconut Oil has a wonderful coconut smell!

We went through a quart of Gold Label Virgin Coconut Oil pretty quickly. I just restocked my pantry with more. Tropical Traditions offers great deals and even free shipping. Be sure to sign up for their newsletter so you don’t miss any chances to get a great product for an even better price.

If you still need more information about exactly what Virgin Coconut Oil is or how to use it, Tropical Traditions has a great explanation for both.

As someone that does a lot of dairy free baking and cooking I use coconut oil almost daily. But even if I didn’t have to make food dairy free I’d still use it! Coconut oil is that great.  And Tropical Traditions is a great resource for coconut oil.

Be sure to enter the giveaway for a chance to win a quart of the Virgin Gold Label Coconut Oil so you can try it yourself. It is a great product with many uses.

a Rafflecopter giveaway

*Tropical Traditions provided me with a free sample of this product to review, and I was under no obligation to review it if I so chose. Nor was I under any obligation to write a positive review or sponsor a product giveaway in return for the free product.

If you order by clicking on any of my links and have never ordered from Tropical Traditions in the past, you will receive a free book on Virgin Coconut Oil, and I will receive a discount coupon for referring you.” Failure to display a proper disclosure statement could result in discontinuation of the referral program.

Dairy Free Egg Free Creamy Butterscotch Pudding

df ef butterscotch pudding

Homemade pudding is such a tasty treat! But typical pudding is made with milk and eggs. That eliminates pudding for many people with allergies.

I recently made a dairy free chocolate pudding for my son. It was a huge hit. But over the last few weeks I’ve been wondering if eggs are bothering him again. I didn’t want to take away his special treat.

So I experimented with a new pudding that is also egg free.

This butterscotch pudding is creamy and delicious! It is so “buttery” that I almost called it caramel pudding. It is also very healthy with its gut-healing gelatin.

My son likes to eat it with crushed graham crackers mixed in. It’s like his own little pudding trifle.

I just love that it’s safe for him to eat, easy to make and filled with good stuff.

Are you looking for an easy treat that is dairy, egg, nut and gluten free? This is it! It only takes about ten minutes to make so you can have it in no time.

df ef butterscotch pudding 2

Dairy Free Egg Free Creamy Butterscotch Pudding
Serves 4
A creamy butterscotch pudding that is gluten, egg and dairy free.
Write a review
Print
Ingredients
  1. 1 cup coconut milk
  2. 3/4 cup milk substitute (oat, rice, almond, etc.)
  3. 3/4 cup coconut sugar or sucanat
  4. 1 tsp. gelatin
  5. 2 1/2 Tbsp. tapioca flour
  6. 1/4 tsp. sea salt
  7. 1 tsp. organic vanilla
Instructions
  1. In a medium saucepan combine the milks, sugar, gelatin, flour and salt.
  2. Let set one minute while gelatin is absorbed.
  3. Cook pudding over medium heat, whisking frequently.
  4. When pudding thickens remove from heat (this takes about 10 minutes).
  5. Add vanilla. Whisk.
  6. Pour into serving dishes.
  7. Serve immediately or refrigerate. The pudding will become firmer as it cools.
Just Take A Bite https://justtakeabite.com/


In order for me to support my blogging activities, I may receive monetary compensation or other types of remuneration for my endorsement, recommendation, testimonial and/or link to any products or services from this blog.

Meal Plans Week of 7-6-14

Allergen-Friendly Weekly Menu 7-6-14July is in full swing. We had a fun holiday weekend. But it sure was tiring. It seems that my energy is dwindling by the day, so I’m trying to make the most of each day to get done what I can. We’re definitely counting down now. Forty six days to go!
This will be a very busy week. I also have a lot to do in the kitchen. I hope I can keep up.

We just defrosted our second freezer. Hopefully today I can get it re-organized. Then both freezers will be ready for stocking! Cherries are in season here in Michigan. If time allows we’ll go picking soon. Before I know it blueberries and peaches will be ready. 

Aside from my kitchen work and running around I need to start making all of my pre-baby to-do lists. I need to plan the menus for when I’m gone so my little guy can be easily fed by someone else. I need to write down all of the last minute items so the house is set. It seems like I keep thinking of one more thing to add to the list.

 Be sure to check back this week as I have a really delicious recipe and a giveaway!! You don’t want to miss them. And if you missed last week’s recipes I had TWO new ice creams – red, white and blue swirl and blueberry pie.

Here is our menu for the week. I hope I can manage all of my extras. I want the freezer stocked by the time baby comes. What are you eating this week?

This post is linked to EatGR Monday Mingle.

***************MENU***************

Sunday
L – cp chicken meatloaf, potatoes, carrots
D – chicken and broccoli quinoa, fruit
*make fruit snacks, make/freeze granola

Monday
D – tacos (double batch of meat), applesauce
*make chicken broth, soak beans, soak flour, freeze taco meat, make fruit leather

Tuesday
D – squash, bean and sausage soup, soaked gf zucchini bread
*strain/freeze broth, make broth, make/freeze bread, soak beans, cook sausage, make/freeze egg casserole

Wednesday
D – (prep ahead) – crockpot chili (double batch), gf df corn muffins
*freeze chili, make/freeze muffins, skim cream, make brownies

Thursday
D – zucchini cakes (with salmon added), baked potatoes, peas
*make ice cream, render lard, make hot fudge

Friday
D – gf df zucchini waffles, sausage, broccoli, fruit salad
*make/freeze granola bars

Saturday – guests?
B – waffles, scrambled eggs, fruit
L – ?
D – ?
*make cherry pie

Red White and Blue Swirl Ice Cream

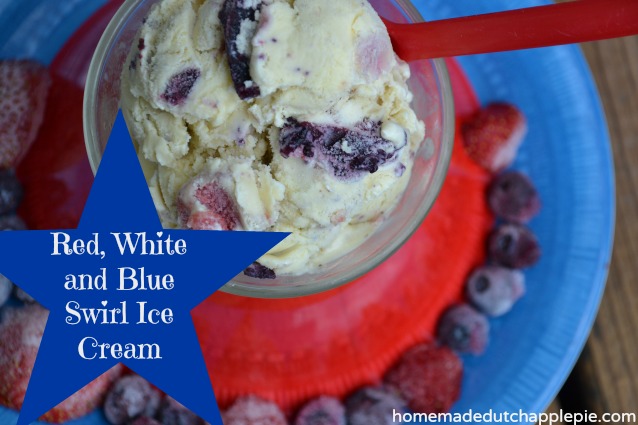
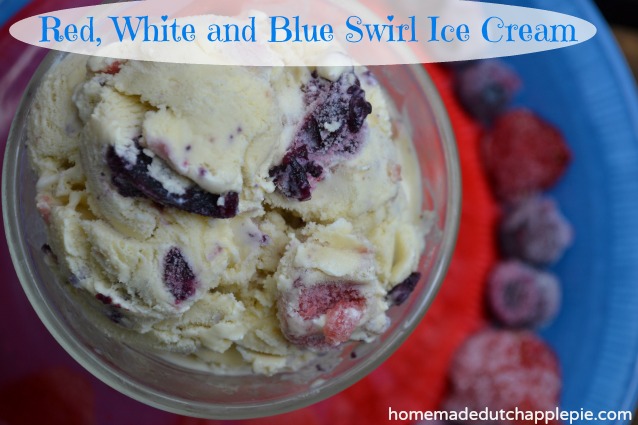
Red white and blue swirl ice cream is a colorful and festive ice cream made with raw cream, fresh fruit and grass-fed gelatin. The perfect summer treat!red white and blue swirl ice creamRed, white, and blue in your ice cream too? YES!
As I was planning my weekly ice cream flavor recently I decided to make something for Independence Day.

There are plenty of red, white, and blue foods you can buy at the store. But it’s hard to find one without food coloring.

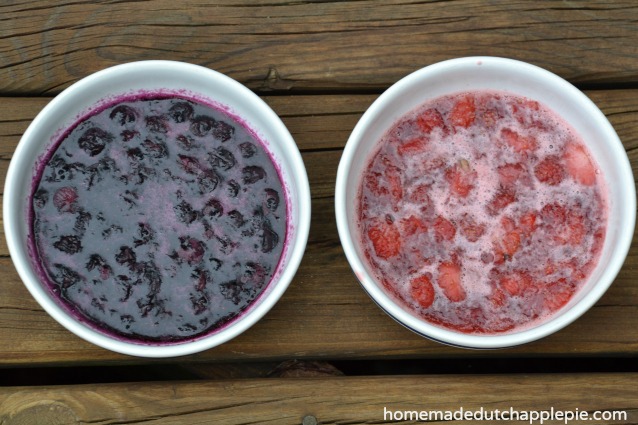
This red, white, and blue swirl ice cream uses only real ingredients to create a colorful treat.

Raw cream, egg yolks, and natural sweeteners are used as the ice cream base. Then as an added bonus it has grass-fed gelatin (use code TAKE10 for 10% off) to bump up the nutrition.red white and blue swirl ice cream 3

You can make it with dairy or without. We made a batch of each so the whole family could enjoy it!

My kids love this fun, festive ice cream. Not to mention the swirl is great plain!

There is no need to resort to junk food to celebrate a holiday with bright colors. Real food is good food. And it can be just as colorful and flavorful.

This Independence Day enjoy a big dish of red, white, and blue swirl ice cream.

red white and blue swirl ice cream 2

Red, White and Blue Swirl Ice Cream
A colorful and festive ice cream made with real ingredients.
Write a review
Print
Red Swirl
  1. 1 cup strawberries (or raspberries) (fresh or frozen)
  2. 1 tsp. gelatin
  3. 1/3 cup sweetener (cane sugar, coconut sugar, honey)
Blue Swirl
  1. 1 cup blueberries (fresh or frozen)
  2. 1 tsp. gelatin
  3. 1/3 cup sweetener (cane sugar, coconut sugar, honey)
Ice Cream
  1. 2 1/2 cups cream (preferably raw) (can be replaced with coconut milk)
  2. 1/2 cup whole milk (preferably raw) (can be replaced with coconut milk)
  3. 1/2 cup sweetener (any combination of cane sugar, coconut sugar, honey or maple syrup)
  4. 1 Tbsp. organic vanilla
  5. 1 - 3 egg yolks (optional)
  6. 1 Tbsp. tapioca flour or arrowroot (optional, helps thicken, especially if not using yolks)
  7. 1/4 tsp. sea salt
Red and Blue Swirls
  1. In a small saucepan combine the strawberries and gelatin.
  2. Let sit one minute.
  3. Add the sweetener.
  4. Cook over med-low heat until mixture begins to bubble.
  5. simmer for two minutes.
  6. Pour strawberry mixture into a bowl.
  7. Refrigerate until fully gelled, about 30 minutes.
  8. Repeat this process with the blueberries.
  9. Set aside half of the mixtures for later use.
Ice Cream
  1. Cut the strawberry and blueberry jellies into small chunks if really firm. Set aside.
  2. In a blender combine the cream, milk, sweetener, vanilla, egg yolks, flour and salt. Blend until smooth.
  3. Process the ice cream in an ice cream mixer according to manufacturer's directions.
  4. During the last 2 minutes of processing add the strawberry and blueberry jelly.
  5. Transfer the ice cream to a freezer-safe container.
  6. Freeze until firm.
Notes
  1. This recipes makes enough strawberry and blueberry swirl for two batches of ice cream. You can also use the leftover swirl to eat plain or use as jelly.
Just Take A Bite https://justtakeabite.com/

Meal Plans Week of 6-29-14

weekly menu 6-29 Happy Independence week. I really can’t believe we’re just a few days away from July already. Somehow our summer “vacation” has become very busy. Time seems to be flying by. At least we’ve been making time for fun things like our trip to Michigan’s Adventure last week.

Thankfully this week isn’t too chaotic. We are celebrating my niece’s second birthday. We have to pick up milk from the farm. We’ll do our usual trip to the library and farmer’s market and a few other little outings. Of course we’ll be celebrating the 4th at the local parade and craft fair.

I haven’t decided yet it there are any special treats I’ll make for the 4th. We’ve got some new ice cream in the freezer…check back tomorrow for the recipe!  And if you missed last week’s recipes be sure to check them out at as well – chocolate covered toffee and honeyed-dew. Both would be great for a summer celebration! Or there are some classics like red, white and blue parfaits, cheesecake, buster bars or holiday “Oreos.”

We mostly have things ready for baby. The nursery is set. I have bags packed. All the clothes and diapers are washed. I’m praying this little one keeps cooking for another 7 1/2 weeks. But at least the house is ready for when he/she does arrive. Now we just need a name!

About the only thing I don’t have ready is food. Last week I got some baked goods in the freezer. This week I’ll focus more on meals. Hopefully each week I can get something in the freezer so I have a good stock of things to pull out after baby arrives. I’ve got a maximum of 53 days left to get things prepared.

We got our last load of strawberries yesterday. A lot of them are already in the freezer. I made a batch of strawberry jam (recipe coming soon!) and strawberry blueberry jello. I’m trying to decide what to do with the rest. I might make strawberry shortcake. I might make more dried strawberries of fruit leather as well.

 I have been keeping myself very busy lately with cooking, baking and cleaning. My legs are not too happy about it. We’ll see if I can make myself put my feet up more this week to help keep the swelling and pain from getting too bad.

Here is our menu for the week. What are you eating?

mi adv

***************MENU***************

Sunday
L – (quick) – misc. leftovers
D – at birthday party

Monday
D – sloppy joes, chips, lettuce salads, fruit salad
*make 2 batches of graham crackers, make strawberry fruit leather or strawberry shortcake

Tuesday
D – cp roast chicken, baked potatoes, broccoli
*make broth, freeze chicken, make “cheese” crackers, soak lentils

Wednesday
D – (prep ahead) –  chicken, lentil and vegetable soup, muffins (family), out to eat (me)
*strain/freeze broth, bake/freeze muffins, skim cream, freeze soup

Thursday
D – hamburger corn bake, fruit
*make ice cream, freeze casserole

Friday
D – grilled brats and hot dogs, grilled zucchini, coleslaw

Saturday
B – pancakes, scrambled eggs, fruit
D – baked cod, caramelized brussels sprouts, fried potatoes
*freeze pancakes

Honeyed-Dew

honeyed-dewI often serve some kind of fruit side dish with our dinner. I try to have variety or simply make fruit salads with whatever fruit we have on hand and is in season.

Recently as I was preparing dinner I was trying to think of what to do with the fruit we had on hand. My son is allergic to grapes and bananas. So those were out. That left honeydew.

We all enjoy honeydew plain. But I wanted to spruce it up a bit. So our honeydew became honeyed-dew.

The honeyed-dew only took about 30 seconds to prepare. It was so refreshing at dinner, and everyone liked it. My son kept sucking on the fruit like a popsicle.

You can make it in a bowl to serve to a group or put the honeydew on sucker or popsicle sticks for a cool treat kids will eat any time of day.

If you don’t have honeydew you can use a different type of melon. You could even use grapes or berries. No matter what fruit you choose this is a healthy, simple side dish or snack.honeyed-dew 2

Honeyed-Dew
A simple and refreshing side dish or fun treat for kids.
Write a review
Print
Ingredients
  1. 1 cup honeydew, cut into chunks
  2. 1 Tbsp. honey
  3. 1/4 tsp. sea salt (optional)
Instructions
  1. Place the honeydew in a bowl or on sticks.
  2. Drizzle with honey.
  3. Sprinkle with salt.
  4. Mix or spread over the fruit.
  5. Freeze the fruit for about 60 minutes.
  6. Stir before serving to make sure the syrup covers the fruit.
Notes
  1. This recipe can easily be doubled, tripled, etc. depending on how many you are serving.
  2. The "popsicles" can stay in the freezer for an easy snack.
Just Take A Bite https://justtakeabite.com/

John Ball Zoo – A Family Tradition

john ball zoo 1

If you asked me what one of my fondest memories of my childhood was, I’d say going to John Ball Zoo. I went there often when visiting my grandparents. Getting a balloon and sitting by the John Ball statue were always on the agenda.

John Ball Zoo is a wonderful park and zoo in Grand Rapids, Michigan. I didn’t grow up in Grand Rapids, but I still went often in the summer. Now I do live near Grand Rapids, and I love taking my own kids! We usually get a membership so we can go as often as we like every year. My son even took his first trip at just a few weeks old.

john ball zoo 3

john ball zoo 4

Recently I was privileged to go on a tour of the zoo. There have been a lot of updates since I was little.

We started with one of my favorites – the chimpanzees. They are always entertaining. There is one older male that loves to get up close and look at everyone. After talking to one of the zookeepers we found out that he likes to look at everyone’s shoes!

john ball zoo 2

We were fortunate to have a good view of one of the lions. We also saw the mountain lions, bears, turtles, otters, and many other neat creatures.

The kids got a special treat, too. They got to see a screech owl up close and pet an albino ferret.

john ball zoo 6

John Ball Zoo has an exciting aquarium. If you time your stop there well you can see the penguins being fed. It’s noisy but fun. We also got go behind the scenes of the aquarium to see where they prepare food, take care of sick creatures and get others adjusted to their environment.

There is also outdoor water fun at the zoo. You can pet stingrays!

The latest attraction at John Ball Zoo is a huge tiger exhibit. It feels like you are walking right through their habitat. Part way up the tiger trail is a unique play area for kids of all ages. Kids can pretend to camp, have fun in a clubhouse or walk along bridges and ropes.

Once you get to the top of the trail  you can make your way back down via the funicular. You get a great view of the zoo and the surrounding area.

john ball zoo 7

But don’t think your visit is over yet. There is still a petting zoo/farm. You can feed budgies. You can get up close and pet wallabees. And a trip to John Ball Zoo is never complete for the little ones without playing on the wooden train.

Did I mention the monkeys, reptiles, frogs, camel rides, baboons…there is so much to see and do at John Ball Zoo! Don’t forget to visit the new gift shop for a souvenir of your visit.

But don’t leave just yet. Once you step out of the zoo you’ll see that there is a huge pond where you can ride duck paddle boats. Or you can take the kids to John Ball Park for a picnic and fun on the playground.

john ball zoo 9

You could spend the whole day at John Ball Park/Zoo. But you also don’t have to. John Ball Zoo is the perfect size for a shorter visit – especially if you have little ones that don’t need long outings. Or you can make a whole day of it.

The zoo continues to evolve and expand. It is different than the zoo I grew up going to. There is so much more to see and do! But it still remains the friendly, fun, family-oriented zoo of West Michigan.

If you live in the area or ever get a chance to visit, be sure to stop by John Ball Zoo. It’s been a part of my family’s tradition for many years. I hope my kids enjoy it for years to come and can take their own children some day.

john ball zoo 5

john ball zoo 8

Homemade Chocolate Covered Toffee

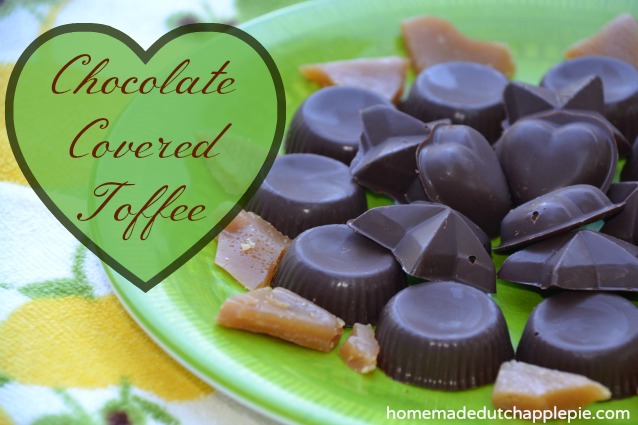
chocolate covered toffee

Did you grow up eating candy bars like Heath and Skor? I did. They were two of my favorites!!

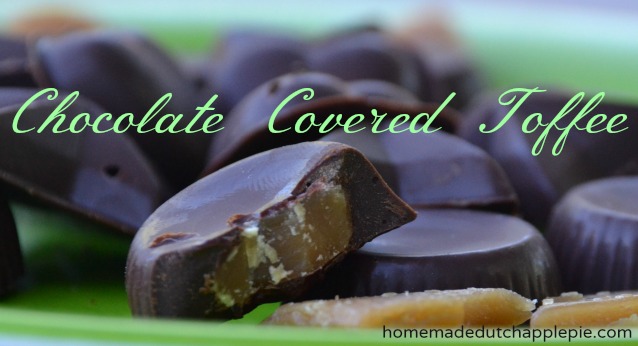
I recently made a homemade version of chocolate covered toffee. It reminds me of my childhood favorites. Milk chocolate outside. Buttery toffee inside.

Homemade Chocolate Covered Toffee

The best part is that these chocolates only contain real ingredients and are super easy to make!

I made them for a Father’s Day treat. They would also be perfect for Valentine’s Day. I wouldn’t mind having them on hand any time for a sweet treat.

Easy Grain-Free Dessert

I used candy molds to make them into individual chocolates. You could also make a batch in a large pan and break it into pieces to be more like a candy bar. Either way you can’t go wrong.

These chocolates are gluten, grain, nut and egg free. So they are a perfect treat for someone with allergies.

chocolate covered toffee 2

Homemade Chocolate Covered Toffee
Yields 30
Homemade buttery toffee topped with milk chocolate.
Write a review
Print
Ingredients
  1. 3 Tbsp. honey
  2. 1/4 cup butter
  3. 1/2 cup brown cane sugar, sucanat or coconut sugar
  4. 1/4 - 1 tsp. salt (to taste)
  5. 12 oz. chocolate chips
Instructions
  1. In a small sauce pan combine the honey, butter, sugar and salt.
  2. Cook over medium heat until the mixture begins to bubble, stirring frequently.
  3. Continue to simmer the mixture for about 5 minutes.
  4. Remove from heat and pour the toffee into a parchment lined 8" baking dish.
  5. Allow to cool in the refrigerator for about 20 minutes.
  6. While the toffee is cooling melt the chocolate chips over a double boiler.
  7. Fill the bottom of candy molds with chocolate (1/4 - 1/3 full) or pour 1/3 of chocolate into a parchment lined 8" baking dish.
  8. Allow the chocolate to firm in the fridge.
  9. When the toffee is cool enough to handle, break or cut it into small pieces (if using molds).
  10. Place a piece of toffee on top of the chocolate layer in each mold or lay the entire toffee piece on the layer of chocolate in a baking pan.
  11. Top the toffee with the remaining melted chocolate.
  12. Allow to cool in the refrigerator until completely firm (at least 30 minutes).
  13. Remove chocolates from mold or break chocolate into bars/large chunks.
  14. Store in a closed container in the refrigerator.
Notes
  1. If you are making individual chocolates, there will be leftover toffee. This makes enough toffee for about two batches of chocolates (use 24 oz. chocolate chips to use up all of the toffee).
  2. The toffee is great on its own.
  3. If you add extra honey the toffee will be more like chewy caramel for chocolate covered caramels.
Just Take A Bite https://justtakeabite.com/

Meal Plans Week of 6-22-14

menu 6-22It’s summer! For real now. I already feel like it’s flying by. There is still so much to get done before baby comes.

At least we are making progress. Yesterday we bought a new pack ‘n’ play (it sure is strange to see that in our bedroom!). We ordered new monitors. I bought a going home outfit for the baby. Now most of the “baby stuff” is set. It’s all the other stuff that needs to get done.

This week will be another very busy one with an OB appointment, chiro appointment, speech therapy appointment and meeting a new pediatrician. I also need to figure out when to grocery shop. Hopefully we can find time for fun things too.

From now until baby arrives I’m hoping to prepare one meal and one snack to put away in the freezer. Last night I started soaking flour for a batch of brownies. I would have loved to make a few batches at once, but we are almost out of honey. So I’ll probably be making more of these later. After I get more honey I also need to make a few batches of graham crackers this week.

Produce is starting to come in. We’ve started freezing strawberries. But there is plenty more to come.

I’ve still been keeping up with my goal of eating seafood at least two times per week. I’m trying to grow another smart kiddo 🙂

I was finally able to meet with my doctor last week to go over thyroid labs. It was a great relief to hear that she thinks my levels are right where they should be. So I won’t worry about thyroid again until after baby is born.

My body is definitely starting to slow down. But I’m still doing my best to keep us all well fed and get our freezer stocked with nourishing foods. Here is what’s on the menu this week. What are you eating?

honeyed dew

***************MENU***************

Sunday
L – cp roast beef, potatoes, carrots
D – leftover baked spaghetti, salad
*bake brownies, dry strawberries, make coffee cake, make lemonade

Monday
D – salmon cakes, mashed potatoes, peas
*freeze strawberries, make fruit leather

Tuesday
D – (prep ahead) – cp meatballs, potatoes, mixed veggies

Wednesday
D – (quick prep) – hot dogs, tater tots, broccoli, fruit
*soak flour, skim cream, make ice cream

Thursday
D – chicken and vegetable stir fry over rice, honeydew
*bake breakfast cookies, bake brownies, make df ice cream, cut up fruit

Friday
D – bacon, muffins, fruit salad, roasted cauliflower
*bake/freeze muffins, make graham crackers, soak flour

Saturday
D – grilled burgers, fries, grilled zucchini
*make zucchini muffins

In order for me to support my blogging activities, I may receive monetary compensation or other types of remuneration for my endorsement, recommendation, testimonial and/or link to any products or services from this blog.

Easy Beef and Bean Enchilada Bake (gluten, egg, dairy, nut, rice free)

beef and bean enchilada bakeSometimes it is very tough to cook for my family. I have to work around food allergies and intolerances. Of course they are different for everyone in the family. So normally I end up cooking a lot of separate items so everyone can feel good and eat well. But it is a lot of work!

It’s pretty rare that I make casseroles. It’s hard to make one that we can all eat. But last week I came up with a super easy casserole that we all enjoyed! I actually did make it three different ways to meet our needs. The big difference was that making different versions didn’t require any extra work.

The main recipe uses tortilla chips, ground beef, tomato sauce, beans and cheese. I left the cheese out for my son’s dairy free version. My version was simply ground beef, cheese and beans so that it was corn and tomato free.

This casserole is naturally gluten, egg, rice and nut free. You can make it dairy free by leaving out the cheese. There is still plenty of flavor. If you don’t tolerate corn you can substitute another starch like cooked rice or quinoa.

I loved that I found a way to use up the bits of tortilla chips at the bottom of the bag instead of throwing them away. If you’re looking for a super easy, allergen-friendly dinner this is it.

Easy Beef and Bean Enchilada Bake
A quick prep casserole that is allergen-friendly and has big enchilada flavor.
Write a review
Print
Ingredients
  1. 1 lb. ground beef (or turkey or chicken)
  2. 15 oz. tomato sauce
  3. 1 Tbsp. tapioca flour, arrowroot or cornstarch
  4. 2 cups pinto beans (cooked)
  5. 2 cups crushed tortilla chips
  6. 2 cups shredded cheese (optional)
  7. salt and garlic powder to taste
Instructions
  1. Brown the meat. Season with salt and garlic powder.
  2. With the heat still on, sprinkle the flour over the meat and mix.
  3. Add the tomato sauce.
  4. Simmer for 5 minutes. Season to taste. Remove from heat.
  5. Heat the oven to 350*F.
  6. In a 2 qt. casserole layer 1/3 of the crushed chips, 1/3 of the meat mixture and 1/3 of the cheese. Repeat layering two times.
  7. Bake, covered, for 35 minutes.
  8. Remove cover and bake another 5 minutes.
Notes
  1. The tortilla chips can be replaced with another starch like cooked rice or quinoa.
  2. This can be turned into a skillet meal by sprinkling the cheese and chips into the pan of meat after simmering the sauce.
Just Take A Bite https://justtakeabite.com/