Home » Archives for Mary | Just Take A Bite » Page 52

Author: Mary | Just Take A Bite

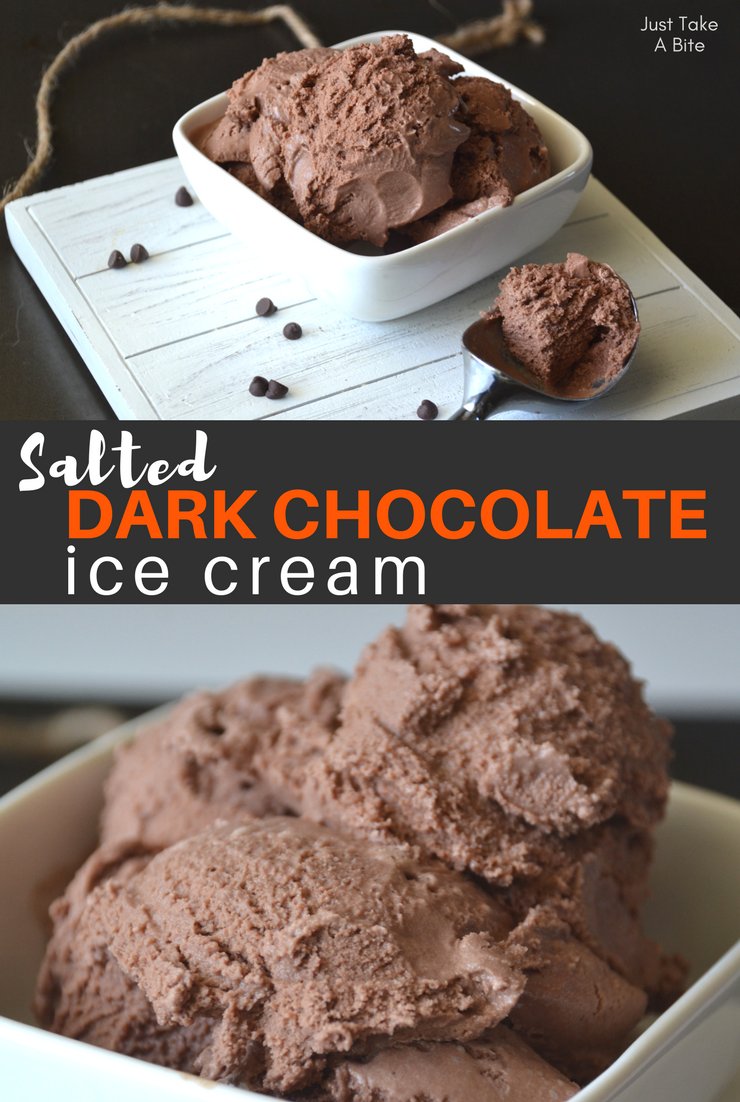
This salted dark chocolate ice cream has the perfect balance of salty and sweet in creamy, rich chocolate.
Salted Dark Chocolate Ice Cream

This salted dark chocolate ice cream has the perfect balance of salty and sweet in creamy, rich chocolate.This salted dark chocolate ice cream has the perfect balance of salty and sweet in creamy, rich chocolate.

In the summer I make ice cream a LOT. Usually it’s once or twice a week. I make some of our favorites quite often – mint chocolate chip, vanilla paired with hot fudge, chocolate and candy bar.

In addition to the standards I love to experiment with new flavors! I’ve made blueberry cheesecake, rhubarb pecan, sea salt caramel and even blue moon (plus many others).This salted dark chocolate ice cream has the perfect balance of salty and sweet in creamy, rich chocolate.
For my latest ice cream creation I made something dear to my heart…salted dark chocolate ice cream.

I love putting salt on my ice cream (crazy pregnancy hormones make me crave salty and sweet together…now I’m hooked). It really brings out the sweetness. I especially love adding salt to chocolate ice cream.This salted dark chocolate ice cream has the perfect balance of salty and sweet in creamy, rich chocolate.
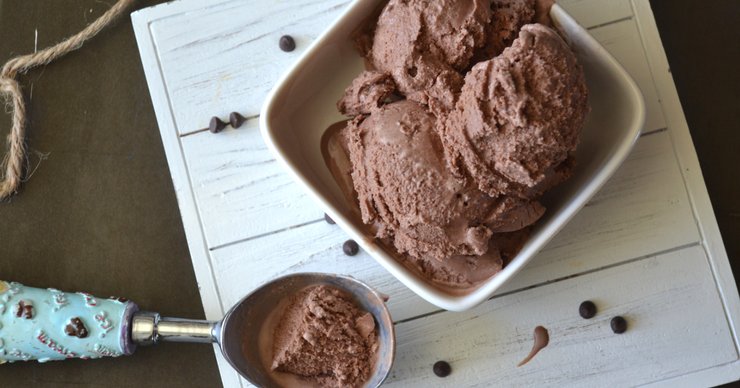
I figured I might as well put salt IN my ice cream instead of adding it every time I scoop a dish.

I combined cocoa powder and carob powder to get a really rich, dark chocolate flavor. Then I added plenty of unrefined sea salt to give a good contrast.

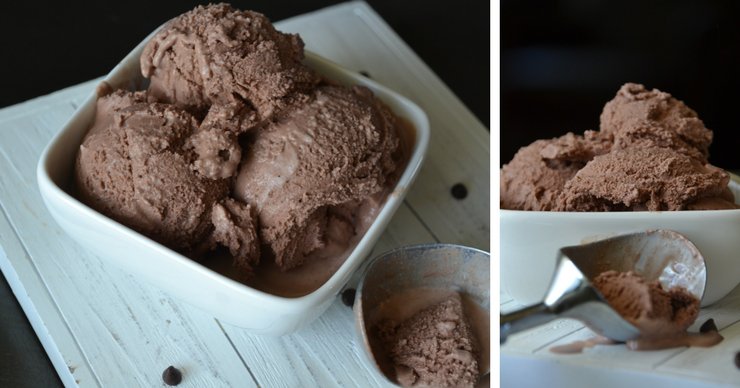
salted dark chocolate ice cream collage

If you tolerate nuts, chopped almonds would be great in this ice cream. If you don’t tolerate dairy you can make it with coconut milk. It still tastes wonderful!This salted dark chocolate ice cream has the perfect balance of salty and sweet in creamy, rich chocolate.
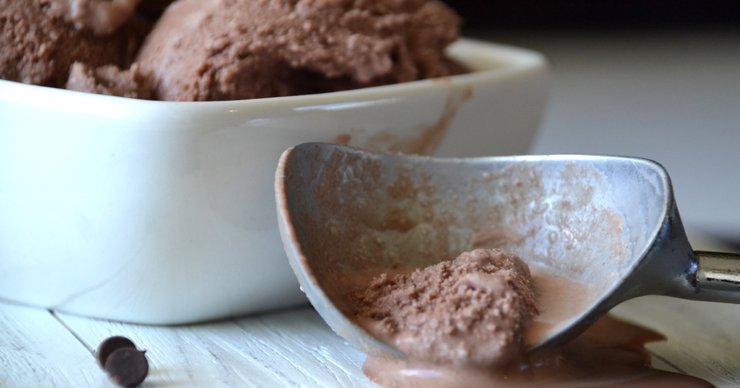
Are you like me and grew up eating a Wendy’s Frosty along side french fries? That’s what this salted chocolate ice cream reminded me of as I was eating it.  YUM! Chocolate plus salt…what could be better?!

Even my daughter LOVES it. So it is very kid friendly. It’s a perfect summer treat.

If you like chocolate ice cream you’ll love this salted dark chocolate ice cream. It’s like chocolate ice cream kicked up a notch.

This post is linked to Allergy Free Wednesday.This salted dark chocolate ice cream has the perfect balance of salty and sweet in creamy, rich chocolate.
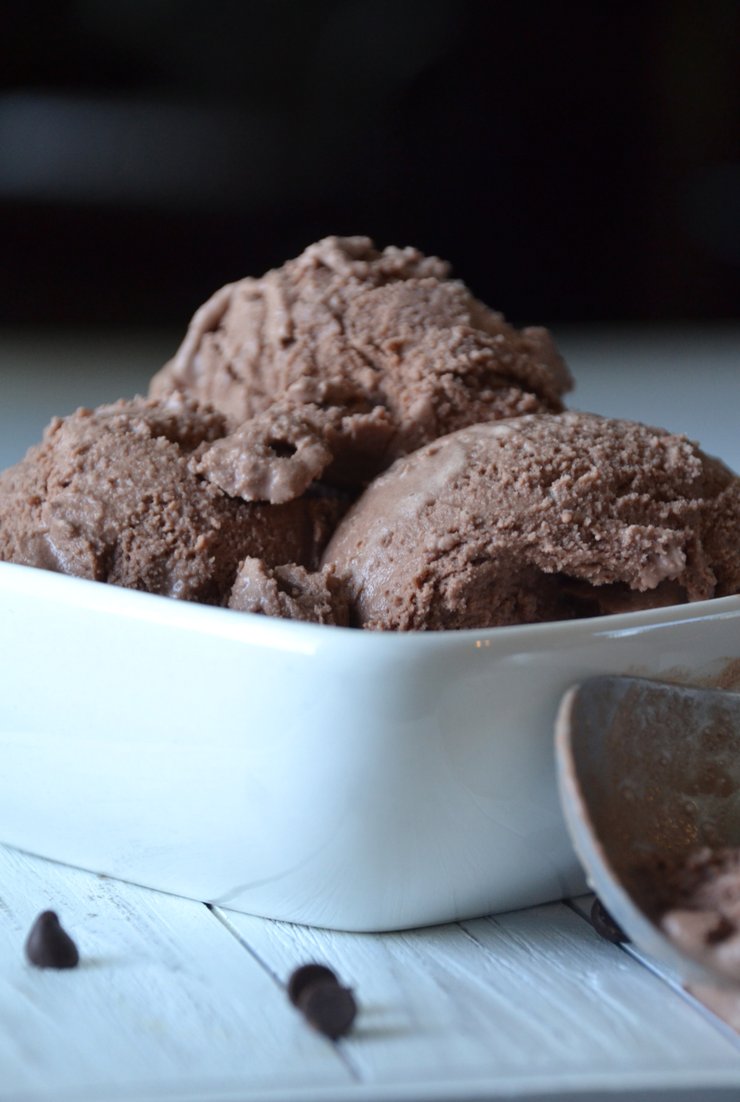
Salted Dark Chocolate Ice Cream
A rich chocolate ice cream with a hint of sea salt to bring out the sweetness.
Write a review
Print
Ingredients
  1. 21/2 cups cream (preferably raw) (can be replaced with full fat coconut milk)
  2. 1/2 cup whole milk (preferably raw) (can be replaced with full fat coconut milk)
  3. 1 - 3 egg yolks (optional)
  4. 3/4 cup sweetener - honey, maple syrup, cane sugar, coconut sugar
  5. 1/3 cup organic cocoa powder
  6. 1/4 cup carob powder (can be replaced with cocoa powder)
  7. 1 Tbsp. vanilla
  8. 1 Tbsp. tapioca flour or arrowroot (optional)
  9. 1/2 - 1 tsp. unrefined sea salt (to taste)
Optional add-ins
  1. 1/2 cup mini chocolate chips
  2. 1/2 cup chopped almonds
  3. 1/2 cup dried cherries
Instructions
  1. In a blender combine the cream, milk, egg yolks, sweetener, cocoa powder, carob, vanilla and flour. Blend until smooth.
  2. Add salt, starting with 1/2 tsp. Blend. Taste and adjust to liking.
  3. Process the ice cream according to manufacturer's directions (mine takes about 20 minutes in a Kitchen Aid attachment).
  4. Transfer the ice cream to a freezer-safe dish. Stir in add-ins.
  5. Freeze until firm.
Just Take A Bite https://justtakeabite.com/

Meal Plans Week of 6-15-14

DSC_2284

Happy Father’s Day!! I feel blessed to have a husband, father, father-in-law and grandfather in my life.

This is our first week of summer break with no set schedule. We still have plenty going on, like doctors appointments, farmer’s market, milk pick up and even a special trip to the zoo! I must admit that I’m really looking forward to the weekend. I get a pregnancy massage!!

I’m also excited today because I am at 30 weeks (though baby is measuring over 31 already)! I’m down to check ups every two weeks. We almost have everything set for baby. Most likely tonight will be the big bedroom switch for my little guy, too. Lots of change. But it’s very exciting.

Last week I was fortunate enough to get a half dozen duck eggs. I’m trying to savor them and not eat them all in a few days. I’m still focusing on third trimester nutrients and making sure I eat seafood a few times a week in addition to drinking plenty of raw milk.

DSC_2263

I made a lot of Father’s Day goodies last week. If you missed them check out the chocolate chunk cookies and strawberry rhubarb cheesecake. I also have a couple more recipes coming. This week I might make some kind of pie. We still have a lot of rhubarb in our garden, so most likely strawberry rhubarb. I also need to make a new batch of graham crackers.

This week I might start stocking up on strawberries. It’s hard to believe preserving season is starting. I don’t think I’ll be up for strawberry picking myself this year, but hopefully my husband and kids can get a lot for us.

There are only a few days left to enter the giveaway for The Nourished Metabolism. If you haven’t entered, now is your chance!

Here is what’s on the menu this week. What are you eating?

DSC_2222

**********MENU**********

S (church, Father’s Day, make smoothies)
B – bagels w/ cream cheese or peanut butter, fruit, granola bars
L – cp chicken breasts w/ potatoes, onions and carrots, broccoli, applesauce
D – grilled cheese, tomato soup, salad

M (milk, A/C install, make pie crust)
D – ham and cheese quiche cups, roasted cauliflower, fruit salad

T (library, FM, make pie)
D – spaghetti, broccoli

W (Dr. A., make broth, skim cream, make ice cream)
D – cp roast chicken, rice, veggies

Th (zoo)
D – mac ‘n’ cheese, peas

F ()
D – sausage, waffles, fruit, TBD vegetable

S (pg massage)
D – grill TBD

Gluten Free Strawberry Rhubarb Cheesecake


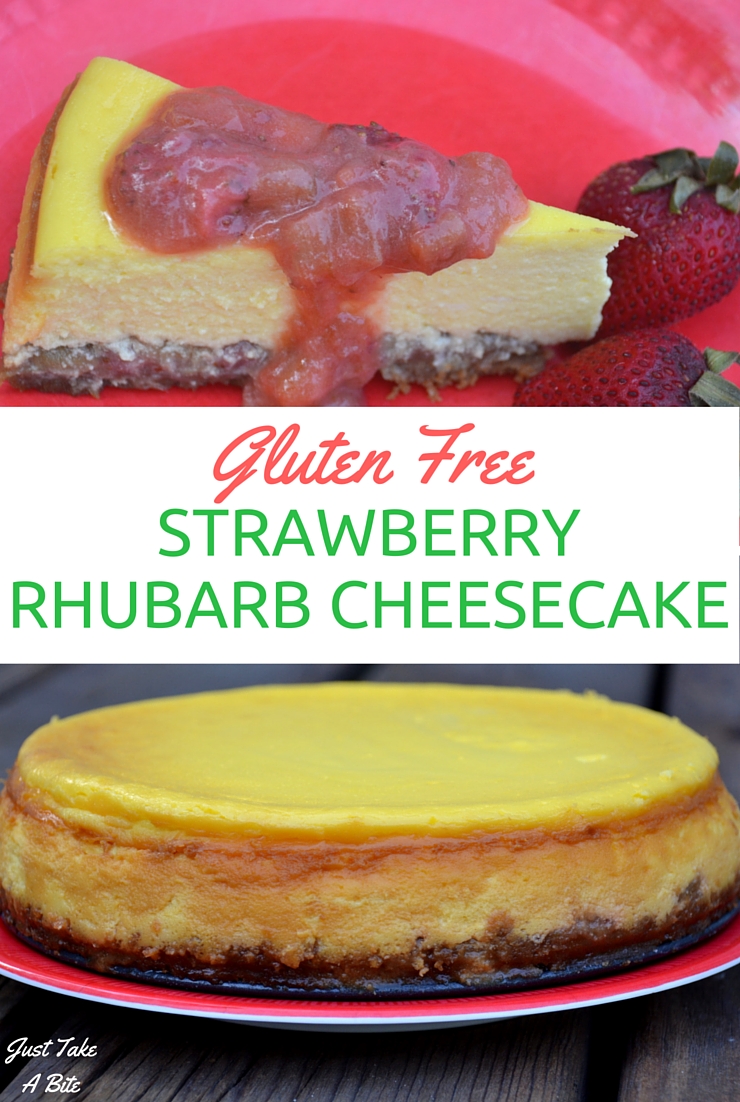
Strawberry rhubarb cheesecake is a a rich and creamy dessert that is gluten and nut free and combines the flavors of spring and summer.This Gluten Free strawberry rhubarb cheesecake is perfect for any summer celebration.For Father’s Day this year I decided to spoil my husband with a special dessert. He’s always interested in new recipes that utilize the rhubarb from our garden. So I combined that with one of our favorite treats – cheesecake!

This cheesecake is packed with flavor. The rhubarb is slightly tart, the strawberries are sweet, and the cheesecake is slightly tangy. Combined you get a perfect balance.gf strawberry rhubarb cheesecake 3

One of the best parts about this dessert is that you can make it 100% from scratch, right down to the graham cracker crumbs and cream cheese. All of the components of the cheesecake can be made in advance. Then the assembly is quite simple.

gf strawberry rhubarb cheesecake collage

I also love that you can make this cheesecake gluten and nut free. I use my homemade gluten free graham crackers for the crust. If you want to soak your grains I have a soaked version as well. If you don’t need it to be gluten free you could also make whole wheat, soaked whole wheat or sourdough grahams. I make homemade cream cheese from yogurt and sour cream from raw cream.

Strawberry rhubarb cheesecake does take a little planning and preparation. But each component requires very little hands on time. You just have to start a day or two (or even a week if that works best for your schedule) in advance of when you want the cheesecake to be ready. It makes a wonderful treat for a special occasion. Even kids will love it!

The next time you want an extra special spring confection try strawberry rhubarb cheesecake. You can spoil one (or all!) of the special dads in your life with this delicious dessert.

gf strawberry rhubarb cheesecake 4

Gluten Free Strawberry Rhubarb Cheesecake
A rich and creamy cheesecake that is gluten free, totally from scratch and perfect for spring.
Write a review
Print
Cheesecake
  1. 1/2 recipe graham crackers (about 2 cups crushed, see links in post for recipes)
  2. 3 Tbsp. organic cane sugar, sucanat or coconut sugar
  3. 6 Tbsp. butter, melted
  4. 2 cups cream cheese at room temp (preferably homemade - see link in post for recipe)
  5. 1 cup sour cream (preferably homemade - see link in post for recipe)
  6. 1 1/4 cups organic cane sugar, sucanat or coconut sugar
  7. 3 eggs
  8. 1 tsp. vanilla
  9. 1 Tbsp. organic lemon juice (optional)
Strawberry Rhubarb Filling/Topping
  1. 3 cups total of strawberries and rhubarb, diced
  2. 2 Tbsp. butter
  3. 1/4 cup organic brown cane sugar, sucanat or coconut sugar
Instructions
  1. Prepare the graham crackers, cream cheese and sour cream.
  2. Pulse the graham crackers in a food processor or blender to make crumbs.
  3. Cook the strawberries and rhubarb in 2 Tbsp. butter and 1/4 cup sugar in a small pan for about 10 minutes, until soft.
  4. Divide the strawberry rhubarb mixture - 1/3 for the filling and 2/3 for topping. Let cool.
When ready to prepare the cheesecake
  1. Heat oven to 350*F.
  2. Combine the graham cracker crumbs, 6 Tbsp. butter and 3 Tbsp. sugar. Press mixture into the bottom of an 8" or 9" spring form pan.
  3. Bake the crust for 10 minutes.
  4. Gently spread 1/3 of the strawberry rhubarb mixture onto the crust.
  5. In a large bowl beat the cream cheese, sour cream, vanilla and 1 1/4 cups sugar until smooth.
  6. Add the eggs one at a time, blending well after each addition.
  7. Add lemon juice if desired.
  8. Pour the cheesecake batter over the strawberry rhubarb filling.
  9. Place the spring form pan in a large pan.
  10. Fill the bottom pan half way with water.
  11. Bake the cheesecake for 90 minutes.
  12. Turn the oven off and allow the cheesecake to set in the oven for 30 minutes.
  13. Remove the cheesecake from the oven and chill in the refrigerator for at least 4 hours before serving.
  14. Top slices with the remaining strawberry rhubarb mixture when serving.
Notes
  1. The graham crackers can be prepared up to 3 weeks before making the cheesecake.
  2. The cream cheese and sour cream can be prepared up to 1 week before making the cheesecake.
  3. Any ratio of strawberries and rhubarb will work. I used 2:1 rhubarb to strawberries to let the rhubarb flavor stand out.
  4. The strawberry rhubarb filling is optional. You can make the cheesecake without the filling and just use the topping.
  5. The topping can be served cold, room temperature or warm.
  6. If you like a very firm cheesecake chill it in the freezer for about an hour before serving.
Just Take A Bite https://justtakeabite.com/
 This post is shared on Allergy Free Wednesday.

Gluten Free Dairy Free Chocolate Chunk Cookies

gf df chocolate chunk cookies

 Who doesn’t love chocolate chip cookies? I know I do! I grew up in a house that always had fresh chocolate chip cookies on hand. My mom is known for her cookies. There is no special recipe. But she knows how to make them just right.

Last week I decided to bake a batch of cookies for one of our Father’s Day goodies. But I wanted to make them so the whole family could enjoy them – allergies and all.

This is my version of chocolate chip cookies that is gluten, dairy, rice and nut free. They are light and crunchy. A perfect treat for everyone.

The next time you have a craving for cookies try a batch of these chocolate chunk cookies. 

This post is shared on Allergy-Free Wednesday.

gf df chocolate chunk cookies 2

Gluten Free Dairy Free Chocolate Chunk Cookies
Yields 3
A light and crispy chocolate chip cookie that is very allergen-friendly.
Write a review
Print
Ingredients
  1. 2 cups any combination of gluten free flours (i.e. white rice, brown rice, amaranth, tapioca, sorghum)*
  2. 1 tsp. baking soda
  3. 1/2 tsp. sea salt
  4. 3/4 cup organic palm shortening
  5. 1 1/2 cups coconut sugar, sucanat, cane sugar or brown cane sugar (using half each of two kinds of sugar gives great flavor)
  6. 1 tsp. organic vanilla
  7. 3 eggs
  8. 1 -2 cups gf df chocolate chunks (or any chip you like)
Instructions
  1. Heat the oven to 350*F.
  2. Cream the shortening and sugars.
  3. Add the vanilla and eggs. Beat well.
  4. Add the dry ingredients. Mix well.
  5. Stir in the chocolate chunks.
  6. Place on an ungreased baking sheet in 1-2 tablespoon scoops.
  7. Bake 15 - 18 minutes (shorter for softer cookies, longer for crispier cookies).
  8. Allow to cool for 5 minutes on the baking sheets before moving the cookies to a cooling rack.
Notes
  1. *The cookies will turn out best if at least 1/3 of the flour mix is a "white" flour like white rice or tapioca.
Just Take A Bite https://justtakeabite.com/
 

In order for me to support my blogging activities, I may receive monetary compensation or other types of remuneration for my endorsement, recommendation, testimonial and/or link to any products or services from this blog.

Meal Plans Week of 6-8-14

DSC_2125

Good morning! It’s summer break. I officially have a first grader! I’m happy to be done with all of our usual activities and be able to relax. I’m also looking forward to spending lots of extra time with my little girl before she’s in school all day in the fall.

This week we’ll keep busy with some errands and my daughter’s first camp of the summer. I also have another check-up. It’s always fun to see how big the baby is getting.

I have quite a bit planned for my kitchen work this week. Hopefully my legs will hold up. The swelling has been pretty bad again the last couple days. I’ll be making several Father’s Day treats this week. I also want to make ice cream and some snacks for the kids.

I think I can finally say I’m done with my whole house makeover. I have cleaned just about every room in the house very thoroughly. It’s not perfect. There is always more that could be done. But I’m satisfied with what I accomplished. I’ll be sharing some photos soon!

A before photo of my desk!

Also on my agenda for the next few weeks is planning meals/snacks for when I’m at the hospital and after I come home. Soon I’ll be working on stocking my freezer with meals. I’m sure we will get some meals after the baby is born. But with all of our food allergies and intolerances usually my husband is the only one that can eat what people bring. So I have to set up my own meals.

If you haven’t entered yet, please go enter the giveaway for two amazing books – The Nourished Metabolism and Love Your Body. I can’t say enough good things about them!

Here is our menu and agenda for the week. What are you eating?

DSC_2140

**********MENU**********

S (church, make cheesecake)
L – cp honey mustard chicken over rice
D – grilled steak, beans, mashed potatoes

M (cheer, shopping, make gummies)
D – modified beefy enchilada bake, corn, fruit

T (cheer, farmer’s market, make crackers)
D – gf df pancake and sausage muffins, sauteed zucchini, fruit

W (cheer, Dr. E., skim cream, make ice cream)
D – salmon cakes, broccoli, french fries

Th (cheer, groceries, make muffins)
D – cp split pea soup with ham, muffins

F (cheer, make chocolates, make scones)
D – scrambled eggs, scones, peas, fruit

S (open house, guests)
D – at parties

The Nourished Metabolism and Love Your Body Review and Giveaway!

NM - NL

Over the years my blog has gone in different directions. I have always tried to focus on healthy, nourishing foods. But the content has taken many forms and gone in some extremes. I even wrote a post once about various diets and the pros and cons of each.

In time I have figured out that the most important thing is to listen to my own body. I have to take care of it, give it what allows me to thrive and not follow someone else’s rules.

I can tell someone else exactly what foods I avoid and what foods I eat regularly. But they should not follow the same diet. Everybody is unique and has different dietary needs.

That being said, there are some general guidelines that apply to most people. It is not about specific foods. It is about learning how to listen to your body and nourish your metabolism.

Whenever anyone asks me about getting on track with healthy eating, my first suggestion is to read The Nourished Metabolism by Elizabeth Walling. This is the best health-related book I have ever read. It helped me on my road to recovery. It even helped me more than “healing” diets like GAPS.

The Nourished Metabolism gave me the freedom to finally let go of rules and figure out what was best for me. I have read it multiple times and enjoy it every time I do.

The process of taking care of your body and healing is not an easy one. You may gain or lose weight. You may be very tired and need to cut back on your normal amount of activity. During this time it can be difficult to undergo some of the physical transformations.

That is where Love Your Body comes in. Elizabeth helps you learn to accept your body and marvel at what it can do. You don’t have to be a certain size or shape or at a certain fitness level. You need to love the body you are in and do your best to take care of it.8694543286_968c6cdaa1

In my own healing journey I learned a LOT. I am very thankful for Elizabeth’s books and how they changed my perspective on health and nourishment.

I learned about how body temperature, digestion, hair, skin and even my mood are indicators of how well or how poorly my metabolism is working. I learned just how critical enough quality sleep is. I even learned that there are some wide-spread myths about salt, sugar and water intake.

If you are interested in really nourishing your body and feeling your best, The Nourished Metabolism is a great place to start!!

I am giving away a bundle of both of Elizabeth’s e-books. I can’t say enough great things about them.

Even if you don’t win the giveaway, Elizabeth is offering her books  HALF OFF for the whole month of June! Or you can get both of them for an even better discount. Simply use the code SUMMER50. I hope you grab your copy today!

 
a Rafflecopter giveaway

In order for me to support my blogging activities, I may receive monetary compensation or other types of remuneration for my endorsement, recommendation, testimonial and/or link to any products or services from this blog.

Meal Plans Week of 6-1-14

DSC_2098

It’s June! It sure feels strange to say that. Back in January when I could barely do more than lay on the couch I thought June would never come. But it’s here…and so is the third trimester!

My daughter’s dance class just ended last night with a great recital. Now we just have four more days of school before it is officially summer break.

This week I have a final gathering for the steering team of my mom’s group. Our local farmer’s market begins!! My daughter has a check up with the allergist. We have a special parent-child program and picnic for the last day of school. I’m also getting my hair cut this week. I really need to figure out what to do with it!

I was able to make a lot of progress in the last few days on moving the last few odds and ends from my son’s room to my daughter’s room. I also washed and put away all of the baby clothes. The nursery is just about complete, aside from reassembling the crib. The kids even made decorations for it this week past week. Next week we get to do the big transition – my little guy moving into a regular bed in the same room as big sister.

DSC_2059

I have a fair amount of extra food preparation this week. I have to bring the snack for my daughter’s class this week. I have to bring a dish to pass to our mom’s group (hummus w/ pita and cucumbers) and the school potluck (fruit salad). In addition I would like to make a batch of granola bars. I might make more ice cream and/or yogurt. We still have a lot of rhubarb in the garden, so I need to make something with it. Maybe pie. I have a few other misc. items on my list if time allows.

 I finally got to talk to the nurse about my thyroid results…I have to go in to see the doctor to discuss them. So I have another 2 1/2 weeks until I know more about that.

In the mean time I think it’s time to try taking my daily cod liver oil again for baby’s brain development. I’m also working on eating more seafood. I’ve had salmon four times in the last week! I will do my best to put my feet up a few times a day to help with swelling as well. My legs are already not doing well, and I have 11 1/2 weeks to go.

It’s been nice lately to be able to get a few posts up every week. I love sharing things with you! Hopefully I can get a couple more up this week too.

Here’s what’s on our menu. We had our first salads with spinach from our garden last night. Yum!! What are you eating? Maybe some rhubarb pecan ice cream? Eet smakelijk!

DSC_1970

**********MENU**********

S (church, cut up fruit, make granola bars, make ice cream or  yogurt)
L – cp roasted chicken, potatoes and veggies
D – Italian meatballs over noodles, broccoli

M (cut up fruit, make granola bars, make ice cream, make hummus, MB)
D – sloppy joes, squash, chips (family), at the party (me)

T (library, farmer’s market, make pie?)
D – baked egg puffs, roasted brussels sprouts and cauliflower, muffins or toast

W (allergist, make fruit salad)
D – pan-fried cod, baked potatoes, peas

Th (last day of school party – bring dish to pass)
D – cp pork and beans, rice, spinach salad

F (bake cookies?)
D – pancakes, bacon, broccoli, fruit salad

S (hair cut, shopping)
D – grilled hot dogs, grilled asparagus, baked potato wedges

Pesto Quinoa Salad

pesto quinoa salad

It’s that time of year again. Time for picnics and potlucks and family gatherings. It’s always tough to figure out what to bring.

Are you sick of potato salad and pasta salad? Or are your kids like mine and won’t touch either of those anyway?

This pesto quinoa salad is my solution! It has a lot of flavor from the pesto. But it’s not overpowering. So even my sensitive palate daughter enjoys it.

The other great part is that this salad is very allergen friendly. It basically has three ingredients – quinoa, peas and olive oil. You can swap peas for another vegetable if you don’t like them or don’t tolerate them.

As an added bonus you don’t have to worry about this salad spoiling after being outside for a little bit.

Pesto quinoa salad can be served as a warm side dish or chilled. The leftovers are great for easy lunches. You can add a little cooked chicken for a complete meal. I even added a few chickpeas and topped it with a fried egg for lunch! It was delicious.

I use a very simple pesto made with peas. A traditional basil or spinach pesto would also be delicious. For a nutrient boost you could even make it with pummus!

If you’re looking for an alternative salad for your next picnic or just want a new side dish for your dinner at home try this pesto quinoa salad. Both of my kids said it was great! If they approve, it must be good.

 pesto quinoa salad 2

Pesto Quinoa Salad
Serves 4
A simple spring salad that is perfect for picnics.
Write a review
Print
Ingredients
  1. 1/2 cup quinoa - soaked and drained
  2. 1 cup water or chicken broth
  3. 1/2 - 1 cup peas (frozen, thawed or fresh)
  4. 1/4 cup pesto (I use pesto made with peas* - you can use any pesto you like)
To taste (optional)
  1. salt
  2. garlic powder
  3. parmesan cheese
  4. chopped nuts
Instructions
  1. Soak the quinoa for 1 - 24 hours. Rinse and drain.
  2. Bring water or broth to a boil in a sauce pan. Add the quinoa, cover, reduce heat and simmer for 12 minutes.
  3. Remove the pan from the heat. Keep the lid on.
  4. After 10 minutes add the peas to the pan of quinoa. Cover and let sit 5 - 10 minutes.
  5. Stir in the pesto.
  6. Season to taste.
  7. Add nuts or cheese if desired.
  8. Serve immediately or chill until ready to serve.
Notes
  1. If you are taking this to a group gathering double or triple the recipe.
  2. *For a simple pesto blend 2 cups thawed peas, 1/2 - 1 cup extra virgin olive oil (can replace some of the oil with water for a milder flavor), sea salt and garlic powder to taste in a blender until smooth.
Just Take A Bite https://justtakeabite.com/

Gluten Free Dairy Free Strawberry Rhubarb Muffins

gf df strawberry rhubarb muffins

When it’s rhubarb season you have to make at least one thing with the classic strawberry rhubarb combination. Recently I made a batch of strawberry rhubarb muffins.

I love the combination of sweet and tart. I added a little cinnamon sugar topping to give them an extra punch of flavor.

I also love that they are so simple to make! It takes less than ten minutes to get them in the oven.

These muffins are very allergen-friendly with no gluten, dairy, rice or nuts. You don’t even have to use a milk substitute.

Make a big batch of muffins, serve some for breakfast and free some for later. It’s a great way to use fresh, spring rhubarb.

gf df strawberry rhubarb muffins 2

Gluten Free Dairy Free Strawberry Rhubarb Muffins
Yields 12
A sweet and tart muffin that is gluten, dairy, rice and nut free.
Write a review
Print
Ingredients
  1. 1/2 cup amaranth flour*
  2. 1/2 cup sorghum flour*
  3. 1/2 cup tapioca flour*
  4. 1/2 cup coconut sugar, sucanat or cane sugar
  5. 2 Tbsp. maple syrup
  6. 1/2 tsp. sea salt
  7. 1/2 tsp. baking soda
  8. 1 tsp. aluminum free baking powder
  9. 1 tsp. vanilla
  10. 3 eggs
  11. 2 Tbsp. melted coconut oil (or butter or palm shortening)
  12. 1/4 c up water or milk substitute
  13. 1/2 cup strawberries, chopped
  14. 1/2 cup rhubarb, chopped
  15. 1/2 tsp. cinnamon (optional)
Topping (optional)
  1. 1/2 tsp. cinnamon
  2. 2 tsp. coconut sugar, sucanat or cane sugar
Instructions
  1. Heat oven to 350 degrees F. Grease muffin tin or line with baking cups.
  2. In a large bowl combine the flour, sugar, syrup, salt, soda, powder, vanilla, eggs, coconut oil, cinnamon and water. Mix until well combined.
  3. Stir in the strawberries and rhubarb.
  4. Fill muffin cups 3/4 full with batter.
  5. Combine the cinnamon and sugar. Sprinkle a little on each muffin.
  6. Bake for 35 minutes, until golden brown and baked through.
  7. Allow muffins to cool 5-10 minutes before serving.
Notes
  1. *You can substitute any gluten free flour for the flours listed. It works best to include at least one "white" flour, such as tapioca or white rice. Using a combination of flours gives a more neutral flavor.
Just Take A Bite https://justtakeabite.com/
 

In order for me to support my blogging activities, I may receive monetary compensation or other types of remuneration for my endorsement, recommendation, testimonial and/or link to any products or services from this blog.

Rhubarb Pecan Ice Cream

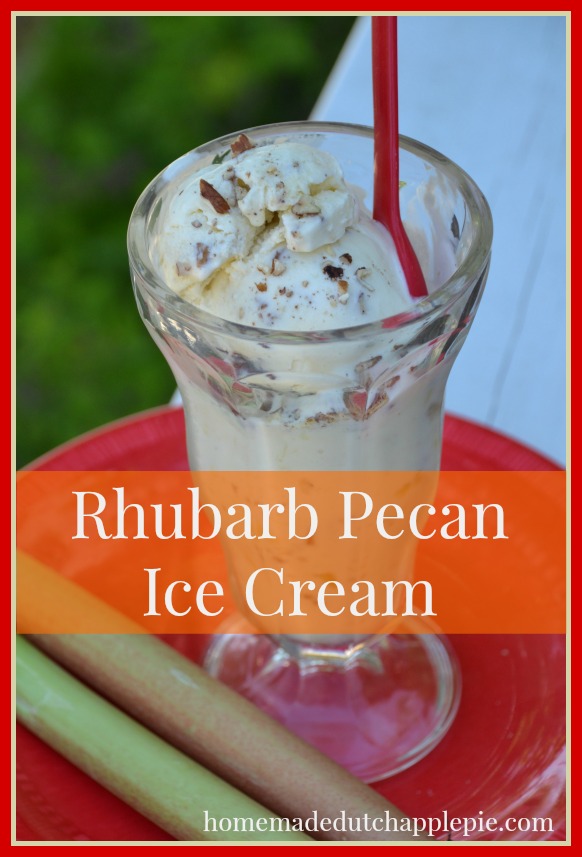
Rhubarb isn’t just for cakes and cobblers. You can also use it to make an amazing rhubarb pecan ice cream! Wow all of your friends and family.

Rhubarb pecan ice cream | Just Take A Bite

As soon as the weather gets warmer and our milk share volume goes up I’m anxious to make ice cream.  It’s definitely a family favorite.

Recently I combined my love of creating ice cream with my need to use rhubarb. I came up with rhubarb pecan ice cream.

The result is delicious!!! Even my six-year old LOVES it. The ice cream is plenty sweet. But it has a hint of tartness from the rhubarb and a nice crunch from the crispy pecans.

If you can’t eat nuts you can absolutely leave them out. The rhubarb alone gives a wonderful flavor.

Are you dairy free? Swap coconut milk for the cream. This ice cream is a unique spring treat no matter what way you make it.
Rhubarb pecan ice cream | Just Take A Bite

Rhubarb Pecan Ice Cream
A fruity ice cream with crunchy pecans.
Write a review
Print
Ingredients
  1. 1 1/2 cups rhubarb, diced
  2. 3 Tbsp. honey, maple syrup, coconut sugar or cane sugar
  3. 2 tsp. butter or coconut oil
  4. 2 cups cream (or coconut milk)
  5. 1/2 cup whole milk (or coconut milk)
  6. 1/3 - 1/2 cup honey, maple syrup, coconut sugar and/or cane sugar*
  7. 1 Tbsp. vanilla
  8. 1/2 tsp. sea salt
  9. 1 Tbsp. tapioca flour or arrowroot (optional)
  10. 1-3 egg yolks (optional)
  11. 1/4 - 1/2 cup liquid reserved from cooked rhubarb
  12. 1/2 cup chopped crispy pecans
Instructions
  1. In a small pan sautee the rhubarb in 2 tsp. fat and 3 Tbsp. sweetener over medium heat. Cook until the rhubarb is soft and released liquid (about 10 minutes).
  2. Allow the rhubarb mixture to cool. Drain up to 1/2 cup liquid off the rhubarb to use in the ice cream batter.
  3. Combine the cream, milk, sweetener, vanilla, salt, flour, egg yolks and rhubarb liquid in a blender.
  4. Blend until well mixed. Taste and adjust sweetness and rhubarb liquid to taste.
  5. Process the ice cream batter in an ice cream maker (I use a Kitchen Aid attachment - it takes 15 - 20 minutes).
  6. During the last 1-2 minutes of processing add the cooked rhubarb.
  7. Transfer the ice cream to a freezer-safe container. Stir in the pecans.
  8. Freeze the ice cream until solid.
Notes
  1. *Using a combination of sweeteners for the ice cream gives a more neutral flavor.
  2. *The batter should be slightly sweeter than how you want the final product to taste. The sweetness will go down as the ice cream freezes.
Just Take A Bite https://justtakeabite.com/
 

In order for me to support my blogging activities, I may receive monetary compensation or other types of remuneration for my endorsement, recommendation, testimonial and/or link to any products or services from this blog.