Home » lunch box » Page 5

Tag: lunch box

Brain Booster Milkshake | Homemade Dutch Apple Pie

Brain Booster Milkshake

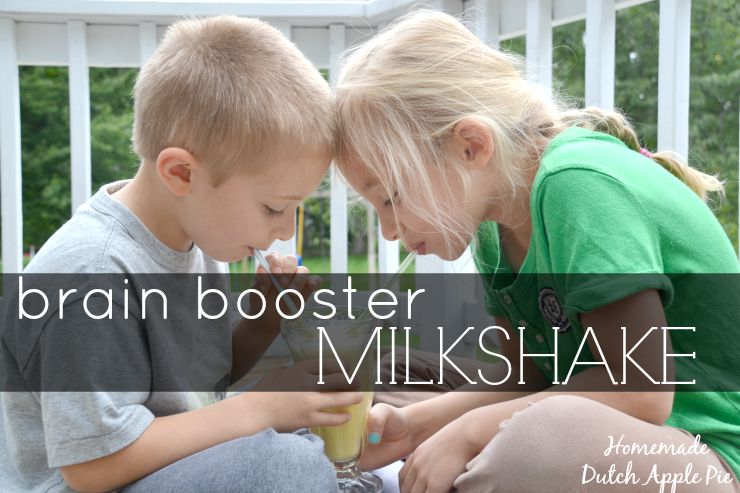
Get the school morning started right with a brain booster milkshake. Full of protein, vitamins and minerals it will keep your kids going all day.

Brain Booster Milkshake - Nutrient-dense drink kids love!

School mornings can be hard. Get breakfast on the table. Feed the baby. Brush everyone’s teeth. Find shoes and backpacks.

You do your best to prepare and have things go smoothly. But even with good planning it is tough to always give your kids the nourishment they need before heading out the door.

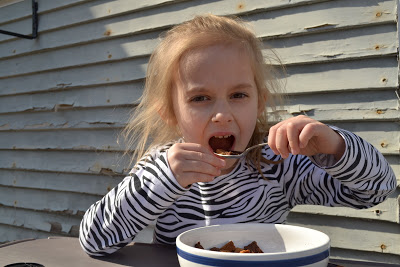
Especially if you have a child like mine that eats very slowly and ends up often only managing a few bites of breakfast.

To make sure she starts her day the right way I created my brain booster milkshake.

Brain Booster Milkshake - Nutrient-dense drink kids love!

Are Milkshakes Healthy?

This milkshake is packed with some nutritional powerhouses.

  • raw milk – easy to digest protein, calcium and vitamins
  • raw pastured egg yolks – B vitamins that are critical for brain function and concentration
  • probiotics – for gut health and boosting the immune system
  • grass-fed collagen – easy to digest protein and important amino acids
  • maple syrup – carbohydrates for energy and trace minerals
  • unrefined sea salt – trace minerals

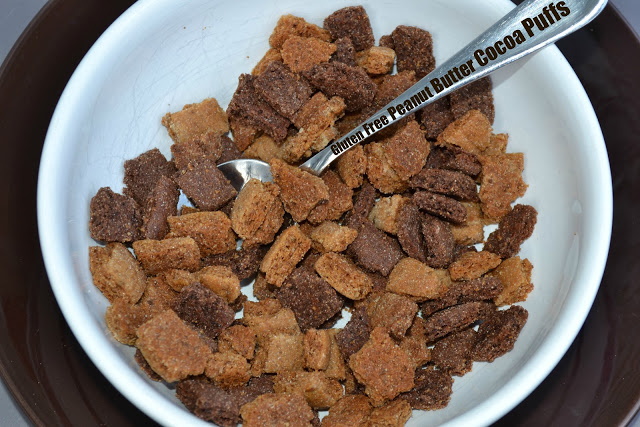
I usually serve the milkshake with something else like a homemade granola bar or even dinner leftovers! But even if she doesn’t take a single bite of her breakfast I know she’s going to be fueled for the morning as long as she drinks her brain booster milkshake.

This is a really good option for kids with oral SPD and chewing problems. A milkshake goes down pretty quickly. It is also easy on the digestive system. The nutrients are very easy to absorb and utilize.

Brain Booster Milkshake - Nutrient-dense drink kids love!

One of the key components is the raw, pastured egg yolk. Have you ever read about them? Though often deemed as unhealthy or bad for your heart the opposite is actually true. And eaten raw (as long as they are pastured) the nutrients are not damaged and are easy to absorb.

Egg yolks are amazing little packages of nutrients, specifically B vitamins that are essential for your child’s brain development and ability to focus. They contain other nutrients such as choline (necessary for methylation), selenium (great for the thyroid) and biotin (helps with blood sugar regulation – perfect for breakfast!).

Milkshake for Breakfast or Lunch

I sometimes put milkshakes in my daughter’s lunch too. She struggles to eat much lunch at school. There just isn’t enough time for her, and she’s busy talking. But she usually comes home with an empty cup!

This is also great for kids going through orthodontic work. The day after adjustments their mouth can be very sore and chewing can be a challenge. A milkshake is always in my daughter’s lunch the day after her expander gets adjusted. I tell her that even if she can’t eat anything she should be sure to drink her brain booster milkshake.

Brain Booster Milkshake - Nutrient-dense drink kids love!

Healthy Chocolate Milkshake

The base milkshake recipe is vanilla. But you can create other flavors too. My kids love when I add a bit of cocoa powder or carob powder for a chocolate shake.

Add some strawberries from your freezer stash for a strawberry shake. Any berry or even cherries will work.

Sometimes we really get creative and add mint extract. It tastes like mint ice cream (my kids’ favorite!).

If you can’t have dairy, coconut milk is a great substitute! Any milk alternative will work.

Serve it in a fun cup with a straw or in a sealed cup to pack in a lunch box.

Whether you serve it for breakfast, lunch or both you’ll know your child is getting essential nutrients with a brain booster milkshake. All they have to know is they get something delicious to drink!

Get your kids excited about breakfast. What flavor do you think they’ll like best?

Brain Booster Milkshake - Nutrient-dense drink kids love!

Brain Booster Milkshake
Serves 1
A delicious shake perfect for breakfast or lunch that will give your kids the nutrients they need to perform their best.
Write a review
Print
Ingredients
  1. 1 cup raw milk or coconut milk
  2. 1 - 2 raw pastured egg yolks
  3. 1 Tbsp. grade B maple syrup
  4. 1/4 tsp. unrefined sea salt
  5. 2 tsp. grass-fed collagen
  6. 1/2 capsule preferred probiotics
  7. 1/2 capsule preferred multi-vitamin
  8. optional: 2 tsp. carob powder or cocoa powder OR 1/4 cup berries or cherries
  9. optional: 1/2 tsp. organic vanilla OR 1/4 tsp. organic mint extract
Instructions
  1. Combine all of the ingredients in a blender or a cup with a lid.
  2. Blend or shake until well combined.
  3. Serve immediately or refrigerate until ready to serve.
Just Take A Bite https://justtakeabite.com/
In order for me to support my blogging activities, I may receive monetary compensation or other types of remuneration for my endorsement, recommendation, testimonial and/or link to any products or services from this blog.

This post is linked to Savoring Saturdays.

Lemon Elderberry Gummies | Homemade Dutch Apple Pie

Lemon Elderberry Gummies

Help ward off the back-to-school illnesses with a fun, fruity treat. Lemon elderberry gummies not only taste great, they are good for you!

Lemon Elderberry Gummies | Homemade Dutch Apple Pie

For many school is already back in session. For others it is only a week away. Either way there is one thing on every parent’s mind when school starts.

How long until the kids start getting sick?

As kids start spending more time inside and around their friends it is inevitable that germs will spread. There are many natural remedies to help your child’s immune system stay strong and avoid some illness.

One simple remedy is elderberry syrup. It helps ward off viruses and minimizes their severity. My kids love taking it right off the spoon.

Lemon Elderberry Gummies | Homemade Dutch Apple Pie

Make it fun.

Another great way to add elderberry syrup into your diet is adding it to gummies. Kids don’t even know they are doing something good for themselves by eating these fun, fruity candies.

The lemon adds some vitamin C along with the elderberry for even more immune support.

These gummies are also packed with grass-fed gelatin that is helpful for healing the gut and supporting the whole body. Plus it provides easy-to-digest pure protein.

Great for everyone.

I like to serve lemon elderberry gummies for breakfast and snacks or pack them in lunches for my oldest. They are great to have around for the younger kids as well. Even toddlers love to munch on gummies!

No need to buy fruit snacks. Most of them are filled with artificial flavors and colors.

Even if you buy the ogranic/natural varieties they still contain “natural flavor” which is actually almost the same thing as artificial flavor. And for kids like mine it has the same effect on their mental clarity and behavior.

Lemon Elderberry Gummies | Homemade Dutch Apple Pie

Fast food.

Although homemade gummies may sound like a daunting snack to make it is actually very simple. Lemon elderberry gummies go from the pan to the fridge in about five minutes.

Simply mix the ingredients, heat and pour. That’s all there is to it.

You can get the kids involved with this project by letting them pick the shapes. See what candy molds your grocery store carries or buy some online. I like to use silicon molds so I don’t have to worry about putting hot liquid in plastic. Plus gummies are much easier to remove from the silicon molds.

If you don’t have any molds you can simply pour the warm liquid into a glass pan. When the lemon elderberry gummies are gelled you can cut them into squares or any shape you like.

No lemon juice on hand? You can use blueberry, cherry or lime juice instead. Try all four varieties and see what your kids like best.

Are you looking for easy, healthy snacks for school lunches? Are you looking for easy ways to help keep your kids healthy?

Lemon elderberry gummies are just what you’re looking for! Fruity, fun and healthy. Whip up a batch to start the school year right.

Lemon Elderberry Gummies | Homemade Dutch Apple Pie

Lemon Elderberry Gummies
Yields 25
A fun, fruity treat to help ward off colds.
Write a review
Print
Ingredients
  1. 1 cup organic lemon juice
  2. 2 Tbsp. elderberry syrup
  3. 1/2 cup honey
  4. 4 Tbsp. grass-fed gelatin (NOT collagen)
  5. 1/4 tsp. unrefined sea salt
Instructions
  1. In a small saucepan combine the lemon juice, elderberry syrup, honey and salt. Whisk to combine.
  2. Add the gelatin and whisk to combine.
  3. Let sit one minute.
  4. Heat over low-medium heat, stirring frequently, until mixture is warm and has become liquid again.
  5. Pour mixture into molds or a glass pan (smaller pan for thicker gummies, larger pan for thinner).
  6. Refrigerate until firm, about thirty minutes.
  7. Remove from molds or cut into shapes.
  8. Store in a sealed container in the refrigerator for up to two weeks.
Just Take A Bite https://justtakeabite.com/

In order for me to support my blogging activities, I may receive monetary compensation or other types of remuneration for my endorsement, recommendation, testimonial and/or link to any products or services from this blog.

This post is linked to Savoring Saturdays.

Rustic Chicken Zucchini Pie With Olive Oil Crust | Homemade Dutch Apple Pie

Rustic Chicken Zucchini Pie with Olive Oil Crust

Looking for a new way to use up your abundance of zucchini? Rustic chicken zucchini pie with olive oil crust makes the perfect breakfast, lunch or dinner! Serve it warm or cold any time of day for a filling and nutritious meal.

Rustic Chicken Zucchini Pie With Olive Oil Crust | Homemade Dutch Apple Pie

Summer is about having fun, getting outside and being active. That includes riding bikes, picnics at the park and pool parties.

But summer is also about slowing down, taking it easy and enjoying the simple pleasures. Think lounging on the beach, sitting by the fire watching the stars and snuggling with your kids on a quiet rainy day.

When it comes to soaking up the summer I think of simple, comfort food that utilizes fresh produce.

Rustic Chicken Zucchini Pie With Olive Oil Crust | Homemade Dutch Apple Pie

Summer food.

Rustic chicken zucchini pie is comfort and summer all wrapped up in a pie crust.

It is a cross between pie and pizza.

The crust is a simple soaked dough made with flour, water, olive oil and salt. The filling is chicken and a bit of squash simmered in bone broth until a thick sauce forms. Finally a layer of zucchini tops the pie for a beautiful and delicious dish.

Simple and versatile.

Rustic chicken zucchini pie is fancy enough for dinner guests. Though you might want to make two! It will go quickly.

It is also simple enough for a weeknight meal that the kids will devour.

Eat it with a fork and knife or your hands. Serve it at the dinner table or pack it in a picnic.

Breakfast, lunch or dinner. Warm or cold.

A full meal all wrapped up in a delicious package, rustic chicken zucchini pie is really that good and that versatile.

Rustic Chicken Zucchini Pie With Olive Oil Crust | Homemade Dutch Apple Pie

Allergen friendly.

The thing I love about it is that it is naturally dairy, egg, nut, corn and coconut free. I did use a wheat crust, but gluten free flour can replace the wheat. So it is safe for just about everyone!

If you can tolerate cheese some fresh mozzarella mixed into the sauce or grated parmesan on top would taste great.

No chicken on hand? Swap it for another meat like sausage. Or simply make it a veggie pie. The sauce underneath can be made without the meat. Simply add a little extra squash to the broth for a creamy base.

Lunch time!

For all of the busy moms out there chicken zucchini pie is perfect for a grab and go lunch. It’s hard enough to feed the kids let alone find time to make your own lunch. Make a pie at the beginning of the week and grab a slice or two each day for lunch.

If you want to get a head start on school lunches you could make a few chicken zucchini pies, cut them into slices and freeze individual pieces. Simply pull out a piece when you need it for adding to a lunch box or even for an easy breakfast.

I don’t know about you but any time I can get my kids to eat broth while at school is great. Vegetables on top of it is a bonus.


Check out the Lunch Box ebook for more fun recipes (35% off through 9/7/15!)


Don’t let that pile of zucchini go to waste! Create a simple summer dish the family will love. Rustic chicken zucchini pie with olive oil crust is perfect for any occasion.

How do you like to use zucchini – in sweets like zucchini bread, cake and scones or in a savory dish?

Rustic Chicken Zucchini Pie With Olive Oil Crust | Homemade Dutch Apple Pie

Rustic Chicken Zucchini Pie with Olive Oil Crust
Serves 4
Creamy chicken, fresh zucchini and a simple olive oil crust - the perfect breakfast, lunch or dinner!
Write a review
Print
Crust
  1. 1 cup whole wheat, all purpose or gluten free flour
  2. 1/2 tsp. unrefined sea salt
  3. 3 Tbsp. extra virgin olive oil
  4. 2-3 Tbsp. cold water
  5. 1 Tbsp. lemon juice
Filling
  1. 2 Tbsp. pureed squash
  2. 2 medium zucchini
  3. 1 cup cooked, shredded or diced chicken
  4. 3/4 cup chicken broth
  5. 1/4 tsp. unrefined sea salt
  6. 1 tsp. of a combination of basil, rosemary and thyme
Crust
  1. In a food processor combine the flour, salt and olive oil. Pulse until crumbly.
  2. Add the water and lemon juice.
  3. Process until a ball of dough forms.
  4. Wrap in plastic wrap and refrigerate 7-24 hours.
Filling
  1. Slice the zucchini and lay it on a cooling rack.
  2. Sprinkle with salt and let sit 20 minutes. Flip and repeat. (This will remove a lot of the water.)
  3. Pat the zucchini dry with paper towel when done draining.
  4. While the zucchini is draining, cook the chicken, squash and salt in broth. Simmer until it is thick and the liquid is evaporated, 5-10 minutes.
  5. Heat oven to 350*F.
  6. Roll the dough into a 12" round on parchment paper.
  7. Spread the chicken filling on the dough, leaving a 2" border.
  8. Layer the zucchini on top of the chicken.
  9. Season with herbs.
  10. Fold edges of dough onto zucchini.
  11. Drizzle the top with olive oil.
  12. Bake for 70 minutes.
  13. Allow to cool for 10 minutes before slicing.
Notes
  1. This can be served warm, room temp or cold.
  2. This can be frozen whole or in slices.
  3. You can add 1/2 cup shredded cheese to the filling and/or the top.
  4. To make a meatless pie omit the chicken and increase the squash to 1/2 cup.
Just Take A Bite https://justtakeabite.com/
Rustic Chicken Zucchini Pie With Olive Oil Crust | Homemade Dutch Apple Pie

In order for me to support my blogging activities, I may receive monetary compensation or other types of remuneration for my endorsement, recommendation, testimonial and/or link to any products or services from this blog.

Homemade lunch meat makes packing healthy lunch a breeze. Plus it's great for little ones too!

Homemade Lunch Meat

Lunch time just got easier and healthier with homemade lunch meat! It is perfect for school lunches or even for babies. Add it to your to-do list!!

Homemade lunch meat makes packing healthy lunch a breeze. Plus it's great for little ones too!

Warning.

You may want to cover your ears.

I’m going to use the dreaded L word – LUNCHES.

There. I said it.

As much as I don’t like to think about it, before we know it we’ll be packing school lunches again.

Homemade lunch meat makes packing healthy lunch a breeze. Plus it's great for little ones too!

You want to send your kids to school with nutritious food. But you also don’t want to make their lunches too different or “weird” (liver pate or sardines anyone?). Not to mention you don’t want to spend an hour making lunch.

Just the other day my seven year old asked why I never put “normal” sandwiches in her lunch like her friends have. She mentioned peanut butter and jelly and ham and cheese.


Need more ideas? Check out Katie’s healthy lunch box e-book!


I don’t send peanut products often because I don’t want to make the school an unsafe place for those with allergies.

The ham and cheese? Well, we just don’t have any lunch meat.

Until now.

Homemade lunch meat makes packing healthy lunch a breeze. Plus it's great for little ones too!

Did you know you can make your own lunch meat?

Homemade lunch meat is so easy to make. It literally takes five minutes of hands on time.

Want to learn how?

Head on over to Kitchen Stewardship where I share my simple homemade lunch meat recipe.

And don’t forget to check out the Healthy Lunch Box ebook!

Homemade lunch meat makes packing healthy lunch a breeze. Plus it's great for little ones too!

In need of a few more ideas for the lunch box? Try some of these:

Sweet potato salmon burgers

Teff and sorghum cherry bars

Gluten free pizza crackers

Strawberry apple salad

Fruit on the bottom  yogurt

Soaked gluten free bread (great for sandwiches with lunch meat!!)

Gluten free crackers

Quinoa bars

Salmon salad

In order for me to support my blogging activities, I may receive monetary compensation or other types of remuneration for my endorsement, recommendation, testimonial and/or link to any products or services from this blog.

Dairy Free Grilled Cheese

Dairy Free Grilled “Cheese”

Dairy free grilled “cheese” is a simple sandwich made without fake cheese alternatives. It is perfect for a quick lunch or a side with nourishing soup.Dairy Free Grilled Cheese
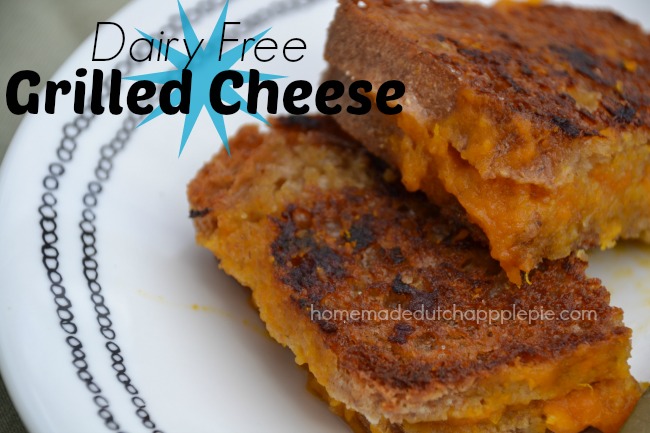
I L.O.V.E grilled cheese.  Really love it. When I’m pregnant it’s one of the only foods that sounds good in the first trimester. When I’m getting over sickness it always appeals to me. I could eat grilled cheese just about any time.

Salty + gooey = love.

No Dairy, No Problem

Being dairy free for seven months now I haven’t eaten grilled cheese in a while. I actually rarely miss cheese. If I could indulge in dairy it would probably just be a big glass of raw milk.

That being said I do miss grilled cheese.

The other day I was making tomato soup…and of course that means grilled cheese. Instead of just making myself something else like usual I decided to make a dairy free grilled “cheese” that I could eat.Dairy Free Grilled Cheese | Homemade Dutch Apple Pie

To my great surprise this turned out so well! I think I could have eaten two or three of these.  My four year old (that can’t have cheese either) thought it was great too! I made it with sourdough bread (I love that sour and salty combination). Any bread you tolerate will work. Soaked gluten free bread would be great too.

Make It Gooey

The “cheese” is made from a combination of pumpkin or squash with gelatin (I love both this brand and this one!), cane sugar and salt.  Then coconut oil + a sprinkle of sea salt gives you a buttery flavor for grilling.

So you get vegetables and healthy protein in your grilled cheese. Please note that gelatin is not a complete protein, so you should pair it with another protein in your meal.  Adding bacon to this grilled cheese would be perfect! (note to self…make bacon grilled cheese ASAP!)  Leftover chicken or canned tuna or salmon would be great too. Or simply pairing it with a soup with meat works well.

Easy Lunch

I love that this is a quick lunch component. Being dairy, egg, nut and bean free there is not much I can make that is quick and still has protein. So if I don’t have leftover meat I’m left with nothing. This sandwich works well for days when there is nothing on hand and I need an easy meal. I even put it in my kids’ lunch box. It’s great cold!

I have made this a few times now. One thing I noticed…if you let the grilled cheese sit for a bit the gelatin has more time to gel and the filling has even more of a cheese texture!  I actually think it tastes a bit like American cheese. It reminded me of my childhood.

I like to make grilled cheese when we have soup for dinner. But I rarely make it these days since only half of the family can eat it. But I’ll be adding it back to the menu now! The whole family can enjoy grilled cheese again.

Do you miss grilled cheese after removing dairy from your diet? You’re in luck. Now you can have it!Dairy Free Grilled Cheese | Homemade Dutch Apple Pie

Dairy Free Grilled "Cheese"
Serves 1
A simple dairy free version of grilled cheese without fake cheese alternatives.
Write a review
Print
Ingredients
  1. Two slices of bread of choice.
  2. 3 Tbsp. pureed squash or pumpkin
  3. 2 tsp. grass-fed gelatin
  4. 1/2 tsp. cane sugar
  5. 1/2 tsp. unrefined sea salt
  6. coconut oil + sea salt for cooking
Instructions
  1. Mix the squash, gelatin, sugar and salt. Let sit two minutes.
  2. Heat a medium pan over low-medium heat.
  3. Spread the squash mixture on one slice of bread. Top with the other slice.
  4. Add coconut oil and a sprinkle of sea salt to the warm pan.
  5. Place the sandwich in the pan and cook until golden, 3-5 minutes.
  6. Flip sandwich, add extra coconut oil and salt to the pan. Cook another 3-5 minutes, until golden.
Notes
  1. This grilled cheese should be cooked slowly so the gelatin has time to warm and dissolve.
  2. This makes enough filling for two small or one large grilled cheese, it depends on the size of your bread.
  3. The longer the sandwich sits/cools after cooking the more the gelatin will firm up and feel like cheese.
Just Take A Bite https://justtakeabite.com/


*If you order by clicking on any of my Tropical Traditions links and have never ordered from Tropical Traditions in the past, you will receive a free book on Virgin Coconut Oil, and I will receive a discount coupon for referring you.

Easy Pink Lemonade | Just Take A Bite

Easy Pink Lemonade

Refreshing and hydrating, this easy pink lemonade is made with only real ingredients. No artificial flavors or colors. It’s the perfect summer drink!

Easy Pink Lemonade | Just Take A Bite

Whether it’s the middle of summer or you’re just looking forward to the start of spring, pink lemonade is the perfect drink.

Dye-free Pink Lemonade

This easy pink lemonade only takes minutes to make. It is free of anything artificial (i.e. no food coloring!). And a simple addition of sea salt turns it into a hydrating homemade sports drink.
 
Sometimes I even go a step further and add grass-fed collagen and powdered probiotic to really bump up the nutrition factor.
 
You can make a single cup or a big pitcher. I usually make a half gallon at a time. It doesn’t last long in my house.

Allergen-Free Drinks

Having kids with all sorts of allergies means they don’t get much to drink besides water (they don’t even have any milk alternatives they tolerate). So I like to treat them to hydrating pink lemonade once in a while, especially when they are playing hard or after illness.

This is also a fun surprise in my daughter’s lunch once in a while. She tends to forget to drink while she’s at school. But if I give her pink lemonade she comes home with an empty cup.

Keep everyone hydrated and satisfied with pink lemonade. All the great flavor. Nothing artificial.

Easy Pink Lemonade | Just Take A Bite

Easy Pink Lemonade

makes 1/2 gallon

6 1/2 cups water
1/3 – 1/2 cup lemon juice
1/4 – 1/3 cup pure grape juice or pure blueberry juice
1/2 cup organic cane sugar (you can also use honey or maple syrup, but it will change the flavor a bit)
1 tsp. unrefined sea salt (optional…makes it very hydrating)
2 Tbsp. grass-fed collagen (optional)
1 capsule powdered probiotic (optional)
ice

Combine all of the ingredients in a 1/2 gallon container. Mix well, allowing the sugar to dissolve. Adjust the lemon juice and grape juice to taste if needed. Refrigerate.

Gluten-free Goldfish® Crackers

Gluten Free Goldfish® and Cheez-It® Crackers (egg free, corn free, nut free)

Make snack time fun for kids with allergies with these gluten-free Goldfish® and Cheez-It® crackers! They’re so good your kids will never know the difference.

Since going gluten-free I’ve had to periodically send separate snacks to school for my daughter. I do my best to send food that is as close as possible to what the other kids are eating. Usually it’s pretty simple.

But when we got to Goldfish® I had a problem. I’m not a fan of most store-bought crackers as they are highly processed. Not to mention they typically have more junk added if they are gluten-free.

That meant I had to experiment. It’s what I love to do in the kitchen.

Cheese Crackers Without Artificial Color

I brainstormed about how to make them look kind of orange, like the real thing. I decided to add squash and some yellow cheese. And it worked!!

Both kids had some for breakfast (I do most of my baking in the morning before they get up…and they instantly run to the kitchen and start eating if they smell something good).

I couldn’t keep their hands off. They paired the crackers with homemade gummies (full of nutrient-dense gelatin) and strawberry lemonade (made with locally grown strawberries and real lemon juice). Delicious!

Gluten-Free Goldfish® Crackers

You can make these crackers in any fun shape or size you like. I decided to try to make them look like the “real” thing. I also made some stars, circles and letters.

Gluten-Free Cheeze-Its®

Squares look a lot like Cheeze-Its®. So that is another option if you are going for the swap.

This is a fun snack for kids, and it’s very healthy. No vegetable oils. No gluten, egg, corn or nuts. Just real ingredients.

Gluten-Free Goldfish® or Cheez-It® Crackers

makes about 2 cups of crackers

1/2 cup white rice* or brown rice flour
1/2 cup tapioca flour*
1/2 tsp. sea salt*
1/4 tsp. baking soda
2 Tbsp. melted butter
4 Tbsp. pureed winter squash (this adds color, so the deeper the color the cheesier the crackers will look)
1 Tbsp. water
2/3 cup finely grated cheese (cheddar works well, a yellow cheese like colby will add extra color)
1/2 tsp. organic cane sugar, sucanat or coconut sugar*

Heat oven to 350 degrees F.

Mix the flours, salt, soda, butter, cheese and squash. Add 1 Tbsp. of water. Mix. A ball of dough should form that does not crumble. Knead it with your hand for a minute or two to get it all combined. If after mixing the dough for a couple minutes it is still crumbly gradually add water a tsp. at a time. You don’t want the dough too wet or the crackers will not get crisp.

Place half of the dough on a piece of parchment paper. Place another piece on top of the dough. Roll until the dough is about 1/8 – 1/4″ thick. Cut into desired shapes or cut into squares with a pizza cutter. Transfer shapes to a parchment lined baking sheet. Transfer parchment paper with squares to a baking sheet. Repeat of the second half of the dough.

Bake for about 20 minutes, until crisp and just starting to get golden on the edges. Allow to cool completely.  

Gluten Free Homemade Peanut Butter “Cocoa Puff” Cereal (egg free, corn free, dairy free option)

Baby stepping your way to real food? Swap out your store-bought cereal for this healthy version of peanut butter cocoa puffs. They are even gluten and egg free (with a diary free option)!

A little while back I made homemade cocoa puffs. They were a big hit! Then my daughter and I went gluten free. And I haven’t made the cocoa puffs since then.

Problem Solved

I decided to make a gluten free version…but add an extra element and make them into peanut butter puff cereal (any fans here of the “real” version of this?).

My inability to keep the kids away from the cereal means it turned out well. I could hardly even get a picture before they were digging in. And my son found whatever he could to reach the cereal on the counter and stuff his mouth full 🙂

Kid Approved!

A mix of chocolate and peanut butter with a little sweetness and crunch. Both kids ate it plain after I made the cereal and then each had a bowl with milk for a bedtime snack. They really enjoyed drinking the chocolate peanut butter milk at the end.

We don’t buy cereal. My son will be 2 in a couple weeks and has no idea what cereal is. But they sure enjoyed this.

Easy and Healthy

This cereal is an easy breakfast on a busy morning. You get some protein from the peanut butter and milk (or milk substitute) and some carbohydrate to keep you going. It’s also a delicious treat any time of day. Or put some in a little container for young kids to munch on when you are out and about. A perfect finger food snack (with no preservatives or unhealthy oils!).

These puffs are also very allergen friendly. They are gluten free, egg free, corn free and soy free. The chocolate puffs are nut free and can easily be made dairy free. The peanut butter puffs are dairy free as well.

Try making a batch for your kids…or for yourself. You’ll be glad you did. It takes a little time to make two batches of dough/puffs. But it’s worth the effort. And if you aren’t fond of the combination you can just make one or the other. Plain chocolate is just like cocoa puffs. Or plain peanut butter puffs are great too.

Gluten Free Peanut Butter Cocoa Puffs
makes 10 cups

Chocolate Puffs

1 cup white rice flour
1/2 cup amaranth flour
1/4 cup tapioca flour
1/3 cup organic cocoa powder
1/2 cup organic cane sugar, sucanat or coconut sugar
1 tsp. baking soda
1/2 tsp. sea salt
1/4 cup honey
2 tsp. chocolate extract (optional)
1 tsp. vanilla extract
1/4 cup butter (can be replaced with coconut oil or palm shortening)
1/4 cup coconut oil

Heat oven to 350.
Melt butter and coconut oil in sauce pan. Set aside.
In a mixing bowl, stir together flour, cocoa, sugar, baking soda and salt. Add the liquids: honey, chocolate extract, vanilla, butter/oil. Stir well. Taste dough and adjust honey and chocolate extract to your liking. Mix until a nice ball of dough is formed. The dough should not be crumbly. If it is gradually add more honey.

Split the dough into 2 equal parts. Cut 3 pieces of parchment paper the size of a cookie sheet. Lay one piece on table. Put 1/2 of dough on the paper. Lay a 2nd piece of parchment on top of dough. Squish the dough down a little with your hand. Use a rolling pin to roll the dough between the parchment paper. Roll until the dough is about 1/4″ thick. Remove the top piece of parchment paper. Cut into very small squares (with pizza cutter). Place on a baking sheet (on the parchment paper…just move the whole thing onto the baking sheet). Repeat for other half of dough. (If you don’t care about appearance you can skip the cutting step and simply break the cookie into little chunks after it bakes.)

Bake for 12-13 minutes. Turn off oven, but leave cereal in to get crisp. Remove after about 5-7 minutes (if some of the puffs are burning remove the pan). Let cool completely. Separate squares.

Peanut Butter Puffs

1 cup white rice flour
1/2 cup amaranth flour
1/2 cup tapioca flour
1/2 cup organic cane sugar, sucanat or coconut sugar
1 tsp. baking soda
1/2 tsp. sea salt
1/3 cup peanut butter
1/3 cup coconut oil
5 Tbsp. honey
1 tsp. vanilla extract

Heat oven to 350.
Melt peanut butter and coconut oil in sauce pan. Set aside.
In a mixing bowl, stir together the flour, sugar, baking soda and salt. Add the liquids: honey, vanilla, peanut butter/oil. Stir well. Mix until a nice ball of dough is formed.The dough should not be crumbly. If it is gradually add more honey.

Split the dough into 2 equal parts. Cut 3 pieces of parchment paper the size of a cookie sheet. Lay one piece on table. Put 1/2 of dough on the paper. Lay a 2nd piece of parchment on top of dough. Squish the dough down a little with your hand. Use a rolling pin to roll the dough between the parchment paper. Roll until the dough is about 1/4″ thick. Remove the top piece of parchment paper. Cut into very small squares (with pizza cutter). Place on a baking sheet (on the parchment paper…just move the whole thing onto the baking sheet). Repeat for other half of dough. (If you don’t care about appearance you can skip the cutting step and simply break the cookie into little chunks after it bakes.)

Bake for 12-13 minutes. Turn off oven, but leave cereal in to get crisp. Remove after about 5-7 minutes (if some of the puffs are burning remove the pan). Let cool completely. Separate squares.

Combine the chocolate and peanut butter puffs in one container. Serve plain, with milk (or milk substitute) or mixed in yogurt. Store in an airtight container. You can freeze the cereal to make it last longer.

Soaked Gluten Free Graham Crackers | Just Take A Bite

Soaked Gluten Free Graham Crackers (gluten free, egg free, dairy free, nut free, corn free)

No need to reach for a box. These soaked gluten free graham crackers are easy to make and properly prepared. Your kids will love them. And so will you!

Soaked Gluten Free Graham Crackers | Just Take A Bite

If you’ve been reading my blog for very long you know that I have a small obsession with graham crackers.

I don’t know why. But they have been one of my absolute favorite foods for many many years now.

They are my go-to snack when I don’t feel well. Not too sweet. But just sweet enough. Always the perfect treat.
I’ve made quite a few varieties of graham crackers over the years. Every time I have a new dietary restriction I think…will I have to give up my beloved graham crackers?!

Recently I started eating gluten free. Which means I can’t have my yummy homemade whole wheat grahams.

So of course I got to work creating a gluten free version. Pure heaven.

Buy Healthy Snacks to Go eBook Recipes Online

These crackers are very easy to make, the grains are soaked (which makes them easier to digest) and they are very allergen friendly.

No eggs, dairy, gluten, rice, corn, oats or nuts. I think they are even vegan (although I don’t know much about it…is honey vegan?).

I’m so happy that I don’t have to give up one of my favorite foods…and that I can eat it without getting a stomach ache (or a whole host of other symptoms).

Do you like graham crackers?

Give these soaked gluten free graham crackers a try. Even if you don’t have to eat gluten free these are a great snack to get some variety in your diet.

Want to learn more ways to feed nutritious food to kids with allergies or picky eaters?

Check out my book Why Won’t My Child Eat?!

Soaked Gluten Free Graham Crackers | Just Take A Bite


Soaked Gluten Free Graham Crackers
Yields 40
Write a review
Print
Ingredients
  1. 1 1/2 cups "whole grain" gluten free flour(s) (amaranth, brown rice, teff, sorghum, garbanzo bean, oat)
  2. 1/2 cup starchy gluten free flour (tapioca, cassava, white rice, arrowroot, potato starch)
  3. 1/2 cup coconut oil, butter, lard or tallow, melted
  4. 1 cup warm water
  5. 1 Tbsp. lemon juice
  6. 1/3 cup cane sugar
  7. 4 Tbsp. honey
  8. 2 Tbsp. molasses (you can skip this and add more honey or use maple syrup)
  9. 1 tsp. baking soda
  10. 1/2 tsp. sea salt
Instructions
  1. Mix the flours, oil, water and lemon juice. Cover and let soak for 24 hours.
  2. Heat oven to 350 degrees. Line two baking sheets with parchment paper.
  3. Add the remaining ingredients to the flour mixture. Mix until well combined.
  4. Add more sugar, honey or molasses to make them sweeter if desired.
  5. Spread half of the batter on each pan.
  6. Bake 10 minutes.
  7. Using a pizza cutter, cut into squares (if they are sticking to the pizza cutter try again in 3-5 minutes). Return to the oven for 5 minutes.
  8. Remove from the oven and transfer the crackers on the parchment paper to dehydrator trays. Dry at highest heat setting until crisp, removing the parchment paper part way through (about 6 - 8 hours).
  9. Let cool. Store in an airtight container.
Notes
  1. These crackers freeze well.
Just Take A Bite https://justtakeabite.com/
In order for me to support my blogging activities, I may receive monetary compensation or other types of remuneration for my endorsement, recommendation, testimonial and/or link to any products or services from this blog. It will not change the cost of any products or services for you.

These scotcheroos come together in about ten minutes, using real, allergen friendly ingredients. A simple, delicious dessert with no baking required!

Quick And Easy Scotcheroos {Gluten, Dairy, Egg and Nut Free!}


These scotcheroos come together in about ten minutes, using real, allergen friendly ingredients. A simple, delicious dessert with no baking required!

These scotcheroos come together in about ten minutes, using real, allergen friendly ingredients. A simple, delicious dessert with no baking required!

I grew up eating scotcheroos.

My mom still makes them all the time. She brings them to the neighbors, brings them for fellowship at church, etc.

But I haven’t made them or had one in years, though. Why? They are filled with not-so-good stuff. The main 3 things…Rice Krispies, corn syrup and regular peanut butter (hydrogenated oils and GMO nuts.

These scotcheroos come together in about ten minutes, using real, allergen friendly ingredients. A simple, delicious dessert with no baking required!

A Fresh Look.

I like to update classic recipes using real ingredients. So I gave these scotcheroos a makeover.

I use plain puffed brown rice, cane sugar, honey and sunbutter in the base. Then I simply melt allergen free chocolate chips for the topping.

Even with three kids trying to help these took about ten minutes from start to finish. There is no baking required. Just a few minutes at the stove. The mix and pour.

These scotcheroos come together in about ten minutes, using real, allergen friendly ingredients. A simple, delicious dessert with no baking required!

And, yes, they got a huge two thumbs up from everyone! Be forewarned…one batch may not be enough.

Scotcheroos also make a great party treat because they are free of gluten, corn, eggs, dairy, nuts and soy!

These scotcheroos come together in about ten minutes, using real, allergen friendly ingredients. A simple, delicious dessert with no baking required!

Kids In The Kitchen.

This may be one of our new favorite treats. And pretty soon my kids can make it without my help since they are learning to cook through the Kids Cook Real Food ecourse. My five and eight year olds can cook at the stove. Even my two year old can measure and pour quite well.

Ready for a special dessert with no allergens and very little effort? I’ve got you covered!
These scotcheroos come together in about ten minutes, using real, allergen friendly ingredients. A simple, delicious dessert with no baking required!

 
Quick And Easy Scotcheroos
Serves 16
A simple allergy friendly bar that requires no baking.
Write a review
Print
Ingredients
  1. 1/2 cup organic cane sugar or sucanat
  2. 1/2 cup honey
  3. 1/2 cup plain sunbutter
  4. 3 cups organic puffed brown rice
  5. 1/2 tsp, vanilla (optional)
  6. 1 1/2 cup chocolate chips
Instructions
  1. Mix sugar and honey in a large saucepan. Heat and boil until sugars are dissolved (about 2 minutes).
  2. Remove from heat. Stir in su butter, rice and vanilla.
  3. Spread in a greased 9" square pan.
  4. Melt the chocolate chips in a double boiler until smooth. Poor over rice mixture. Let cool completely before cutting (in the refrigerator works best).
Just Take A Bite https://justtakeabite.com/


These scotcheroos come together in about ten minutes, using real, allergen friendly ingredients. A simple, delicious dessert with no baking required!