Home » Archives for Mary | Just Take A Bite » Page 6

Author: Mary | Just Take A Bite

It's not always easy or cheap to lead a natural lifestyle. Sometimes we still reach for convenience foods...but of higher quality. But just what is the natural flavor in your "natural" foods?

The Secret Ingredient Hiding In Your Natural Food: What Is Natural Flavor?

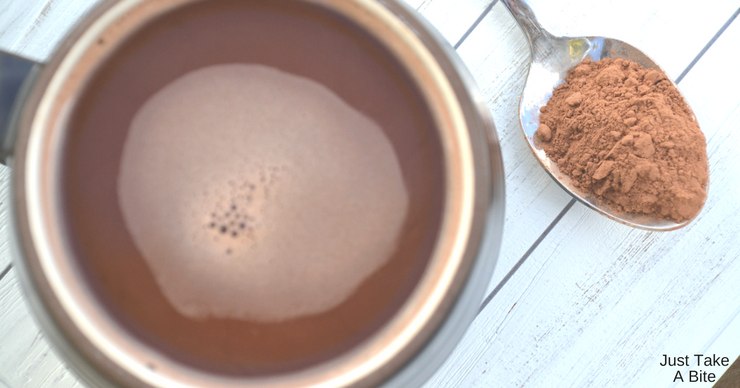
It’s not always easy or cheap to lead a natural lifestyle. Sometimes we still reach for convenience foods…but of higher quality. But just what is natural flavor in your “natural” foods?

It's not always easy or cheap to lead a natural lifestyle. Sometimes we still reach for convenience foods...but of higher quality. But just what is the natural flavor in your "natural" foods?

It’s been over six years now since we cut out food coloring/food dyes from our kids’ diet. As in absolutely none. No exceptions. Artificial flavor is limited to a few times a year in a treat of vanilla ice cream.

Food dyes are connected to behavior – and not in a good way! Eliminating them has made a big difference in how my children feel and behave. It is literally like a drug for my oldest. Sometimes it makes her insane. Sometimes it makes her super mellow. Either way, it’s impacting her brain and is not good.

Of course cutting out artificial ingredients naturally lends itself to a healthier, more natural lifestyle. Who doesn’t love that?!

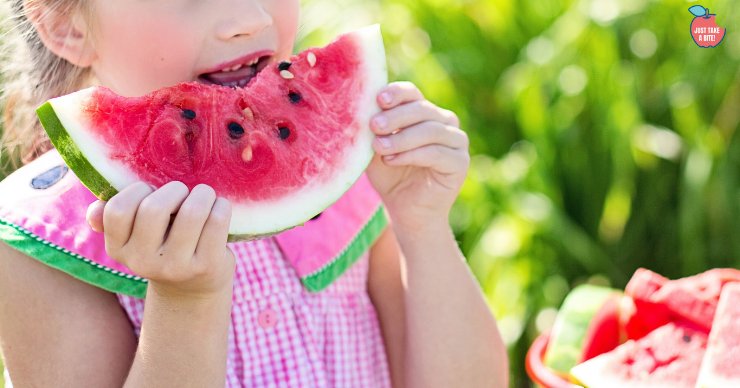
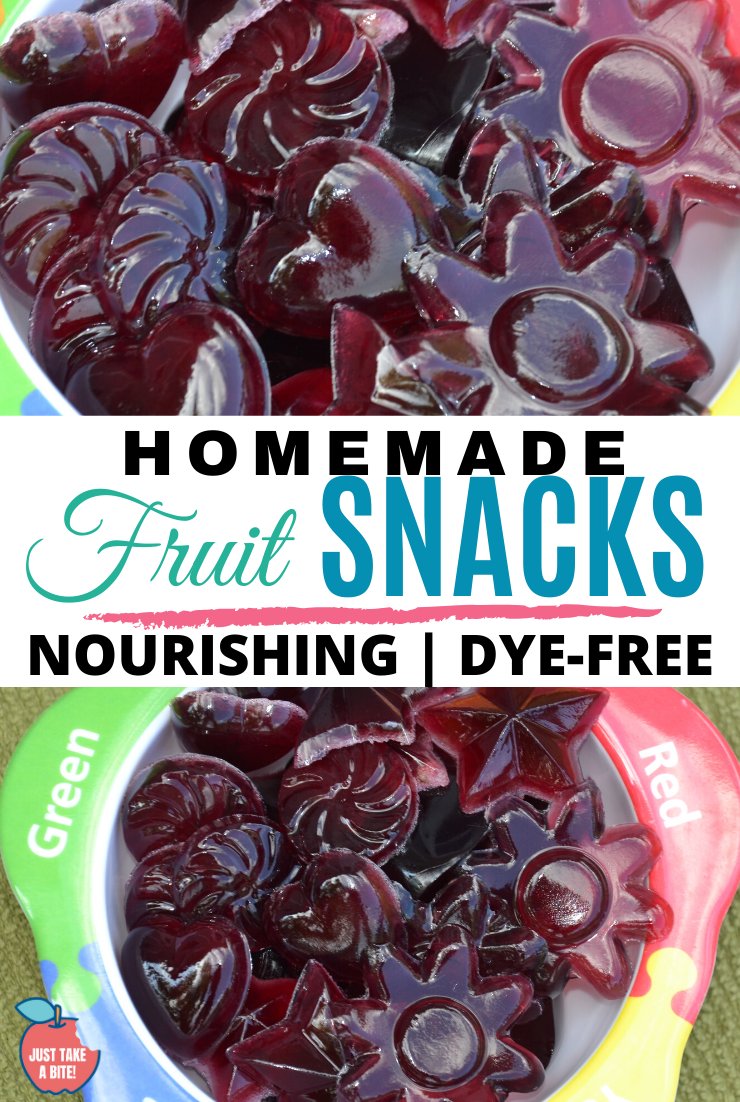
Instead of artificially-flavored fruit snacks you buy organic gummies or even make your own homemade fruit snacks! Instead of Trix yogurt with food dyes you get organic yogurt. Instead of traditional candy you buy organic suckers made with fruit. Sounds great!

Why Eliminating Food Dyes is Not Enough

That was us…for a while. Until I noticed my daughter was exhibiting the same behavior as when she ate the foods with artificial colors and flavors.

Being the investigator that I am, I read labels, I observed her, I kept a food journal. She had already been gluten-free for a long time. And no other food seemed to be causing the problems.

The one thing that I came up with was the ingredient common to all of these “natural” foods…natural flavor.

What is Natural Flavor?

Since then I’ve been doing more research. Both experimenting with diet and reading any information I can find. I really want to know…what is natural flavor??

Not surprisingly I came across article after article that said natural flavor is basically the same thing as artificial flavor. The only real difference is the ingredient(s) it starts with. Natural flavor starts with real food. But it still undergoes various chemical processes which result in a product not much different than its artificial counterpart.

How is Natural Flavor Defined?

According to the Code of Federal Regulations, “The term natural flavor or natural flavoring means the essential oil, oleoresin, essence or extractive, protein hydrolysate, distillate, or any product of roasting, heating or enzymolysis, which contains the flavoring constituents derived from a spice, fruit or fruit juice, vegetable or vegetable juice, edible yeast, herb, bark, bud, root, leaf or similar plant material, meat, seafood, poultry, eggs, dairy products, or fermentation products thereof, whose significant function in food is flavoring rather than nutritional. Natural flavors, include the natural essence or extractives obtained from plants.”

Per dictionary.com enzymolysis is: “Chemical change or cleavage of a substance by enzymatic action.

So, natural flavor can come from a chemical change of bark and it’s still within the guidelines. Interesting.

It's not always easy or cheap to lead a natural lifestyle. Sometimes we still reach for convenience foods...but of higher quality. But just what is the natural flavor in your "natural" foods?

Is Natural Flavor Harmful?

According to dailyburn.com:

“Natural flavors are coming from natural sources — the original ingredient is found in nature and then purified and extracted and added back into the food.

But, that doesn’t necessarily mean the “natural flavors” in your blueberry granola bar are simply…crushed-up blueberries. Rather, they probably consist of a chemical originally found in blueberries, enhanced and added into your food in a lab.”

“Added flavoring, both natural and artificial, could contain anywhere from 50 to 100 ingredients. And all of the extra ingredients in flavors often aren’t as innocent as you’d hope they would be. The mixture will often have some solvent and preservatives — and that makes up 80 to 90 percent of the volume [of the flavoring]. In the end product, it’s a small amount, but it still has artificial ingredients.”

NaturalNews.com states:

“Regulations for the word “natural” only apply to flavors; anywhere else you find it on food packaging means absolutely nothing regarding quality. Secondly, the FDA definition of “natural flavors” and “natural flavoring” allows for the substance to be extracted from plant or animal “matter.” So when you buy something that’s organic, vegetarian, or vegan, and it has “natural flavoring,” you could be eating a pig, cow, turkey, chicken, or lamb which was shot up with growth hormones, fed GMO pesticide-laden corn and grain – probably mixed with other animals of it’s same breed, then shot up with antibiotics due to infections and diseases from living in confined quarters on slats covered in feces.

Monosodium Glutamate is a neurotoxin that can be legally hidden from you and/or be labeled “natural flavors” in the ingredients list. MSG is not a natural flavor – in fact, it can cause brain lesions, neuro-endocrine disorders, and neurodegenerative disease in humans, but you won’t hear any doctors of Western Medicine mentioning that at your next extreme migraine emergency visit. There are more than 25 names for MSG, so sometimes you find it spread out a little, just in case the manufacturer gets “checked out” by anyone other than the FDA.”

Foodbabe.com says:

“With the words “natural flavor” food chemists and companies can put whatever they want in your food that is “generally regarded as safe” including excitotoxins. Natural flavor can legally contain natural occurring “glutamate” bi-products like MSG – which are known excitotoxins. These excitotoxins are some of the chemicals that cause your taste buds to experience irresistibility when it comes to food. Excitotoxins overexcite your cells literally until they die or are damaged causing “injury” and “incapacitating” you with disease. When consumed over time, excitotoxins can cause nerve disorders resulting a myriad of diseases from stroke to Alzheimer’s to Parkinson’s. And lots of other side effects too – like obesity, migraines, fatigue and depression.”

Remember what I said about “natural flavor” acting like a brain-altering drug for my kids? It’s not so far fetched when you really do some searching. My observations were spot on.

Do Manufacturers Lie About Ingredients?

None of it sounds very appealing and certainly doesn’t put my mind at ease.

But I know you can’t trust everything you read. So I set out to do my own investigation.

I called some popular organic food companies and some conventional food companies to ask them about the ingredients in their food (I’ll be kind and won’t name names). Sadly most of them had no answer for me.

I told them I was a mom of kids with tons of allergies. I need to know a full ingredient list or I can’t give it to my kids. Simply avoiding the top eight allergens does not cut it.

These are the responses I got:

“Natural flavor is listed so we can keep the full ingredient list from our competitors. The natural flavor in X product contains apple, corn, black raspberry, cherry, cranberry, lemon, lime and strawberry. I don’t know how it’s processed, but it does contain those ingredients.”

“The natural flavor is outsourced. The ingredients for each flavor can change by the season so we can’t tell you what’s in it. It is made from fruits, vegetables and/or spices. And they can’t be modified. There are no major allergens.”

“The natural flavor comes from a natural source. I don’t have a specific list of ingredients.”

“It is a proprietary formula that I can’t tell you. It is an all natural food or something.”

“The Natural Flavors in our products will follow our same Brand Promise to be Gluten-Free and Free-From the top defined food allergens. We have only aligned ourselves with business partners and ingredient suppliers that can adhere to our strict allergen requirements.”

One website directly stated:

“All our Natural Flavors in our certified organic product are Organic Compliant Natural Flavors and conform to the regulations of both the FDA and the very strict National Organic Plan (NOP) by the USDA.These natural flavors do not contain anything we would not be proud to put in our family’s mouths.

Please note that we consider our Natural Flavors to be secret recipes so we do not reveal the contents of our Natural Flavors. We are aware that some people may not be able to eat some of our flavors because we are unable to reveal the secret recipe and we are truly sorry for this inconvenience.”

Does Anyone Know Where Natural Flavor Comes From?

Since I was getting nowhere with the food manufacturers I tried contacting some natural flavor manufacturers directly.

No surprise…I couldn’t get any response from them!

Why Natural Flavor is Dangerous for Food Allergies

As a mom of kids with allergies it concerns me greatly that I am not allowed to know what is in just about every packaged food. Even simple foods like canned tomatoes and salsa. It also concerns me that these “natural flavors” are so common that nobody questions them.

The word natural has no real standard. It can mean just about anything. Don’t let it fool you too. If you are conscious of avoiding artificial flavors and colors, you might want to add natural flavor your list.

If it is so “natural,” why don’t you just tell us what it is??

How to Avoid Natural Flavor

I’m not just a bearer of bad news. I want you to have hope! Don’t feel discouraged! You can still live a natural lifestyle. And it does NOT have to be complicated or involve convenience foods with suspicious ingredients.

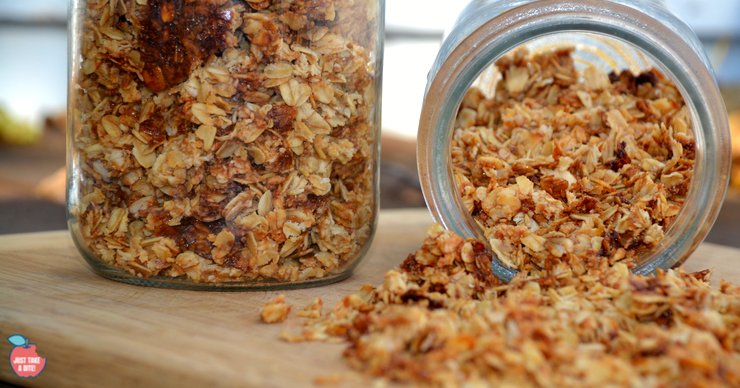
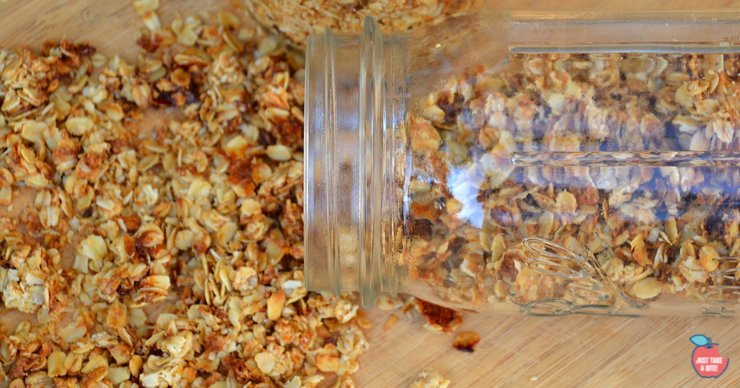
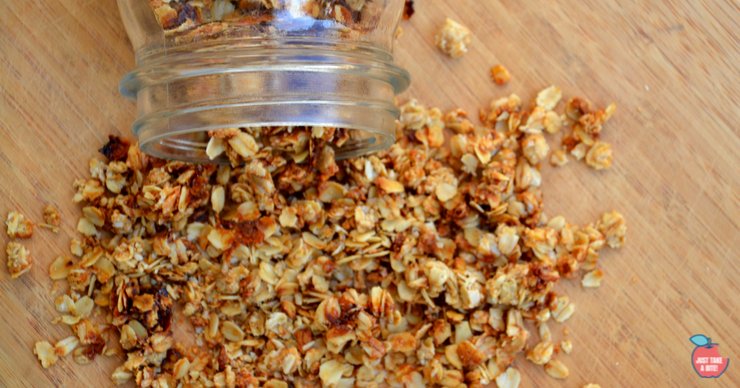
You can learn to replace store-bought products with DIY options that actually work (like homemade fruit snacks and granola bars) and are easy to make. You feel better (and even look better, too). Healthy living becomes less stressful and more enjoyable.

Our family has felt so much better by making changes to the way we eat, the products we use, and how we take care of ourselves. It’s made all the difference in the world and I want the same for you.

The use of natural flavor has been my biggest “natural food” complaint for many years. It really has no place in our food. And food companies that make quality, whole foods should be more than happy to tell consumers exactly what ingredients they use.

Do you avoid natural flavor?

If you are looking for a simple way to keep your family healthy and thinking clearly, avoid natural flavor. This mystery ingredient has no place in real food.

Homemade Fruit Snacks

How to Make Homemade Fruit Snacks | Dye-Free & Allergy-Friendly!

Impress your kids and avoid strange ingredients by making homemade fruit snacks! Just a few simple and nourishing ingredients create a fun and healthy snack.

Homemade Fruit Snacks - Dye-free healthy snacks

One of the best decisions I made as a parent was to stop buying packaged fruit snacks. Let’s face it – they are sort of weird, food-like morsels that really are more like candy than anything.

Even the “natural” or organic versions still have some questionable ingredients. And basically zero nutrition.

Why You Should Make Your Own Fruit Snacks

My solution to this problem is always homemade.

I’ve been making homemade fruit snacks (also known as gummies) from scratch for my kids for quite some time. I get lots of requests for the recipe.

Most people are amazed at how simple it is. But beyond that, it’s amazing how healthy they are!

We used to buy organic fruit snacks once in a while as a special treat. But not anymore.Homemade Fruit Snacks - Dye-free healthy snacks

Homemade Fruit Snacks with Grass-fed Gelatin

These fruit snacks are filled with nourishing gelatin (use code TAKE10 for 10% off) which is great for gut healing. They are also very safe for almost any allergy. I love that I can even make a variety of flavors for my little guy that is allergic to multiple fruits (have you ever tried finding something fruit flavored at the store that does not contain banana, grape or pear? Impossible).

My kids will easily eat a whole batch in a week if I let them. So I often have to make a new batch almost weekly! I try to make different flavors like blueberry lemon, lemon lime, lemonade and cherry. I love having very healthy snacks on hand that my kids truly love. And they don’t have to feel like they are missing out.

Healthy Snacks for Toddlers

One of the things that surprised me is how much my toddler loves homemade fruit snacks. I just make them in a pan and cut them into small squares. It’s a great finger food! Bonus that I can pack them up for when we are out and about. No little puffs or melts with strange ingredients. Just fruit and gelatin.

Do your kids like fruit snacks?

Try replacing the store-bought version with a homemade version. You can make them in any shape and flavor. Let your kids choose which ones. They’ll think it’s great! And you can know they are eating something that is healthy and healing.

This post is linked to Allergy Free Wednesday.

Homemade Fruit Snacks - Dye-free healthy snacks

Homemade Fruit Snacks
A fun, fruity snack that is full of nourishing gelatin and free of allergens and artificial ingredients.
Write a review
Print
Ingredients
  1. 1 cup pure juice (i.e. blueberry, cherry, lemon, lime)
  2. 3/4 cups sweetener (cane sugar, coconut sugar, honey, maple syrup)
  3. 3 -6 Tbsp. grass-fed gelatin
  4. 1/4 tsp. sea salt (optional)
Instructions
  1. Combine the juice, salt and sweetener in a small saucepan. Heat slightly and mix until the sugar/honey dissolves.
  2. Taste the juice and add more sweetener if necessary.
  3. Allow the juice to cool for 10 - 30 minutes.
  4. Add the gelatin to the juice while gently whisking.
  5. Let sit for one minute.
  6. Heat the juice/gelatin mixture over low heat, whisking gently until the gelatin completely dissolves.
  7. Pour the mixture into molds or a glass pan.
  8. Refrigerate until solid (about 20 minutes).
  9. Remove fruit snacks from molds or cut into squares/desired shape from a pan.
  10. Store in a container in the refrigerator.
Notes
  1. Do not use juice from concentrate/juice that you would drink plain. Use pure juice.
  2. You may need extra sweetener for some flavors like lemon and lime.
  3. You can use one type of juice or a combination - blueberry lemon, cherry lime, lemon lime, etc.
  4. Using less gelatin will make a softer gummy and they will need more time to set. More gelatin will make it firmer.
Just Take A Bite https://justtakeabite.com/
Gluten-Free Pumpkin Bread

Gluten-Free Pumpkin Bread {dairy free, nut free, corn free}

Gluten-free pumpkin bread is easy to make and will be a hit with the whole family. Both kids and adults will love this tasty way to add pumpkin into your diet.Gluten-Free Pumpkin Bread

Fall is time for all things pumpkin. Do you agree?

If you’re like me and have grown to love pumpkin and enjoy eating it in season, then this recipe is for you!

How to Get Kids to Eat Pumpkin

My kids LOVE this bread.  It’s slightly sweet with just a hint of spice. Spread some butter on and you have the perfect snack or breakfast treat.

I always try to get some feedback from my family when I make a new recipe. According to my six year old this bread is “a bajillion times good.”  She gave it two thumbs and two toes up.

Then she told me “it tastes like it came from the store…it tastes like it’s processed!”  That may sound odd, but her definition of processed is anything that doesn’t come from our kitchen. In other words, she thought it was so good you’d never know it was gluten-free and that we didn’t buy it.

I must say that I agree with her assessment. Sadly two loaves disappeared pretty quickly. Now I have to make more.Gluten-free pumpkin bread is easy to make and will be a hit with the whole family. Both kids and adults will love this tasty way to add pumpkin into your diet.

How to Use Up Leftover Pumpkin

Do you have leftover pumpkin from making pies or leftover squash from Thanksgiving dinner? Gluten-free pumpkin bread is the perfect way to use them!Gluten-Free Pumpkin Bread: Dairy-Free, Nut-Free, Corn-Free

This would make a great day after Thanksgiving breakfast or accompaniment to some turkey noodle soup.

Add chocolate chips or chopped nuts to make gluten-free pumpkin bread extra special.

Gluten-Free Pumpkin Bread

Be sure to make a big batch of gluten-free pumpkin bread so you can stock your freezer. Simply cool, slice and wrap a loaf of bread. Freeze it. Then take slices out as  you need them.

This recipe makes one large loaf (9×5-in.) and one medium loaf (8×4-in.). If you don’t want to make loaves you can turn this into muffins. Simply put the batter in muffin pans and cut the baking time in half.

When to Stock Up on Pumpkin

October and November is the time of year to stock up on pumpkin. Pumpkins at the orchard are cheap and easy to roast, puree and freeze. Or this is when pumpkin at the store is the cheapest it will be all year. Fill your pantry or freezer now so you can enjoy pumpkin bread whenever you want without spending a lot.

This pumpkin bread is gluten, dairy, nut, corn and coconut free. But you’ll never know! All you get is sweet pumpkin and a hint of cinnamon. Bake a batch or two for a delicious fall treat. Gluten-Free Pumpkin Bread

Gluten-Free Pumpkin Bread

Author Mary | Just Take A Bite

Ingredients

  • 1 cup organic white rice flour
  • 1 cup organic sorghum flour or brown rice flour
  • 1/2 - 1 cup organic cane sugar or coconut sugar (adjust sweetness to liking)
  • 1 tsp. psyllium husk powder
  • 1 tsp. baking soda
  • 1 tsp. cream of tartar
  • 1/2 tsp. salt
  • 1 tsp. cinnamon
  • 1 cup pureed pumpkin
  • 1 tsp. organic vanilla extract
  • 1/2 cup olive oil or avocado oil
  • 3 eggs
  • 1/2 cup mini chocolate chips, chopped walnuts optional

Instructions

  1. Heat the oven to 350 degrees F. Grease two loaf pans (one large, one medium).

  2. In a large bowl combine the flour, sugar, soda, cream of tartar, salt and cinnamon.

  3. Add the vanilla, pumpkin and oil. Mix.

  4. Add the eggs. Mix until well combined.

  5. Stir in chips or nuts if desired.

  6. Pour the batter into the prepared pans.

  7. Bake for 50 - 60 minutes, until baked through.

  8. Allow to cool before slicing.

  9. Store in an airtight container at room temperature or in the freezer for long term storage.

Recipe Notes

  • You can sprinkle cinnamon and sugar on the batter before baking the bread for a crunchy topping.
  • You can replace the pumpkin with squash.
  • To make the batter into muffins, fill muffin cups 3/4 full with batter and bake for 30 minutes.
This healing hot cocoa will warm you up, keep you hydrated and nourish your body. Plus it tastes great! The perfect cold weather drink.

How to Make Homemade Hot Cocoa That Heals

This healing hot cocoa will warm you up, keep you hydrated and nourish your body. Plus it tastes great! The perfect cold weather drink.This healing hot cocoa will warm you up, keep you hydrated and nourish your body. Plus it tastes great! The perfect cold weather drink. #realfood #glutenfree #homemade

Ever since I got pregnant with baby number two (in 2010) I have been hooked on hot chocolate. While I had morning sickness, it was about the only way I could get fluids down. For some reason even when I’m sick chocolate still sounds good.

Even after giving birth I still enjoyed hot chocolate, but didn’t need it daily any more. I should say I’d try not to drink it daily…I was trying to be “good.”

Being good didn’t work.

Why Water Doesn’t Hydrate

I’d go for stretches where I only drank lots of plain water or water with a little lemon juice (that’s supposed to be healthy, right?). But I started to notice that I always felt so full after drinking plain water. It felt like I never absorbed it unless I just took tiny sips at a time. And I would always have to go to the bathroom frequently. Plus I would get very cold.
 
But give me a big mug of hot chocolate – completely different! I can go through the whole thing in a few minutes and not feel like I have a belly full of liquid. I feel like my body absorbs it and uses it. It helps me get warm and stay warm.

So whenever I’m feeling dehydrated, like I’m not absorbing fluids, or like I need something to help warm up I reach for a big mug of homemade hot cocoa.

This healing hot cocoa will warm you up, keep you hydrated and nourish your body. Plus it tastes great! The perfect cold weather drink. #realfood #glutenfree #homemade

Why Hot Cocoa Heals

I’ve tried other drinks, but they never do the same thing. Why would this be?

Turns out my body really does know what it needs.

First, cocoa is actually quite high in magnesium. And that’s something I am lacking.


You can also increase your magnesium levels with this two-ingredient DIY magnesium lotion OR buy a high quality magnesium lotion HERE. We love both!


Cocoa is also high in iron. And I just found out this week that I’m anemic. So I better keep drinking my hot chocolate!

Finally, as a tired mom with adrenal fatigue, plain water just makes me sluggish. This healthy hot cocoa gives my adrenals the boost they need to get through the day.

Healthy Hot Cocoa

After reading Eat For Heat I know that some fluids like plain water, tea, coffee and soda just flush the minerals out of your body. But cocoa is is a very warming food. And so is salt…which I add to my hot chocolate to make it even more warming!

Finally I saw this article recently about the health benefits of honey and cinnamon.

I combine all of these benefits into a cup of delicious, healing, hydrating, warming hot cocoa. It only takes a few seconds to make (once you have hot water). And it is very allergy-friendly (dairy, eggs, wheat, gluten, soy, etc.). If you can handle cocoa powder it is even GAPS legal.

You can also use cacao or carob in place of the cocoa. Whichever you choose make sure it’s organic.

With the salt/sweet/mineral content this could even replace your sports drink.

Make Your Homemade Hot Cocoa Even Better

If you really want a nutrient boost you can add collagen, butter and/or coconut oil!

Want to take a step towards good health? Instead of drowning in ounce after ounce of plain water try a delicious mug of healing hot cocoa. Your body and your taste buds will thank you.

A little disclaimer – I’m not a doctor. I don’t have scientific data to back this up. I just know how my body responds. I always feel warm and hydrated when I drink my homemade hot cocoa. But I feel full and cold when I drink most other fluids.

How about you? Does your body respond well to hot cocoa?

Want to learn more about hydration, thyroid, and adrenals? Read why I cut way down on drinking plain water.

This healing hot cocoa will warm you up, keep you hydrated and nourish your body. Plus it tastes great! The perfect cold weather drink. #realfood #glutenfree #homemade

5 from 2 votes
Print

Homemade Hot Cocoa That Heals

Prep Time 2 minutes
Servings 1

Ingredients

  • 1 - 2 tsp. organic cocoa powder it is important to use organic to avoid GMOs (you can also use carob powder if you can't tolerate cocoa)
  • 2 tsp. raw honey, organic cane sugar or maple syrup
  • 1/4 tsp. cinnamon optional
  • 1/8 tsp. unrefined sea salt
  • 1/4 cup milk or milk substitute optional
  • 2 tsp. collagen  optional
  • 2 tsp. butter optional
  • 2 tsp. coconut oil optional
  • hot water

Instructions

  1. Place cocoa powder, honey, cinnamon, collagen and salt in a mug.

  2.  Fill the mug with hot water and stir to dissolve.

  3. Add a splash of milk if desired for creaminess/to cool the hot chocolate.

Kettle corn granola is a little salty and little sweet. You get the flavor of kettle corn in your breakfast bowl!

Kid-Friendly Kettle Corn Granola Recipe

Kettle corn granola is a little salty and little sweet. You get the flavor of kettle corn in your breakfast bowl!Kettle corn granola is a little salty and little sweet. You get the flavor of kettle corn in your breakfast bowl!

Granola is one of my absolute favorite foods. I got hooked on it in college…and ate it every day. I wish I had known back then just how easy it is to make your own granola.

Now I make it all the time. I always have some on hand for an easy snack or quick breakfast.  It’s great mixed in yogurt or eaten plain with milk. I even love putting some in my daughter’s lunch for a filling finger food.

A super easy breakfast that my kids love is a granola bar bowl – you get the taste of granola bars without the work. Grab the recipe here.

Sweet and Salty Homemade Granola

I’ve been making granola for many years now. I have several granola recipes already on the blog.  I don’t usually follow a recipe anymore. I just use what we have on hand and create something new every time.

But this version of granola is hands down my favorite!

It’s salty and sweet and very addictive!! I call it kettle corn granola because it really tastes like kettle corn.Kettle Corn Granola || Homemade Dutch Apple Pie

Easy Finger Food Snack

My kids love to munch on this stuff. As you can see my son had no problems helping me make the granola and being my taste tester.

One of the great things about granola is that you can make a huge batch (I usually do about 10 cups of oats at a time – a double batch of this recipe) and freeze it.  Then when you want granola you are set.

You don’t even have to thaw it! Granola is ready straight from the freezer. I usually keep a small jar in the cupboard and refill it from the freezer stash as we use it up.Kettle corn granola is a little salty and little sweet. You get the flavor of kettle corn in your breakfast bowl!

Budget-Friendly Breakfast

 The other thing I love about granola is how much money it saves.  Have you looked at the price of granola made with quality ingredients? I was recently at a small meat market. They had locally made granola…$4 for about 6 oz.!!! That is insane. My kids would eat that much in one sitting.

When you make granola at home you control the ingredients AND you save a ton of money. Always good.

You also make a very allergy-friendly breakfast treat. This one is gluten, dairy, nut and egg free.Kettle corn granola is a little salty and little sweet. You get the flavor of kettle corn in your breakfast bowl!

Quick-Prep Homemade Granola

Granola only takes about five minutes to prepare. The end result is a huge batch of homemade cereal that will last a long time. It is also the perfect project to do with kids. When I make granola each kids gets his or her own bowl to create their own batch. They can add whatever they like. My kids love being creative with granola. Sometimes we end up baking theirs, but usually they eat it before it gets to the oven.

This would make a great Christmas gift. Make a couple batches, package it and pass it around to family and friends. Throw a few mini chocolate chips in after the granola has cooled and you’ll really be giving a delicious treat.

Soaked Granola Recipe

If you want to be sure you’re really getting all of the nutrients out of your granola you can make this into a soaked version. You’ll have to plan ahead, but it’s still oh, so delicious!

Do you like the salty sweet combination of kettle corn? Now you can enjoy it for breakfast with kettle corn granola.

Kettle corn granola is a little salty and little sweet. You get the flavor of kettle corn in your breakfast bowl!

Kettle Corn Granola
A delicious granola cereal that has the sweet and salty flavor of kettle corn.
Write a review
Print
Unsoaked
  1. 5 cups old fashioned oats
  2. 1/2 cup water
  3. 3/4 cup coconut oil and/or butter
  4. 1/2 cup coconut sugar
  5. 1/4 cup honey
  6. 1/4 cup maple syrup
  7. 1 tsp. unrefined sea salt
Soaked
  1. 5 cups old fashioned oats
  2. 2 1/2 cups warm water + 2 Tbsp. yogurt, kefir or lemon juice
  3. 1/3 cup coconut oil and/or butter
  4. 1/2 cup coconut sugar
  5. 1/4 cup honey and/or maple syrup
  6. 1 tsp. unrefined sea salt
Unsoaked
  1. Heat the oven to 350*F.
  2. In a large bowl combine the oats, water and salt.
  3. In a saucepan heat the sugar, honey, syrup and oil until the oil is melted and the sugars and oil combine.
  4. Pour the sugar/oil mixture over the oats. Mix until well combined.
  5. Spread the oat mixture onto a large parchment lined baking sheet.
  6. Bake for about one hour, stirring every 20 minutes, until golden brown.
  7. Remove from the oven and allow to cool completely.
  8. Store in an air tight container in the cupboard or in the freezer for long term storage.
Soaked
  1. Combine the oats, warm water and soaking agent.
  2. Cover and let sit 24 hours.
  3. Spread the oat mixture onto dehydrator trays and dry until crisp, about 8 hours.
  4. Crumble dried oats into a large bowl.
  5. Heat oven to 350*F.
  6. In a small saucepan combine the salt, butter, sugar and honey.
  7. Cook until melted and combined.
  8. Pour the butter mixture over the oats. Mix well.
  9. Spread onto a parchment lined baking sheet (it may fit on one large sheet or you may need to spread it on two sheets).
  10. Bake for 30 minutes.
  11. Allow to cool completely.
  12. Crumble the granola and store in an air tight container or in the freezer.
Notes
  1. This recipe easily doubles or triples and freezes well.
  2. Granola is ready straight from the freezer.
Just Take A Bite https://justtakeabite.com/
This post is linked to From The Archives Friday.

Traditional Blueberry Pie Recipe

Traditional blueberry pie is a family classic handed down through generations. This blueberry pie recipe is easy-to-make and will turn anyone into a blueberry lover!

Traditional blueberry pie is a family classic handed down through generations. This blueberry pie recipe is easy-to-make and will turn anyone into a blueberry lover!

I’ve mentioned before that blueberries are my favorite fruit…and blueberry pie is my favorite pie! So every summer I make at least one blueberry pie. Even if it’s the only blueberry dessert I make.

We’ve had a whole assortment of grain/starch/flour restrictions over the years. At one point or another the list included:

  • wheat
  • rice
  • corn
  • quinoa
  • oats
  • rye
  • amaranth
  • tapioca
  • cassava
  • potato
  • almonds
  • coconut
  • arrowroot

That doesn’t leave much to work with.

The Best Pie Crust

Now that we have done a lot of healing we can tolerate some wheat (though we still eat mostly gluten-free). I normally only use wheat in the form of sourdough.

But I make an exception when it comes to pie. I use basic all purpose flour for pie crust.

I’ve made quite a few gluten-free pies in the past. They are good. But gluten-free pie crust just doesn’t turn out that well.

So when it comes to pie I go the old fashioned route and make a traditional blueberry pie with wheat crust.

I use butter to make pie crust. Traditional blueberry pie is a family classic handed down through generations. This blueberry pie recipe is easy-to-make and will turn anyone into a blueberry lover!

Blueberry Pie Filling

Blueberry pie filling is so easy to make. It’s not like cherry pie that you have to cook in advance. Just mix a few ingredients and pour it in the crust.

That being said, blueberry pie filling can be tricky to get just right because it needs quite a bit of thickener. Fresh blueberries are so juicy!!

I generally opt for white rice flour. Though cornstarch works well too.

Sometimes I add grass-fed gelatin. It works well to make sure things gel and adds some nutrients to the filling. The tricky part is guessing how much to use depending on how juicy your blueberries are.

Grab some gelatin and all of your other favorite PS brand products HERE for 10% off using the code TAKE10!!

The Best Traditional Blueberry Pie

Blueberry pie has always been my favorite pie. In fact it’s one of the only pies I will eat. Dutch apple pie is the only other one. So when blueberries are in season I HAVE to make pie. It’s a once-a-year treat.

Now that my big kids have learned to cook they are starting to take over the pie-making. My oldest can do it all by herself from start to finish. Then she helps her siblings make mini pies.

Pie is such a great project to let your kids help with. Hands are the most important tool!

Traditional blueberry pie is even better served with freshly made classic vanilla ice cream if you tolerate dairy. Otherwise coconut milk ice cream or almond milk ice cream are just as good.Traditional blueberry pie is a family classic handed down through generations. This blueberry pie recipe is easy-to-make and will turn anyone into a blueberry lover!

How to Preserve Pie

Blueberry pie freezes very well! You can prepare the entire pie and then freeze it until you are ready to bake. Simply thaw in the fridge for about an hour and follow the same baking instructions.

I like to make two pies at a time so I can have one now and freeze one for later. Blueberry pie in the middle of winter reminds me that summer will indeed come again.

When it comes to pie I don’t think anything beats blueberry. 

What is your favorite pie flavor? Do you go with a traditional wheat crust or make it gluten or grain free?

Traditional Blueberry Pie

Prep Time 20 minutes
Cook Time 50 minutes
Servings 10
Author Mary | Just Take A Bite

Ingredients

  • 2 cups organic all purpose flour
  • 1 tsp. salt
  • 10 Tbsp. butter
  • 1/4 cup cold water
  • 4 1/2 cups blueberries
  • 3/4 cup organic cane sugar
  • 4 Tbsp. white rice flour or cornstarch
  • 3 tsp. grassfed gelatin optional
  • 1/4 tsp. salt
  • 1/4 tsp. nutmeg optional
  • 1/4 tsp. cinnamon optional
  • 1 Tbsp. lemon juice

Instructions

  1. Heat the oven to 450 degrees F.

  2. Combine the flour and salt in a food processor (this can also be done by hand). Pulse to blend.

  3. Add 5 Tbsp. butter. Pulse until combined.

  4. Add other 5 Tbsp. of butter. Pulse until combined and there are pea-size crumbles.

  5. Add the water and process until a ball of dough forms.

  6. Split the dough in half.

  7. Roll one of half of the dough on a floured surface and place it in a 9" pie pan.

  8. In a large bowl combine the remaining ingredients for the filling.

  9. Pour the filling into the prepared pie crust.

  10. Roll the remaining crust on a floured surface.

  11. Cover the filling with the pie crust and seal edges.

  12. Cut slits in the top to allow steam to escape.

  13. Place the pie pan on a sheet pan (in case of spills).

  14. Bake for 10 minutes in preheated oven.

  15. Reduce heat to 350 degrees F and bake for another 40 - 45 minutes.

  16. Allow pie to cool completely before serving. This allows the filling to fully set.

  17. Serve plain or with ice cream or whipped cream.

Missing tacos due to dietary restrictions? Bring back taco night with this simple night-shade free cucumber salsa. Free of allergens and nightshades, and low in Vitamin A, it's sure to be a hit!

Nightshade-Free Cucumber Salsa

Missing tacos due to dietary restrictions? Bring back taco night with this simple night-shade free cucumber salsa. Free of allergens and nightshades, and low in Vitamin A, it’s sure to be a hit!Missing tacos due to dietary restrictions? Bring back taco night with this simple night-shade free cucumber salsa. Free of allergens and nightshades, and low in Vitamin A, it's sure to be a hit!

Sometimes when I’m trying to meal plan and just can’t think of anything to put on the menu, I crowd source. In other words, I ask my kids.

It’s inevitable that at least one of them suggests tacos (though I try not to bore my husband and actually serve them every week).

It’s usually my son making the suggestion. He has been my taco meat chef since he was six, and jumps at the chance to cook his “famous” taco meat (you can get his taco seasoning recipe here).

Taco night has always been one of my favorites too, from childhood until now. I mean, who doesn’t love a good taco?

Vitamin A Detox Diet Tacos

Our tacos have certainly evolved over the years, through all sorts of food allergies and dietary restrictions. These days taco night is a bit more challenging on the Vitamin A Detox Diet. No tomatoes, peppers, avocado, or cheese.

I know that may not sound like much is left.

But we still have delicious tacos regularly!Missing tacos due to dietary restrictions? Bring back taco night with this simple night-shade free cucumber salsa. Free of allergens and nightshades, and low in Vitamin A, it's sure to be a hit!

One key component is this nightshade-free cucumber salsa.

Not only is it easy to make, it’s totally delicious! Even my pickiest eater loves it.

Nightshade-Free Cucumber Salsa

There is no cooking involved to make cucumber salsa. The most work you’ll have to do is peel and chop a cucumber. Or better yet, delegate it to your kids. My oldest loves to make cucumber salsa for the family when we’re having tacos.


Teach your kids to cook with the Kids Cook Real Food eCourse!

Check it out HERE!


Once the veggies are prepped you just mix all of the ingredients in a jar and let it chill for a few minutes. So, you can still have delicious salsa even if you don’t remember to make it until fifteen minutes before dinner!Missing tacos due to dietary restrictions? Bring back taco night with this simple night-shade free cucumber salsa. Free of allergens and nightshades, and low in Vitamin A, it's sure to be a hit!

This nightshade-free cucumber salsa tastes amazing as a dip with organic tortilla chips.

Most of the time we use it on tacos, taco bowls, or nachos (topped with this gooey dairy-free cheese sauce!).

What is on VAD Diet Tacos?

For VAD Diet-safe tacos we use either organic blue corn hard shells (I like this brand) or homemade white corn soft shells, and fill them with seasoned ground beef or chicken.

Toppings include:

  • Cucumber salsa
  • Grated zucchini cheese (grab the recipe here)
  • Sour cream (my kids can have a small amount of cream)
  • Black beans or refried pinto beans (I cook them in the Instant Pot)

Our tacos are simple, but so, so delicious!Missing tacos due to dietary restrictions? Bring back taco night with this simple night-shade free cucumber salsa. Free of allergens and nightshades, and low in Vitamin A, it's sure to be a hit!

What Are Nightshades?

Most healing diets eliminate nightshades. These include tomatoes, peppers, eggplants, and potatoes, plus a few other less-common foods like goji berries, ashwagandha, Cape gooseberries, ground cherries, and garden huckleberries.

For many people nightshades are a pain – literally. Nightshades cause calcinosis, a calcification of soft tissues, due to calcitriol. Calcitriol is a very potent hormone, possibly the most powerful hormone in your body!

Calcitriol tells your intestines to absorb calcium. Too much can quickly lead to hypercalcemia. This is the cause of calcium deposits in your soft tissue, also known as joint pain, muscle stiffness, arthritis, coronary artery disease, and more.

If you struggle with any type of chronic pain or weakness, consider cutting nightshades out of your diet. Or if you have issues with osteoporosis you might want to consider eliminating nightshades as well.

Here is a a great article on nightshades if you want to read more!

We do still eat some potatoes (though not if they are green or sprouting!). But we avoid all of the other nightshades.Missing tacos due to dietary restrictions? Bring back taco night with this simple night-shade free cucumber salsa. Free of allergens and nightshades, and low in Vitamin A, it's sure to be a hit!

Salsa Without Tomatoes

Now even if you are nightshade-free you can enjoy chips and salsa or everyone’s favorite taco night with this super simple cucumber salsa. Having salsa without tomatoes is totally doable and delicious.

What is taco night like at your house? What are your favorite toppings?

5 from 1 vote
Print

Nightshade-Free Cucumber Salsa (VAD Diet)

A quick and easy salsa free of nightshades.

Prep Time 10 minutes
Cook Time 0 minutes
Servings 4
Author Mary | Just Take A Bite

Ingredients

  • 2 cups cucumber peeled and diced
  • 1 1/2 tsp. apple cider vinegar or white vinegar
  • 3/4 tsp. salt
  • 1/4 tsp. garlic powder of 1 clove fresh garlic, minced
  • 1 1/2 tsp. organic cane sugar
  • 1/4 cup white onion, diced optional

Instructions

  1. Combine all of the ingredients in a jar.

  2. Mix and chill for at least 10 minutes.

  3. Store in the refrigerator for up to a week.

EMF Protection During Pregnancy and Childhood

EMFs are all around us, yet we don’t know their full impact. I’m sharing my EMF protection tips for pregnancy and as kids grow. A few simple changes could have a big impact!EMFs are all around us, yet we don't know their full impact yet. I'm sharing my EMF protection tips for pregnancy and as kids grow. A few simple changes could have a big impact!

In the digital age we live in you’ve probably heard the term EMF – electromagnetic frequency. It is something that is all around us both from natural and man-made sources.

Why Worry About EMFs?

It’s hard to say. The data is still inconclusive. Though I tend to err on the side of caution. I’d rather be proactive and find out I was overcautious than to do nothing and find out I could have prevented some harm.

Some EMFs are low frequency, such was microwaves and WiFi. Others are higher frequency and are known to potentially cause problems, like X-rays (i.e. no x-rays while pregnant!).

Wellness Mama has a great post with more info on EMF exposure and the potential impacts to our bodies…that are actually electromagnetic systems themselves! I strongly encourage you to do more research on this topic.

Especially with the recent development of 5G networks that could have some profound health consequences, EMF protection is more important than ever!
EMFs are all around us, yet we don't know their full impact. I'm sharing my EMF protection tips for pregnancy and as kids grow. A few simple changes could have a big impact!

Protecting Babies From EMF Exposure

What I want to talk to you about today is how to protect your baby before and after birth from too much EMF exposure. Little ones are going to be impacted the most by EMFs simply due to their size. So it is important to take precautionary measures when they are young.

There are some simple ways to reduce EMFs in your day-to-day life:

  • Turn off WiFi at night or any time it’s not in use.
  • Keep your cell phone on airplane mode.
  • Keep electronics out of the bedrooms.
  • Replace your smart meter with an analog meter.
  • Hard wire electronics instead of using wireless.
  • Use EMF-blocking cases and pads for cell phones, tablets and laptops.
  • Keep wireless devices off of your body (laps, pockets, etc.). This is especially true for children!

One of the biggest step I took in my last pregnancy was to use a Belly Armor blanket.

RadiaShield® Fabric make this blanket a convenient and unobtrusive way to protect your child within against the risks of everyday radiation. Easily portable in your handbag, this maternity blanket is ideal for both the home and the office. You’ll forget this breathable protector is even there while having the peace of mind of RadiaShield® protection.

Safe to use for mom and baby – products are free of heavy metals, toxic chemicals and common allergens.

During pregnancy, simply drape over your midsection while sitting or lying down to create a soft, protective barrier from wireless radiation.

EMFs are all around us, yet we don't know their full impact yet. I'm sharing my tips to help protect baby before and after birth from EMF exposure.Working with Wireless While Pregnant

The Belly Armor blanket has 99.9% shielding effectiveness. As a blogger I spend a lot of time at the computer. I feel so much better knowing that baby is protected while I work. I love that I’m getting more protection too!! I just lay the blanket over my belly and legs. So simple.

Since my son was born I have continued to use my Belly Armor blanket on a daily basis. I drape it over him while he’s nursing or sleeping on me and I’m at the computer or using my cell phone. It basically travels around the house with us!

I already do my best to keep cell phones and tablets away from my kids. But now I can go one step further for protection.

If you are expecting a baby or have a new little one I highly recommend Belly Armor. I wish I had found it sooner! I would have worn the belly band the whole pregnancy. Their baby monitor looks amazing as well. Yes, baby monitors generate EMFs too! I know some people go without for this very reason. I’d never hear baby without one. So I do my best to keep it at a distance in both my bedroom and the nursery so I can still hear baby without too much exposure.EMFs are all around us, yet we don't know their full impact yet. I'm sharing my EMF protection tips for pregnancy and as kids grow. A few simple changes could have a big impact!

Cell Phone EMF Protection

I love my Belly Armour blanket. But I can’t keep it draped over a busy toddler all day. So I have also taken another step to protect my kids from EMF exposure.

I use an Aires shield on my cell phone. It drastically reduces EMFs. Let’s be real – there is no way around using a smart phone around kids sometimes. We use it to look up information or watch videos while homeschooling. And I often use my phone while nursing my son to sleep.

I feel so much better knowing I have added protection.

The best part is how easy it is to use!. Seriously. Just peel it off the card and stick it on your phone. Done.

I’m planning to use more of them on our other wireless devices, like our laptop. The things my kids use. It gives me peace of mind.EMFs are all around us, yet we don't know their full impact yet. I'm sharing my EMF protection tips for pregnancy and as kids grow. A few simple changes could have a big impact!

Are you worried about how to protect your kids – whether in utero or after birth – from EMF exposure?

Check out all of the cool Belly Armor products. If you’re like me you’ll have a hard time choosing just one! The little bunny hat is so adorable!

And consider getting an Aires shield for your devices. I’m actually really intrigued by their other products that can be worn by individuals or used for entire rooms. I’d love to get something like that for my kids and their bedroom. EMFs can really impact sleep!


Interested in ordering some EMF protection devices for your family? Use the code justtakeabite10 to get 10% off AiresTech products HERE!!


Taking a few simple steps can help you rest easier knowing you are doing your part to reduce EMF exposure for both you and your growing little ones.EMFs are all around us, yet we don't know their full impact yet. I'm sharing my tips to help protect baby before and after birth from EMF exposure.

I am working with Belly Armor and Aires Tech and have been compensated for my time commitment. All opinions are my own. I have not been paid to post positive reviews.

Before starting any new diet you need to know if it is a permanent lifestyle change or a temporary situation. Find out how to come off the Vitamin A Detox Diet before you even start! My last post introduced the Vitamin A Detox (VAD) Di

How to Come Off the Vitamin A Detox Diet

Before starting any new diet you need to know if it is a permanent lifestyle change or a temporary situation. Find out how to come off the Vitamin A Detox Diet before you even start!Before starting any new diet you need to know if it is a permanent lifestyle change or a temporary situation. Find out how to come off the Vitamin A Detox Diet before you even start!

NOTE: I no longer support the Vitamin A as poison theory. All information in this article is purely to help you understand what it is based on. It is possible to get too much Vitamin A by overdosing supplements or liver. But that doesn’t happen often and can be quickly remedied if it does. Vitamin A from animal sources is an essential part of the diet. Beta Carotene can cause carotenemia (as my son had) but will not overload the body with Vitamin A. I encourage you to research and make your own decisions. You can read our update/why we turned and ran from the Vitamin A Detox Diet HERE.

My last post introduced the Vitamin A Detox (VAD) Diet. And here I am a week later telling you how to come off the Vitamin A Detox diet.

I did this because I know it is a big hangup for many people. Before starting a diet they wonder how quickly they can go back to eating “normally” or if the dietary changes have to be a permanent lifestyle. I want to ease your worries and give you some guidance.

First and foremost any new diet should be experimental. If at any point you feel like it’s doing more harm than good, scrap it. Don’t stick something out because it’s supposed to work. Do what works for you and your child.

The VAD Diet is quite different than any other healing diet out there. And it isn’t easy. So it’s natural to want it to be as short as possible.

For some kids it could be as short as three months. For others it could take six months or more. It just depends on the severity of the toxicity and how well you adhere to the diet.

Start With Symptoms

Taking note of symptoms and their severity throughout the VAD Diet is very important. What are you hoping heals or is totally eliminated? What are your goals for the detox? Assess them when you start the diet and then every couple months throughout.

When you feel like your child is sufficiently detoxed and the toxicity symptoms are gone it is time to come off the Vitamin A Detox Diet. Start experimenting with adding foods back.

This will be a very gradual process. And the end goal is not to go back to “eating the rainbow” and loading up on liver. The ultimate goal is to find balance where your child can eat a variety of foods without getting back to a saturated state. What this looks like will be different for everyone.Before starting any new diet you need to know if it is a permanent lifestyle change or a temporary situation. Find out how to come off the Vitamin A Detox Diet before you even start!

How to Reintroduce Foods on the Vitamin A Detox Diet

Start by making a list of foods you would like to add back to your child’s diet. Then add them one at a time, starting with the foods with the lowest Vitamin A content. Starting with green vegetables is a great way to do this. Even vegetables that you have been eating peeled are great for starting. Leave the peel on and see what happens.

I’ll give you an example of an introduction. You may want to add green beans, red peppers, peanuts and milk. Start with a small serving of green beans and see how it goes. If symptoms flare you know that your child needs more time on the VAD Diet to fully clear the liver. If no symptoms return move on to the peanuts. Give each food a week or two before adding anything else. Again, you are watching for Vitamin A Toxicity symptoms. If they come back with even small amounts of Vitamin A added your child needs more time on the VAD Diet.

There are no rules about how to reintroduce food. But try to go slowly and observe.

The Goal is Moderation

Keep adding back new foods as long as your child’s symptoms do not return. Remember that the end goal is moderation. Even after detoxing you can’t expect your child to be able to eat anything any time. He may be able to tolerate a glass of milk or a dish of ice cream here and there. But drinking milk with every meal will build up the Vitamin A stores again quickly. In fact, you may decide to stick to a dairy free lifestyle.

This will be a lifelong experiment. There may be periods of time where your child can tolerate more Vitamin A and times where she can tolerate less. You have to make adjustments over time to keep the liver from becoming saturated again.

As a child becomes a teen and an adult his storage capacity will continue to change. Teach him how to monitor his own symptoms.

Remember that the end goal is moderation. You never want to go back to a high Vitamin A diet. It will not go well. We are not meant to eat that way. And living in a world loaded with glyphosate makes it even more complicated. It’s hard to change your mentality about what is healthy (lots of brightly colored veggies). But hopefully after enough time on the VAD Diet and seeing your child’s health improve you’ll make the mental switch.

Maybe you will want to remain on a relatively low Vitamin A diet permanently. That’s ok too. See how you and your child feels once the detox phase is over. Create your own new normal.

Vitamin A Testing

There are some tests to check Vitamin A levels. Currently they are limited. Serum Vitamin A checks blood levels. If your child’s liver is saturated, then the additional Vitamin A dictates the blood levels. Unfortunately Vitamin A in the blood will not start decreasing until the liver is fully cleared. So your child may be close to clearing the liver, but blood levels will remain the same.

It is good to check serum Vitamin A at the start of the VAD Diet to get a baseline. Then if a retest shows a decrease you know that the liver is detoxed and working to now clear the excess from the blood.

If you don’t do testing you can simply watch for symptoms. It should be obvious when your child reaches the point of clearing the liver. Symptoms should quickly reverse at that point.

As you can see this is all individual and experimental. But it could change your child’s life forever. Stick with the diet until symptoms are gone. Then gradually add foods back, one at a time, watching for the return of Vitamin A Toxicity symptoms.Before starting any new diet you need to know if it is a permanent lifestyle change or a temporary situation. Find out how to come off the Vitamin A Detox Diet before you even start!

What is the Best Diet?

In the end you have to do what works for you and your family. My kids have seen a significant health improvement in less than six months on the VAD Diet.

But that doesn’t mean we’re jumping ship now. My kids are still dairy free (except for butter and a little sour cream here and there). We still avoid peanuts, cashews, nightshades, most red, orange, and yellow vegetables, and dark leafy greens.

My kids seem to do ok with green beans and peas. They eat a little bit of pork and egg yolk, though definitely not daily. We are even starting to experiment with sourdough bread (made with wheat) after six years of eating gluten free.

We know what symptoms to watch for now. And we can quickly adjust our diet if need be.

A strict low Vitamin A diet is not necessary for life. But you will always have to be conscious of Vitamin A levels in our toxic world.

Are you considering the Vitamin A Detox diet? Have you already started?

Are you ready to overcome Vitamin A Toxicity and get your child back to full health? I've got all of the details of the Vitamin A Detox Diet to get your started.

How to Overcome Vitamin A Toxicity: The Vitamin A Detox Diet

VAD Diet update

Are you ready to overcome Vitamin A Toxicity and get your child back to full health? I've got all of the details of the Vitamin A Detox Diet to get your started.

NOTE: I no longer support the Vitamin A as poison theory. I do not recommend it to anyone, especially children. All information in this article is purely to help you understand what it is based on. It is possible to get too much Vitamin A by overdosing supplements or liver. But that doesn’t happen often and can be quickly remedied if it does by stopping the supplements. Vitamin A from animal sources (retinol) is an essential part of a nourishing diet. Beta Carotene can cause carotenemia (as my son had) but will not overload the body with Vitamin A. Retinol is required for regulating both copper and iron. I encourage you to research and make your own decisions. You can read our update/why we turned and ran from the Vitamin A Detox Diet HERE.

Today we’re discussing what you’ve all been waiting for – how to overcome Vitamin A Toxicity.

It’s really quite simple.

I also wanted to note that I will be focusing on the Vitamin A Detox Diet in relation to children since that is my area of specialty. That being said, everything will be applicable to adults as well.

Finally, know that this is VERY NEW information. So new things are coming to light left and right. I will do my best to keep up with anything that changes and give you the most up-to-date information.

How Does Your Child Get Vitamin A Toxicity?

A person becomes toxic when the liver is saturated with a particular toxin and can’t handle any more. Too much toxin = toxic. Once your bathtub is full of water it will start spilling over the edges. You can’t truly drain the tub until the faucet is completely turned off.

In other words, you have to stop taking in Vitamin A (intox) in order for your body to get the built up Vitamin A out (detox). You need the Vitamin A Detox Diet.

To clarify I do NOT mean detox in the sense of a juice cleanse or starving yourself. I’m using the word detox purely to mean the act removing the toxin. Not the widely held beliefs about the methods of detox.

The idea of no more in, drain the stored amount out is pretty simple and straight forward. I’ll go into more details on how specifically in a moment.

First I want to address how we got here in the first place.

Are you ready to overcome Vitamin A Toxicity and get your child back to full health? I've got all of the details of the Vitamin A Detox Diet to get your started.

Why Are Children so Loaded with Vitamin A?

If you’re like me you’ve been trying hard to nourish your kids and make sure they are eating lots of fruits, veggies and whole foods. Maybe you add extra egg yolks to smoothies or some desiccated liver to your meatballs. Your kids take cod liver oil weekly, drink raw milk or organic whole milk, eat sweet potatoes, carrots, avocados, peppers, beets, spinach and kale. An assortment of healthy food.

How about a multi-vitamin added in for good measure? Just to “fill in the gaps.” Some whole food Vitamin C too?

Well, maybe not. Each of those things contains Vitamin A in the form of retinol, beta carotene or other carotenoids. And they add up. Quickly.

Humans did not eat this way thousands or even hundreds of years ago. Nobody ate the rainbow 1,000 years ago (I think we’ve forgotten how healthy white fruits and veggies are!). It just was not an option. There were no supermarkets with produce from around the world shipped in daily. People ate what was available.

Or maybe you’ve raised your kids on a typical diet these days of processed foods and pasteurized milk. They are all fortified with Vitamin A. Did your child ever drink formula? Fortified. In this case the government is dictating that your child needs large doses of Vitamin A on a daily basis.

How our Food and Diet Have Changed

I’m going to get technical just for a second here to explain some things on a deeper level.

Our bodies have a variety of receptors (molecule that responds to/”receives” specific substances like neurotransmitters, antigens and hormones). These substances are called ligands. Scientists have labeled one of the receptors RXR (Retinoid X Receptor). It is a poor name since this receptor can, and should, accept more than just retinoic acid.

RXR can also accept DHA (docosahexanoic acid) and phytanic acid, two types of fatty acids (there are others it accepts as well). These are actually the intended ligands for the RXR. Think of them as keys that unlock the RXR. And when they are present, they block the RXR from accepting Vitamin A.

DHA and phytanic acid should come from our food, specifically from ruminant animals. Ruminants eat grass, break down chlorophyll into DHA and phytanic acid. Then we consume them in beef fat and dairy fat. Both DHA and phytanic acid speed up the enzyme that breaks down Vitamin A in addition to blocking it from the RXR.

But this process has been interrupted. What are animals fed these days? Grains. No chlorophyll. On top of that the grains are usually covered in glyphosate. So there is much less DHA and phytanic acid to breakdown Vitamin A. And there is glyphosate that prevents the breakdown of Vitamin A (read all about the glyphosate Vitamin A connection here). A double whammy.

The popularity of vegetarian and vegan diets has also been a factor. We need red meat and animal fats from grassfed animals to get sufficient protein (to make retinol binding protein), DHA and phytanic acid. But those are missing on these restricted diets. Then add Vitamin A supplements on top of that “to prevent deficiencies.” It’s a recipe for disaster. If you know anyone that has gone on a vegan or vegetarian diet and felt great for a bit and then all of a sudden started to feel awful…this is why. They may actually be inducing an autoimmune disease!

As you can see our food supply and recommended diet has contributed greatly to this imbalance of Vitamin A. Plus the abundance of glyphosate is preventing us from detoxing Vitamin A.

How My Children Became Toxic

I’m right there with you when it comes to having children with Vitamin A Toxicity. 

When my son was two he started itching his legs like crazy until they would bleed. Eczema. I did not know it then, but eczema is actually classified as an autoimmune condition. We had him tested for allergies. Oh boy. A laundry list of foods, including dairy and nuts. Time for big diet changes.

So over the years I got creative and made everything dairy free (or tomato free when avoiding nightshades) using pumpkin or squash as a replacement. He also couldn’t have potatoes. So he always got carrots instead.

When he was five (after multiple rounds of testing and we’d had to carry an epi-pen for a year due to a severe nut allergy) he had more allergy testing. The new allergist took one look at him and noted that he had orange feet!! Carotenemia…an overload of beta carotene…Vitamin A Toxicity. I’m sure he was overloaded before that (why he had the eczema in the first place). But this took it to a whole new level.

We’ve struggled for years with him having stomach aches, up and down eating, skin issues, minor fevers, mood/behavior issues. Now we know why!

Vitamin A Toxicity in Pregnancy

When I was pregnant with my third I was being so “good” eating every nutrient dense food possible…with liver added. And a multi on top. I’m sure I was getting extremely high amounts of Vitamin A. And it’s passed to baby both in utero and in breastmilk. God designed babies to detox the Vitamin A from mom since baby’s liver is healthier. Great design. But not so nice for baby in this world we now live in.

So my daughter had a tongue tie, feeding issues and extreme vaccine reactions as an infant. She basically stopped eating. And of course I tried to get her back to health feeding her squash and liver smoothies!! She is now 4 1/2 and still struggles. She has complained of bone pain since she was old enough to verbalize how she felt. She has frequent stomach aches and a low appetite. Again, now we know why!

Thank goodness after a short time on the VAD diet and using our simple magnesium lotion her leg pain is gone, and she eats so well!

Of course I did not know anything about Vitamin A Toxicity back then. So when I became pregnant with baby #4 I ate the same way. So much nourishing food…or so I thought. Salads piled high with a rainbow of vegetables, avocado, fried eggs and desiccated liver. Washed down with a big glass of raw milk.

Now I’m dealing with the consequences again. Or should I say my son is. Feeding troubles from birth. Food reactions. Flat spot on his head. Weak bones. Horrible teething pain. Body tension and tongue restriction. All because I tried to follow current health advice.

Are We All Overloaded with Vitamin A?

But it didn’t even start there. Like most people I’ve been overloaded with Vitamin A my whole life. My parents probably were too. Maybe my grandparents were too! I was born in 1980. Processed food was what everyone ate. And all processed food, infant formula, and pasteurized milk are fortified with Vitamin A.

Then glyphosate was added to everything, making it much harder for our bodies to detox Vitamin A.

So it didn’t matter which extreme I was in – I was filling up on a toxin. And then passed that on to my children. Even my oldest. She was born before I had ever heard the term Real Food. But she still got the Vitamin A overload from me, then compounded with vaccines. And it impacted her neurologically.

All this to say, many people are overdosing on Vitamin A whether they realize it or not. Plus nobody is able to detox in our toxic world. That is a big problem. And it needs to stop.

How Do You Stop Vitamin A From Coming In?

  1. The easiest way to start the process is by eliminating all supplements containing Vitamin A or D and foods fortified with Vitamin A or D from your child’s diet. Immediately. They can be sneaky. Alternative milks and yogurts, flours, cereals, crackers. Not sure why our government thinks we are all Vitamin A deficient and we need it added to every food.
  2. The next step is removing Vitamin A foods from your child’s diet. Well, mostly. Unless you go to extremes like eating only beef and rice for the next six months you will be getting some Vitamin A. But the goal is to make that as minimal as possible. The less comes in, the faster it gets out. I will talk more about particular foods later.
  3. Then you have to look at what you put on your child’s body. Soap, shampoo, lotion. Even essential oils. If it comes from brightly colored plants (even green herbs) it has carotenoids and your skin will absorb it.
  4. Another critical aspect of your child’s food is to make sure it is organic. Glyphosate amplifies the effects of Vitamin A in the body. Try to avoid it as much as you can. This is particularly important when it comes to grains. Washing your produce well is also helpful.
  5. Finally I highly recommend doing HTMA (hair tissue mineral analysis) with a skilled practicioner to find out what supplements your child truly does need short term to get in balance and to help the detox process.

Vitamin A Detox Diet

So what exactly does the Vitamin A Detox Diet look like? And how do you get started?

That’s where my new book comes in! I have created a guide for parents to walk them through the process of detoxing their children.

The diet does not eliminate any major food groups. You can still eat meat, veggies (all these white ones are awesome!), fruits, grains, seeds, nuts, beans and fats. So in that sense it is quite easy. You definitely won’t go hungry!

But it does eliminate a lot of foods you are probably used to eating. Like most red, orange, yellow and green veggies, pork, fish (due to contamination), dairy, egg yolks, olive oil, lard and unrefined coconut oil. In that sense it’s a big change from the traditional food diet we are used to. It’s hard to make that mental shift. And it can be hard in social settings.

My book has a long list of recipes and sample menus to help get you going. And it has the approved food list.

One critical aspect of the VAD Diet is protein. Your child must get adequate protein. Remember that Retinol Binding Protein we discussed in an earlier post? It is the only way to safely transport Vitamin A out of the liver. And it is a protein…so you need protein to make it. There are many sources of protein, but meat from ruminant animals is an essential one of the VAD Diet (read why here).

Getting Started on the Vitamin A Detox Diet

If you want to jump in now, a general rule is that if it’s colored it’s out and if it’s white it’s OK. This does not apply to all fruits as many get their color from substances other than beta carotene. But some do, like peaches and nectarines. Most grains are OK and most meat is OK (except pork). There are also some foods that don’t contain Vitamin A but do impact the body’s use of Vitamin A, like certain nuts and fats. So it is important to get the full diet.

The Vitamin A Detox Diet is generally a very short process for kids. I’d say a few weeks to a month or two is all that is needed.

Kid-Friendly Vitamin A Detox Diet Foods

I’ll keep sharing some new Vitamin A Detox Diet recipes.

My four-year old has been the easiest to feed on the VAD Diet. She asks for my food all the time.

Some of our favorites right now are:

  • roasted parsnips
  • rutabaga fries
  • crinkle cut homemade french fries (yes, you can eat white potatoes!)
  • peeled cucumbers or rice crackers dipped in homemade hummus
  • rice and beans
  • baked or roasted chicken dipped in honey
  • roasted cauliflower
  • roasted green cabbage
  • gluten-free banana bread topped with sunbutter or butter
  • fresh fruit (blueberries, strawberries, raspberries, grapes, bananas, pears, apples, cherries, white peaches)
  • grassfed beef meatballs