Home » Archives for Mary | Just Take A Bite » Page 31

Author: Mary | Just Take A Bite

ecocentric mom august mom box review | Homemade Dutch Apple Pie

Ecocentric Mom August Mom Box Review

It’s time for the ecocentric mom august mom box review! This month featured fun products for mom like bright blue nail polish and tasty popcorn – my two favorites!

ecocentric mom august mom box review | Homemade Dutch Apple Pie

I am working with ecocentric mom to blog about this mom box. I have been compensated for my time commitment to review this product. However, my opinions are entirely my own and I have not been paid to publish positive comments.

As summer ends and the kids go back to school mom deserves a little treat, right? You’ve been busy all summer taking kids to the park, hosting playdates and doing some teaching so children don’t forget everything! An ecocentric mom box is just what you need to pamper yourself.

Here is how it works. Ecocentric mom does the hard work for you – finding great products that are natural and healthy. You get a box full of fun stuff to try at a fraction of the cost. It can be a one time event, or you can get a new box every other month.


There is even an end of summer sale going on. So grab your mystery box now!


This month’s box has some great goodies. Here is my august mom box review so you can see what products are available.

ecocentric mom august mom box review | Homemade Dutch Apple Pie

Square Hue Nail Polish

Square Hue is a nail polish subscription box delivering full sized, limited edition colors monthly. Receive either 2 or 3 polishes per month. The collections are uniquely themed, 5-Free, vegan-friendly & cruelty-free. A portion of each subscription is donated to organizations helping others. Get luxurious nail polish and partner with us to change the world.

I am not one to buy nail polish…ever. Because I never paint my nails. Especially since I have to do mouth exercises on my little one. I don’t want nail polish in her mouth!

But when I got this super fun blue nail polish I had to try it right away. My daughter and I both painted our toe nails.

It went on very easily!! Just one coat stayed on for quite a while. In fact, I’m still wearing it.

The fun thing about Square Hue is that, just like ecocentric mom, they send you a box with fun new colors every month! You can change up your nail color  year round.

What’s better is that they use some of the profit to help others. It’s a win for everyone.

Product Pricing: 2 polishes ($10.99/month +$5 s&h) OR 3 polishes ($14.99/month +$5 s&h)

Coupon: 
50% off 1st Collection Set through 9/30/15 – code: ECOCENTRICMOM

squarehue.com

Elektra Magnesium Cream

Elektra Magnesium Cream is a Luxurious Anti-Ageing Cream that is a blend of natural plant butters and oils infused with magnesium to keep your skin supple and hydrated. This moisturizer and supplement combo is great for massage and healthy skin. This cream is available in Zest-Citrus, Herbal or Island Spice scents. It is free of parabens, petrochemical or animal ingredients.

I did try a small amount of the magnesium cream. It goes on so smoothly and rubs right in. I love that it does not burn your skin like magnesium oil often does.

It also comes in two great scents.

I wish I could have used it more to see the full benefit, but it does contain coconut oil. And since my little one is climbing on me all day long I can’t let her touch it.

But this is for sure a great way to get your daily magnesium since you can absorb it through your skin.

Product Pricing: $18.99 for 100g bottle, 20g included

xlvita.com

ecocentric mom august mom box review | Homemade Dutch Apple Pie

Ground 2 Table

Ground 2 Table Spice was conceived as a portal into a true sustainable lifestyle. You are about to experience the beginning of an expanding product line designed to optimize the culinary experience. To start, our organic, blended spices are salt-free, sugar-free, and have no GMOs. Come visit us at G2T.com and help us create the gateway to a healthier world.

When it comes to spices my kitchen is pretty boring. With lots of allergies and one child with oral SPD I stick to just a few herbs and spices for our cooking.

So it was a fun treat to receive the Ground 2 Table seasoning packets.

The one my family really loved was the cinnamon spice blend. I added it to apple slices.

I also used it to make delicious apple spice ice cream! (Note – the recipe is coming…be on the lookout.)

The other spice blends were a bit too “spicy” for my daughter. But my husband really loved them. The all purpose seasoning worked well in our chili.

The only thing I didn’t like about the spice blends was that all of the ingredients weren’t listed on the packets. They are on the website, though. I couldn’t try them due to allergens.

These come in really handy for quick meal prep. No need to take ten spice jars out of the cupboard! And I love that they are in individual size packets. Just pour one packet on and  you’re done.

Product Pricing: $1.99 for 5 to 8 gram packet, 3 included

Branch to Nature THYME Facial Astringent with MSM.

Branch to Nature promotes gentle & eective care of the body’s largest organ – our skin! Gently cleanses, refreshes and revives the skin. This signature THYME collection is naturally formulated to cleanse all skin types. Feel clean but not dry when washing your face. All products are sulfate free and paraben free.

I really liked the facial astringent. You can feel it working right away!

I was disappointed to see polysorbate 20 on the ingredient list. That is another coconut derived ingredient. So it’s not something I can use regularly right now.

Product Pricing: $15.50 for 3.5 fl oz, travel size included, $14.95 for 4 piece THYME Collection Sample Kit

branchtonature.com

Vance

Vance Family Soy Candles began with the mission to provide the perfect, sustainable candle. The wicks are low-smoke cotton, and the containers are made in the USA with recycled glass. They use pure essential oils and organic flavor oils to create amazing hand crafted candles. Their aromatic boutique tumbler candle makes a lovely bath or dinner candle.

The Vance soy candle has a mild, pleasant smell. And the glass container is very cute.

I did not, however, burn the candle. We generally try to avoid soy. So I didn’t feel right about burning a soy candle.

Product Pricing: $18.99 for 8oz candle included

vancefamilysoycandles.com

ecocentric mom august mom box review | Homemade Dutch Apple Pie

Earthwise Beauty Tangerine Skies Facial Oil

Earthwise Beauty hand makes incredibly effective organic skin care products that feel like food for your skin. This relies on a wonderful synergy of a trio of carefully selected oils, along with a few essential oils chosen for their broad-range skin-rejuvenating, firming, brightening, and anti-inflammatory topical effects.

I do my best to try all of the products I receive at least a little. But since there is so much coconut and palm in this facial oil I couldn’t use it (due to my nursing daughter’s allergies). Even without trying it I love that it has safe ingredients. And I bet the orange feels great on your face!

Product Pricing: $38 for 1 fl oz, 0.2 fl oz included

Use code ecomom715 for 20% OFF through 10/30/15

earthwisebeauty.com

Boom Chicka a Pop

Snacking is the best part about life. It should be both DELICIOUS and carefree. That’s why Angie’s set out to make a light, tasty treat that satisfies without triggering post-snack guilt. ALWAYS SIMPLE, ALWAYS REAL, free of gluten and preservatives. And because it’s made by Angie’s, it’s a SUPERSTAR combo of salty and sweet.

We have been buying Boom Chick a Pop products for a few years now. But I don’t think we’ve had the salty sweet flavor. If I can find a product that does not contain refined sweeteners, artificial flavors or even natural flavors I get pretty excited.

I was particularly excited to try this salty sweet popcorn because I have had a corn intolerance for a few years. But lately I seem to do ok with some. So I got to try popcorn!!!

Let me tell you, it was so delicious! I am a huge fan of salty sweet combinations (like my salted dark chocolate ice cream or my kettle corn granola). I also love crunchy snacks. So this was the perfect treat. I was kind of sad I only had a small bag. If my local store carries this flavor I may be in trouble.

And for what it’s worth I did share my little bag with my daughter. She really loved it too!

Available in 1 and 6 oz bags at a retailer near you

boomchickapop.com

ecocentric mom august mom box review | Homemade Dutch Apple Pie

Pilates Anytime

Take charge of your health on your own time. Pilates Anytime offers unlimited access to an extensive pilates video library of over 1,800 classes, tutorials, and discussions. Watch the HD quality videos anytime on your computer, tablet, smartphone, or TV. Join this wonderful community of people giving themselves the gift of health, one breath at a time.

I tried pilates once about fifteen years ago. I’ve done some yoga since then, but never pilates. So I was very excited to get to try Pilates Anytime for free!

There are so many videos!! It was almost overwhelming…but still great to have so many options. I love that there is something for everyone, from the basics to challenges for advanced students.

I don’t often take time to do relaxing, restorative exercise like pilates. But now I will for sure! I’m excited to try more videos. Don’t forget to try your free 30 days!!

Product Pricing: $18/month for Unlimited Access pilatesanytime.com


Free 30 day trial with code ECOCENTRIC


Pilatesanytime.com

Every ecocentric box (pregnancy, mom or mom+baby) is filled with great products. All you have to do is open the box and try them! Grab your end of summer box today.

In order for me to support my blogging activities, I may receive monetary compensation or other types of remuneration for my endorsement, recommendation, testimonial and/or link to any products or services from this blog. It will not change the cost of any products or services for  you.

Crockpot Sprouted Orca Bean and Squash Chili | Homemade Dutch Apple Pie

Crockpot Sprouted Orca Bean and Squash Chili

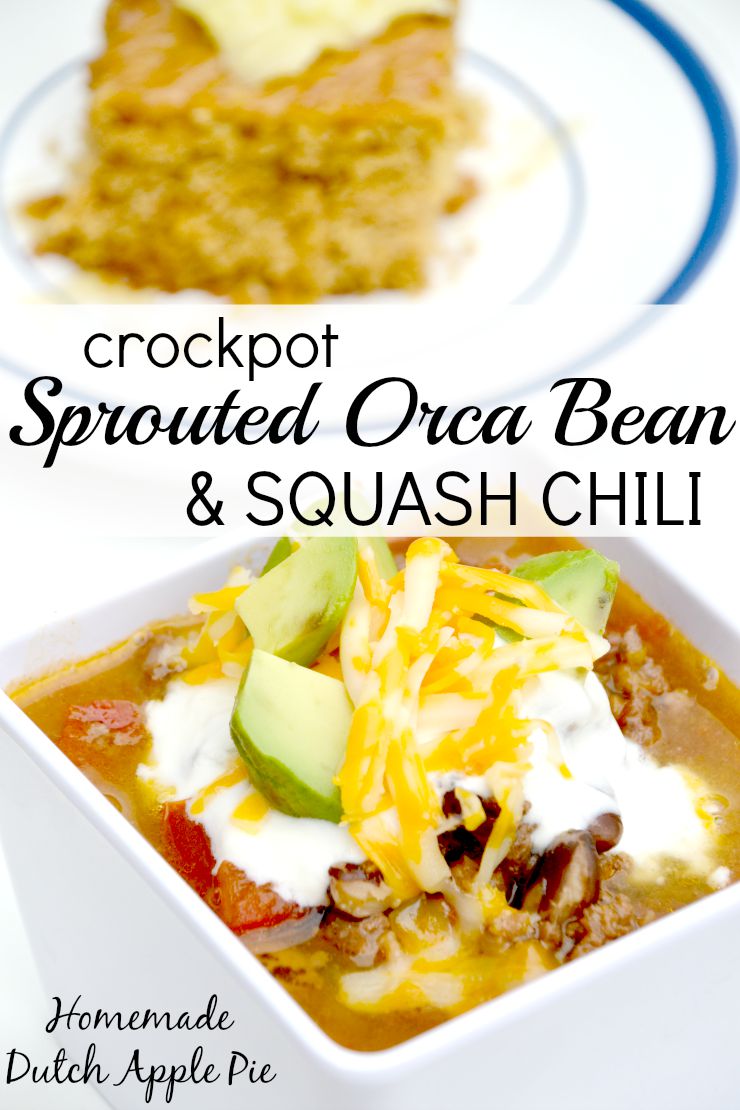
Put a new spin on your usual chili by adding Bob’s Red Mill orca beans to create sprouted orca bean and squash chili. Pair it with freshly baked corn bread for a hearty week night dinner.

Crockpot Sprouted Orca Bean and Squash Chili | Homemade Dutch Apple Pie

I am partnering with Bob’s Red Mill and Stonyfield for this post. I have been compensated for my time commitment to use these products. However, my opinions are entirely my own and I have not been paid to publish positive comments.

There is nothing quite like a bowl of hot chili on a cool fall day. You can add lots of vegetables, make it extra meaty, spice it up or keep it mild.

I’ve made chili many ways. The possibilities are endless.

Try something new.

But one thing I have never added to my chili is orca beans! In fact I had never heard of them until recently.

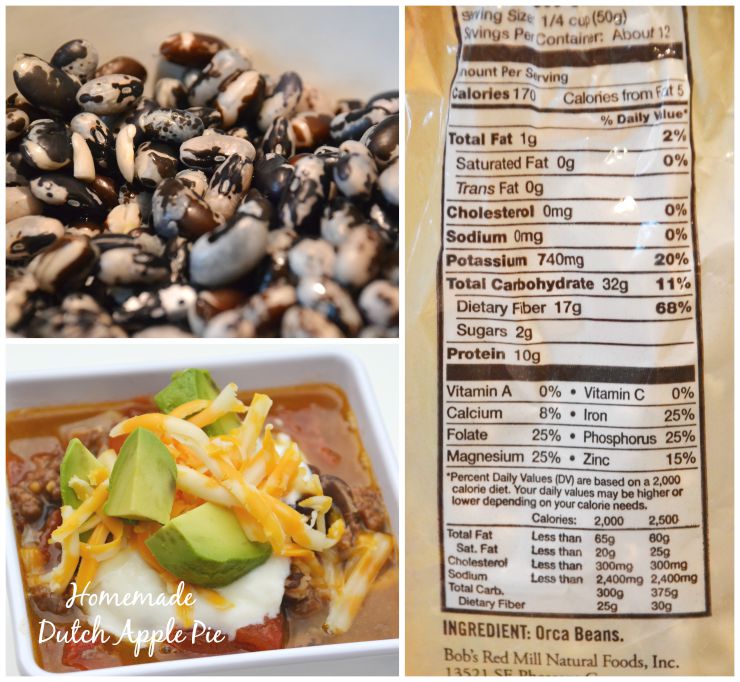
Bob’s Red Mill orca beans are so fun. They look like mini orca whales with the black and white exterior. What kid wouldn’t love to have whales swimming around in her chili?!

Crockpot Sprouted Orca Bean and Squash Chili | Homemade Dutch Apple Pie

A lot to love about beans.

One of the things about orca beans that stood out to me right away was the nutrition content. They have lots of fiber, protein, folate, magnesium, potassium, phosphorus, iron and zinc. Talk about packing a punch!

Just be sure to sprout your beans first to make them easier to digest and to make the vitamins and minerals available. That means thinking ahead to start the beans the day before you make chili. But it only takes about thirty seconds to get them sprouting.

The other unique thing about this chili is the pureed squash. It adds thickness and a hint of sweetness. Combine that with tomatoes, onions, peppers, zucchini, broth and your choice of beef or chicken. Dinner is served!

Crockpot Sprouted Orca Bean and Squash Chili | Homemade Dutch Apple Pie

Top it. Pair it.

Sprouted orca bean and squash chili can be eaten as is or you can add a variety of toppings. We like to add grated cheese and avocado. Another delicious addition is Stonyfield plain yogurt. It cools down the spice and adds a creaminess to the chili.

Of course you can’t just have a bowl of chili. Sprouted orca bean and squash chili is great served on noodles or rice.

But our favorite way to eat it is paired with cornbread! You can make traditional cornbread. Or if you have corn allergies like we do try my corn free cornbread. You’ll never know the difference.

Crockpot Sprouted Orca Bean and Squash Chili | Homemade Dutch Apple Pie

Eat it now, eat it later.

Load up the crockpot with a big batch of chili. Serve it for dinner and pack up the leftovers for school lunches. Simply heat it in the morning, and it will stay warm in a thermos. Spread a generous helping of butter on leftover cornbread. It doesn’t get much easier or tastier!

Chili also freezes well. So you can keep some on hand in the freezer for an easy lunch or dinner.

My kids love orca beans. They are great in chili or cooked and eaten plain. Give them a try and see what your kids think. Then add them to sprouted orca bean and squash chili. They won’t be able to pass up killer whales in their soup!

Looking for a new, easy dinner this fall? Crockpot sprouted orca bean and squash chili is perfect any night of the week.

Crockpot Sprouted Orca Bean and Squash Chili | Homemade Dutch Apple Pie


Crockpot Sprouted Orca Bean and Squash Chili
Serves 6
A new twist on chili with orca beans and squash.
Write a review
Print
Ingredients
  1. 1/2 cup Bob's Red Mill orca beans
  2. warm water
  3. 2 cups chicken or beef broth
  4. 1 lb. ground beef or chicken
  5. 1 cup pureed squash
  6. 1 cup diced tomatoes
  7. optional: 1/2 cup diced onion
  8. optional: 1/2 cup green peppers, diced
  9. optional: 1/2 cup zucchini, diced
  10. 2 tsp. unrefined sea salt
  11. 1 tsp. garlic powder
  12. 1/2 tsp. chili powder
  13. 1/4 tsp. cumin
  14. optional toppings: shredded cheese, avocado, Stonyfield plain full fat yogurt
Instructions
  1. The day before making the chili, place the beans in a bowl and fill it with warm water. Let it sit 8 hours. Drain the water. Let the bowl sit in a warm area or in the oven (turned off) with the light on for 8 hours.
  2. When ready to prepare, cook the meat. Add it to the crockpot.
  3. Saute the onion, peppers and zucchini (if using). Add them to the crockpot.
  4. Add the sprouted beans, broth, squash, tomatoes and seasoning.
  5. Cover and cook on HIGH 6-8 hours or on LOW 8-12 hours, until beans are fully cooked.
  6. Add toppings to individual bowls if desired.
Notes
  1. This chili freezes and reheats well.
  2. You can replace the squash with pumpkin.
Just Take A Bite https://justtakeabite.com/

This post is linked to Savoring Saturdays.

Creamy Sprouted Red Lentil and Sausage Stew | Homemade Dutch Apple Pie

Creamy Sprouted Red Lentil and Sausage Stew

Start the school year with nutrient dense creamy sprouted red lentil and sausage stew. It is full of broth, vegetables and protein for a great lunch or dinner.

Creamy Sprouted Red Lentil and Sausage Stew | Homemade Dutch Apple Pie

I am partnering with Bob’s Red Mill and Stonyfield for this post. I have been compensated for my time commitment to use these products. However, my opinions are entirely my own and I have not been paid to publish positive comments.

Ready or not, summer is over. The holiday has come and gone. It is back to school time for everyone.

It is also time for the weather to turn cooler and the days to be shorter.

After hot summer days it is time to return to a warm bowl of soup, freshly baked bread and hot apple cider.

Creamy Sprouted Red Lentil and Sausage Stew | Homemade Dutch Apple Pie

Soup is the perfect fall food. It is comforting and warm. But it will also help boost your immune system if you include lots of homemade bone broth. Just what you need for warding off illnesses in the fall.

You can go the traditional route with chicken noodle and beef vegetable soup. Or maybe spruce it up a bit with squash or split pea.

But I’ve got a new soup for you that the whole family will love. The really great thing is that it is easy to make and packed with nutrients.

Creamy Sprouted Red Lentil and Sausage Stew | Homemade Dutch Apple Pie

It starts with lentils.

Sprouted red lentil and sausage stew starts with Bob’s Red Mill red lentils. They contain lots of fiber, protein and iron. It is important to sprout them first for easier digestion and absorption of nutrients. It will also allow them to cook very quickly.

If you’ve never sprouted lentils it is so easy. Just put warm water over them. That’s pretty much all there is to it.

Now add bone broth, sausage and vegetables to these colorful lentils and you’ve got an amazing soup that comes together in no time.

Looking to add even more nutrition? Toss your favorite greens in during the last few minutes of cooking (I like spinach). Then top it all off with some plain Stonyfield yogurt for creaminess and healthy fat.

Your kids will love it.

Are you worried your kids won’t be willing to try lentils? No need for concern. The lentils cook down and virtually disappear into the soup. It just looks like sausage and vegetables. But the lentils will give the soup a great texture and thickness. They make it really filling.

Creamy Sprouted Red Lentil and Sausage Stew | Homemade Dutch Apple Pie

Great for lunch or dinner.

You’ll want to make a big batch of sprouted red lentil and sausage stew. Have it for dinner one night. Then pack the leftovers in lunches. Simply warm it on the stove for a  minute in the morning and pack it in a thermos.

This stew also freezes well. So you can make a double batch to eat some now and freeze a meal for another busy week night or easy lunches later on.

Red lentil and sausage stew is filling enough to be your whole meal. But we like some variety. So I serve it with crackers and cheese, bread with jam or a delicious sweet bread like pumpkin, zucchini or winter spice.

Have you ever had red lentils? Are you ready to try some?

Whether you’re new to lentils or they are a staple in your pantry, this creamy sprouted red lentil and sausage stew needs to be on your menu this fall.

Creamy Sprouted Red Lentil and Sausage Stew | Homemade Dutch Apple Pie

Creamy Sprouted Red Lentil and Sausage Stew
Serves 6
A creamy, rich stew filled with sprouted red lentils and sausage.
Write a review
Print
Ingredients
  1. 1/2 cup Bob's Red Mill red lentils
  2. 3 cups warm water
  3. 3 cups chicken broth
  4. 1/2 lb. ground sausage, cooked and crumbled OR precooked sausage, cut up
  5. 2 large carrots, cut up
  6. 1/2 cup sweet potato, cut up
  7. 1 small onion, cut up
  8. 1 Tbsp. extra virgin olive oil
  9. 1 tsp. unrefined sea salt
  10. 1/2 tsp. garlic powder
  11. 1/2 tsp. dried thyme
  12. 1/2 tsp. dried dill weed
  13. 1 cup plain, whole milk Stonyfield yogurt
  14. optional: 2 cups chopped greens (spinach, kale, chard)
Instructions
  1. In a small bowl combine the lentils and warm water. Let sit in a warm place or in the oven with the light on for at least 12 hours. Drain water and return to warm place for another 6 or more hours to sprout.
  2. In a large sauce pan saute the vegetables in olive oil 5 minutes.
  3. Add the broth and seasoning.
  4. Simmer 20 minutes.
  5. Add the sprouted lentils and cooked/cut up sausage.
  6. Simmer another 20 minutes.
  7. Add greens in last 3 minutes if desired.
  8. Top individual bowls with plain yogurt and stir into soup.
Just Take A Bite https://justtakeabite.com/
In order for me to support my blogging activities, I may receive monetary compensation or other types of remuneration for my endorsement, recommendation, testimonial and/or link to any products or services from this blog.

This post is linked to Savoring Saturdays.

Allergen Friendly Meal Plan | Homemade Dutch Apple Pie

Allergen Friendly Meal Plan Week of 9/6/15

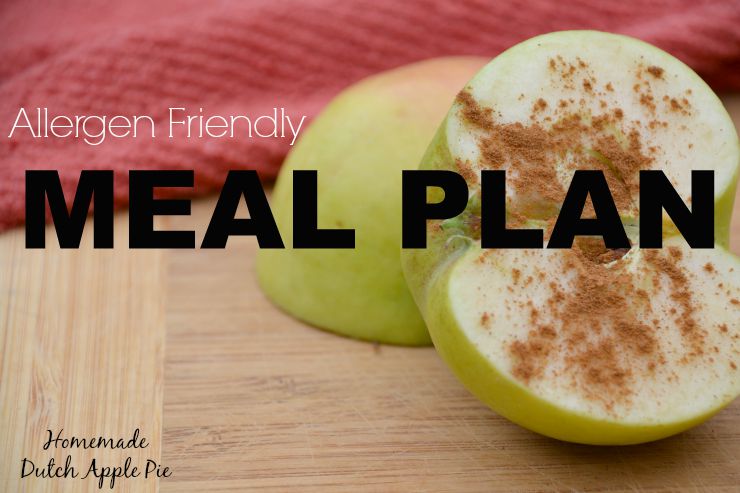
This week’s allergen friendly meal plan is all about getting back into routines, starting fall activities and keeping the busyness to a minimum.

Allergen Friendly Meal Plan | Homemade Dutch Apple Pie

Welcome to September! It’s time for school and fall activities.

Are you ready?

I think I am. But I still have the first day of school nerves just like I did as a child. I’m excited to see friends and do fun things as we get back to school, Kindermusik, dance and mom’s group. But I will sure miss our lazy summer days.

This week we hit the ground running with Kindermusik, school and dance all starting on Tuesday. I better make sure we’re all in bed on time Monday night!

Next week we add in piano lessons and preschool.

Health news.

One of my fears about school starting is illness…and we already had one sick kid over the weekend…before school! My son just had a low fever. Thankfully he fought it off pretty quickly.

We did some thorough cleaning last week in my daughter’s room. Plus I’ve been diffusing every night in her room. She has been breathing better and sleeping better. She does not wake up sneezing her head off anymore. That is so exciting!

I am still experimenting with her diet as well. For this week I’m cutting out chicken and eggs. When she was tested for allergies a couple years ago chicken showed up. But I didn’t do anything about it. And she has always had a hard time eating eggs. So we’ll see if there is any noticeable difference.

My little one had a rough week of sleeping last week. So for the last couple days she has skipped her morning nap. We’ll see if this is a permanent thing or not. If so it is perfect timing as we have morning activities a few times a week now.

Allergen Friendly Meal Plan | Homemade Dutch Apple Pie

In the kitchen.

I’m doing my best to keep up with produce preservation. I froze corn last week. I think my only freezing left to do is squash and pumpkin. Now it’s time for more canning. I might try to do pears this week.

I’m trying to keep my kitchen projects to a minimum. I want to focus on adjusting to new routines and not letting each day get stressed and chaotic. So here is what I’m planning:

If you’re looking for some fun recipes to try for the kids check out last week’s posts:

If you’re still seeing peaches make sure to can some the easy way to stock your pantry.

This week I’ve got a couple great fall recipes that are perfect for any week night and great for packing in lunches. I’ll be taking the holiday off so check back on Tuesday to see new recipes!


There is still one more day to take advantage of the Kitchen Stewardship Lunch Box Book sale. But it ends Monday!


I’ve got a simple to-do list and simple meals this week. Here is my allergen friendly meal plan without eggs (except for some of my meals) or chicken!

But there will still be plenty of good stuff. What is on your menu this week?

Allergen Friendly Meal Plan | Homemade Dutch Apple Pie
Sunday
B – yogurt, granola, fruit | salted caramel custard w/ pumpkin and sourdough cereal
L – pumpkin and sausage pasta, garlic bread, broccoli
D – pan fried cod w/ garlic dill sour cream, french fries, beans
*soak flour for breakfast cookies

Monday
B – apple slices w/ pumpkin dip, granola bars | broth w/ cod, beans, sd bread
L – grilled cheese, pepper slices and chips w/ dip | tuna, beans
D (grill) – grilled pork chops, grilled zucchini, rice
*bake breakfast cookies, make gummies

Tuesday
B – ef breakfast cookies, gummies | broth w/ squash and peas, breakfast cookie
L – crackers w/ cheese, olives, avocado, graham crackers
D (prep ahead) – cp meatloaf, baked potatoes, carrots | meatloaf, squash, peas
*sprout beans

Wednesday
B – granola w/ milk, fruit | sd bread w/ avocado
L – sunbutter sandwich, beets, gummies
D – crockpot pork and beans (w/ bacon), buttered noodles | scrambled egg yolk, pumpkin, peas
*make sd bread, soak quinoa

Thursday
B – cereal, fruit | beets, cheese | salted caramel custard w/ pumpkin and sourdough cereal
L – pork and beans, crackers, pear slices
D – sweet and sour beef stir fry over quinoa
*soak flour for pancakes, can pears?

Friday
B – yogurt, granola bars | leftover stir fry
L – graham cracker, cheese, cauliflower w/ evoo and salt, 
D – gf ef pancakes w/ blueberry topping, bacon, roasted cauliflower and cabbage | broth w/ spinach, peas
*make salad dressing

Saturday
B – pancakes, bacon | broth w/ squash, spinach
L (guests) – grilled burgers and hot dogs, lettuce salad, fruit salad, chips, broccoli
D – pan seared salmon, fried potatoes, beans
*

In order for me to support my blogging activities, I may receive monetary compensation or other types of remuneration for my endorsement, recommendation, testimonial and/or link to any products or services from this blog. It will not change the cost of any products or services for  you.
The Easiest Way to Can Peaches | Homemade Dutch Apple Pie

The Easiest Way to Can Peaches: A Step-by-step Tutorial

Want to know the easiest way to can peaches? It’s all about one key step. Follow this simple step-by-step tutorial to preserve one of summer’s gems so you can enjoy peaches year round.

The Easiest Way to Can Peaches | Homemade Dutch Apple Pie

The first time I canned peaches I was overwhelmed. There was so much work involved.

I was not new to canning. I didn’t have three kids yet. No big deal.

I had purchased a half bushel of peaches assuming that would be a good starting point. I ended up doing one round of canned peaches and freezing the rest. After peeling, pitting, chopping and canning one batch I gave up and just figured canned peaches would not be on my list of to-dos again for many…many years.

Then my mother-in-law told me a trick that changed everything.

Do NOT peel your peaches!

Of course this makes canning peaches about ten times easier. But it also preserves the sweetness and flavor of the peaches.

There is no need to worry about having to eat the skin either. It comes right off when you are ready to eat the peaches.

I have now successfully canned many…many quarts of peaches! Instead of being the hardest canning task it is about the easiest one I do all year.

I try to buy a half bushel every summer and can twenty one quarts of peaches, with a few left over for baking and eating.

Have you ever wanted to try canning peaches but it seems like a daunting task? I promise you it is not.

Grab a few peaches before they are gone for the summer and preserve them to enjoy all winter.

No more spending hours in the kitchen. This is the easiest way to can peaches. This summer I canned twenty one quarts in ONE day! With three young children, one nursing frequently. If I can do it anyone can!

The Easiest Way to Can Peaches | Homemade Dutch Apple Pie

One round of canning:

One half bushel of peaches = 3 rounds of canning (21 quarts) plus a few extra peaches for eating fresh

The Easiest Way to Can Peaches

The Easiest Way to Can Peaches | Homemade Dutch Apple Pie

  1. Let the peaches sit in a single layer until they are ripe but still slightly firm.The Easiest Way to Can Peaches | Homemade Dutch Apple Pie
  2. Prepare the simple syrup: Heat water and sugar in a large pot until sugar is dissolved. The syrup needs to be warm/hot when ready to can. You can prepare the syrup up to a few days in advance and just warm it before canning.
  3. Fill the canner with water and place the clean, quart jars inside. Put the lid on. Turn on the stove to high heat and let the water heat up until small bubbles appear. Maintain this low simmer and allow the jars to heat for ten minutes.The Easiest Way to Can Peaches | Homemade Dutch Apple Pie
  4. Wash the peaches well. This is important since you are keeping the skins on.The Easiest Way to Can Peaches | Homemade Dutch Apple Pie
  5. Fill a large bowl 2/3 full of water. Add 1/4 cup of lemon juice.
  6. Cut the peaches in half. Twist. Remove the pit. Quarter the peaches and place in the bowl of lemon water. Continue until all of the peaches are quartered.The Easiest Way to Can Peaches | Homemade Dutch Apple Pie
  7. Remove the jars from the hot water.
  8. Fill the hot jars with the peaches, skin side up if possible.The Easiest Way to Can Peaches | Homemade Dutch Apple Pie
  9. When all of the jars are full ladel the hot syrup into the jars, leaving 1 – 1 1/2 inches of space at the top of the jar.The Easiest Way to Can Peaches | Homemade Dutch Apple Pie
  10. Wipe the jar rims. Place a lid on and secure a band around the lid.
  11. Place all of the jars back in the canner. Put the lid on. Return to a boil.The Easiest Way to Can Peaches | Homemade Dutch Apple Pie
  12. Let the jars process for 30 minutes (25 minutes if doing pints).
  13. Turn off the heat. Remove the canner lid. Let sit for 5 minutes.The Easiest Way to Can Peaches | Homemade Dutch Apple Pie
  14. Remove the jars from the canner and place on a towel. Let the jars sit, untouched for at least 6 hours.
  15. When the jars are completely cool you can remove the bands, label the lids and store in your pantry.

In order for me to support my blogging activities, I may receive monetary compensation or other types of remuneration for my endorsement, recommendation, testimonial and/or link to any products or services from this blog.

Brain Booster Milkshake | Homemade Dutch Apple Pie

Brain Booster Milkshake

Get the school morning started right with a brain booster milkshake. Full of protein, vitamins and minerals it will keep your kids going all day.

Brain Booster Milkshake - Nutrient-dense drink kids love!

School mornings can be hard. Get breakfast on the table. Feed the baby. Brush everyone’s teeth. Find shoes and backpacks.

You do your best to prepare and have things go smoothly. But even with good planning it is tough to always give your kids the nourishment they need before heading out the door.

Especially if you have a child like mine that eats very slowly and ends up often only managing a few bites of breakfast.

To make sure she starts her day the right way I created my brain booster milkshake.

Brain Booster Milkshake - Nutrient-dense drink kids love!

Are Milkshakes Healthy?

This milkshake is packed with some nutritional powerhouses.

  • raw milk – easy to digest protein, calcium and vitamins
  • raw pastured egg yolks – B vitamins that are critical for brain function and concentration
  • probiotics – for gut health and boosting the immune system
  • grass-fed collagen – easy to digest protein and important amino acids
  • maple syrup – carbohydrates for energy and trace minerals
  • unrefined sea salt – trace minerals

I usually serve the milkshake with something else like a homemade granola bar or even dinner leftovers! But even if she doesn’t take a single bite of her breakfast I know she’s going to be fueled for the morning as long as she drinks her brain booster milkshake.

This is a really good option for kids with oral SPD and chewing problems. A milkshake goes down pretty quickly. It is also easy on the digestive system. The nutrients are very easy to absorb and utilize.

Brain Booster Milkshake - Nutrient-dense drink kids love!

One of the key components is the raw, pastured egg yolk. Have you ever read about them? Though often deemed as unhealthy or bad for your heart the opposite is actually true. And eaten raw (as long as they are pastured) the nutrients are not damaged and are easy to absorb.

Egg yolks are amazing little packages of nutrients, specifically B vitamins that are essential for your child’s brain development and ability to focus. They contain other nutrients such as choline (necessary for methylation), selenium (great for the thyroid) and biotin (helps with blood sugar regulation – perfect for breakfast!).

Milkshake for Breakfast or Lunch

I sometimes put milkshakes in my daughter’s lunch too. She struggles to eat much lunch at school. There just isn’t enough time for her, and she’s busy talking. But she usually comes home with an empty cup!

This is also great for kids going through orthodontic work. The day after adjustments their mouth can be very sore and chewing can be a challenge. A milkshake is always in my daughter’s lunch the day after her expander gets adjusted. I tell her that even if she can’t eat anything she should be sure to drink her brain booster milkshake.

Brain Booster Milkshake - Nutrient-dense drink kids love!

Healthy Chocolate Milkshake

The base milkshake recipe is vanilla. But you can create other flavors too. My kids love when I add a bit of cocoa powder or carob powder for a chocolate shake.

Add some strawberries from your freezer stash for a strawberry shake. Any berry or even cherries will work.

Sometimes we really get creative and add mint extract. It tastes like mint ice cream (my kids’ favorite!).

If you can’t have dairy, coconut milk is a great substitute! Any milk alternative will work.

Serve it in a fun cup with a straw or in a sealed cup to pack in a lunch box.

Whether you serve it for breakfast, lunch or both you’ll know your child is getting essential nutrients with a brain booster milkshake. All they have to know is they get something delicious to drink!

Get your kids excited about breakfast. What flavor do you think they’ll like best?

Brain Booster Milkshake - Nutrient-dense drink kids love!

Brain Booster Milkshake
Serves 1
A delicious shake perfect for breakfast or lunch that will give your kids the nutrients they need to perform their best.
Write a review
Print
Ingredients
  1. 1 cup raw milk or coconut milk
  2. 1 - 2 raw pastured egg yolks
  3. 1 Tbsp. grade B maple syrup
  4. 1/4 tsp. unrefined sea salt
  5. 2 tsp. grass-fed collagen
  6. 1/2 capsule preferred probiotics
  7. 1/2 capsule preferred multi-vitamin
  8. optional: 2 tsp. carob powder or cocoa powder OR 1/4 cup berries or cherries
  9. optional: 1/2 tsp. organic vanilla OR 1/4 tsp. organic mint extract
Instructions
  1. Combine all of the ingredients in a blender or a cup with a lid.
  2. Blend or shake until well combined.
  3. Serve immediately or refrigerate until ready to serve.
Just Take A Bite https://justtakeabite.com/
In order for me to support my blogging activities, I may receive monetary compensation or other types of remuneration for my endorsement, recommendation, testimonial and/or link to any products or services from this blog.

This post is linked to Savoring Saturdays.

Lemon Elderberry Gummies | Homemade Dutch Apple Pie

Lemon Elderberry Gummies

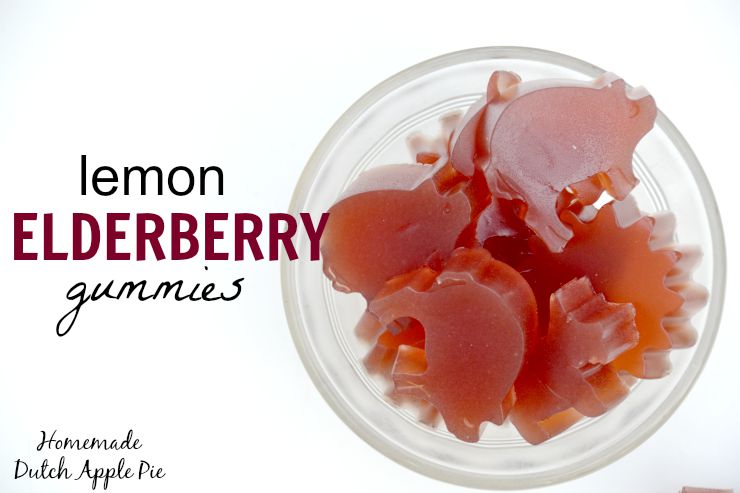
Help ward off the back-to-school illnesses with a fun, fruity treat. Lemon elderberry gummies not only taste great, they are good for you!

Lemon Elderberry Gummies | Homemade Dutch Apple Pie

For many school is already back in session. For others it is only a week away. Either way there is one thing on every parent’s mind when school starts.

How long until the kids start getting sick?

As kids start spending more time inside and around their friends it is inevitable that germs will spread. There are many natural remedies to help your child’s immune system stay strong and avoid some illness.

One simple remedy is elderberry syrup. It helps ward off viruses and minimizes their severity. My kids love taking it right off the spoon.

Lemon Elderberry Gummies | Homemade Dutch Apple Pie

Make it fun.

Another great way to add elderberry syrup into your diet is adding it to gummies. Kids don’t even know they are doing something good for themselves by eating these fun, fruity candies.

The lemon adds some vitamin C along with the elderberry for even more immune support.

These gummies are also packed with grass-fed gelatin that is helpful for healing the gut and supporting the whole body. Plus it provides easy-to-digest pure protein.

Great for everyone.

I like to serve lemon elderberry gummies for breakfast and snacks or pack them in lunches for my oldest. They are great to have around for the younger kids as well. Even toddlers love to munch on gummies!

No need to buy fruit snacks. Most of them are filled with artificial flavors and colors.

Even if you buy the ogranic/natural varieties they still contain “natural flavor” which is actually almost the same thing as artificial flavor. And for kids like mine it has the same effect on their mental clarity and behavior.

Lemon Elderberry Gummies | Homemade Dutch Apple Pie

Fast food.

Although homemade gummies may sound like a daunting snack to make it is actually very simple. Lemon elderberry gummies go from the pan to the fridge in about five minutes.

Simply mix the ingredients, heat and pour. That’s all there is to it.

You can get the kids involved with this project by letting them pick the shapes. See what candy molds your grocery store carries or buy some online. I like to use silicon molds so I don’t have to worry about putting hot liquid in plastic. Plus gummies are much easier to remove from the silicon molds.

If you don’t have any molds you can simply pour the warm liquid into a glass pan. When the lemon elderberry gummies are gelled you can cut them into squares or any shape you like.

No lemon juice on hand? You can use blueberry, cherry or lime juice instead. Try all four varieties and see what your kids like best.

Are you looking for easy, healthy snacks for school lunches? Are you looking for easy ways to help keep your kids healthy?

Lemon elderberry gummies are just what you’re looking for! Fruity, fun and healthy. Whip up a batch to start the school year right.

Lemon Elderberry Gummies | Homemade Dutch Apple Pie

Lemon Elderberry Gummies
Yields 25
A fun, fruity treat to help ward off colds.
Write a review
Print
Ingredients
  1. 1 cup organic lemon juice
  2. 2 Tbsp. elderberry syrup
  3. 1/2 cup honey
  4. 4 Tbsp. grass-fed gelatin (NOT collagen)
  5. 1/4 tsp. unrefined sea salt
Instructions
  1. In a small saucepan combine the lemon juice, elderberry syrup, honey and salt. Whisk to combine.
  2. Add the gelatin and whisk to combine.
  3. Let sit one minute.
  4. Heat over low-medium heat, stirring frequently, until mixture is warm and has become liquid again.
  5. Pour mixture into molds or a glass pan (smaller pan for thicker gummies, larger pan for thinner).
  6. Refrigerate until firm, about thirty minutes.
  7. Remove from molds or cut into shapes.
  8. Store in a sealed container in the refrigerator for up to two weeks.
Just Take A Bite https://justtakeabite.com/

In order for me to support my blogging activities, I may receive monetary compensation or other types of remuneration for my endorsement, recommendation, testimonial and/or link to any products or services from this blog.

This post is linked to Savoring Saturdays.

Allergen Friendly Meal Plan | Homemade Dutch Apple Pie

Allergen Friendly Meal Plan Week of 8/30/15

This week’s allergen friendly meal plan is all about stocking the freezer and pantry and enjoying our last week of summer.

Allergen Friendly Meal Plan | Homemade Dutch Apple Pie

Summer is just about unofficially over. We’ve got one more week before the complete chaos of September begins. It will be a big adjustment for everyone as we start school and all of our fall activities.

I’ll admit I’m very nervous about it all and how my little one will do with all of our coming and going again. Hopefully now that she’s a bit older and is doing well it won’t be as bad as it was in the spring.

I wish we could just relax and have fun this week. But even without fall activities it will be a busy week with orthodontist, grocery shopping, farmer’s market, meeting with our realtor and going to the school open house.

It makes me tired just thinking about everything that needs to get done. Last week was busy as well cleaning, cooking and hosting. I’m going to see if I can squeeze in a nap today so I’m starting the week at full speed.

Allergen Friendly Meal Plan | Homemade Dutch Apple Pie

How we’re feeling.

On the whole everyone is doing well. We’re still struggling with breathing/sleeping/behavior stuff for my oldest. I’m praying hard that she’ll be able to handle school ok.

We’re trying to get my little one evaluated AGAIN for her tongue tie. It’s getting tight and some of the symptoms are returning again.

I’m reading up on natural/herbal remedies so we can hopefully stay healthy as school starts. My oldest is curious about them too! As soon as I figure out which recipes to make I need to order my supplies and start mixing them up. Soon I’ll be sharing my thoughts on this great book with you all!

Allergen Friendly Meal Plan | Homemade Dutch Apple Pie

What we’re making.

My to-do list this week is quite lengthy. I really need to get some corn in the freezer before it’s not available. I really want to use our tomatoes to make chili sauce and spaghetti sauce, but I think that will have to wait (they’ll go in the freezer). I’m trying to keep up with produce but also prep some staples for school lunches. Here are the items on my kitchen project list so far:

Last week I posted recipes for nectarine squash first birthday pops and salted caramel cupcakes with maple bacon glaze. If you’re in the mood for a treat both are delicious!!

This week I’ve got some back-to-school recipes you won’t want to miss.

What we’re eating.

I let my kids help brainstorm our allergen friendly meal plan for this week. Hopefully I also made it easy enough on myself that I’m not spending hours preparing meals.

What is on your menu? Have your fall activities started or are you enjoying one last week of summer?

Allergen Friendly Meal Plan | Homemade Dutch Apple Pie

Sunday
B – yogurt, quinoa bars | salted caramel custard, scone, nectarine
L – leftover pesto pasta, broccoli, applesauce
D – cp roast chicken, rice, beans
*make broth, feed sd starter, freeze peppers

Monday
B – cereal, fruit | broth w/ chicken, peas
L – chicken salad, crackers, pepper slices
D (prep ahead) – taco bowls, pears
*make sd bread, make sd cereal, skim cream

Tuesday
B – toast w/ almond butter, grapes | sd bread w/ avocado, molasses tonic
L – taco bowls
D – mac ‘n’ cheese, spinach | broth w/ veggies
*soak oats, make ice cream

Wednesday
B – yogurt, granola, fruit | broth w/ squash, peas
L – mac ‘n’ cheese, cauliflower
D (early) – hobo dinners
*freeze corn, make fudge, prep cheesecake cups, dry oats

Thursday
B – pumpkin cheesecake cups | salted caramel custard w/ sd cereal
L – almond butter sandwiches, peppers
D – roast beef, corn on the cob, carrots | roast beef, pumpkin, spinach
*make broth, make graham crackers, soak flour for cake

Friday
B – yogurt, granola bar | broth w/ pumpkin, peas, beef
L – roast beef, carrots
D (planned by 4 year old) – “dinner coffee cake”, sausage, peas, blueberries
*freeze corn, bake cake

Saturday
B – scrambled eggs, “dinner coffee cake” | sd bread w/ avocado, sausage
L – beef vegetable soup, grilled cheese
D – pan fried cod, french fries, broccoli
*make granola bars, make granola, make lunch meat

In order for me to support my blogging activities, I may receive monetary compensation or other types of remuneration for my endorsement, recommendation, testimonial and/or link to any products or services from this blog.

Salted Caramel Cupcakes with Maple Bacon Glaze | Homemade Dutch Apple Pie

Salted Caramel Cupcakes with Maple Bacon Glaze

Looking for a unique treat that is both salty and sweet? Salted caramel cupcakes with maple bacon glaze are the perfect solution. They are free of gluten, dairy, corn and nut but full of flavor.

Salted Caramel Cupcakes with Maple Bacon Glaze | Homemade Dutch Apple Pie

When it comes to dessert cupcakes top the list for fun, portable and easy to eat. No need to fuss with cutting or plating.

Simple. Just the way I like it.

There are so many cupcake flavors to choose from. Chocolate, vanilla and yellow are traditional flavors. Or you can add some fun with strawberry and coconut.

But if you really want to kick your cupcakes up a notch try a salted caramel cupcake base with maple bacon glaze.

The cake is properly prepared with soaked gluten free grains. The glaze is made with only four simple ingredients, including bacon grease and urefined sea salt!

Salted Caramel Cupcakes with Maple Bacon Glaze | Homemade Dutch Apple Pie

The family consensus.

I thought these salted caramel cupcakes were amazing! I am a sucker for anything sweet with a pop of saltiness. Add bacon on top? You’ve got a winner. I would have gladly eaten the whole batch myself.

And I may have eaten a few for breakfast!

My husband enjoyed them, but wasn’t sure he liked quite so much bacon flavor in his cupcake.

The kids felt the same – good cupcakes, pretty strong on bacon.

You can adjust the bacon flavor to your liking by adjusting the amount of bacon grease used in the glaze. It will also depend on your bacon. Ours is quite smokey and has a very strong flavor.

Salted Caramel Cupcakes with Maple Bacon Glaze | Homemade Dutch Apple Pie

The cake.

Salted caramel cupcakes have a great balance of salty and sweet. They are actually good without adding any frosting or glaze.

You could go for a simple vanilla buttercream on top too if you like more sweet. Chocolate frosting would also pair well with the salty base.

The cake itself is soft and moist from soaking the gluten free grains. Not too dense but also not crumbly. It holds up well in little hands.

Allergen friendly.

These cupcakes are gluten, dairy, nut, corn, rice, soy and coconut free. If you can’t have eggs you could use an egg replacement.

In other words they are safe for just about everyone!

Bring on the birthday parties. Salted caramel and bacon are the perfect combination for a celebration.

Are you a salty and sweet fan? Looking for a confection that’s unique and allergen friendly?

Salted caramel cupcakes with maple bacon glaze give a whole new meaning to dessert. Easy, fun, salty, sweet goodness.

Salted Caramel Cupcakes with Maple Bacon Glaze | Homemade Dutch Apple Pie

Salted Caramel Cupcakes with Maple Bacon Glaze
Yields 12
An allergen friendly salty and sweet cupcake perfect for birthdays and holidays.
Write a review
Print
Cupcake
  1. 1/4 cup amaranth or brown rice flour
  2. 1 cup sorghum or white rice flour
  3. 1/2 cup tapioca flour
  4. 1 cup warm water
  5. 1 Tbsp. lemon juice
  6. 1/4 cup maple syrup
  7. 1 tsp. organic vanilla (use corn free if allergic to corn)
  8. 1 1/2 tsp. unrefined sea salt
  9. 1 tsp. baking soda
  10. 1 egg or egg substitute
  11. 1 1/2 Tbsp. extra virgin olive oil
  12. 1/4 cup organic cane sugar or coconut sugar
Glaze
  1. 2 Tbsp. melted bacon grease
  2. 2 Tbsp. maple syrup
  3. 4 Tbsp. organic cane sugar
  4. pinch sea salt (optional)
Cupcake
  1. Combine the amaranth, sorghum and tapioca flour. Whisk to remove any lumps.
  2. Add the water and lemon juice. Mix and work out any lumps.
  3. Cover and let sit 7-24 hours.
  4. Heat the oven to 325*F. Line a muffin pan with muffin cups.
  5. Add the syrup, vanilla, salt, soda, egg, oil and sugar to the soaked mixture.
  6. Beat until well combined.
  7. Fill muffin cups almost full.
  8. Bake for 45 minutes.
  9. Allow to cool completely before glazing.
Glaze
  1. Combine the melted bacon grease, syrup, sugar and salt. Mix well.
  2. Top the cupcakes with glaze.
  3. Refrigerate to solidify the glaze.
  4. Serve at room temp or straight from the refrigerator.
  5. Store in a covered container in the refrigerator.
Notes
  1. Some or all of the bacon grease can be replaced with melted lard, butter or coconut oil to reduce the bacon flavor.
  2. The cupcakes freeze well. Freeze without glaze.
Just Take A Bite https://justtakeabite.com/
In order for me to support my blogging activities, I may receive monetary compensation or other types of remuneration for my endorsement, recommendation, testimonial and/or link to any products or services from this blog.

This post is linked to Savoring Saturdays.

Nectarine Squash Pops | Homemade Dutch Apple Pie

Nectarine Squash Pops: Sugar Free First Birthday Popsicles!!

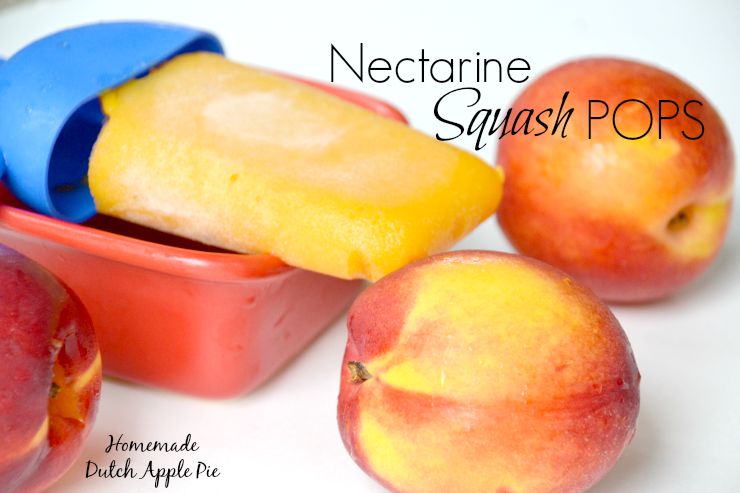
When your summer baby turns one you need a safe, sugar free treat. Nectarine squash pops are the perfect solution! Two ingredients, lots of flavor and no allergens.

Nectarine Squash Pops | Homemade Dutch Apple Pie

First birthdays definitely require a celebration.

You made it! You made it through the first year.

The first year of sleepless nights, crying and dirty diapers.

The first year full of firsts! Smiles, coos, laughs, rolling, crawling and maybe even walking. First foods, first teeth, first words.

Nectarine Squash Pops | Homemade Dutch Apple Pie

Let them eat cake.

A birthday celebration requires a special birthday treat. Usually that means cake.

I LOVE decorating cakes. I look forward to our family birthdays each year because I get to create new cakes.

I’ve done Dora, monkeys, dinosaurs, cars, arts and crafts, Legos, cows, Frozen, bulldozers, April showers and princesses for my kids. I’ve even done airplanes, sports and Cat in the Hat for my nephew, basketball and Calvin Knights for my dad, a fall cake for other family members and a neat recital cake for my sister-in-law.

I wanted to continue that tradition with my third child. With the challenges we’ve faced over the last year we are all certainly ready to celebrate.

Of course I set to work experimenting with new recipes that were free of her allergens.

I made a couple batches of cupcakes (that she loved!)…only to find out more foods that bother her.

Nectarine Squash Pops | Homemade Dutch Apple Pie

Who needs cake?

My daughter’s allergies combined with my preference to keep her at least gluten free for now (she’s been grain free up to this point) make birthday cake almost impossible. We can’t use:

  • wheat
  • rye
  • barley
  • oats
  • rice
  • sorghum
  • amaranth
  • buckwheat
  • tapioca
  • potato
  • arrowroot
  • coconut
  • almond
  • nuts
  • quinoa
  • millet
  • beans

Add to that no coconut oil, palm shortening, butter or egg whites and you’re not left with much.

Birthday Pops.

I gave up on the idea of birthday cake and opted to do popsicles! They make a perfect summer treat.

Since these popsicles are for a one year old I made them without any added sweetener. I even added some vegetables to keep them mild and nutritious.

Nectarine squash pops make a birthday dessert you can really feel good about serving to the whole family.

Nectarine Squash Pops | Homemade Dutch Apple Pie

Eat in season.

I chose fruit that is in season here in Michigan in late August. Nectarines are so sweet and have such a bright color. They make a great base for a popsicle.

You can use peaches instead if you prefer the flavor.

I ended up making a second batch since we ate the first batch before the birthday! I added some watermelon to the second batch for extra color and sweetness. Watermelon is another late summer fruit that almost everyone enjoys.

Nectarine Squash Pops | Homemade Dutch Apple Pie

Fun and Fast.

Nectarine squash pops are the easiest birthday dessert you’ll ever make. Puree cooked squash and cut up nectarine with an immersion blender or in a regular blender and pour the puree into the popsicle molds. Done!

They are also easy to serve. Simply take them out of the molds a few minutes before serving to take the chill off. Pass them out and enjoy.

For older kids you can add chunks of fruit like cut up strawberries, whole blueberries or raspberries to the puree before filling the molds. Then you’ll really have a fruity, colorful treat.

You can also add a tablespoon or two of honey for big kids. It really covers up any hint of squash flavor. My oldest is pretty picky about flavors and textures. She said she couldn’t taste the squash at all when I added a bit of honey.

I was very disappointed that I couldn’t make a cake for my baby’s first birthday. But I’m so happy with how these nectarine squash pops turned out! I’m even happier that my daughter likes them…and that they are so healthy and free of allergens.

Do you celebrate any summer birthdays?

Instead of cake try nectarine squash pops. They make summer celebrations delicious and healthy.

Nectarine Squash Pops | Homemade Dutch Apple Pie

Nectarine Squash Pops
Serves 4
A fruity, sugar free summer birthday treat.
Write a review
Print
Ingredients
  1. 3 medium nectarines, peeled and pitted
  2. 3/4 cups cooked butternut squash
  3. optional: 1/2 cup watermelon (seeds removed)
  4. optional: 1 - 2 Tbsp. honey
Instructions
  1. Puree the nectarines and squash (and watermelon and honey) with an immersion blender or in a blender.
  2. Fill popsicle molds and freeze until firm.
Notes
  1. You can replace the nectarines with peaches.
  2. For little ones let the popsicles sit out for a few minutes to soften before serving.
Just Take A Bite https://justtakeabite.com/
In order for me to support my blogging activities, I may receive monetary compensation or other types of remuneration for my endorsement, recommendation, testimonial and/or link to any products or services from this blog.

This post is linked to Savoring Saturdays.