Home » Kid-friendly Recipes » dairy free » Page 4

Category: dairy free

Whether you need a simple snack or a nourishing side dish, this simple hummus is VAD Diet approved and very kid friendly. Plus it's ready in less than five minutes!

The Easiest Hummus Recipe Ever

Whether you need a simple snack or a nourishing side dish, this simple hummus is very kid friendly. Plus it’s ready in less than five minutes!Whether you need a simple snack or a nourishing side dish, this simple hummus is VAD Diet approved and very kid friendly. Plus it's ready in less than five minutes!

Hummus is a staple in our house. Being dairy free we use this as our go-to veggie dip. It also works well as a pasta sauce or even a cheese replacement for pizza (we love this gluten free crust).

I think I’ve only ever made traditional hummus once. Then the jar of tahini sat in my pantry.

Over the years I’ve simplified my hummus so much. It literally takes three minutes to make. And my kids go crazy for it!

Kid-Approved Hummus

My kids will eat this hummus by the spoonful. This is seriously the easiest hummus recipe ever. Three ingredients. Three minutes. Done.

There are so many things to dip in hummus:

You can even use hummus as a simple salad dressing!

Whether you need a simple snack or a nourishing side dish, this simple hummus is VAD Diet approved and very kid friendly. Plus it's ready in less than five minutes!

How to Make Easy Hummus

Canned or boxed chickpeas will work just fine for a super quick hummus. I do this when I don’t plan ahead. Take note that it will increase your resistant starch intake. If you want a healthier and more frugal option simply cook your own! Dried beans are so cheap. If you have an Instant Pot, cooking beans is a snap too. That’s my favorite method. Check out this guide for cooking beans in an Instant Pot.

Aside from beans all you need is oil and salt.

Sometimes I add organic garlic powder and onion powder for a little more flavor. But my kids love it either way.Whether you need a simple snack or a nourishing side dish, this simple hummus is VAD Diet approved and very kid friendly. Plus it's ready in less than five minutes!

Hummus Adds Protein

Since adequate protein is such an important part of a healthy diet, hummus makes a great addition to any snack or meal. Beans have a lot of protein. Not to mention they are loaded with fiber to help fill those little bellies and feed the good bacteria.

I try my best to give my kids a balance of protein, carbohydrates and fat at both meals and snacks. Veggies or crackers with hummus meets all three requirements! And it is easy to pack in a school lunch. That is my definition of a winning food.

Ready for some delicious snacking or need an easy lunch addition? This super simple hummus is kid-friendly and loaded with nutrition.Whether you need a simple snack or a nourishing side dish, this simple hummus is VAD Diet approved and very kid friendly. Plus it's ready in less than five minutes!

Three Ingredient Hummus

Prep Time 3 minutes
Servings 8
Author Mary | Just Take A Bite

Ingredients

  • 1 1/2 cups canned, boxed or cooked garbanzo beans (chickpeas), drained, liquid reserved
  • 4 Tbsp. avocado oil
  • 4 Tbsp. bean liquid
  • 1/4 tsp. salt
  • 1/4 tsp. organic garlic powder optional
  • 1/4 tsp. organic onion powder optional

Instructions

  1. Combine all of the ingredients in a blender.

  2. Blend on high until smooth, adding extra oil or bean liquid if necessary.

  3. Adjust seasoning to taste.

  4. Serve immediately or refrigerate for up to a week.

No need to forgo your favorite cereal to eat healthier. Gluten free Golden Grahams® is easy to make, allergy friendly and contains quality ingredients.

Gluten-Free Golden Grahams® Cereal {egg free, nut free, dairy free option}

No need to forgo your favorite cereal to eat healthier. Gluten-free Golden Grahams® is easy to make, allergy-friendly and contains quality ingredients.No need to forgo your favorite cereal to eat healthier. Gluten free Golden Grahams® is easy to make, allergy friendly and contains quality ingredients.

Whether it’s hot outside and you want a cold breakfast or you are just too busy to cook, it’s very convenient to have cereal on hand.

For those mornings where the kids are up early and need to make their own breakfast. Or when Mom has been up all night with the baby and needs some quick energy. And you don’t happen to have leftover muffin bread pudding on hand. Gluten-free Golden Grahams® really come in handy. Not to mention they taste great!

Why Cereal is Unhealthy

Even though I was a cereal junky for many, many years (HAD to have it every morning), I stopped buying it regularly when we switched to real food. It really is not healthy, even organic.
 
Cereal typically gives you lots of processed sugar, synthetic vitamins/fortification (like Vitamin A!), artificial or “natural” flavors and artificial colors, GMO’s and glyphosate. Not to mention they are made with an extrusion process that makes the grains toxic.No need to forgo your favorite cereal to eat healthier. Gluten free Golden Grahams® is easy to make, allergy friendly and contains quality ingredients.
 
We do still like cereal. And I’ll be honest – we do have some organic gluten-free cereal in the cupboard for a once-in-a-while snack. But my preferred choice if we are craving cereal is homemade. Over the years I’ve made:
 

Did I mention I used to be a cereal addict? I had to make lots of homemade varieties while I transitioned away from processed food. They were delicious experiments.
No need to forgo your favorite cereal to eat healthier. Gluten free Golden Grahams® is easy to make, allergy friendly and contains quality ingredients.

Allergy-Friendly Homemade Cereal

Once we started down the road of food allergies (like going gluten-free) I decided to make my own allergy-friendly versions of our favorite foods. Yes, even cereal!

My kids love them.

Are Golden Grahams® Gluten-Free?

The processed, store-bought version of Golden Grahams® are NOT gluten-free. But this simple homemade version is!

Gluten-free Golden Grahams® are crunchy and sweet. They make a perfect breakfast treat or a fun snack any time of day. My kids love them plain or even mixed into yogurt.
 
Fair warning – they are addictive. And it’s easy to eat a lot since they are so small. Just keep popping a few in your mouth here and there and you’ve eaten quite a few before you know it. No idea how I know that…No need to forgo your favorite cereal to eat healthier. Gluten free Golden Grahams® is easy to make, allergy friendly and contains quality ingredients.

Easy Gluten-Free Snack

Gluten-free Golden Grahams® make a great finger food for on the go. It’s tough to figure out what real food to stash in the diaper bag sometimes. Homemade cereal works very well.

We also love to have a bowl with homemade rice milk for an afternoon snack. It satisfies both your sweet and crunchy cravings – without the extruded grains!

Do you still enjoy cereal? Do you need a healthier, allergen-free version?

Try these homemade Golden Grahams®. You won’t be disappointed.No need to forgo your favorite cereal to eat healthier. Gluten free Golden Grahams® is easy to make, allergy friendly and contains quality ingredients.

Gluten-Free Golden Grahams®

Prep Time 10 minutes
Cook Time 20 minutes
Total Time 30 minutes

Ingredients

  • 1 1/4 cups white rice flour
  • 1/2 cup amaranth flour
  • 1/4 cup teff flour can be replaced with white rice or amaranth
  • 1/2 cup organic cane sugar or sucanat or coconut sugar
  • 1/2 tsp. sea salt
  • 1/2 tsp. vanilla
  • 4 Tbsp. honey
  • 2 Tbsp. maple syrup
  • 1/2 cup butter or coconut oil

Instructions

  1. Heat oven to 350 degrees F. Cut 4 pieces of parchment paper the size of a baking sheet.
  2. Melt the butter/oil. Set aside.
  3. Mix the flours, sugar and salt in a large bowl.

  4. Add the vanilla, sweetener and the butter and mix until well combined. The dough should hold together when squeezed. If it is crumbly add more honey or butter.

  5. Split the dough into 3 equal parts. Lay one piece of parchment paper on a table. Put 1/3 of dough on the paper. Lay a 2nd piece of parchment on top of dough. Squish the dough down a little with your hand. Use a rolling pin to roll the dough between the parchment paper. Roll the dough until it is very thin (1/16th" or so). Remove the top piece of parchment paper.
  6. Cut into small squares with a pizza cutter or knife. Place on a baking sheet (on the parchment paper...just move the whole thing onto the baking sheet). Repeat for rest of dough.

  7. Bake for 8-10 minutes. Turn the oven off, but leave the cereal in to get crisp. Remove after 5 min.

  8. Let cool completely. Store in airtight container for up to 2 weeks or in the freezer for up to a year.

Recipe Notes

Makes about 2 quarts.

Any 2 cup combination of gluten free flour will work - this combination gives a very neutral flavor.

This post is shared on Allergen Free Wednesday.

This easy allergen free bread is great for sandwiches or toast. Let the kids help make it!

Easy Allergen-Free Bread

Looking for a great gluten-free bread that holds together without allergens or gums? This allergen-free bread is easy to make and tastes great!This easy allergen free bread is great for sandwiches or toast. Let the kids help make it!

A couple years ago I spent at least six months trying to come up with a decent gluten free bread. I probably made at least fifty experimental loaves.

What did I come up with?

My “not-quite-perfect” gluten free bread. It tastes good. But it’s not quite as sturdy as I’d like. And it seems to turn out differently every time I make it!

Easy Allergen-Free Bread

Then when two of my kids added a bunch of new allergies I just stopped making bread. I really didn’t know how to bake anything safe for them. Back to experimenting.

This easy allergen free bread is great for sandwiches or toast. Let the kids help make it!

Eventually I got the hang of making decent muffins (my poor husband with texture issues had to suffer through some over-moist and dry, crumbly experiments).

Can You Bake Gluten-Free Bread Without Xanthan Gum?

One day I decided to try making a loaf of bread. Just to see what would happen.

Imagine my surprise when it turned out great! Actually way better than the gluten-free bread I had tried to create for so long.

Who knew you could cut out the eggs, dairy and binders and get something better?!

My allergen-free bread has no gluten, eggs, dairy, nuts, coconut, rice, corn, seeds or soy. And as with all of my baking it has no gums. As an added bonus, it is soaked so it’s gentler on the tummy.This easy allergen free bread is great for sandwiches or toast. Let the kids help make it!

Kid-approved Gluten-Free Bread

Want to know what my kids think about this allergen-free bread?

First kid: “This is AWESOME!”

Second kid: “This is only for me! Nobody else can have it.”

What Can You Make with Allergen-Free Bread?

Life sure is easier when you have bread. My son can enjoy sloppy joes, sandwiches with homemade lunch meat or toast with sunbutter (we love this brand because it is made in a peanut and tree nut facility). We even use it to make mini pizzas with our nutrient dense pizza sauce (no cheese necessary)!

Sometimes we use leftover pancakes or tortillas as “bread.” But this allergen free bread is definitely our first choice. I try to keep some in the freezer at all times for quick snacks, breakfasts and lunches. I even pre-slice it so I can just grab one slice at a time.

This easy allergen free bread is great for sandwiches or toast. Let the kids help make it!

Just a few simple ingredients, mixed by hand gives you a delicious and versatile bread. Soak the flour the day before (or skip that step if you didn’t plan ahead). Then it takes about five minutes to get the bread into the oven.

Just because you have allergies doesn’t mean you have to miss out on freshly baked bread. It also doesn’t mean  you have to resort to strange ingredients and binders (that actually often contain allergens!), like most store-bought versions have.

Looking for Homemade Allergen-Free Bread?

Give this allergen free bread a try. Your kids will be begging for more.

Better yet, get your kids in the kitchen to help make it! They can practice, measuring, pouring and mixing. This will definitely be on our list of things to bake as we go through the Kids Cook Real Food eCourse. Click here to learn more about it!

This easy allergen free bread is great for sandwiches or toast. Let the kids help make it!

5 from 1 vote
Print

Easy Allergen Free Bread

Prep Time 10 minutes
Cook Time 55 minutes
Total Time 1 hour 5 minutes
Author Mary | Just Take A Bite

Ingredients

  • 1 1/2 cups organic sorghum flour
  • 1/2 cup organic tapioca or white rice flour
  • 1/4 cup psyllium husk
  • 2/3 cup warm water
  • 1 Tbsp. lemon juice
  • 1 tsp. baking soda
  • 1 tsp. cream of tartar
  • 1/2 tsp. salt
  • 3 Tbsp. honey
  • 5 Tbsp. olive oil or avocado oil
  • 3 tsp. grassfed gelatin
  • 1/4 cup cold water
  • 3/4 cup hot water

Instructions

  1. Combine the flour, psyllium husk, warm water and lemon juice. Mix to remove any lumps. Cover and let sit 7 - 24 hours.

  2. Heat the oven to 350*F. Grease or line with parchment paper one medium bread pan.

  3. Combine the gelatin and cold water. Set aside.

  4. Add the baking soda, cream of tartar, salt, honey and oil to the flour mixture. Stir well.

  5. Add the hot water to the gelatin water and mix until dissolved.

  6. Add the gelatin water to the flour mixture. Blend well with a hand mixer to remove any lumps.

  7. Pour the dough in the prepared pans.

  8. Bake for 55 - 60 minutes, until golden.

  9. Allow to cool for 30 minutes before removing from the pan.

  10. Allow to cool for at least an additional 60 minutes before slicing.

  11. Store in a sealed container at room temperature for up to 5 days, in the fridge for up to a week or in the freezer for up to a year.

Recipe Notes

You can slice the bread before freezing.
You can replace any of the water with yogurt, whole milk, coconut yogurt, coconut milk, almond milk or rice milk for a moister bread.

Easy and Delicious Homemade Rice Milk

Are you looking for a milk alternative that is budget-friendly, easy to make, doesn’t contain gums, fillers or allergens and actually tastes good? This homemade rice milk is the perfect solution!Are you looking for a milk alternative that is budget-friendly, easy to make, doesn't contain gums, fillers or allergens and actually tastes good? This homemade rice milk is the perfect solution!

I have a love-hate relationship with milk alternatives.

I love that they are readily available since so many people have problems with dairy.

But I hate how expensive they are and all of the unhealthy ingredients added. Especially the Vitamin A and D supplements!! You can read about why I think that is such a BAD idea here.

Why You Should Make Your Own Milk Alternative

To avoid the cost and undesirable ingredients you really have to make your own milk alternative.

There are some really good ones. I love this coconut milk. But when you are working around a lot of allergies, many of the easiest and most delicious milk alternatives are out. We’ve had both almond and coconut allergies. Plus coconut milk is not allowed on the VAD Diet. So those aren’t options.

When you eliminate nuts and coconut, you move to grains. My son has been drinking rice milk for a few years now. We tried a few different milks. But he would only drink rice milk. It’s my favorite too.Are you looking for a milk alternative that is budget-friendly, easy to make, doesn't contain gums, fillers or allergens and actually tastes good? This homemade rice milk is the perfect solution!

So we bought rice milk.

He drinks water most of the time. So it’s not a daily staple. But it’s still often enough that I was starting to investigate the ingredients and worry about it impacting his health.

We’ve used Organic Enriched Rice Dream for quite a while. Until I learned that it had Vitamin A and D added. We switched to the original variety to eliminate the vitamins, but there are still vegetable oils and gums. And Rice Dream it is made with fluoridated water! Yikes. (Learn more about the trouble with fluoride here and here.) Double strike.

The final straw was learning that most brown rice is high in arsenic. Three strikes. You’re out!Are you looking for a milk alternative that is budget-friendly, easy to make, doesn't contain gums, fillers or allergens and actually tastes good? This homemade rice milk is the perfect solution!

How to Make Homemade Rice Milk

I’m not one to shy away from making food from scratch. I make everything from graham crackers to cereal to ice cream to pretzels.

So I started by searching for homemade rice milk recipes.

They were all pretty much the same. Cook rice. Blend it with water. Drink.

I tried it. Yuck! It tasted just like you’d imagine. Thick rice-flavored water. And nothing like the rice milk my son was used to drinking. He wouldn’t touch it.

There had to be a better way.

There is a better way. I did my own experimenting and came up with an easy and delicious homemade rice milk that my kids (and I!!) will actually drink. Honestly, I think it tastes better than the store-bought version. Even my 8 month old enjoys it.

Rice Milk with Nutrition

In addition to the great taste, my homemade rice milk includes healthy protein and fat. But no gums or fillers.

The protein comes from grassfed collagen. I choose Perfect Supplements brand collagen. It comes from well-raised cows.

Perfect Supplements offers a whole assortment of dietary supplements. One of my other favorites is MCT oil. Which you can also use in this homemade rice milk if you don’t have a coconut allergy.


Take advantage of Perfect Supplement’s year-round discount of 25% off when you purchase three of any product. Or if you really want to stock up and save you can get 30% off six or more of a product. You could split an order with a friend.

Then to sweeten the deal even more you can take an extra 10% off with the code TAKE10.

Now that I’m making homemade rice milk weekly I am using a lot of collagen. I also add it to my oatmeal for extra protein. I need to take advantage of the bulk discount and stock up!! My MCT oil that I add to my oatmeal every day is almost gone too.


Are you looking for a milk alternative that is budget-friendly, easy to make, doesn't contain gums, fillers or allergens and actually tastes good? This homemade rice milk is the perfect solution!
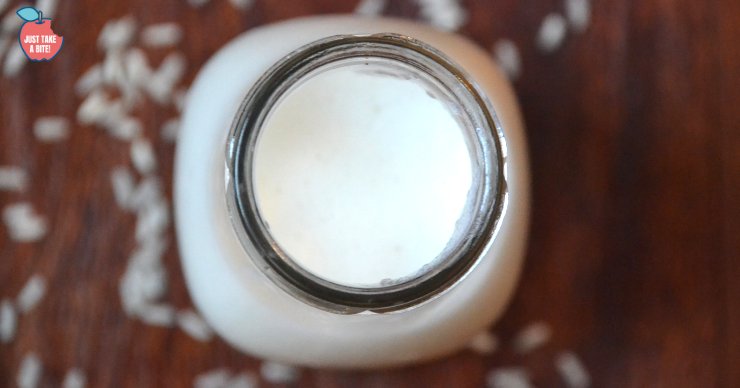
Rice Milk That Actually Tastes Good

This homemade rice milk is so easy to make. It takes about ten minutes from start to finish.

You can choose your preferred sweetener and adjust it to your liking. Dates and maple syrup are very natural options. But they also change the color. Organic cane sugar is a very neutral flavor and keeps the milk white. This may be important for a child switching over from dairy milk. Looks can be everything. My kids actually really like the flavor of the dates.

My rice milk is also VAD Diet approved! It has been a huge blessing for me to have safe milk to drink again! And I can feel good about giving it to my kids or using it in our cooking and baking. I love to use it on my kettle corn granola or on a big bowl of steel cut oatmeal.

If you are looking for a milk alternative that is easy on your budget, doesn’t take long to make, is free of common allergens and tastes great this is it! Homemade rice milk that actually tastes good.

I make a half gallon at a time. But you could make more or less depending on how much you use milk. I store it in quart mason jars with these really cool reCAP lids for easy pouring.Are you looking for a milk alternative that is budget-friendly, easy to make, doesn't contain gums, fillers or allergens and actually tastes good? This homemade rice milk is the perfect solution!

Have you ever tried making rice milk? What is your favorite milk alternative?

5 from 2 votes
Print

Homemade Rice Milk

A simple and delicious milk alternative that is free of allergens and fillers.

Prep Time 3 minutes
Cook Time 10 minutes
Total Time 13 minutes

Ingredients

  • 4 Tbsp. organic/non-gmo white rice flour
  • 4 Tbsp. grassfed collagen
  • 4 Tbsp. avocado oil or MCT oil
  • 3 cups filtered water
  • 1/4 tsp. salt
  • 4 pitted organic dates OR 2-4 Tbsp. maple syrup or organic cane sugar
  • 2-3 cups filtered water

Instructions

  1. In a medium saucepan combine the rice flour, collagen, oil, 3 cups water, salt and sweetener.

  2. Whisk well to combine.

  3. Cook over medium-high heat, whisking frequently, until the mixture is hot and the flour starts to thicken, about 8 minutes. You will see steam rising. Keep cooking with it steaming for about 2 minutes.

  4. Pour the mixture into a high-powered blender. Add 2-3 cups water and blend on high for 1-2 minutes, until smooth/all of the dates have been blended.

  5. Pour into a glass jar, cover and refrigerate for up to one week.

  6. Shake gently before serving.

Recipe Notes

You can adjust the water to make it as thin or thick as you like.

You can adjust the sweetener to your taste.

You can increase the collagen and oil if you want more protein and fat.

I've got a solution for your busy weekday mornings. These grain free pumpkin spice breakfast cookies are so easy to make and loaded with good stuff. Plus kids love them!

Grain Free Pumpkin Spice Breakfast Cookies

I’ve got a solution for your busy weekday mornings. These grain free pumpkin spice breakfast cookies are so easy to make and loaded with good stuff. Plus kids love them!

*I am working with Perfect Supplements for this post. I have been compensated for my time commitment, but all opinions are my own. Some links are affiliate links. Using the links will not change the cost of anything for you.*

I've got a solution for your busy weekday mornings. These grain free pumpkin spice breakfast cookies are so easy to make and loaded with good stuff. Plus kids love them!

Life is BUSY. And just when you think your current busy situation is coming to an end…something else comes up. Last year we had so many activities. I was driving the kids here, there and everywhere. I hated it.

Fast forward a year. Now we are home a lot more. But we have a baby that requires a lot of my time and attention. It feels just as busy. Just in a different way.

Busy life = less time for making good food.

But I’m not giving up! No way. I came up with the perfect fall breakfast that you can prepare in advance. You can even make a double or triple batch to stock your freezer for weeks. And if you are teaching your kids to cook they can actually make them for you. How’s that for freeing up some time?!

Allergy Friendly Pumpkin Spice Breakfast Cookies

These pumpkin spice breakfast cookies are loaded with nourishing ingredients. Plus they taste great! They are super allergy friendly too. No grains, dairy, nuts, eggs or soy.

There is one secret ingredient that is really the star of the show.

Gelatin!

I love the grass-fed gelatin from Perfect Supplements. There is no strange smell. It gels beautifully. And since I do a lot of egg free baking it is my go-to ingredient.

These pumpkin spice breakfast cookies are also packed with coconut oil for healthy fat. Combine that with gelatin and garbanzo bean flour for protein. Plus tapioca flour for starch. It’s a complete breakfast that you can hold in your hand.

Grab a couple for the road, pair it with bacon and fresh fruit or pack one in your child’s lunch box. You get the flavors of fall in a nutritious cookie.

I've got a solution for your busy weekday mornings. These grain free pumpkin spice breakfast cookies are so easy to make and loaded with good stuff. Plus kids love them!

Grain Free Pumpkin Spice Breakfast Cookies
Yields 15
An allergy friendly breakfast cookie loaded with healthy protein, fat and carbs.
Write a review
Print
Ingredients
  1. 1 cup amaranth flour
  2. 3/4 cups tapioca flour
  3. 3/4 cups garbanzo bean flour
  4. 3/4 cups water
  5. 2 Tbsp. Perfect Supplements collagen
  6. 1 Tbsp. organic lemon juice
  7. 1/4 cup coconut oil, melted
  8. 1/2 cup pumpkin puree
  9. 1/2 cup organic cane sugar
  10. 3 tsp. Perfect Supplements gelatin
  11. 1/2 tsp. unrefined sea salt
  12. 1 tsp. baking soda
  13. 1 tsp. cinnamon
  14. 1/2 - 1 cup mix-ins of choice: raisins, dried cranberries, mini chocolate chips, sunflower seeds, pumpkin seeds
Instructions
  1. In a large bowl combine the flour, water, collagen and lemon juice.
  2. Mix well.
  3. Cover and let sit at room temperature 7 - 24 hours.
When ready to bake
  1. Heat oven to 375*F. Line two baking sheets with parchment paper or silpat.
  2. Add the coconut oil and pumpkin to the soaked mixture. Stir to combine.
  3. Add the sugar, gelatin, salt, baking soda and cinnamon. Mix well.
  4. Stir in your mix-ins of choice.
  5. Drop by large mounds onto the prepared baking pans.
  6. Bake for 25 - 30 minutes, until golden brown.
  7. Remove from oven and let cool for 5 minutes on baking pan.
  8. Serve warm or at room temperature.
  9. Store in a sealed container at room temperature for 3 days, in the refrigerator for up to a week or in the freezer for up to a year.
Just Take A Bite https://justtakeabite.com/

Prep Ahead Breakfast Cookies

I soak the seed and bean flours to help with digestion. I also prep the rest of the ingredients the night before. In the morning I just pour, mix and bake. I can have a batch of pumpkin spice breakfast cookies in the oven in about five minutes. Then we can eat some fresh and stick the rest in the freezer for a quick breakfast any day of the week.

Or if you like to do all of your prep work on the weekends that works too!

Add whatever mix-ins you like. Pumpkin seeds, sunflower seeds, flax seeds, chia seeds, mini chocolate chips, raisins, dried cranberries…they’re all good.

My kids LOVE these cookies. I think my toddler ate THREE one morning (yes, the toddler that used to barely eat anything). They are that good.

I've got a solution for your busy weekday mornings. These grain free pumpkin spice breakfast cookies are so easy to make and loaded with good stuff. Plus kids love them!

More To Love From Perfect Supplements

If you’ve never tried Perfect Supplements gelatin I highly recommend it. The quality is exceptional. But don’t stop there. Perfect Supplements carries such a wide variety of products.

Collagen

Like the collagen that I also use in the pumpkin spice breakfast cookies. I use it in all of our smoothies (like this blueberry spinach smoothie or this squash cherry smoothie). It was a life saver (literally) for my toddler when she was barely eating (check out how I got her to eat again with this “squash milk”).

Greens

We also recently tried both the fermented kale powder and the aquatic greens. They are perfect for smoothies. And the aquatic greens are especially great for those with allergies. I use it for my big kids as often as possible.

I could go on and on about all of the great products. But I’ll let you do some looking for yourself.

I've got a solution for your busy weekday mornings. These grain free pumpkin spice breakfast cookies are so easy to make and loaded with good stuff. Plus kids love them!

How to Save Money on Breakfast

Now for the best part.

You can use the coupon code TAKE10 at checkout to get 10% off your entire order!

I’ve got another great recipe that uses Perfect Supplements gelatin to share with you!

I've got a solution for your busy weekday mornings. These grain free pumpkin spice breakfast cookies are so easy to make and loaded with good stuff. Plus kids love them!

What is your favorite way to use gelatin?

Need more ideas for fun ways to add gelatin or collagen to your diet? Try these:

Strawberry Kiwi Gummies

Lemon Elderberry Gummies

Dairy Free Grilled Cheese

Homemade Fruit Snacks

Healing Hot Chocolate

Molasses Tonic

Squash Milk

Allergy Friendly Vanilla Cake

Chocolate Chip Banana Bread

Pumpkin Spice Graham Crackers {gluten free, dairy free, egg free, nut free}

Pumpkin spice graham crackers are easy to make, allergen friendly and capture the warm flavors of pumpkin pie. They make a perfect after school snack or lunch box addition.Pumpkin spice graham crackers are easy to make, allergen friendly and capture the warm flavors of pumpkin pie. They make a perfect after school snack or lunch box addition. #glutenfreefood #pumpkinspice

For me there is no better snack than a graham cracker. Crunchy. Slightly sweet. Perfection.

I got hooked on them in college and have eaten more than my share since. Of course they came out of box.

No more boxes here. Now when I’m in the mood for graham crackers I make them!

I have created quite a few versions of graham crackers:

Pumpkin spice graham crackers are easy to make, allergen friendly and capture the warm flavors of pumpkin pie. They make a perfect after school snack or lunch box addition. #glutenfreefood #pumpkinspice

Graham Crackers with Fall Spice!

Today I’m sharing my fall version of graham crackers – pumpkin spice.

They are very easy to make and very allergen friendly. Pumpkin spice graham crackers are gluten, dairy, egg, nut, soy, corn and rice free. But nobody will ever know!

You get the mild sweetness and crunch of a graham cracker combined with pumpkin and spice. This is a fun holiday treat for kids and adults. It is like pumpkin pie in graham cracker form.

Let your kids trade in Halloween candy for pumpkin spice graham crackers or add them to your Thanksgiving baking list!
Buy Healthy Snacks to Go eBook Recipes Online

Graham Crackers for Breakfast, Lunch, Snack or Dessert

My kids go crazy for pumpkin spice graham crackers. Though we try not to go overboard, a whole batch is sometimes gone in a couple weeks.

They make the perfect after school snack with a big glass of raw milk. Somehow they make homework easier. But there are many other ways to enjoy them.

Pumpkin spice graham crackers are delicious broken and sprinkled over whole milk yogurt for breakfast. You can also spread nut butter in between two crackers for a nutritious snack or sandwich alternative.

Kids will love pumpkin spice graham crackers in their lunch. What a fun way to give them a treat that is full of good stuff.

Pumpkin spice graham crackers are easy to make, allergen friendly and capture the warm flavors of pumpkin pie. They make a perfect after school snack or lunch box addition. #glutenfreefood #pumpkinspice
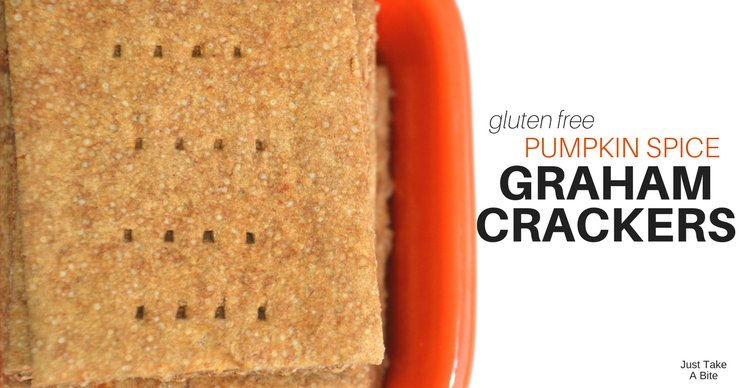
They can be used in desserts as well. Sprinkle crushed graham crackers on top of pudding or grind them to make the crust for a fall cheesecake.

No matter how you serve them, pumpkin spice graham crackers are sure to be a hit.

Kids in the Kitchen

The next time your kids are begging for a treat make a batch of pumpkin spice graham crackers. But be sure to let them help.

All you need is a bowl and a spoon. Kids can measure, poor, stir and then roll the dough. My kids always have fun making graham crackers. Especially since they have learned to cook using the Kids Cook Real Food eCourse! Learn more about how you can teach your kids to cook here.

You can make it even more fun by using cookie cutters to create different shaped crackers.

The dough is ready to go in the oven in less than fifteen minutes. The hard part is waiting for them to bake and cool.

Pumpkin spice graham crackers are easy to make, allergen friendly and capture the warm flavors of pumpkin pie. They make a perfect after school snack or lunch box addition.

Pumpkin Spice Graham Crackers Year Round.

One batch of pumpkin spice graham crackers makes around fifty crackers. Keep half in the cupboard and store the rest in the freezer for an easy snack when you don’t have time to bake.

If your kids are like mine you might need to make a double batch!

Not sure what to give your kids when they are asking for snacks? Pumpkin spice graham crackers are just the thing. Healthy fat, vegetables and gluten free grains will give them the energy they need to keep going.

Do you enjoy graham crackers? What is your favorite way to eat them?

Pumpkin spice graham crackers are easy to make, allergen friendly and capture the warm flavors of pumpkin pie. They make a perfect after school snack or lunch box addition.

Pumpkin Spice Graham Crackers {gluten free, dairy free, nut free, egg free}
Yields 50
A graham cracker with the taste of pumpkin pie.
Write a review
Print
Ingredients
  1. 1 cup any combination of starchy gluten free flour (tapioca, white rice)
  2. 1 cup any combination of whole grain gluten free flour (sorghum, amaranth, brown rice, buckwheat)
  3. 1/2 cup organic cane sugar or coconut sugar
  4. 1/2 tsp. sea salt
  5. 1/2 tsp. baking soda
  6. 1 tsp. vanilla
  7. 1 tsp. cinnamon
  8. 1/4 tsp. nutmeg
  9. 1/8 tsp. cloves
  10. 2 Tbsp. honey
  11. 2 Tbsp. molasses (can be replaced with honey or maple syrup)
  12. 6 Tbsp. butter, coconut oil, lard or tallow, melted
  13. 1/3 cup pureed pumpkin
Instructions
  1. Preheat an oven to 350*F.
  2. Cut three pieces of parchment paper the size of a baking sheet.
  3. In a large bowl combine the flour, sugar, salt, soda, vanilla, cinnamon, nutmeg and cloves. Stir.
  4. Add the honey, molasses, pumpkin and melted oil. Stir until well combined.
  5. Split the dough in half.
  6. Place one half on a piece of parchment paper. Top with a second sheet.
  7. Roll the dough between the paper until it is about 1/4" thin.
  8. Remove the top piece of paper. Using a pizza cutter or knife cut the dough into squares.
  9. Transfer the dough on the parchment paper to a baking sheet.
  10. Repeat this process for the second half of the dough.
  11. Bake graham crackers in the preheated oven for about 25 minutes.
  12. Turn off the oven. Leave the crackers in the oven for an extra 10 minutes.
  13. Remove the crackers from the oven. Allow to cool completely.
  14. The crackers will crisp as they cool.
  15. Store in an airtight container at room temperature or in the freezer for long term storage.
Notes
  1. The graham crackers freeze very well and are ready to eat as soon as you take them out of the freezer.
  2. You can replace the cinnamon, cloves and nutmeg with 1 1/2 tsp. of pumpkin pie spice.
Just Take A Bite https://justtakeabite.com/
This post is linked to From The Archives Friday and Savoring Saturdays.

Picky Eater Approved Grain-Free Meatloaf Sliders

Make meal time or snack time fun for kids with these picky eater approved grain-free meatloaf sliders.Make meal time or snack time fun for kids with these picky eater approved grain-free meatloaf sliders.

I’m a big fan of meatloaf. It’s so easy to make. And all of my kids will eat it. That’s pretty much the equivalent of a gold medal meal.

I usually cook mine in the crockpot (I like this style). I put it in before we leave for church on Sunday and it’s ready when we get home.

A New Way to Make Meatloaf

Recently I got to review the Paleo Cooking with your Air Fryer cookbook by Karen S. Lee (grab your copy here). When I saw her little meatloaf sliders I knew I had to try them! A family staple in a mini size for little hands? Perfect!

Since my kids have done the Kids Cook Real Food eCourse I actually let them help me make these fun meatloaf sliders. Everything goes in one bowl. My kind of prep work!

Make meal time or snack time fun for kids with these picky eater approved grain-free meatloaf sliders.

My kids are used to eating their burgers without a bun. So that’s what we did. But it would also be fun to make some mini buns or use a lettuce wrap. Or if your kids are like mine they love anything served on a stick. I like mine on a big salad! Top it with some avocado. YUM.

I love that these meatloaf sliders are free of grains/gluten and dairy. If you can’t have eggs I bet they would work fine without. We are nut free, so I swapped a little more coconut flour for the almond flour.

I served our meatloaf sliders with cauli-bites, also from Karen’s book. I skipped the buffalo seasoning since my kids are not big on spice. But I bet it would be delicious!

Do You Need an Air Fryer?

Now you may be thinking, “These look good…but I don’t have an air fryer.” Well, I don’t either! Though I may have to put one on my Christmas list now. All of the recipes can be adapted for the oven by using a wire rack on a baking sheet. Simple.

If you do have an air fryer I’d love to hear what you think of it!Make meal time or snack time fun for kids with these picky eater approved grain-free meatloaf sliders.

Even if you don’t have an air fryer I highly recommend Karen’s book. The pictures are gorgeous (my favorite thing about any cookbook). And the recipes all sound delicious. PLUS they are all paleo recipes and easy to adapt to your dietary needs.

I had to steal the cookbook back from my ten year old. She was drooling over every page.

Divided into eleven chapters, Paleo Cooking with your Air Fryer includes crispy and flavorful dishes for every meal and snack,  including desserts. Karen’s nutritious and delicious air fryer recipes will turn her family favorites into your family’s favorites, including Healthy Korean Chicken Wings, Filet Mignon with Herbs and Roasted Garlic, Not Your Gramma’s Fried Chicken, Fish Tostadas, Fancy Pants French Fries, Simple Chocolate Mud Cake and Pumpkin Coconut Crème Brûlée.

Dr. Karen S. Lee is a retired Doctor of Chiropractic and Acupuncture Fellow, who helped thousands of patients with emphasis on holistic therapy, ergonomics, nutrition therapy, and mind-body medicine. She is the founder of www.drkarenslee.com, a blog dedicated to holistic health, real food recipes, and lives in Westchester County, New York with her family.Make meal time or snack time fun for kids with these picky eater approved grain-free meatloaf sliders.

Grain Free Meatloaf Sliders

Karen has graciously allowed me to share the meatloaf slider recipe with my readers! It’s great for little hands. And it’s definitely picky eater approved! Especially if you let them help cook. Something about helping prepare the food makes it so much more appealing.

Enjoy this super fast, super delicious, super kid friendly recipe. We eat it for breakfast, lunch or dinner!Make meal time or snack time fun for kids with these picky eater approved grain-free meatloaf sliders.

Recipe reprinted with permission from Paleo Cooking With Your Air Fryer by Dr. Karen S. Lee, Page Street Publishing Co. 2018. Photo Credit: Donna Crous.

Grain Free Meatloaf Sliders

Grain and dairy free mini meatloaves.

Cook Time 10 minutes
Servings 8
Author Karen S. Lee

Ingredients

  • 1 lb. grass-fed ground beef
  • 2 eggs large
  • 1/4 cup onion finely chopped
  • 1 clove garlic minced
  • 1/2 cup almond flour extra fine blanched
  • 1/4 cup coconut flour
  • 1/4 cup ketchup
  • 1/2 tsp. unrefined sea salt
  • 1/2 tsp. black pepper
  • 1 Tbsp. gluten free Worcestershire sauce
  • 1 tsp. Italian seasoning
  • 1/2 tsp. dried tarragon

Instructions

  1. In a large mixing bowl, combine all of the ingredients and mix well.

  2. Make patties that are about 2 inches in diameter and about 1 inch thick. If you want to make thicker or thinner patties, make sure all of them are similar size, so they cook properly at the same time.

  3. Place the patties on a platter and refrigerate for 10 minutes for the flour to absorb the wet ingredients and the patties to become firm.

  4. Preheat the air fryer to 360*F or the oven to 400*F.

  5. Place as many patties as you can fit in the basket and close. Set the timer for 10 minutes. Check the patties halfway through. When the timer goes off, take them out, place on a serving platter and cover until all the patties are cooked.

  6. If using the oven, place patties on a wire rack on top of a baking sheet. Bake for 20 minutes, until cooked through.

Simple Baked Beet Fries

Every summer our garden is loaded with beets. My husband just did our THIRD planting! There are so many reasons to eat beets. But not everyone is a fan. Until now. You’ll have even your picky eaters going for seconds with these simple baked beet fries!

Beets. You either love them or hate them. Some (like me!) love their earthy sweet flavor. Then there are others that think they just taste like dirt.

I am happy to say that I’ve converted my whole family into beet eaters! Especially freshly roasted golden beets from our garden. They are so sweet!!

But I know not everyone is so fond of them.

It’s a shame because they are loaded with vitamins and minerals. Just look at that rich color! Plus they are powerhouse helpers for your liver, assisting in detox.

There must be a way to get beet haters to enjoy them (besides trying to hide a tiny bit in a smoothie), right?

Yes, there is!There are so many reasons to eat beets. But not everyone is a fan. Until now. You'll have even your picky eaters going for seconds with these simple baked beet fries!

Beet Fries.

My three year old will eat a mountain of beets. But my son, although willing, really only cares for a few pieces. Until I made them into fries.

All it takes is cutting beets into sticks and rolling them in flour. Bake for an hour and sprinkle generously with real salt. And presto. Beet fries.

Suddenly my son will fight over them!

You don’t even need ketchup for dipping. They are great as-is. Perfect for keeping the added sugar out of your diet.

I love that this is also a great alternative for anyone that can’t have potatoes due to allergies (like my sons) or a nightshade sensitivity. We also make a lot of carrot fries to avoid potatoes.There are so many reasons to eat beets. But not everyone is a fan. Until now. You'll have even your picky eaters going for seconds with these simple baked beet fries!

My kids will eat these warm or cold. They do tend to go for the golden ones first. Like I said, golden beets are so sweet. But they like both varieties. If you think you don’t like beets, try golden. You might change your mind.

Grab some beets from your local farmer’s market (or grow your own!) and make these picky eater approved beet fries. Easy to make and fun to eat. Plus they are so good for you! It’s a win all around.

Do your kids like beets? Would they eat them as beet fries?

There are so many reasons to eat beets. But not everyone is a fan. Until now. You'll have even your picky eaters going for seconds with these simple baked beet fries!

5 from 2 votes
Print

Simple Baked Beet Fries

A delicious way to serve beets to picky eaters.

Prep Time 10 minutes
Cook Time 1 hour
Total Time 1 hour 10 minutes
Servings 5

Ingredients

  • 3-6 medium to large beets
  • 1/2 cup rice flour, cassava flour or tapioca flour
  • 1 tsp. unrefined sea salt
  • 1 Tbsp. olive oil or avocado oil

Instructions

  1. Heat oven to 400 degrees F.

  2. Line a large baking sheet with parchment paper.

  3. Peel and slice beets into 1/2" sticks.

  4. Combine flour and half of the salt.

  5. Lightly coat beet sticks with flour and line them up on the baking sheet.

  6. Drizzle the olive oil over the beets.

  7. Bake in heated oven for one hour.

  8. Sprinkle on remaining salt while fries are still hot.


Healthy Gluten Free Instant Porridge with MCT Oil

Looking for a simple, yet nourishing breakfast that you can get on the table quickly? This picky eater approved gluten free instant porridge with MCT oil will be a new family favorite. No cooking. No allergens. And best of all the kids can make it!Looking for a simple, yet nourishing breakfast that you can get on the table quickly? This picky eater approved gluten free instant porridge with MCT oil will be a new family favorite. No cooking. No allergens. And best of all the kids can make it!

I’m definitely a creature of habit. When it comes to breakfast I tend to serve the same things to my family every week (one less thing to think about when meal planning!). Monday is yogurt. Tuesday is a smoothie. Wednesday is eggs. And Thursday is usually oatmeal.

There’s just one problem. My oldest son is allergic to oats!

Easy Oat-Free Breakfast

So I always have to come up with an alternative for him. Sometimes I make a different hot cereal, like teff porridge. But I’ll be honest…I usually do not feel like cooking a second breakfast. Especially now with a new baby. I just don’t have time for that.

Looking for a simple, yet nourishing breakfast that you can get on the table quickly? This picky eater approved gluten free instant porridge with MCT oil will be a new family favorite. No cooking. No allergens. And best of all the kids can make it!
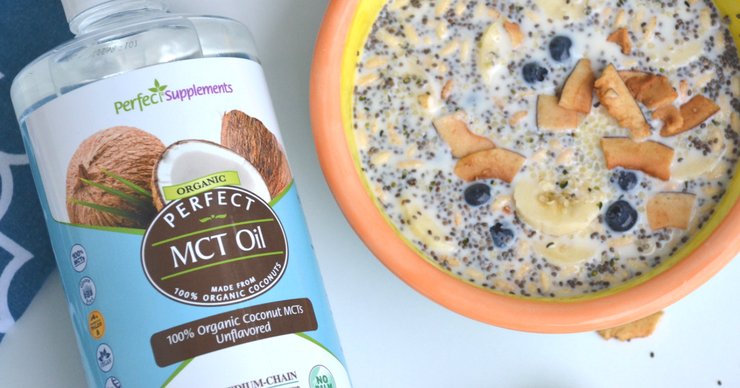
One day I just started tossing some miscellaneous food in a bowl for him. His own instant porridge. And he loved it!

In fact, it looked so good my daughters were jealous that he got instant porridge when they had oatmeal. So now I make it for all of them! Or better yet, they can make it for themselves since they know how to cook. It’s that easy.


Want to teach your kids to cook? Check out the Kids Cook Real Food ecourse HERE! You can get a set of FREE kids make breakfast videos when you sign up by August 8!


Not to mention it’s very versatile. You can partially prep it the night before, 30 minutes before or just before breakfast. It can be gluten-free or grain-free and dairy-free.

Instant Porridge Packed with Nutrition

The key ingredient is chia seeds. They pack a nutritional punch with omega-3’s, vitamins, minerals, fiber, and protein.

There is another superstar ingredient that we add – MCT oil. If you’ve never tried it, you should. It comes from coconuts. Here are some of the benefits:

  • Increase Energy Levels
  • Improve Mental Clarity, Reduce Brain Fog
  • Improve Mood
  • Improve Gut Function and Digestion
  • Support a Healthy Metabolism
  • Aid In The Process of Reducing Stored Body Fat
  • Promote Healthy Brain Function
  • Keep Excess Inflammation in Check
  • Promote Healthy Heart Function
  • Helps Maintain Healthy Blood Sugar Levels
  • Variety of antimicrobial and anti-fungal effects

Anything that improves brain function and blood sugar regulation is wonderful for kids! Not to mention it boosts nutrition, which is a key factor in dealing with picky eaters. It’s great for Mom and Dad too!

Looking for a simple, yet nourishing breakfast that you can get on the table quickly? This picky eater approved gluten free instant porridge with MCT oil will be a new family favorite. No cooking. No allergens. And best of all the kids can make it!The best source for MCT oil is Perfect Supplements (I trust them for all of my favorite supplements like desiccated liver and collagen). It is 100% pure (read more about it here)!

Grab your MCT oil HERE. Use the code TAKE10 to get an extra 10% off!

If you’ve never used MCT oil, make sure you start with a small dose (about 1 tsp.) and work your way up to 1 – 2 Tbsp. It can upset your digestive system if you eat too much too quickly.

To your chia seeds and MCT oil add your favorite type of milk (we us raw milk, coconut milk, almond milk or rice milk), seeds, and fruit. Then my personal favorite topping of coconut chips (advanced warning…they are so addictive!).

Looking for a simple, yet nourishing breakfast that you can get on the table quickly? This picky eater approved gluten free instant porridge with MCT oil will be a new family favorite. No cooking. No allergens. And best of all the kids can make it!Healthy, Prep-ahead Breakfast

You can prepare and eat it immediately. Or you can let the chia seeds soak in the milk for a few minutes or even over night to thicken. Sometimes we add brown rice puffs or quick oats (depending on who’s eating it) to thicken it as well.

My three-year old has been measuring ingredients and slicing bananas since she was two. She loves to make instant porridge herself. Plus each child gets to choose their toppings when they make it. And they learn how to serve themselves proper portions.

If your mornings are really hectic mix the chia seeds and milk the night before. In the morning set out bowls of toppings for the family.

Instant porridge. Instant breakfast. Instant nutrition.

That is my kind of breakfast!Looking for a simple, yet nourishing breakfast that you can get on the table quickly? This picky eater approved gluten free instant porridge with MCT oil will be a new family favorite. No cooking. No allergens. And best of all the kids can make it!

5 from 1 vote
Print

Healthy Gluten Free Instant Porridge with MCT Oil

A simple, no-cook breakfast porridge that is allergy friendly and loaded with nutrition.

Prep Time 5 minutes
Total Time 5 minutes
Servings 1
Author Mary | Just Take A Bite

Ingredients

  • 1 cup milk or yogurt of choice
  • 2 Tbsp chia seeds
  • 1 Tbsp. hemp seeds (optional)
  • 1 Tbsp. MCT oil (start with 1 tsp. if you've never used it before and work up to 1 Tbsp.)
  • 2 Tbsp. brown rice puffs or rolled oats (optional)
  • 1 banana sliced
  • 2 Tbsp. coconut chips
  • dried or fresh fruit of choice (optional)

Instructions

  1. Combine the milk/yogurt, chia seeds, hemp seeds, MCT oil and puffs/oats.

  2. Allow to sit for 5 - 10 minutes or overnight (in refrigerator).

  3. Add banana, coconut chips and fruit.

  4. Serve.

Recipe Notes

Any form of dairy works - coconut milk, almond milk, rice milk, etc.

This serves 1. Multiply for as many servings as you need.

What is your go-to quick and healthy breakfast?

Don’t forget to grab your MCT oil and all your other favorite Perfect Supplements products like desiccated liver and collagen HERE! Use the code TAKE10 to get an extra 10% off.

Easy Gluten Free Crackers with Liver! {dairy free, nut free, egg free}

Looking for a crunchy snack that isn’t loaded with junk? These gluten free crackers with liver are made with healthy fat and lots of vitamins and minerals! Snack away.Looking for a crunchy snack that isn't loaded with junk? These gluten free crackers with liver are made with healthy fat and lots of vitamins and minerals! Snack away.

It’s no secret. I LOVE my desiccated liver! I add it to just about anything, including meatballs, soups, tacos, smoothies and even caramel! I consider liver to be one of the world’s healthiest foods. It is loaded with vitamins and minerals.

But that doesn’t mean everyone loves to eat it. I personally can’t stand cooked liver. I try to choke a little down every once in a while. Just because I should.

How We Eat Liver.

Rather than rely on the rare mouthful, I use Perfect Supplements desiccated liver on a daily basis. I usually start my day with it in capsule form (perfect if you don’t even like the taste of desiccated liver). Then I add the powder to my food later in the day.

My kids call it our “secret ingredient” when we cook together. They like to surprise Daddy, telling him there is liver in his food.

Even if my kids don’t mind me adding liver to our food, I’m always on the hunt for new ways to get it down.Looking for a crunchy snack that isn't loaded with junk? These gluten free crackers with liver are made with healthy fat and lots of vitamins and minerals! Snack away.

Gluten Free Crackers with Liver!

I recently decided to boost the nutrition of a kid favorite – crackers! These gluten free crackers with liver are super easy to make and taste delicious. But they are also loaded with nutrition.

In addition to the liver I used fermented kale and aquatic greens. Now if that’s not a healthy cracker, I don’t know what is!Looking for a crunchy snack that isn't loaded with junk? These gluten free crackers with liver are made with healthy fat and lots of vitamins and minerals! Snack away.

Liver for Less!

You can always stock up on Perfect Supplement desiccated liver (or any of their other awesome products) at a 10% discount with my code TAKE10. Stock up on all your favorite supplements HERE. Then head to the kitchen to make a batch of gluten free crackers with liver.

Looking for a crunchy snack that isn't loaded with junk? These gluten free crackers with liver are made with healthy fat and lots of vitamins and minerals! Snack away.Kid-Approved Snacks

Speaking of the crackers, my kids love them! I bet yours will too. We like to use them for easy lunches. Dip crackers in nut butter or sunbutter. Or my favorite – homemade Lunchables®. Freshly baked crackers with homemade lunch meat (that also has liver!) and cheese slices. Add some fruits and veggies and you’ve got the perfect packable lunch.
 
One batch makes about 150 crackers. So they will last a while.
 
The next time you see a box of “veggie crackers” at the store, don’t be fooled. It is still just a processed food with made with vegetable oil. Make your own nutrient loaded crackers. And let your kids help!Looking for a crunchy snack that isn't loaded with junk? These gluten free crackers with liver are made with healthy fat and lots of vitamins and minerals! Snack away.

Do you regularly consume liver? What is your favorite way to eat it?

Gluten Free Crackers with Liver {dairy free, nut free, egg free}
Yields 150
A simple, allergen free cracker loaded with vitamins and minerals.
Write a review
Print
Ingredients
  1. 1 cup white rice flour
  2. 1 cup sorghum flour
  3. 1 tsp. Perfect Supplements gelatin
  4. 1 1/2 tsp. unrefined sea salt
  5. 4 tsp. organic cane sugar
  6. 1 1/2 tsp. Perfect Supplements desiccated liver
  7. 1/4 tsp. Perfect Supplements fermented kale
  8. 1/8 tsp. Perfect Supplements aquatic greens
  9. 1/2 - 1 tsp. herbs of choice (optional)
  10. 6 Tbsp. avocado oil (or extra virgin olive oil)
  11. 1/2 - 3/4 cups water
Instructions
  1. Heat oven to 350 degrees F.
  2. In a large bowl combine the flour, gelatin, salt, sugar, liver, kale, greens, herbs and olive oil. Mix well.
  3. Add 1/2 cup water. Mix well.
  4. Gradually add more water, 1 Tbsp. at a time, until a ball of dough forms when squeezed with your hands.
  5. Split the dough in half.
  6. Lay one half on a piece of parchment paper or silpat. Place another piece of paper on top. Roll until 1/8 - 1/4 inch thin.
  7. Cut with a pizza cutter or knife into desired size squares. Sprinkle with extra salt if desired. Place parchment paper with cracker dough on a baking pan.
  8. Repeat process for the second ball of dough.
  9. Bake at 350 degrees F for 12 minutes. Turn off oven and leave crackers in to crisp for an additional 7 minutes.
  10. Remove from oven and allow to cool completely.
  11. Store in a sealed container for up to 3 weeks or in the freezer for up to 6 months.
Just Take A Bite https://justtakeabite.com/

Looking for a crunchy snack that isn't loaded with junk? These gluten free crackers with liver are made with healthy fat and lots of vitamins and minerals! Snack away.